xrdpは、無料のオープンソースのリモートデスクトッププロトコルサーバーであり、Windowsマシン/LinuxマシンからLinuxサーバーのリモートデスクトップセッションを取得できます。 rdesktop、freerdp、およびリモートデスクトップクライアントからのリモート接続を受け入れることができます。
この投稿は、CentOS 8 /RHEL8にxrdpをインストールするのに役立ちます。
この記事に記載されている手順は、RHEL 8でサブスクリプションを有効にしている場合、またはシステムでローカルのyumリポジトリーを構成している場合にのみ機能します。前提条件
EPELリポジトリのセットアップ
xrdpパッケージはEPELリポジトリで入手できます。したがって、xrdpをインストールするには、CentOS 8 /RHEL8でEPELリポジトリを有効にする必要があります。
CentOS 8
yum install -y epel-release
RHEL 8
yum install -y https://dl.fedoraproject.org/pub/epel/epel-release-latest-8.noarch.rpm
Gnomeデスクトップのインストール
xrdpサーバーをインストールする前に、YUMコマンドを使用してGnomeデスクトップをインストールする必要があります。
読む :CentOS 8 /RHEL8にGnomeデスクトップをインストールする
CentOS 8 /RHEL8にxrdpをインストールします
TigerVNCパッケージを使用してxrdpをインストールします。
yum install -y tigervnc-server xrdp
出力:
Last metadata expiration check: 1 day, 5:23:26 ago on Wed 25 Sep 2019 06:04:22 AM EDT.
Dependencies resolved.
===============================================================================================================
 Package                       Arch                 Version                      Repository               Size
===============================================================================================================
Installing:
 tigervnc-server               x86_64               1.9.0-9.el8                  AppStream               252 k
 xrdp                          x86_64               1:0.9.11-1.el8               epel                    440 k
Installing dependencies:
 xorgxrdp                      x86_64               0.2.11-1.el8                 epel                     70 k
 xrdp-selinux                  x86_64               1:0.9.11-1.el8               epel                     20 k

Transaction Summary
===============================================================================================================
Install  4 Packages

Total download size: 782 k
Installed size: 3.0 M
Downloading Packages:
(1/4): xorgxrdp-0.2.11-1.el8.x86_64.rpm                                         59 kB/s |  70 kB     00:01
(2/4): xrdp-selinux-0.9.11-1.el8.x86_64.rpm                                    256 kB/s |  20 kB     00:00
(3/4): xrdp-0.9.11-1.el8.x86_64.rpm                                            329 kB/s | 440 kB     00:01
(4/4): tigervnc-server-1.9.0-9.el8.x86_64.rpm                                  179 kB/s | 252 kB     00:01
---------------------------------------------------------------------------------------------------------------
Total                                                                          126 kB/s | 782 kB     00:06
warning: /var/cache/dnf/epel-6519ee669354a484/packages/xorgxrdp-0.2.11-1.el8.x86_64.rpm: Header V3 RSA/SHA256 Signature, key ID 2f86d6a1: NOKEY
Extra Packages for Enterprise Linux 8 - x86_64                                  87 kB/s | 1.6 kB     00:00
Importing GPG key 0x2F86D6A1:
 Userid     : "Fedora EPEL (8) <epel@fedoraproject.org>"
 Fingerprint: 94E2 79EB 8D8F 25B2 1810 ADF1 21EA 45AB 2F86 D6A1
 From       : /etc/pki/rpm-gpg/RPM-GPG-KEY-EPEL-8
Key imported successfully
Running transaction check
Transaction check succeeded.
Running transaction test
Transaction test succeeded.
Running transaction
  Preparing        :                                                                                       1/1
  Installing       : xorgxrdp-0.2.11-1.el8.x86_64                                                          1/4
  Installing       : xrdp-selinux-1:0.9.11-1.el8.x86_64                                                    2/4
  Running scriptlet: xrdp-selinux-1:0.9.11-1.el8.x86_64                                                    2/4
  Installing       : xrdp-1:0.9.11-1.el8.x86_64                                                            3/4
  Running scriptlet: xrdp-1:0.9.11-1.el8.x86_64                                                            3/4
  Installing       : tigervnc-server-1.9.0-9.el8.x86_64                                                    4/4
  Running scriptlet: tigervnc-server-1.9.0-9.el8.x86_64                                                    4/4
  Running scriptlet: xrdp-1:0.9.11-1.el8.x86_64                                                            4/4
  Running scriptlet: tigervnc-server-1.9.0-9.el8.x86_64                                                    4/4
  Verifying        : tigervnc-server-1.9.0-9.el8.x86_64                                                    1/4
  Verifying        : xorgxrdp-0.2.11-1.el8.x86_64                                                          2/4
  Verifying        : xrdp-1:0.9.11-1.el8.x86_64                                                            3/4
  Verifying        : xrdp-selinux-1:0.9.11-1.el8.x86_64                                                    4/4

Installed:
  tigervnc-server-1.9.0-9.el8.x86_64       xrdp-1:0.9.11-1.el8.x86_64       xorgxrdp-0.2.11-1.el8.x86_64
  xrdp-selinux-1:0.9.11-1.el8.x86_64

Complete!
xrdpがインストールされたら、systemctlコマンドを使用してxrdpサーバーサービスを開始します。
systemctl start xrdp
xrdpは3389でリッスンしているはずです。netstatコマンドを使用してこれを確認できます。
netstat -antup | grep xrdp
出力:
tcp        0      0 127.0.0.1:3350          0.0.0.0:*               LISTEN      8067/xrdp-sesman
tcp        0      0 0.0.0.0:3389            0.0.0.0:*               LISTEN      8068/xrdp
デフォルトでは、xrdpサーバーサービスはシステムの再起動後に自動的に開始されません。以下のコマンドを実行して、システム起動時にサービスを有効にします。
systemctl enable xrdp
ファイアウォール
外部マシンからのRDP接続を許可するようにファイアウォールを構成します。次のコマンドは、RDPポート(3389)の例外を追加します。
firewall-cmd --permanent --add-port=3389/tcp

firewall-cmd --reload
xrdpを介してCentOS8/RHEL8マシンにアクセスする
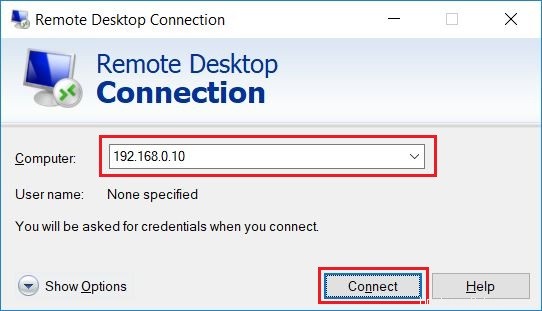
次に、リモートデスクトップ接続プログラムを使用して任意のWindowsマシンからRDPセッションを取得します。
LinuxサーバーのIPアドレスを[コンピューター]フィールドに入力し、[接続]をクリックします。
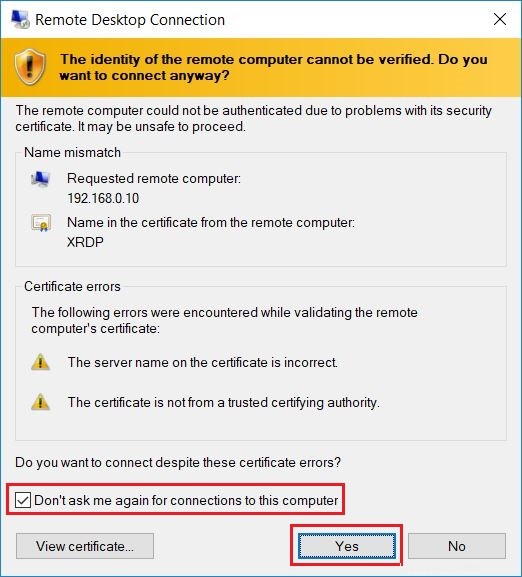
[はい]をクリックして、RDP証明書名の不一致の警告を受け入れます。
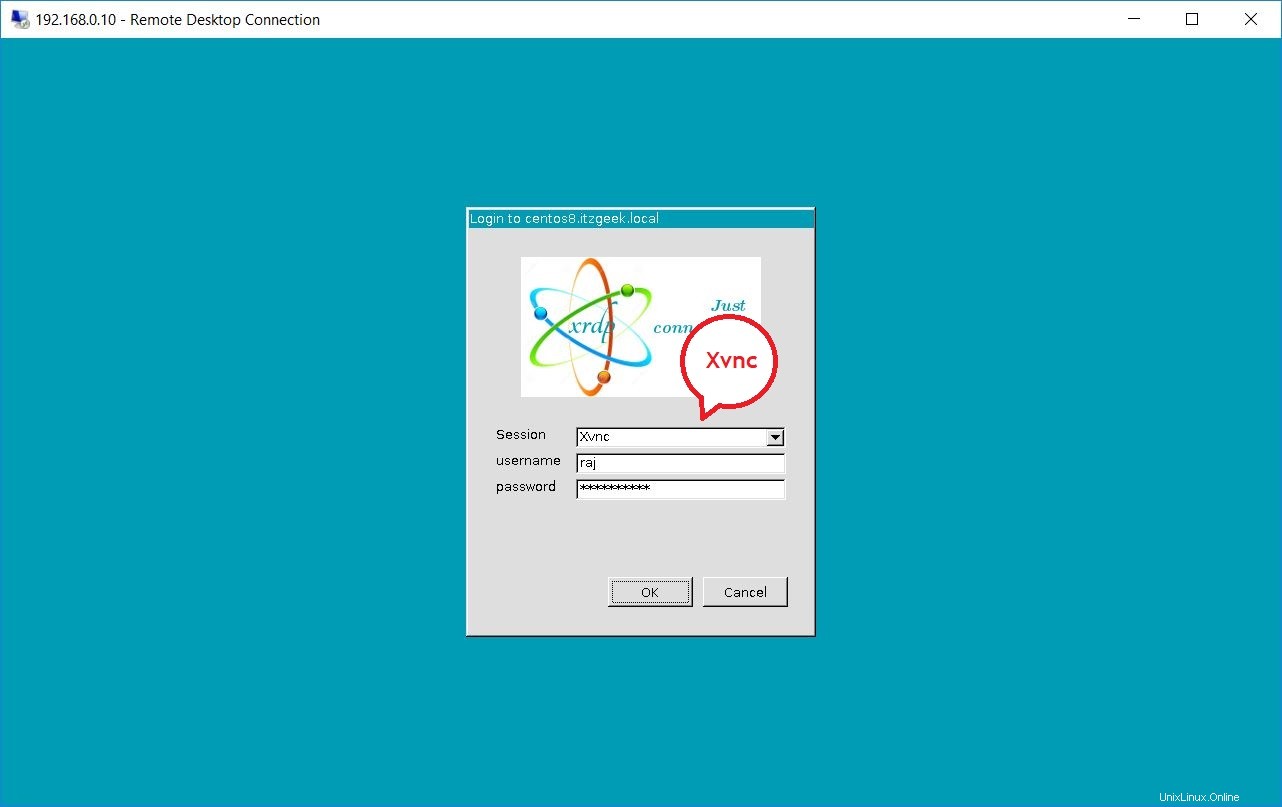
システムにインストールされている通常のユーザーとしてログインします。必ずXvncモジュールを使用してください。
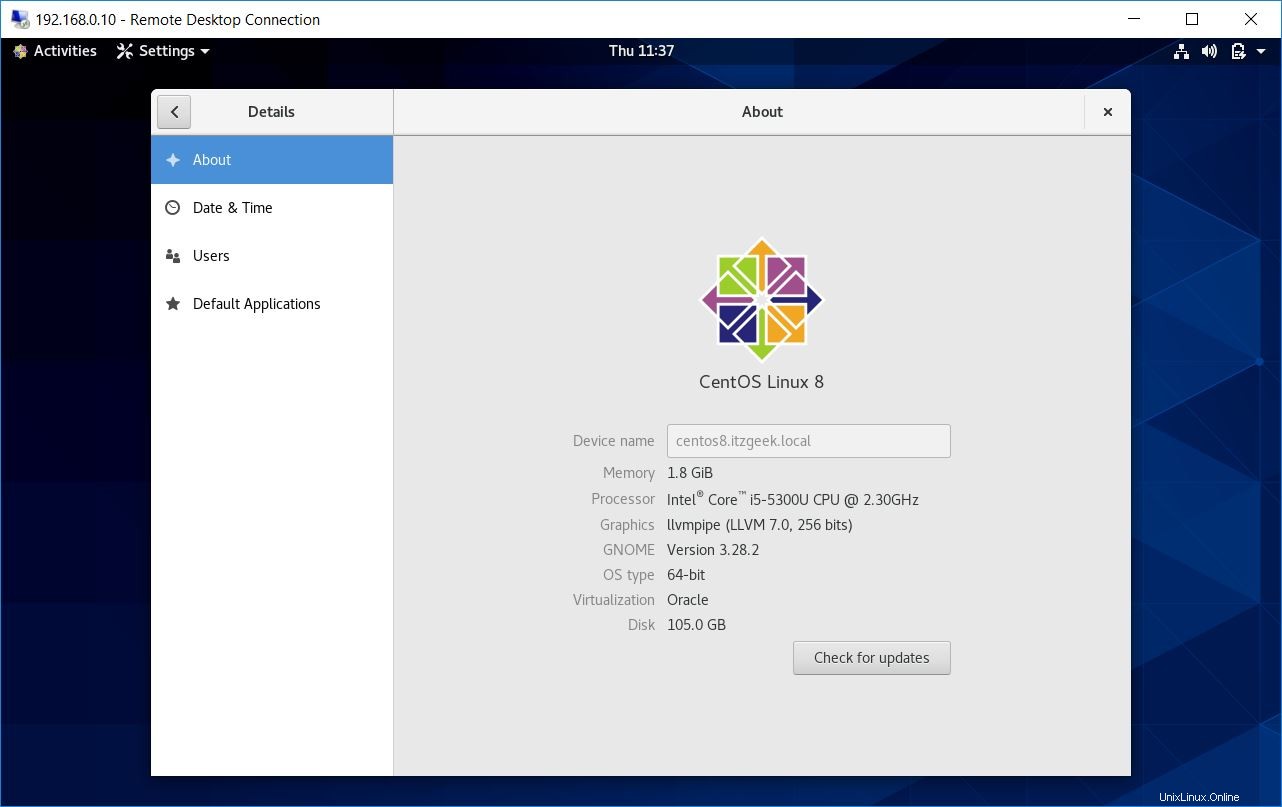
リモートデスクトップセッションがロードされるのを待ちます。デスクトップセッションは30分以内に完了するはずです。
CentOS 8:
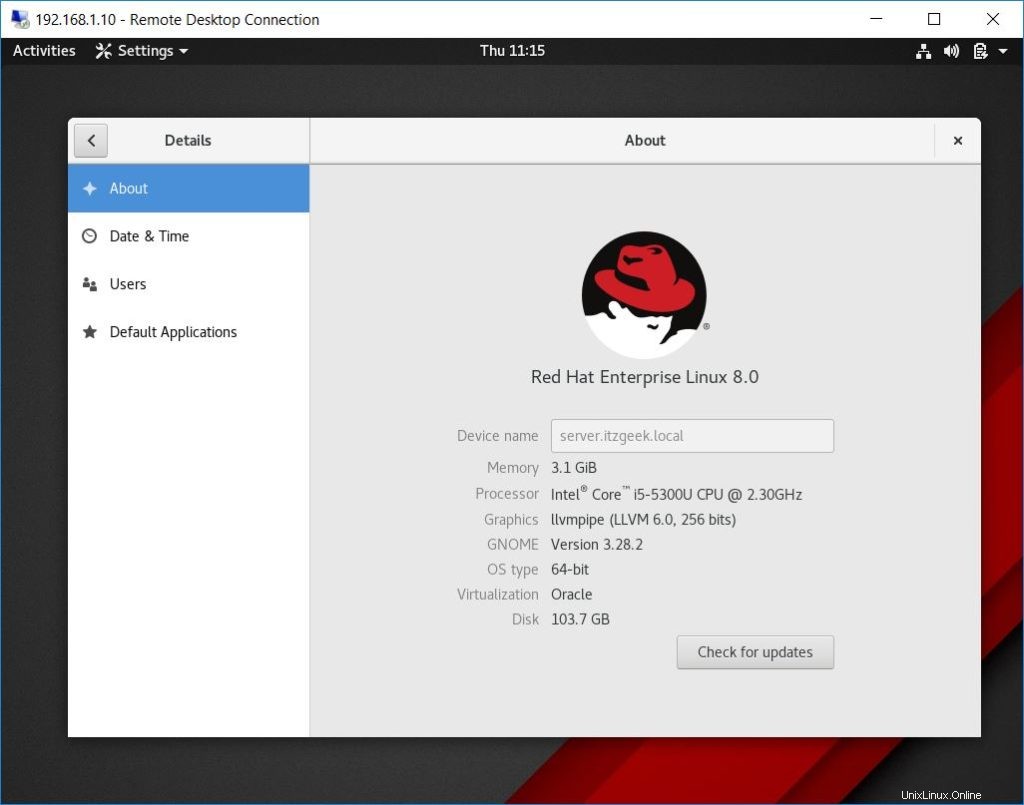
RHEL 8:
結論
これで、CentOS 8 / RHEL 8にxrdpが正常にインストールされました。xrdpは、サーバーへのxrdp接続を保護できるTLSセキュリティレイヤー接続を受け入れるようになりました。さらに、PulseAudioをインストールしてオーディオ出力リダイレクトを行うことができます。