Reactは、Facebookによって開発された無料のオープンソースJavaScriptライブラリです。 WebフロントエンドおよびUIコンポーネントの作成に使用されます。多くの場合、Webアプリケーションまたはモバイルアプリの開発に使用されます。これにより、開発者は互いに独立した再利用可能なコンポーネントを作成できます。 Axios、JQuery AJAX、ブラウザの組み込みwindow.fetchなどの他のライブラリで使用できます。
この投稿では、CentOS8にReactJSをインストールする方法を紹介します
- CentOS8を実行しているサーバー。
- サーバーIPで指定された有効なドメイン名。
- ルートパスワードはサーバーで構成されています。
開始する前に、システムパッケージを最新バージョンに更新する必要があります。次のコマンドを実行して更新できます:
dnf update -y
すべてのパッケージが最新になったら、次のコマンドを使用して他の必要な依存関係をインストールします。
dnf install gcc-c++ make curl -y
必要な依存関係のインストールが完了したら、次の手順に進むことができます。
NPMとNode.jsをインストールします
次に、Node.jsとNPMをシステムにインストールする必要があります。パッケージマネージャーとも呼ばれるNPMは、Javascriptパッケージとの対話に使用されるコマンドラインツールです。デフォルトでは、最新バージョンのNPMとNode.jsはCentOSのデフォルトリポジトリに含まれていません。したがって、ノードソースリポジトリをシステムに追加する必要があります。次のコマンドで追加できます:
curl -sL https://rpm.nodesource.com/setup_14.x | bash -
リポジトリが追加されたら、次のコマンドを使用してNode.jsとNPMをインストールします。
dnf install nodejs -y
インストールが完了したら、次のコマンドを実行してNode.jsのバージョンを確認します。
node -v
次の出力が得られるはずです:
v14.16.0
次のコマンドを実行して、NPMのバージョンを確認することもできます。
npm -v
次の出力が得られるはずです:
6.14.11
この時点で、NPMとNode.jsがシステムにインストールされます。これで、Reactjsのインストールに進むことができます。
Reactjsをインストール
開始する前に、システムにcreate-react-appをインストールする必要があります。これは、Reactアプリケーションを作成するために使用されるコマンドラインユーティリティです。
以下に示すように、NPMを使用してインストールできます。
npm install -g create-react-app
インストールしたら、次のコマンドを使用して、インストールされているcreate-react-appのバージョンを確認します。
create-react-app --version
次の出力が表示されます。
4.0.3
次に、次のコマンドを使用して最初のReactjsアプリを作成します。
create-react-app myapp
次の出力が表示されます。
Success! Created myapp at /root/myapp
Inside that directory, you can run several commands:

  npm start
    Starts the development server.

  npm run build
    Bundles the app into static files for production.

  npm test
    Starts the test runner.

  npm run eject
    Removes this tool and copies build dependencies, configuration files
    and scripts into the app directory. If you do this, you can’t go back!

We suggest that you begin by typing:

  cd myapp
  npm start
次に、ディレクトリをmyappに変更し、次のコマンドでアプリケーションを起動します。
cd myapp
npm start
アプリケーションが正常に開始されると、次の出力が表示されます。
Compiled successfully!

You can now view myapp in the browser.

  http://localhost:3000

Note that the development build is not optimized.
To create a production build, use npm run build.
ここで、CTRL+Cを押してアプリケーションを停止します。これで、次のステップに進むことができます。
ReactjsのSystemdサービスファイルを作成する
次に、Reactjsサービスを管理するためのsystemdサービスファイルを作成することをお勧めします。次のコマンドで作成できます:
nano /lib/systemd/system/react.service
次の行を追加します:
[Unit]
After=network.target

[Service]
Type=simple
User=root
WorkingDirectory=/root/myapp
ExecStart=/usr/bin/npm start
Restart=on-failure

[Install]
WantedBy=multi-user.target
ファイルを保存して閉じてから、次のコマンドを使用してsystemdデーモンをリロードします。
systemctl daemon-reload
次に、Reactjsサービスを開始し、次のコマンドを使用してシステムの再起動時に開始できるようにします。
systemctl start react
systemctl enable react
次に、次のコマンドを使用してReactjsアプリのステータスを確認します。
systemctl status react
次の出力が得られるはずです:
? react.service
   Loaded: loaded (/usr/lib/systemd/system/react.service; disabled; vendor preset: disabled)
   Active: active (running) since Tue 2021-03-23 02:52:32 EDT; 6s ago
 Main PID: 2191 (node)
    Tasks: 29 (limit: 12524)
   Memory: 220.3M
   CGroup: /system.slice/react.service
           ??2191 npm
           ??2202 node /root/myapp/node_modules/.bin/react-scripts start
           ??2209 /usr/bin/node /root/myapp/node_modules/react-scripts/scripts/start.js

Mar 23 02:52:34 centos8 npm[2191]: ? ?wds?: Project is running at http://0.0.0.0:3000/
Mar 23 02:52:34 centos8 npm[2191]: ? ?wds?: webpack output is served from
Mar 23 02:52:34 centos8 npm[2191]: ? ?wds?: Content not from webpack is served from /root/myapp/public
Mar 23 02:52:34 centos8 npm[2191]: ? ?wds?: 404s will fallback to /
Mar 23 02:52:34 centos8 npm[2191]: Starting the development server...
Mar 23 02:52:37 centos8 npm[2191]: Compiled successfully!
Mar 23 02:52:37 centos8 npm[2191]: You can now view myapp in the browser.
Mar 23 02:52:37 centos8 npm[2191]:   http://localhost:3000
Mar 23 02:52:37 centos8 npm[2191]: Note that the development build is not optimized.
Mar 23 02:52:37 centos8 npm[2191]: To create a production build, use npm run build.
この時点で、Reactjsが起動し、ポート3000でリッスンしています。次のコマンドで確認できます。
ss -antpl | grep 3000
次の出力が得られるはずです:
LISTEN 0 128 0.0.0.0:3000 0.0.0.0:* users:(("node",pid=2209,fd=18))
終了したら、次のステップに進むことができます。
NginxをReactアプリのリバースプロキシとして構成する
次に、ポート80でReactアプリにアクセスするには、Nginxをリバースプロキシとして構成する必要があります。まず、次のコマンドを使用してNginxパッケージをインストールします。
dnf install nginx -y
Nginxがインストールされたら、次のコマンドを使用して新しいNginx仮想ホスト構成ファイルを作成します。
nano /etc/nginx/conf.d/react.conf
次の行を追加します:
server {
    listen 80;
    server_name react.example.com;

    location / {
        proxy_set_header   X-Forwarded-For $remote_addr;
        proxy_set_header   Host $http_host;
        proxy_pass         http://localhost:3000;
    }
}
終了したらファイルを保存して閉じ、次のコマンドを使用して構文エラーがないかNginxを確認します。
nginx -t
次の出力が得られるはずです:
nginx: the configuration file /etc/nginx/nginx.conf syntax is ok
nginx: configuration file /etc/nginx/nginx.conf test is successful
最後に、次のコマンドを実行して、Nginxサービスを開始し、システムの再起動時に開始できるようにします。
systemctl start nginx
systemctl enable nginx
次のコマンドを実行して、Nginxのステータスを確認することもできます。
systemctl status nginx
次の出力でReactサービスのステータスを取得する必要があります:
? nginx.service - The nginx HTTP and reverse proxy server
   Loaded: loaded (/usr/lib/systemd/system/nginx.service; disabled; vendor preset: disabled)
   Active: active (running) since Tue 2021-03-23 02:57:48 EDT; 4s ago
  Process: 4079 ExecStart=/usr/sbin/nginx (code=exited, status=0/SUCCESS)
  Process: 4078 ExecStartPre=/usr/sbin/nginx -t (code=exited, status=0/SUCCESS)
  Process: 4076 ExecStartPre=/usr/bin/rm -f /run/nginx.pid (code=exited, status=0/SUCCESS)
 Main PID: 4081 (nginx)
    Tasks: 2 (limit: 12524)
   Memory: 4.0M
   CGroup: /system.slice/nginx.service
           ??4081 nginx: master process /usr/sbin/nginx
           ??4082 nginx: worker process

Mar 23 02:57:48 centos8 systemd[1]: Starting The nginx HTTP and reverse proxy server...
Mar 23 02:57:48 centos8 nginx[4078]: nginx: the configuration file /etc/nginx/nginx.conf syntax is ok
Mar 23 02:57:48 centos8 nginx[4078]: nginx: configuration file /etc/nginx/nginx.conf test is successful
Mar 23 02:57:48 centos8 systemd[1]: nginx.service: Failed to parse PID from file /run/nginx.pid: Invalid argument
Mar 23 02:57:48 centos8 systemd[1]: Started The nginx HTTP and reverse proxy server.
終了したら、次のステップに進むことができます。
次に、ポート80と443がファイアウォールを通過できるようにする必要があります。次のコマンドを実行して、それらを許可できます。
firewall-cmd --permanent --add-port=80/tcp
firewall-cmd --permanent --add-port=443/tcp
次に、ファイアウォールをリロードして構成の変更を適用します。
firewall-cmd --reload
終了したら、次のステップに進むことができます。
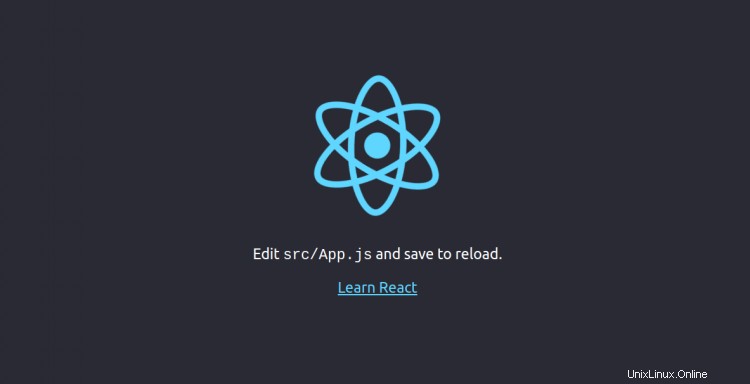
次に、Webブラウザーを開き、URL http://react.example.comを使用してReactjsアプリケーションにアクセスします。 。次の画面にReactjsページが表示されます。

おめでとう!これで、CentOS8にReactjsが正常にインストールされました。また、ReactjsアプリのリバースプロキシとしてNginxを構成しました。これで、Reactjsアプリケーションの開発を開始できます。