Djangoは、PythonWebアプリケーションの開発に使用される無料のオープンソースの高レベルのWebフレームワークです。安全でスケーラブルなWebアプリケーションの構築に役立つ一連のツールが付属しています。その主な目標は、複雑なアプリケーションの作成を容易にし、内部構造を処理することです。
このチュートリアルでは、Djangoをインストールし、CentOS8でDjangoのリバースプロキシとしてNginxを構成する方法を学習します。
- CentOS8を実行しているサーバー。
- ルートパスワードはサーバーで構成されています。
DjangoはPythonベースのフレームワークであるため、システムにPythonとPIPをインストールする必要があります。次のコマンドを実行してインストールできます:
dnf install python36 python3-pip -y
両方のパッケージがインストールされたら、次のステップに進むことができます。
Djangoをインストール
以下に示すように、PIPコマンドを使用してDjangoをインストールできます。
pip3 install Django
Djangoをインストールした後、次のコマンドでDjangoのバージョンを確認できます:
django-admin --version
次の出力にDjangoバージョンが表示されます。
3.0.3
Djangoプロジェクトを作成する
この時点で、Djangoがインストールされます。それでは、新しいDjangoアプリケーションを作成しましょう。
以下に示すように、/optディレクトリ内でdjango-adminコマンドを使用して新しいDjangoアプリケーションを作成できます。
cd /opt
 django-admin startproject djangoproject
djangoプロジェクトが作成されたら、ディレクトリをdjangoprojectに変更し、次のコマンドを使用して変更を移行します。
cd djangoproject
 python3 manage.py migrate
次の出力が得られるはずです:
Operations to perform:
  Apply all migrations: admin, auth, contenttypes, sessions
Running migrations:
  Applying contenttypes.0001_initial... OK
  Applying auth.0001_initial... OK
  Applying admin.0001_initial... OK
  Applying admin.0002_logentry_remove_auto_add... OK
  Applying admin.0003_logentry_add_action_flag_choices... OK
  Applying contenttypes.0002_remove_content_type_name... OK
  Applying auth.0002_alter_permission_name_max_length... OK
  Applying auth.0003_alter_user_email_max_length... OK
  Applying auth.0004_alter_user_username_opts... OK
  Applying auth.0005_alter_user_last_login_null... OK
  Applying auth.0006_require_contenttypes_0002... OK
  Applying auth.0007_alter_validators_add_error_messages... OK
  Applying auth.0008_alter_user_username_max_length... OK
  Applying auth.0009_alter_user_last_name_max_length... OK
  Applying auth.0010_alter_group_name_max_length... OK
  Applying auth.0011_update_proxy_permissions... OK
  Applying sessions.0001_initial... OK
次に、Djangoプロジェクトを管理するための管理者ユーザーアカウントを作成する必要があります。次のコマンドで作成できます:
python3 manage.py createsuperuser
ユーザー名、メールアドレス、パスワードの入力を求められます。以下に示すように、選択に従ってそれらを提供できます。
Username (leave blank to use 'root'): dadmin
Email address: [email protected]
Password:
Password (again):
Superuser created successfully.
終了したら、次のステップに進むことができます。
Djangoアプリケーションを起動します
デフォルトでは、リモートホストからDjangoアプリケーションにアクセスすることはできません。したがって、外部ホストに対してDjangoを許可する必要があります。これを行うには、settings.pyにサーバーIPを追加します:
nano /opt/djangoproject/djangoproject/settings.py
次の行を変更します:
ALLOWED_HOSTS = ['your-server-ip']
ファイルを保存して閉じます。次に、次のコマンドを使用してDjangoアプリケーションを起動します。
cd /opt/djangoproject
 python3 manage.py runserver 0.0.0.0:8000
次の出力が表示されます。
Watching for file changes with StatReloader
Performing system checks...

System check identified no issues (0 silenced).
March 03, 2020 - 02:31:19
Django version 3.0.3, using settings 'djangoproject.settings'
Starting development server at http://0.0.0.0:8000/
Quit the server with CONTROL-C.

Django application is now started and runs on port 8000.
この時点で、Djangoアプリケーションが起動し、ポート8000で実行されます。これで、次の手順に進むことができます。
次に、firewalldを介してポート8000と80を許可する必要があります。次のコマンドで許可できます:
firewall-cmd --permanent --add-port=8000/tcp>
firewall-cmd --permanent --add-port=80/tcp
firewall-cmd --reload
次に、次のコマンドを使用してSELinuxを構成します。
setsebool httpd_can_network_connect on -P
終了したら、次のステップに進むことができます。
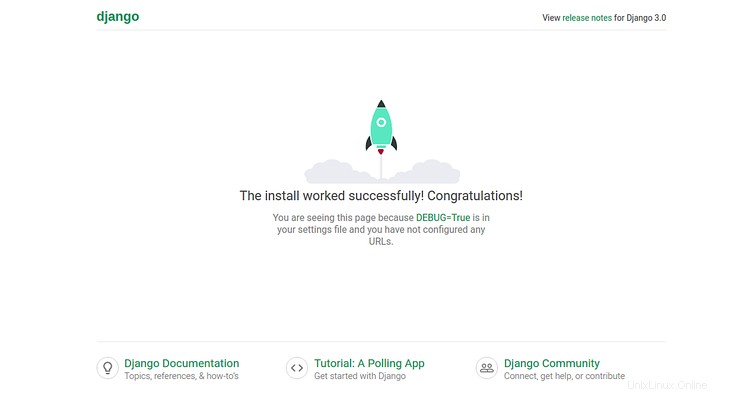
URL http:// your-server-ip:8000にアクセスすると、Djangoアプリケーションにアクセスできます。次のページが表示されます:
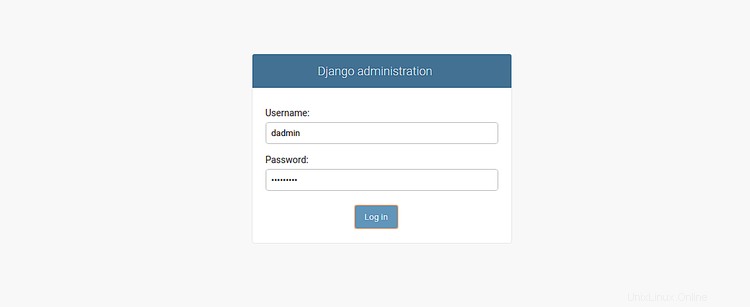
URL http:// your-server-ip:8000/adminを使用してDjango管理インターフェースにアクセスすることもできます。次のページが表示されます:
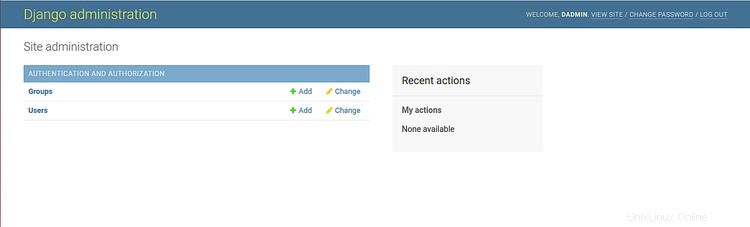
管理者のユーザー名とパスワードを入力し、ログをクリックします で ボタン。次のページが表示されます:
NginxとGunicornをインストールする
このセクションでは、GunicornをインストールしてDjangoサービスを作成および管理し、NginxをインストールしてDjangoアプリケーションを提供します。
まず、次のコマンドを使用してNginxをインストールします。
dnf install nginx -y
次に、以下に示すように、PIPコマンドを使用してGunicornをインストールします。
pip3 install gunicorn
両方のパッケージがインストールされたら、次のコマンドを使用してNginxサービスを開始し、システムの再起動後に開始できるようにします。
systemctl start nginx
 systemctl enable nginx
次に、以下に示すように、/ opt/djangoprojectディレクトリの所有権をNginxに変更します。
chown -R nginx:nginx /opt/djangoproject
DjangoのSystemdサービスファイルを作成する
次に、次のコマンドを使用して、Djangoサービスを管理するためのsystemdサービスファイルを作成します。
nano /etc/systemd/system/django.service
次の行を追加します:
[Unit]
Description=django daemon
After=network.target

[Service]
User=nginx
Group=nginx
WorkingDirectory=/opt/djangoproject
ExecStart=/usr/local/bin/gunicorn --workers 3 --bind unix:/opt/djangoproject/djangoproject.sock djangoproject.wsgi:application

[Install]
WantedBy=multi-user.target
ファイルを保存して閉じてから、次のコマンドを使用してsystemdデーモンをリロードします。
systemctl daemon-reload
次に、Djangoサービスを開始し、次のコマンドを使用してシステムの再起動後に開始できるようにします。
systemctl start django
 systemctl enable django
次のコマンドを使用して、Djangoサービスのステータスを確認できるようになりました。
systemctl status django
次の出力が表示されます。
? django.service - django daemon
   Loaded: loaded (/etc/systemd/system/django.service; disabled; vendor preset: disabled)
   Active: active (running) since Mon 2020-03-02 22:27:51 EST; 3min 32s ago
 Main PID: 960 (django)
    Tasks: 4 (limit: 25028)
   Memory: 95.2M
   CGroup: /system.slice/django.service
           ??960 /usr/bin/python3.6 /usr/local/bin/gunicorn --workers 3 --bind unix:/opt/djangoproject/djangoproject.sock djangoproject.wsgi:a>
           ??964 /usr/bin/python3.6 /usr/local/bin/gunicorn --workers 3 --bind unix:/opt/djangoproject/djangoproject.sock djangoproject.wsgi:a>
           ??965 /usr/bin/python3.6 /usr/local/bin/gunicorn --workers 3 --bind unix:/opt/djangoproject/djangoproject.sock djangoproject.wsgi:a>
           ??966 /usr/bin/python3.6 /usr/local/bin/gunicorn --workers 3 --bind unix:/opt/djangoproject/djangoproject.sock djangoproject.wsgi:a>

Mar 02 22:27:51 centos8 systemd[1]: Started django daemon.
Mar 02 22:27:52 centos8 django[960]: [2020-03-02 22:27:52 -0500] [960] [INFO] Starting django 20.0.4
Mar 02 22:27:52 centos8 django[960]: [2020-03-02 22:27:52 -0500] [960] [INFO] Listening at: unix:/opt/djangoproject/djangoproject.sock (960)
Mar 02 22:27:52 centos8 django[960]: [2020-03-02 22:27:52 -0500] [960] [INFO] Using worker: sync
Mar 02 22:27:52 centos8 django[960]: [2020-03-02 22:27:52 -0500] [964] [INFO] Booting worker with pid: 964
Mar 02 22:27:52 centos8 django[960]: [2020-03-02 22:27:52 -0500] [965] [INFO] Booting worker with pid: 965
Mar 02 22:27:52 centos8 django[960]: [2020-03-02 22:27:52 -0500] [966] [INFO] Booting worker with pid: 966
h pid: 966
Django用にNginxを構成する
次に、NginxをDjangoのリバースプロキシとして構成する必要があります。これを行うには、次のコマンドを使用して新しいNginx構成ファイルを作成します。
nano /etc/nginx/conf.d/django.conf
次の行を追加します:
server {
    listen 80;
    server_name your-server-ip

    location = /favicon.ico { access_log off; log_not_found off; }
    location /static/ {
        root /opt/djangoproject;
    }

    location / {
        proxy_set_header Host $http_host;
        proxy_set_header X-Real-IP $remote_addr;
        proxy_set_header X-Forwarded-For $proxy_add_x_forwarded_for;
        proxy_set_header X-Forwarded-Proto $scheme;
        proxy_pass http://unix:/opt/djangoproject/djangoproject.sock;
    }
}
終了したら、ファイルを保存して閉じます。次に、次のコマンドを使用して、構文エラーがないかnginxをテストします。
nginx -t
すべてが正常であれば、次の出力が得られるはずです:
nginx: the configuration file /etc/nginx/nginx.conf syntax is ok
nginx: configuration file /etc/nginx/nginx.conf test is successful
次に、Nginxサービスを再起動して、変更を実装します。
systemctl start nginx
次のコマンドを使用してNginxを確認することもできます:
systemctl status nginx
次の出力が得られるはずです:
? nginx.service - The nginx HTTP and reverse proxy server
   Loaded: loaded (/usr/lib/systemd/system/nginx.service; disabled; vendor preset: disabled)
   Active: active (running) since Mon 2020-03-02 22:28:13 EST; 4min 14s ago
  Process: 984 ExecStart=/usr/sbin/nginx (code=exited, status=0/SUCCESS)
  Process: 982 ExecStartPre=/usr/sbin/nginx -t (code=exited, status=0/SUCCESS)
  Process: 980 ExecStartPre=/usr/bin/rm -f /run/nginx.pid (code=exited, status=0/SUCCESS)
 Main PID: 985 (nginx)
    Tasks: 3 (limit: 25028)
   Memory: 5.5M
   CGroup: /system.slice/nginx.service
           ??985 nginx: master process /usr/sbin/nginx
           ??986 nginx: worker process
           ??987 nginx: worker process

Mar 02 22:28:12 centos8 systemd[1]: Starting The nginx HTTP and reverse proxy server...
Mar 02 22:28:12 centos8 nginx[982]: nginx: the configuration file /etc/nginx/nginx.conf syntax is ok
Mar 02 22:28:12 centos8 nginx[982]: nginx: configuration file /etc/nginx/nginx.conf test is successful
Mar 02 22:28:13 centos8 systemd[1]: Started The nginx HTTP and reverse proxy server.
これで、URL http://your-server-ipを使用してDjangoアプリケーションにアクセスできます。
このガイドでは、CentOS 8にDjangoをインストールする方法を学びました。また、Gunicornを使用してDjangoサービスを作成および管理し、Djangoアプリケーションを提供するリバースプロキシとしてNginxを構成する方法も学びました。