Plexは、無料のオープンソースのフル機能のメディアサーバーであり、世界中のどこからでもPC、タブレット、電話で写真、ビデオ、オーディオファイルをストリーミングできます。 Plexは、Linux、Windows、Mac、FreeBSDなどのほとんどのオペレーティングシステムをサポートしています。 Plexは、ComedyCentralおよびMTVのコンテンツを視聴できるようにするいくつかのプラグインもサポートしています。
Plexはクライアントサーバーメディアプレーヤーシステムです。メディアを保管しているサーバーにPlexサーバーをインストールしてから、電話、タブレット、またはその他のデバイスのPlexアプリケーションをインストールして、インターネット経由でメディアにアクセスするだけです。
機能複数のユーザーをサポートします。映画/テレビ番組のおすすめを表示します。お気に入りの音楽や映画のプレイリストを作成します。オフラインで使用するためにメディアファイルを同期してアクセスします。ペアレンタルコントロールを使用すると、Plexアプリケーションを子供のデバイスにインストールし、特定のコンテンツのみを視聴するように制限することができます。ローカルテレビチャンネルをデバイスにストリーミングして、テレビの生放送を視聴する機能。
このチュートリアルでは、リバースプロキシとしてNginxを使用してCentOS8システムにPlexMediaServerをインストールする方法を示します。
- 2GB以上のRAMを搭載したCentOS8を実行しているサーバー。
- 有効なドメイン名はサーバーのIPで示されます。
- ルートパスワードはサーバーで構成されています。
まず、サーバーを最新バージョンに更新することをお勧めします。次のコマンドを使用して更新できます:
dnf update -y
サーバーが更新されたら、サーバーを再起動して変更を実装します。
PlexMediaサーバーをインストールする
デフォルトでは、PlexメディアサーバーパッケージはCentOS8デフォルトリポジトリでは使用できません。したがって、Plexメディアサーバーのリポジトリを作成する必要があります。次のコマンドで作成できます:
nano /etc/yum.repos.d/plex.repo
次の行を追加します:
[Plex]
name=Plex
baseurl=https://downloads.plex.tv/repo/rpm/$basearch/
enabled=1
gpgkey=https://downloads.plex.tv/plex-keys/PlexSign.key
gpgcheck=1
終了したら、ファイルを保存して閉じます。次に、次のコマンドを使用してPlexメディアサーバーをインストールします。
dnf install plexmediaserver -y
インストールが完了したら、次のコマンドを使用してPlexメディアサービスを開始し、システムの再起動後に開始できるようにします。
systemctl enable plexmediaserver
 systemctl start plexmediaserver
次のコマンドを使用して、Plexメディアサーバーのステータスを確認することもできます。
systemctl status plexmediaserver
次の出力が表示されます。
? plexmediaserver.service - Plex Media Server
   Loaded: loaded (/usr/lib/systemd/system/plexmediaserver.service; enabled; vendor preset: disabled)
   Active: active (running) since Mon 2020-01-06 02:45:40 EST; 41s ago
 Main PID: 1009 (Plex Media Serv)
    Tasks: 113 (limit: 12552)
   Memory: 268.1M
   CGroup: /system.slice/plexmediaserver.service
           ??1009 /usr/lib/plexmediaserver/Plex Media Server
           ??1033 Plex Plug-in [com.plexapp.system] /usr/lib/plexmediaserver/Resources/Plug-ins-349e9837e/Framework.bundle/Contents/Resources/>
           ??1077 /usr/lib/plexmediaserver/Plex Tuner Service /usr/lib/plexmediaserver/Resources/Tuner/Private /usr/lib/plexmediaserver/Resour>
           ??1246 Plex Plug-in [org.musicbrainz.agents.music] /usr/lib/plexmediaserver/Resources/Plug-ins-349e9837e/Framework.bundle/Contents/>
           ??1356 Plex Plug-in [com.plexapp.agents.plexthememusic] /usr/lib/plexmediaserver/Resources/Plug-ins-349e9837e/Framework.bundle/Cont>
           ??1364 Plex Plug-in [com.plexapp.agents.themoviedb] /usr/lib/plexmediaserver/Resources/Plug-ins-349e9837e/Framework.bundle/Contents>
           ??1365 Plex Plug-in [tv.plex.agents.music] /usr/lib/plexmediaserver/Resources/Plug-ins-349e9837e/Framework.bundle/Contents/Resource>
           ??1389 Plex Plug-in [com.plexapp.agents.thetvdb] /usr/lib/plexmediaserver/Resources/Plug-ins-349e9837e/Framework.bundle/Contents/Re>
           ??1450 Plex Plug-in [com.plexapp.agents.imdb] /usr/lib/plexmediaserver/Resources/Plug-ins-349e9837e/Framework.bundle/Contents/Resou>

Jan 06 02:45:40 plex systemd[1]: Starting Plex Media Server...
Jan 06 02:45:40 plex systemd[1]: Started Plex Media Server.
この時点で、Plexメディアサーバーがインストールされ、実行されています。これで、次のステップに進むことができます。
PlexMediaServer用にファイアウォールとSELinuxを構成する
次に、Plexメディアサーバー固有のポートを許可するようにfirewalldを構成する必要があります。次のコマンドを実行することでそれを行うことができます:
firewall-cmd --zone=public --add-port=32400/tcp --permanent
 firewall-cmd --zone=public --add-port=32469/tcp --permanent
 firewall-cmd --zone=public --add-port=8324/tcp --permanent
 firewall-cmd --zone=public --add-port=3005/tcp --permanent
 firewall-cmd --zone=public --add-port=32412/udp --permanent
 firewall-cmd --zone=public --add-port=32413/udp --permanent
 firewall-cmd --zone=public --add-port=32414/udp --permanent
 firewall-cmd --zone=public --add-port=32410/udp --permanent
 firewall-cmd --zone=public --add-port=1900/udp --permanent
 firewall-cmd --zone=public --add-port=5353/udp --permanent
 firewall-cmd --zone=public --add-port=80/tcp --permanent
次に、firewalldサービスをリロードして、変更を実装します。
firewall-cmd --reload
デフォルトでは、SELinuxはCentOS8サーバーで有効になっています。したがって、インターネット経由でPlexMediaServerにアクセスするようにSELinuxを設定する必要があります。次のコマンドを使用してSELinuxを設定できます:
setsebool httpd_can_network_connect on -P
この時点で、Plexメディアサーバーにインターネット経由でアクセスできます。これで、次のステップに進むことができます。
これで、URL http:// your-server-ip:32400を使用してPlexメディアサーバーにアクセスできます。次のページが表示されます:
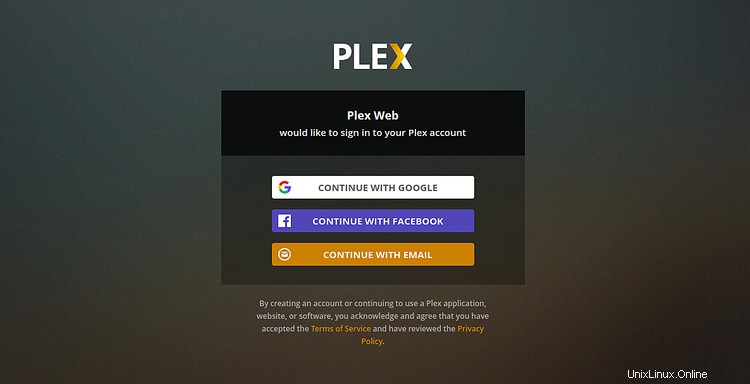
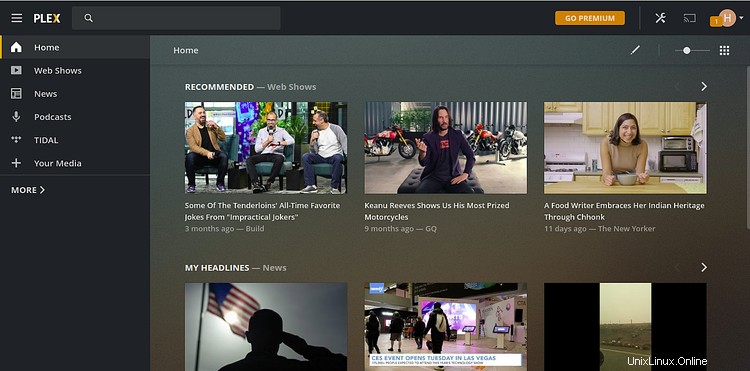
次に、サービスを使用するには、有効な電子メールアドレスでサインアップする必要があります。サインアップに成功した後。以下に示すように、Plexメディアサーバーダッシュボードにリダイレクトされます。
次に、IPアドレスとポート番号を指定せずにドメイン名でNginxにアクセスできるように、Nginxをリバースプロキシとして設定する必要があります。
これを行うには、最初に次のコマンドを使用してNginxWebサーバーをインストールします。
dnf install nginx
インストールが完了したら、次のコマンドを使用してNginxサービスを開始し、システムの再起動後にサービスを開始できるようにします。
systemctl start nginx
 systemctl enable nginx
次に、次のコマンドを使用して、Plex用のNginx仮想ホスト構成ファイルを作成します。
nano /etc/nginx/conf.d/plex.conf
次の行を追加します:
upstream plex_backend {
        server 127.0.0.1:32400;
        keepalive 32;
}

server {
        listen 80;
        server_name plex.example.com;

        send_timeout 100m; #Some players don't reopen a socket and playback stops totally instead of resuming after an extended pause (e.g. Ch$

       	#Plex has A LOT of javascript, xml and html. This helps a lot, but if it causes playback issues with devices turn it off. (Haven't enc$
        gzip on;
        gzip_vary on;
        gzip_min_length 1000;
        gzip_proxied any;
        gzip_types text/plain text/css text/xml application/xml text/javascript application/x-javascript image/svg+xml;
        gzip_disable "MSIE [1-6]\.";

       	#Nginx default client_max_body_size is 1MB, which breaks Camera Upload feature from the phones.
       	#Increasing the limit fixes the issue. Anyhow, if 4K videos are expected to be uploaded, the size might need to be increased even more
        client_max_body_size 100M;

       	#Forward real ip and host to Plex
        proxy_set_header Host $host;
        proxy_set_header X-Real-IP $remote_addr;
        proxy_set_header X-Forwarded-For $proxy_add_x_forwarded_for;
        proxy_set_header X-Forwarded-Proto $scheme;
        proxy_set_header Sec-WebSocket-Extensions $http_sec_websocket_extensions;
        proxy_set_header Sec-WebSocket-Key $http_sec_websocket_key;
        proxy_set_header Sec-WebSocket-Version $http_sec_websocket_version;
       	#Websockets
        proxy_http_version 1.1;
        proxy_set_header Upgrade $http_upgrade;
        proxy_set_header Connection "Upgrade";

       	#Buffering off send to the client as soon as the data is received from Plex.
        proxy_redirect off;
        proxy_buffering off;

        location / {
                proxy_pass http://plex_backend;
        }
}
終了したら、ファイルを保存して閉じます。次に、Nginxサーバーのハッシュバケットサイズを定義する必要があります。 Nginx構成ファイルを編集することでそれを行うことができます:
nano /etc/nginx/nginx.conf
最後の行のすぐ上に次の行を追加します:
server_names_hash_bucket_size 64;
終了したら、ファイルを保存して閉じます。次に、次のコマンドを使用して、構文エラーがないかNginxを確認します。
nginx -t
次の出力が表示されます。
nginx: the configuration file /etc/nginx/nginx.conf syntax is ok
nginx: configuration file /etc/nginx/nginx.conf test is successful
最後に、Nginxサービスを再起動して変更を実装します。
systemctl restart nginx
Nginxサービスのステータスを確認するには、次のコマンドを実行します。
systemctl status nginx
すべてが正常であれば、次の出力が得られるはずです:
? nginx.service - The nginx HTTP and reverse proxy server
   Loaded: loaded (/usr/lib/systemd/system/nginx.service; disabled; vendor preset: disabled)
  Drop-In: /usr/lib/systemd/system/nginx.service.d
           ??php-fpm.conf
   Active: active (running) since Thu 2020-01-09 05:17:27 EST; 48s ago
  Process: 1230 ExecStart=/usr/sbin/nginx (code=exited, status=0/SUCCESS)
  Process: 1229 ExecStartPre=/usr/sbin/nginx -t (code=exited, status=0/SUCCESS)
  Process: 1227 ExecStartPre=/usr/bin/rm -f /run/nginx.pid (code=exited, status=0/SUCCESS)
 Main PID: 1232 (nginx)
    Tasks: 2 (limit: 5060)
   Memory: 13.1M
   CGroup: /system.slice/nginx.service
           ??1232 nginx: master process /usr/sbin/nginx
           ??1233 nginx: worker process

Jan 09 05:17:25 centos8 systemd[1]: Starting The nginx HTTP and reverse proxy server...
Jan 09 05:17:27 centos8 nginx[1229]: nginx: the configuration file /etc/nginx/nginx.conf syntax is ok
Jan 09 05:17:27 centos8 nginx[1229]: nginx: configuration file /etc/nginx/nginx.conf test is successful
これで、URLhttp://plex.example.comを使用してPlexメディアサーバーにアクセスできます。
おめでとう!これで、リバースプロキシとしてNginxを使用してPlexメディアサーバーがCentOS8に正常にインストールされました。これで、Plexメディアサーバーでその他のオプションを調べたり、独自のメディアライブラリをセットアップしたりできます。次に、携帯電話のPlayストアからPlexアプリケーションをインストールして、メディアにアクセスできます。また、友達や家族がWebブラウザまたはPlexアプリケーションから写真、音楽、映画にアクセスできるようにすることもできます。ご不明な点がございましたら、お気軽にお問い合わせください。