バージョン4.0以降、SambaはActive Directory(AD)ドメインコントローラー(DC)として実行できるようになりました。このチュートリアルでは、Samba4をWindows10、CentOS 7、およびCentOS6クライアントでドメインコントローラーとして構成する方法を示します。
このチュートリアルでは、Samba4をソースからコンパイルします。 Samba4のSamba4RPMベースのインストールとSELinux構成をお探しの場合は、こちらの新しいSamba4チュートリアルをご覧ください。
3つのシステム、1つのCentOS7サーバーとリモート管理用のWindows10クライアント、CentOS7とCentOS6クライアントを使用します。
- 192.168.1.190 Samba4 AD centos7
- 192.168.1.191リモート管理が10を獲得
- 192.168.1.22-クライアント認証-centos7
- 192.168.1.192-クライアント認証-centos6
Samba4のインストール
192.168.1.190 Samba4 AD centos 7
BasisはCentOS7であり、インストールは最小限で、SELinuxは無効になっています。
[example@unixlinux.online〜]#sestatusSELinux status:disabled [example@unixlinux.online〜]#
/ etc/hostsファイルにエントリを作成します。
[example@unixlinux.online〜]#cat /etc/hosts127.0.0.1 localhost localhost.localdomain localhost4 localhost4.localdomain4 ::1 localhost localhost.localdomain localhost6 localhost6.localdomain6192.168.1.190 samba4.sunil.cc samba4 [ [メール保護]〜]#
epelリポジトリをインストールします。
[example@unixlinux.online〜]#yum install epel-release -y
samba4のコンパイルに必要なすべてのパッケージをインストールします。
[example@unixlinux.online〜]#yum install perl gcc libacl-devel libblkid-devel gnutls-devel readline-devel python-devel gdb pkgconfig krb5-workstation zlib-devel setroubleshoot-server libaio-devel setroubleshoot-plugins \ policycoreutils- python libsemanage-python setools-libs-python setools-libs popt-devel libpcap-devel sqlite-devel libidn-devel libxml2-devel libacl-devel libsepol-devel libattr-devel keyutils-libs-devel \ cyrus-sasl-devel cups-devel bind-utils libxslt docbook-style-xsl openldap-devel pam-devel bzip2 vim wget -y
次に、samba4パッケージをダウンロードします。このセットアップでは最新のsamba-4.6.0を使用しています。
[example@unixlinux.online〜]#wget https://download.samba.org/pub/samba/stable/samba-4.6.0.tar.gz
それでは、samba4をインストールしましょう。
[example@unixlinux.online〜]#tar -zxvf samba-4.6.0.tar.gz [example@unixlinux.online〜]#cd samba-4.6.0 [example@unixlinux.online samba-4.6.0]#。 / configure --enable-debug --enable-selftest --with-ads --with-systemd --with-winbind [example@unixlinux.online samba-4.6.0]#make &&make install
システムの速度にもよりますが、インストールには約10分かかります。
次に、ドメインプロビジョニングを行います。
[example@unixlinux.online samba]#samba-tool domain Provisioning --use-rfc2307 --interactiveRealm [SUNIL.CC]:Domain [SUNIL]:Server Role(dc、member、standalone)[dc]:dc DNSバックエンド(SAMBA_INTERNAL、BIND9_FLATFILE、BIND9_DLZ、NONE)[SAMBA_INTERNAL]:DNSフォワーダーIPアドレス(転送を無効にするには「none」と入力)[4.2.2.1]:管理者パスワード:パスワードの再入力:IPv4アドレスの検索IPv6アドレスの検索IPv6アドレスはありません割り当て済みshare.ldbの設定secrets.ldbの設定レジストリの設定権限データベースの設定idmapdbの設定SAMdbの設定sam.ldbパーティションと設定の設定sam.ldbrootDSEPの設定Samba4とADスキーマの再読み込みDomainDNの追加:DC =sunil、DC =cc構成コンテナーの追加sam.ldbスキーマのセットアップsam.ldb構成データのセットアップ表示指定子のセットアップディスプレイ指定子の変更ユーザーコンテナーの追加ユーザーコンテナーの変更コンピューターコンテナーの追加コンピューターコンテナーの変更sam.ldbデータのセットアップ既知のセキュリティプリンシパルsam.ldbユーザーとグループの設定ERROR(ldb):キャッチされない例外-../ source4 / dsdb / samdb / ldb_modules / password_hash.c:2820ファイル"/usr/local/samba/lib64/python2.7での操作エラー/site-packages/samba/netcmd/__init__.py "、176行目、_run return self.run(* args、** kwargs)ファイル" /usr/local/samba/lib64/python2.7/site-packages/ samba / netcmd / domain.py "、行471、実行中nosync =ldap_backend_nosync、ldap_dryrun_mode =ldap_dryrun_mode)ファイル" /usr/local/samba/lib64/python2.7/site-packages/samba/provision/__init__.py "、 2175行目、プロビジョニングskip_sysvolacl =skip_sysvolacl)ファイル "/usr/local/samba/lib64/python2.7/site-packages/samba/provision/__init__.py"、1787行目、provision_fill next_rid =next_rid、dc_rid =dc_rid)ファイル"/usr/local/samba/lib64/python2.7/site-packages/samba/provision/__init__.py"、行1447、fill_samdb "KRBTGTPASS_B64":b64encode(krbtgtpass.encode('utf-16-le' ))ファイル "/usr/local/samba/lib64/python2.7/site-packages/samba/provision/ common.py "、55行目、setup_add_ldif ldb.add_ldif(data、controls)ファイル" /usr/local/samba/lib64/python2.7/site-packages/samba/__init__.py "、225行目、add_ldif self .add(msg、controls)[example@unixlinux.online samba]#
ドメインのプロビジョニングを行うと、いくつかのエラーが発生します。
それらを修正するには、/ etc/krb5.confの以下の行をコメントアウトしてください。
-------- #includedir /etc/krb5.conf.d/ --------
ドメインプロビジョニングを再度実行すると、ドメインがエラーなしで作成されます。
[example@unixlinux.online etc]#samba-tool domain Provisioning --use-rfc2307 --interactiveRealm [SUNIL.CC]:Domain [SUNIL]:Server Role(dc、member、standalone)[dc]:DNSバックエンド(SAMBA_INTERNAL、BIND9_FLATFILE、BIND9_DLZ、NONE)[SAMBA_INTERNAL]:DNSフォワーダーIPアドレス(転送を無効にするには「none」と入力)[4.2.2.1]:管理者パスワード:パスワードの再入力:IPv4アドレスの検索IPv6アドレスの検索IPv6アドレスは割り当てられません設定up secrets.ldbレジストリの設定権限データベースの設定idmapdbの設定SAMdbの設定sam.ldbパーティションと設定の設定sam.ldbrootDSEPの設定Samba4とADスキーマの再ロードDomainDNの追加:DC =sunil、DC=cc構成コンテナの追加samの設定.ldbスキーマsam.ldb構成データの設定表示指定子の設定表示指定子の変更ユーザーコンテナーの追加ユーザーコンテナーの変更コンピューターコンテナーの追加コンピューターコンテナーの変更sam.ldbデータのセットアップよく知られたセキュリティ原則のセットアップalssam.ldbユーザーとグループの設定自己結合の設定DNSアカウントの追加CN=MicrosoftDNS、CN =System、DC =sunil、DC=ccの作成DomainDnsZonesおよびForestDnsZonesパーティションの作成DomainDnsZonesおよびForestDnsZonesパーティションの設定sam.ldbrootDSEマーキングを同期として設定する固定プロビジョニングGUIDに適したKerberos構成Samba ADは/usr/local/samba/private/krb5.confで生成されています。偽のypサーバー設定のセットアップ上記のファイルがインストールされると、Samba4サーバーを使用できるようになります。サーバーの役割:Active Directoryドメインコントローラーホスト名:samba4NetBIOSドメイン:SUNILDNSドメイン: sunil.ccDOMAIN SID:S-1-5-21-2936486394-2075362935-551615353 [[メール保護]など]#
ファイアウォールでポートが開いていることを確認してください。
[example@unixlinux.online etc]#firewall-cmd --add-port =53 / tcp --permanent; firewall-cmd --add-port =53 / udp --permanent; firewall-cmd --add- port =88 / tcp --permanent; firewall-cmd --add-port =88 / udp --permanent; \ alarm-cmd --add-port =135 / tcp --permanent; firewall-cmd --add-port =137-138 / udp --permanent; firewall-cmd --add-port =139 / tcp --permanent; \ Firewall-cmd --add-port =389 / tcp --permanent; firewall-cmd --add-port =389 / udp --permanent; Firewall-cmd --add-port =445 / tcp --permanent; \ Firewall-cmd --add-port =464 / tcp --permanent; firewall-cmd --add-port =464 / udp --permanent; Firewall-cmd --add-port =636 / tcp --permanent; \ firewall-cmd --add-port =1024-5000 / tcp --permanent; firewall-cmd --add-port =3268-3269 / tcp --permanent [example@unixlinux.online〜]#firewall-cmd --reload
再起動中にサービスを自動起動する起動スクリプトを作成します。
[example@unixlinux.online〜]#cat /etc/systemd/system/samba.service [Unit] Description =Samba 4 Active DirectoryAfter =syslog.targetAfter =network.target [Service] Type =forkingPIDFile =/ usr / local /samba/var/run/samba.pidExecStart=/usr/local/samba/sbin/samba [Install] WantedBy =multi-user.target [example@unixlinux.online〜]#[example@unixlinux.online〜]#systemctl enable sambaCreated /etc/systemd/system/multi-user.target.wants/samba.serviceから/etc/systemd/system/samba.serviceへのsymlink。[[emailprotected]〜]#systemctl start samba
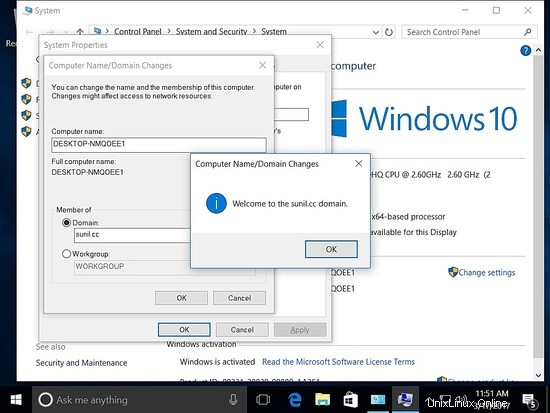
Windowsホストをドメインに追加する
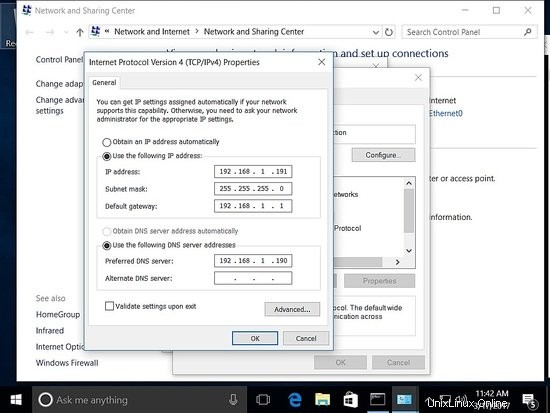
192.168.1.191リモート管理が10勝
ホストに静的IPアドレスが追加されていることを確認してください。
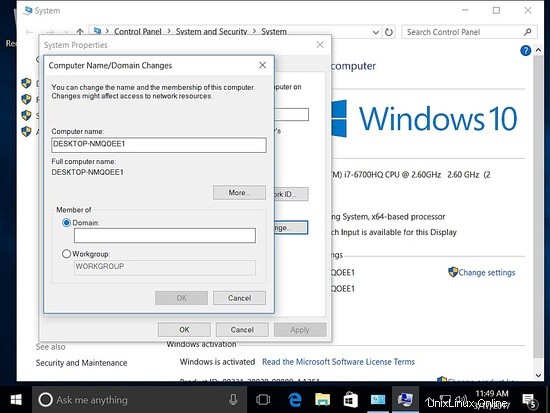
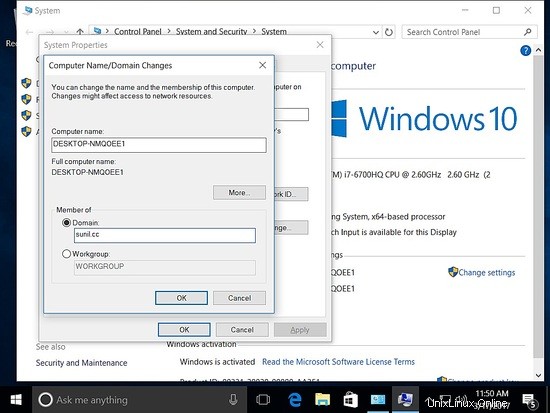
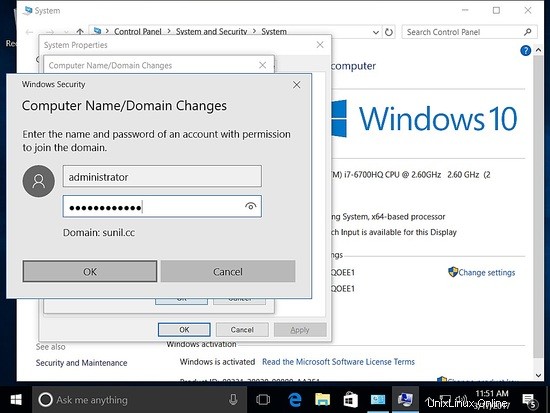
ドメインにホストを追加します。
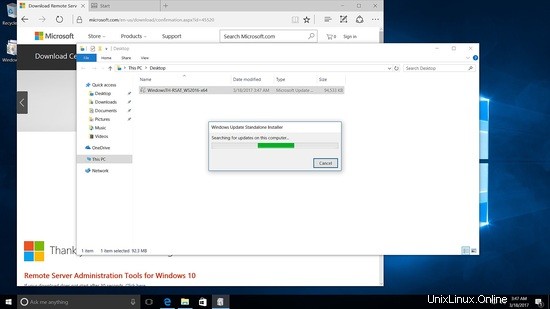
WindowsからSamba4を管理するには、Microsoft Remote Server Tools(RSAT)をインストールする必要があります。
Wikiページには、https://wiki.samba.org/index.php/Installing_RSAT
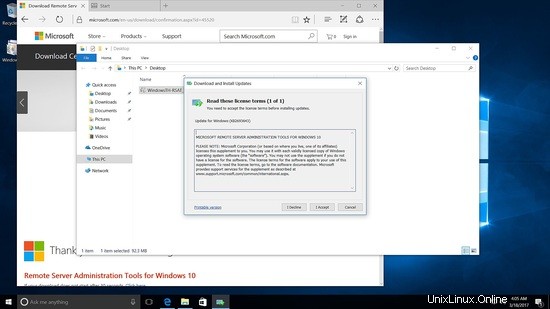
へのリンクがあります。Windows10へのRSATツールのインストール
インストーラーを実行します。

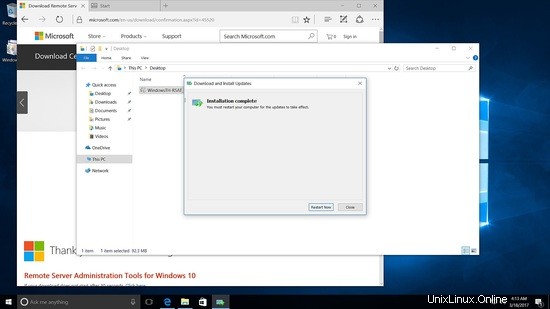
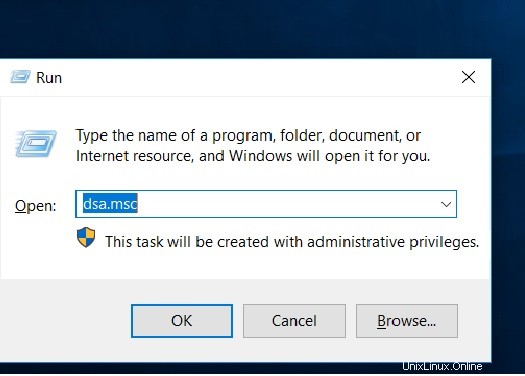
再起動後、実行して dsa.mscと入力します
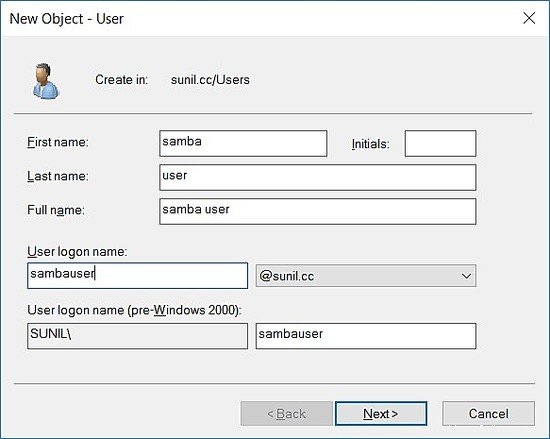
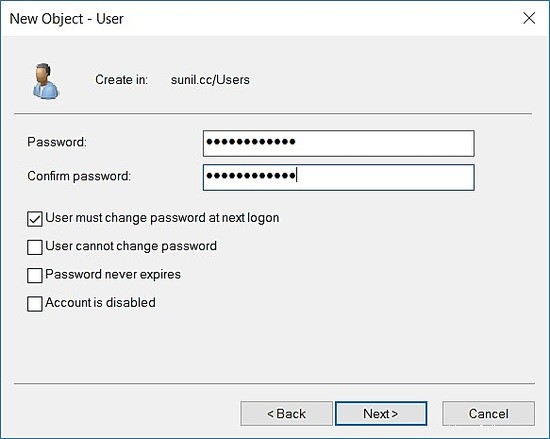
sunil.ccドメインをクリックし、[新規]->[ユーザー]を右クリックします。
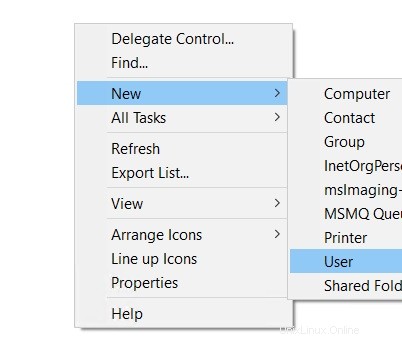
テストユーザーを作成します。
CentOS7上のSamba4を使用したクライアント認証
192.168.1.22-CentOS7でのクライアント認証
パッケージのインストール:
[example@unixlinux.online〜]#yum -y install realmd sssd oddjob oddjob-mkhomedir adcli samba-common
samba4との接続を確認してください:
[example@unixlinux.online〜]#realm Discover SUNIL.CCsunil.ccタイプ:kerberos realm-name:SUNIL.CC domain-name:sunil.cc構成:kerberos-member server-software:active-directory client-software :sssd required-package:oddjob required-package:oddjob-mkhomedir required-package:sssd required-package:adcli required-package:samba-common-tools login-formats:%U login-policy:allow-realm-logins [[メールで保護]〜]#
ドメインに参加しています。
[example@unixlinux.online〜]#realm join SUNIL.CCPassword for Administrator:[example@unixlinux.online〜]#
samba4からユーザーを取得できるかどうかを確認します。
[example@unixlinux.online〜]#id SUNIL \\ testuseruid =1570001104(example@unixlinux.online)gid =1570000513(domain example@unixlinux.online)groups =1570000513(domain example@unixlinux.online)[example@unixlinux.online〜 ]#
sssdを設定します。
[example@unixlinux.online〜]#cat /etc/sssd/sssd.conf [sssd] domains =sunil.ccconfig_file_version =2services =nss、pam [domain / sunil.cc] ad_domain =sunil.cckrb5_realm =SUNIL.CCrealmd_tags =manages-system join-with-sambacache_credentials =Trueid_provider =adkrb5_store_password_if_offline =Truedefault_shell =/ bin / bashldap_id_mapping =Trueuse_fully_qualified_names =Truefallback_homedir =/ home /%example@unixlinux.online%daccess_provider =ad [example@unixlinux.onlinesssdを再起動します。
[example@unixlinux.online〜]#systemctl restart sssd [example@unixlinux.online〜]#systemctl enable sssdユーザーを確認してください。
[example@unixlinux.online〜]#id example@unixlinux.online uid =1570001105(example@unixlinux.online)gid =1570000513(domain example@unixlinux.online)groups =1570000513(domain example@unixlinux.online)、1570000512(domain [メールで保護])、1570000572(rodcパスワードの複製を拒否[メールで保護])[[メールで保護]〜]#ドメイン名のないユーザーを取得するには。
[example@unixlinux.online〜]#vim /etc/sssd/sssd.conf ----------------------- use_fully_qualified_names =False ---- ------------------sssdを再起動し、idコマンドを確認します。
[example@unixlinux.online〜]#systemctl restart sssd [example@unixlinux.online〜]#id sambauseruid =1570001105(sambauser)gid =1570000513(domain users)groups =1570000513(domain users)、1570000512(domain admins)、 1570000572(rodcパスワードレプリケーショングループを拒否しました)[[メール保護]〜]#CentOS6上のSamba4を使用したクライアント認証
192.168.1.192-CentOS6でのクライアント認証。
パッケージのインストール。
[example@unixlinux.online db]#yum install pam pam_ldap pam_krb5 sssd sssd-ldap sssd-common authconfig oddjob oddjob-mkhomedir openldap openldap-clients krb5-workstation adcli -yKerberos構成ファイルを変更します。
[example@unixlinux.online db]#cat /etc/krb5.conf [logging] default =FILE:/var/log/krb5libs.log kdc =FILE:/var/log/krb5kdc.log admin_server =FILE:/ var / log / kadmind.log [libdefaults] default_realm =SUNIL.CC dns_lookup_realm =false dns_lookup_kdc =false ticket_lifetime =24h renew_lifetime =7d forwardable =true [realms] SUNIL.CC ={kdc =samba4.sunil.cc admin_server =samba4.sunil .cc} [domain_realm] .sunil.cc =SUNIL.CC sunil.cc =SUNIL.CC [example@unixlinux.online db]#adcliコマンドを使用してドメインに参加します。
[example@unixlinux.online db]#adcli info sunil.cc [domain] domain-name =sunil.ccdomain-short =SUNILdomain-forest =sunil.ccdomain-controller =samba4.sunil.ccdomain-controller-site =Default -First-Site-Namedomain-controller-flags =pdc gc ldap dskdctimeserv最も近い書き込み可能なgood-timeservfull-secretdomain-controller-usable=yesdomain-controllers =samba4.sunil.cc [computer] computer-site =Default-First-サイト名[[メール保護]db]#[[メール保護] db]#adcli join sunil.ccPassword for [メール保護]:[[メール保護] db]#Kerberosチケットが作成されていることを確認してください。
[example@unixlinux.online db]#klist -ke認証を構成します。
[example@unixlinux.online db]#authconfig --enablesssd --enablesssdauth --enablemkhomedir --update今すぐsssd設定を変更して、認証を行います。
[example@unixlinux.online db]#cat /etc/sssd/sssd.conf [sssd] services =nss、pam、ssh、autofsconfig_file_version =2domains =sunil.cc [domain / sunil.cc] id_provider =ad#コメント解除サービスディスカバリが機能していない場合#ad_server =server.win.example.comdefault_shell =/ bin / bashfallback_homedir =/ home /%u [example@unixlinux.online db]#sssdサービスを再起動します。
[example@unixlinux.online db]#chkconfig sssd on [example@unixlinux.online db]#service sssd restartStopping sssd:[OK] Starting sssd:[OK] [example@unixlinux.online db]#ユーザーを検証しています。
[example@unixlinux.online db]#id sambauseruid =1570001105(sambauser)gid =1570000513(domain users)groups =1570000513(domain users)、1570000512(domain admins)、1570000572(denied rodc password Replication group)[[email保護された]db]#
Cent OS