今日のビジネスでは、ワークスペース、ラボ、ツール、およびその他の種類のリソースを共有する必要性がますます高まっています。利用可能なリソースを最大限に活用することは、現代のビジネスにとって競争上の優位性になっています。
すべての企業は有限のリソースを持っているため、すべてのメンバーによるこれらのリソースの使用について論争があります。これがポイントです。これらのリソースの論争は、従業員間の問題、組織内の関係の損耗、非生産性を引き起こす可能性があります。
この議論はテクノロジーとはかけ離れているようですが、この種の問題を解決するために、多くの無料ソフトウェアが利用可能です。この記事では、リソースの使用を公正かつ効果的に整理するのに役立つ企業ツールについて書きます。方法。
ソフトウェアの概要
Bookedは、PHPとMySQLで記述されたオープンソースソフトウェアであり、組織やグループがあらゆる種類のリソースを効率的に管理、記録、追跡するのに役立ちます。スケジュールを作成して、ユーザーがリソースの使用に利用できるスケジュールを見つけることができるようにします。
予約済みでは、クォータを使用してリソースを公平に分散できます。また、予備の承認を通じてリソースの使用を制御することもできます。リソースの予約間の自動範囲も構成できます。
予約済みには、多くの言語のサポート、ウェブベース、モバイルファースト、レポートシステム、リマインダー、LDAP、Active Directory、メールクライアントと統合するためのicalファイルなどの優れたエンタープライズ機能が含まれています。
この記事では、予約済みのインストールと基本構成について説明します。この記事は、次の環境に基づいて作成されました:CENTOS 7 Minimal、2 GB RAM、8 GB HD、2つのネットワークインターフェース(ホストのみとNAT)を備えたVirtualBoxVM。
この記事は、複雑で広範囲にわたるこの主題を完全にはカバーしていません。シンプルなS.O.に焦点を当てています。構成と予約済みシステム構成。
Centos 7 Minimalの新規インストールを使用する場合、Bookedをインストールする前に、次のコマンドを実行してシステムを更新し、追加のパッケージをインストールします。
yum update
Transaction Summary ================================================================================ Install 1 Package Upgrade 39 Packages Total download size: 91 M Is this ok [y/d/N]: y
お気に入りのテキストエディタをインストールするか、VIを使用します。この記事では、VIMを使用してインストールし、次のコマンドを実行します。
yum install vim
WGETパッケージをインストールし、次のコマンドを実行します:
yum install wget
UNZIPパッケージをインストールし、次のコマンドを実行します。
yum install unzip
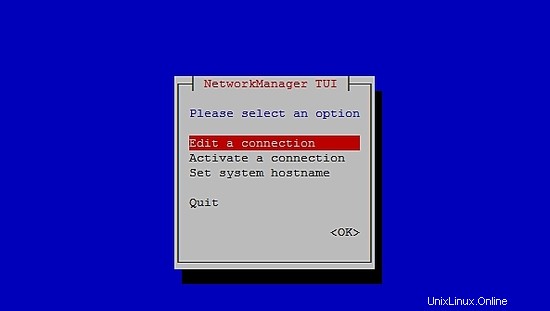
ネットワークを設定するには、次のコマンドを実行してNMTUI(Network Manager Text User Interface)ツールを開き、ネットワークインターフェイスとホスト名を希望どおりに編集します。
nmtui
CentOS 7でネットワーク設定とホスト名を設定した後、次のコマンドを実行して変更を適用します。
service networks restart
ネットワーク情報を確認するには、次のコマンドを実行します。
ip addr
出力は次のようになります:
1: lo: <LOOPBACK,UP,LOWER_UP> mtu 65536 qdisc noqueue state UNKNOWN qlen 1
link/loopback 00:00:00:00:00:00 brd 00:00:00:00:00:00
inet 127.0.0.1/8 scope host lo
valid_lft forever preferred_lft forever
inet6 ::1/128 scope host
valid_lft forever preferred_lft forever
2: enp0s3: <BROADCAST,MULTICAST,UP,LOWER_UP> mtu 1500 qdisc pfifo_fast state UP qlen 1000
link/ether 08:00:27:67:bc:73 brd ff:ff:ff:ff:ff:ff
inet 10.0.2.15/24 brd 10.0.2.255 scope global dynamic enp0s3
valid_lft 84631sec preferred_lft 84631sec
inet6 fe80::9e25:c982:1091:90eb/64 scope link
valid_lft forever preferred_lft forever
3: enp0s8: <BROADCAST,MULTICAST,UP,LOWER_UP> mtu 1500 qdisc pfifo_fast state UP qlen 1000
link/ether 08:00:27:68:88:f3 brd ff:ff:ff:ff:ff:ff
inet 192.168.56.101/24 brd 192.168.56.255 scope global dynamic enp0s8
valid_lft 1044sec preferred_lft 1044sec
inet6 fe80::a00:27ff:fe68:88f3/64 scope link
valid_lft forever preferred_lft forever
Centos 7でSELINUX(Security Enhanced Linux)を無効にし、次の構成ファイルを編集します。
vim /etc/selinux/config
"/etc/selinux/config" 14L, 547C# This file controls the state of SELinux on the system.
# SELINUX= can take one of these three values:
#     enforcing - SELinux security policy is enforced.
#     permissive - SELinux prints warnings instead of enforcing.
#     disabled - No SELinux policy is loaded.
SELINUX=enforcing
# SELINUXTYPE= can take one of three two values:
#     targeted - Targeted processes are protected,
#     minimum - Modification of targeted policy. Only selected processes are prootected.
#     mls - Multi Level Security protection.
SELINUXTYPE=targeted
値を強制に変更します ディレクティブSELINUXの無効への移行 、ファイルを保存してサーバーを再起動します。
Centos 7でSELinuxのステータスを確認するには、次のコマンドを実行します。
getenforce
出力は次のとおりである必要があります:
Disabled
Centos 7でFirewallDを無効にするには、次のコマンドを実行します。
systemctl disable firewalld
systemctl stop firewalld
Centos 7のファイアウォールステータスを確認するには、次のコマンドを実行します。
systemctl status firewalld
Centos 7にMariaDB、Apache、およびPHPをインストールします
Centos 7にMariaDBをインストールするには、次のコマンドを実行します。
yum -y install mariadb-server
MariaDBを起動するには、次のコマンドを実行します。
systemctl start mariadb
MariaDBのセキュリティを強化するには、次のコマンドを実行します。
/usr/bin/mysql_secure_installation
次の出力に従ってオプションを設定するか、独自の設定を使用してください。
NOTE: RUNNING ALL PARTS OF THIS SCRIPT IS RECOMMENDED FOR ALL MariaDB
      SERVERS IN PRODUCTION USE!  PLEASE READ EACH STEP CAREFULLY!

In order to log into MariaDB to secure it, we'll need the current
password for the root user.  If you've just installed MariaDB, and
you haven't set the root password yet, the password will be blank,
so you should just press enter here.

Enter current password for root (enter for none):<Press Enter>

OK, successfully used password, moving on...

Setting the root password ensures that nobody can log into the MariaDB
root user without the proper authorisation.

Set root password? [Y/n] <Press Y>
ルートパスワードの設定:
New password: *******
Re-enter new password: *******
Password updated successfully!
Reloading privilege tables..
 ... Success!

By default, a MariaDB installation has an anonymous user, allowing anyone
to log into MariaDB without having to have a user account created for
them.  This is intended only for testing, and to make the installation
go a bit smoother.  You should remove them before moving into a
production environment.

Remove anonymous users? [Y/n] <Press Y>

... Success!

Normally, root should only be allowed to connect from 'localhost'. This
ensures that someone cannot guess at the root password from the network.

Disallow root login remotely? [Y/n] <Choose acording your needs>

... Success!

By default, MariaDB comes with a database named 'test' that anyone can
access. This is also intended only for testing, and should be removed
before moving into a production environment.

Remove test database and access to it? [Y/n] <Press Y>


- Dropping test database...
 ... Success!
 - Removing privileges on test database...
 ... Success!

Reloading the privilege tables will ensure that all changes made so far
will take effect immediately.

Reload privilege tables now? [Y/n] <Press Y>

... Success!

Cleaning up...

All done! If you've completed all of the above steps, your MariaDB
installation should now be secure.

Thanks for using MariaDB!
Centos 7で自動的に起動するようにMariaDBを設定します:
systemctl enable mariadb.service
Apacheをインストールするには、次のコマンドを実行します。
yum install httpd
Apacheを起動するには、次のコマンドを実行します。
systemctl start httpd.service
Centos 7で自動的に起動するようにApacheを設定します:
systemctl enable httpd.service
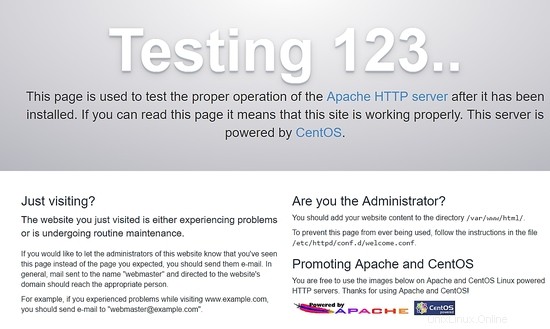
Apacheをテストするには、WebブラウザでサーバーのIPアドレスを入力します。すべてがきちんと整っている場合は、テストページを見ることができます:
PHPをインストールするには、次のコマンドを実行します。
yum install php php-mysql
Apacheを再起動し、次のコマンドを実行します。
systemctl restart httpd.service
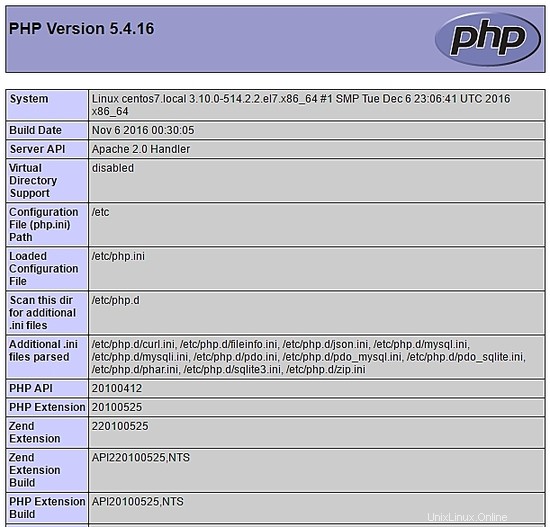
PHPをテストするには、/ var / www/htmlディレクトリ内に次の内容のファイルphpinfo.phpを作成します。
<?php phpinfo(); ?>
これで、次のURLを使用してブラウザからphpinfo.phpにアクセスできます:http://[your-ip-addres]/phpinfo.php。すべて問題がなければ、次のページが表示されます:
ターミナルからMariaDBにアクセスし、データベース bookedschedulerを作成します およびユーザーbooked_user このデータベースを管理するのに十分な権限を持っています。次のコマンドを実行して、ターミナルを介して実行します。
mysql -u root -p
bookedschedulerを作成します データベース:
MariaDB [(none)]> create database bookedscheduler;
booked_userを作成します MariaDbで:
CREATE USER 'booked_user'@'localhost' IDENTIFIED BY 'your_password';
ユーザーに権限を付与するbooked_user bookedscheduler データベース:
GRANT ALL PRIVILEGES ON database.bookedscheduler TO 'booked_user'@'localhost';
予約済みのデータベーススキーマとデータを/var/ www / html / booked / database_schema /ディレクトリからインポートするには、次のSQLファイルをインポートする必要があります。 create_schema.sql およびcreate-data.sql :
mysql -u root -p bookedscheduler < create-schema.sql
mysql -u root -p bookedscheduler < create-data.sql
PHPMyAdminを使用してデータベースを設定する
Centos 7にPHPMyAdminをインストールします(オプション)
PHPMyAdminは、ブラウザを介してmysql(mariaDB)データベースを使いやすい方法で管理するためのツールです。 phpmyadminを自動的にインストールするには、Epelリポジトリをインストールし、次のコマンドを実行する必要があります。
yum install epel-release
これで、次のコマンドを実行できます。
yum install phpmyadmin
PHPMyAdminのインストール後、設定する必要があります。まず、構成ファイルのコピーを作成し、/ etc / httpd /conf.d/にあるphpMyAdmin.confファイルを編集します。
cp /etc/httpd/conf.d/phpMyAdmin.conf /etc/httpd/conf.d/phpMyAdmin.conf.old
vim /etc/httpd/conf.d/phpMyAdmin.conf
ネットワーク環境に応じて値を変更します。私の場合は、次の行(17、25、34、42)を変更しました。私の設定ファイルは次のようになります:
# phpMyAdmin - Web based MySQL browser written in php
#
# Allows only localhost by default
#
# But allowing phpMyAdmin to anyone other than localhost should be considered
# dangerous unless properly secured by SSL
Alias /phpMyAdmin /usr/share/phpMyAdmin
Alias /phpmyadmin /usr/share/phpMyAdmin

<IfModule mod_authz_core.c>
# Apache 2.4
<RequireAny>
Require ip 127.0.0.1
Require ip 192.168.56.1
Require ip ::1
</RequireAny>
</IfModule>
 <IfModule !mod_authz_core.c>
 # Apache 2.2
 Order Deny,Allow
 Deny from All
 Allow from 192.168.56.1
 Allow from ::1
 </IfModule>
<Directory /usr/share/phpMyAdmin/setup/>
 <IfModule mod_authz_core.c>
 # Apache 2.4
 <RequireAny>
 Require ip 127.0.0.1
 Require ip ::1
 </RequireAny>
 </IfModule>
<IfModule !mod_authz_core.c>
 # Apache 2.2
 Order Deny,Allow
 Deny from All
 Allow from 192.168.56.1
 Allow from ::1
 </IfModule>
</Directory>
# These directories do not require access over HTTP - taken from the original
# phpMyAdmin upstream tarball
#
<Directory /usr/share/phpMyAdmin/libraries/>
 Order Deny,Allow
 Deny from All
 Allow from None
</Directory>
<Directory /usr/share/phpMyAdmin/setup/lib/>
 Order Deny,Allow
 Deny from All
 Allow from None
</Directory>
<Directory /usr/share/phpMyAdmin/setup/frames/>
 Order Deny,Allow
 Deny from All
 Allow from None
</Directory>
# This configuration prevents mod_security at phpMyAdmin directories from
# filtering SQL etc. This may break your mod_security implementation.
#
#<IfModule mod_security.c>
# <Directory /usr/share/phpMyAdmin/>
# SecRuleInheritance Off
# </Directory>
#</IfModule>
Apacheを再起動し、次のコマンドを実行します。
systemctl restart httpd.service
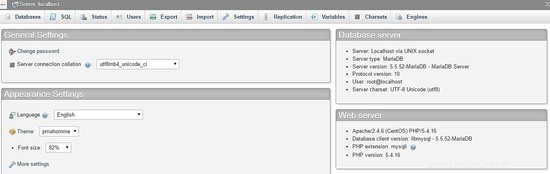
これで、次のURLを使用してブラウザからPHPMyAdminにアクセスできます:http:// [your-ip-addres] / phpMyAdmin /
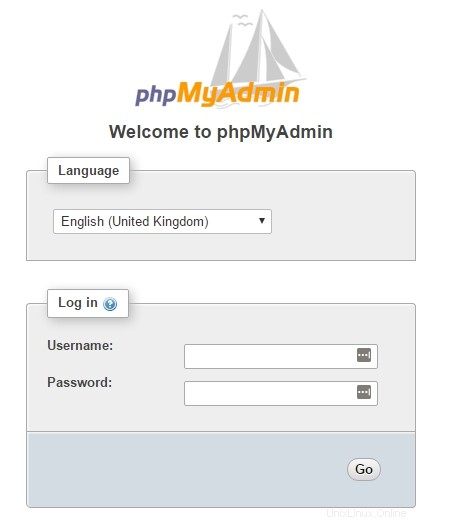
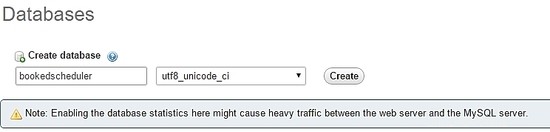
ルートを使用する データベースとユーザーを作成するためにMariaDBインストールで以前に定義されたアカウントとパスワード。ダッシュボードで、[データベース]を選択します 新しいデータベースを作成するオプション:
フォームにデータベース名を入力し、作成を選択します 。
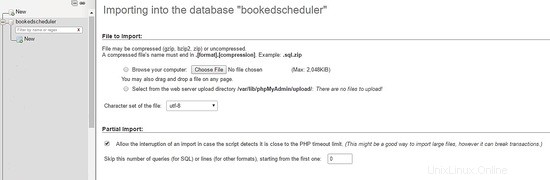
データベースデータをインポートするには、左側のメニューで bookedschedulerを選択します データベース、およびインポート PHPMyAdminダッシュボードから、インストールファイルから次のファイルcreate-schema.sql(1)とcreate-data.sql(2)を選択し、インポートします。
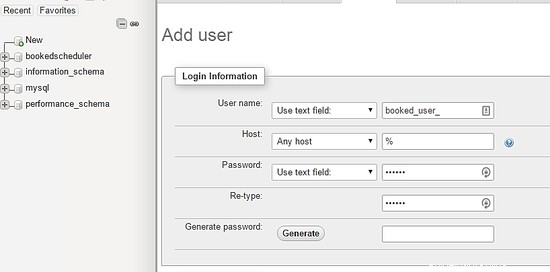
ユーザーを作成するbooked_user bookedschedulerを管理する権限を持つ データベース。 PHPMyAdminダッシュボードで、[ユーザー]を選択します および追加 :
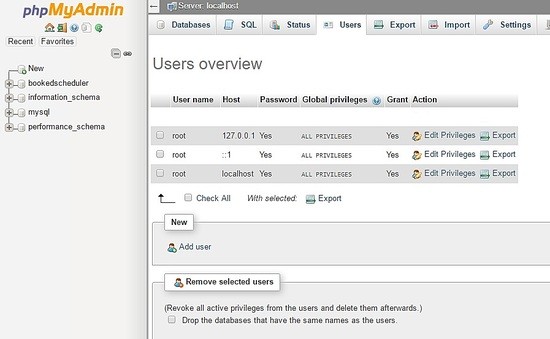
ユーザー作成画面で、フィールドにユーザーデータベース(booked_user)を入力し、パスワードを設定して、 GOを選択します。 ページの最後に:
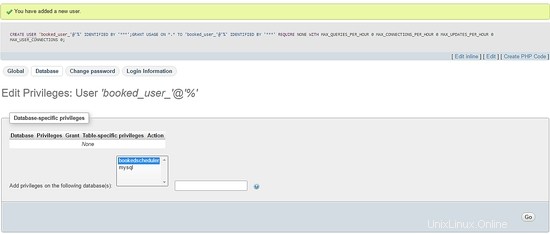
booked_userへの権限を設定するには bookedscheduler データベースで、 bookedschedulerを選択します データベースリストからGo:を選択します
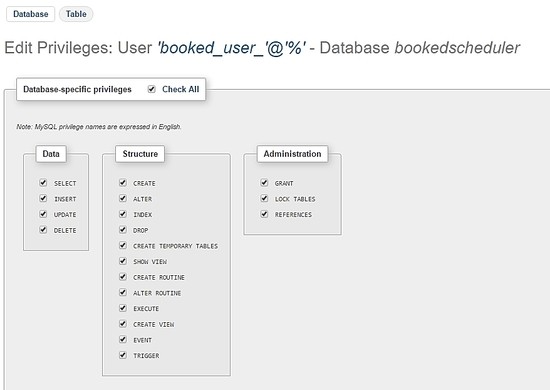
権限画面で、[すべてチェック]オプションを選択します および移動 :
Booked SchedulerCentos7のインストール
Booked Schedulerをインストールするには、手動または自動の2つの方法があります。この記事では、手動インストールについてのみ説明します。 BookedSchedulerをCentos7にインストールするには、/ tmpディレクトリに移動し、ソースコードをダウンロードします。
wget https://ufpr.dl.sourceforge.net/project/phpscheduleit/Booked/2.6/booked-2.6.5.zip
/ var / www / htmlディレクトリにあるファイルを解凍し、次のコマンドを実行します。
unzip booked-2.6.5.zip -d /var/www/html/
解凍したファイルの権限を変更します。
cd /var/www/html/
chown -R apache:apache /booked
/ var / www / html / booked/configで構成ファイルを設定します。 config.dist.phpファイルのコピーをconfig.phpに作成し、構成ファイルのブロックを編集します(これは私の構成ファイルです):
cp config.dist.php config.php
環境に応じて値を変更します。ここでは、変更する主な設定を示します。最初のサインアップ後、電子メールアドレスはシステム管理者になります。
<?php
/**
Copyright 2011-2016 Nick Korbel
This file is part of Booked Scheduler.
Booked Scheduler is free software: you can redistribute it and/or modify
it under the terms of the GNU General Public License as published by
the Free Software Foundation, either version 3 of the License, or
(at your option) any later version.
Booked Scheduler is distributed in the hope that it will be useful,
but WITHOUT ANY WARRANTY; without even the implied warranty of
MERCHANTABILITY or FITNESS FOR A PARTICULAR PURPOSE. See the
GNU General Public License for more details.
You should have received a copy of the GNU General Public License
along with Booked Scheduler. If not, see <http://www.gnu.org/licenses/>.
*/
error_reporting(E_ALL & ~E_NOTICE & ~E_STRICT);
//ini_set('display_errors', 1);
//ini_set('display_startup_errors', 1);
/**
* Application configuration
*/
$conf['settings']['app.title'] = 'Booked Scheduler'; // application title
$conf['settings']['default.timezone'] = 'America/Chicago'; // Change your time zone - look up here http://php.net/manual/en/timezones.php
$conf['settings']['allow.self.registration'] = 'true'; // if users can register themselves
$conf['settings']['admin.email'] = '[email protected]'; // fill with the email address of admin user
$conf['settings']['admin.email.name'] = 'Booked Administrator'; // name to be used in From: field when sending automatic emails
$conf['settings']['default.page.size'] = '50'; // number of records per page
$conf['settings']['enable.email'] = 'true'; // global configuration to enable if any emails will be sent
$conf['settings']['default.language'] = 'en_us'; Change acording to your language // find your language in the lang directory
$conf['settings']['script.url'] = 'http://[your-ip-address]/Web'; // public URL to the Web directory of this instance. this is the URL that appears when you are logging in. leave http: or https: off to auto-detect
$conf['settings']['image.upload.directory'] = 'Web/uploads/images'; // full or relative path to where images will be stored
$conf['settings']['image.upload.url'] = 'uploads/images'; // full or relative path to show uploaded images from
$conf['settings']['cache.templates'] = 'true'; // true recommended, caching template files helps web pages render faster
$conf['settings']['use.local.jquery'] = 'false'; // false recommended, delivers jQuery from Google CDN, uses less bandwidth
$conf['settings']['registration.captcha.enabled'] = 'true'; // recommended. unless using recaptcha this requires php_gd2 enabled in php.ini
$conf['settings']['registration.require.email.activation'] = 'true'; // requires enable.email = true
$conf['settings']['registration.auto.subscribe.email'] = 'false'; // requires enable.email = true
$conf['settings']['registration.notify.admin'] = 'true'; // whether the registration of a new user sends an email to the admin (ala phpScheduleIt 1.2)
$conf['settings']['inactivity.timeout'] = '30'; // minutes before the user is automatically logged out
$conf['settings']['name.format'] = '{first} {last}'; // display format when showing user names
$conf['settings']['css.extension.file'] = ''; // full or relative url to an additional css file to include. this can be used to override the default style
$conf['settings']['disable.password.reset'] = 'false'; // if the password reset functionality should be disabled
$conf['settings']['home.url'] = 'your-intranet-portal-url'; // the url to open when the logo is clicked
$conf['settings']['logout.url'] = 'your-intranet-portal-url'; // the url to be directed to after logging out
$conf['settings']['default.homepage'] = '1'; // the default homepage to use when new users register (1 = Dashboard, 2 = Schedule, 3 = My Calendar, 4 = Resource Calendar)
$conf['settings']['schedule']['use.per.user.colors'] = 'false'; // color reservations by user
$conf['settings']['schedule']['show.inaccessible.resources'] = 'true'; // whether or not resources that are inaccessible to the user are visible
$conf['settings']['schedule']['reservation.label'] = '{name}'; // format for what to display on the reservation slot label. Available properties are: {name}, {title}, {description}, {email}, {phone}, {organization}, {position}, {startdate}, {enddate} {resourcename} {participants} {invitees} {reservationAttributes}. Custom attributes can be added using att with the attribute id. For example {att1}
$conf['settings']['schedule']['hide.blocked.periods'] = 'false'; // if blocked periods should be hidden or shown
/**
* ical integration configuration
*/
$conf['settings']['ics']['require.login'] = 'true'; // recommended, if the user must be logged in to access ics files
$conf['settings']['ics']['subscription.key'] = ''; // must be set to allow webcal subscriptions
$conf['settings']['ics']['import'] = 'false'; // enable iCal import
$conf['settings']['ics']['import.key'] = ''; // it's recommended to set this key when iCal import is enabled
/**
* Privacy configuration - Set up here your business rules
*/
$conf['settings']['privacy']['view.schedules'] = 'true'; // if unauthenticated users can view schedules
$conf['settings']['privacy']['view.reservations'] = 'false'; // if unauthenticated users can view reservations
$conf['settings']['privacy']['hide.user.details'] = 'false'; // if personal user details should be displayed to non-administrators
$conf['settings']['privacy']['hide.reservation.details'] = 'false'; // if reservation details should be displayed to non-administrators
$conf['settings']['privacy']['allow.guest.reservations'] = 'false'; // if reservations can be made by users without a Booked account, if true this overrides schedule and resource visibility
/**
* Reservation specific configuration
*/
$conf['settings']['reservation']['start.time.constraint'] = 'future'; // when reservations can be created or edited. options are future, current, none
$conf['settings']['reservation']['updates.require.approval'] = 'false'; // if updates to previously approved reservations require approval again
$conf['settings']['reservation']['prevent.participation'] = 'false'; // if participation and invitation options should be removed
$conf['settings']['reservation']['prevent.recurrence'] = 'false'; // if recurring reservations are disabled for non-administrators
$conf['settings']['reservation']['enable.reminders'] = 'false'; // if reminders are enabled. this requires email to be enabled and the reminder job to be configured
$conf['settings']['reservation']['allow.guest.participation'] = 'false';
$conf['settings']['reservation']['allow.wait.list'] = 'false';
$conf['settings']['reservation']['checkin.minutes.prior'] = '5';
/**
* Email notification configuration
*/
$conf['settings']['reservation.notify']['resource.admin.add'] = 'false';
$conf['settings']['reservation.notify']['resource.admin.update'] = 'false';
$conf['settings']['reservation.notify']['resource.admin.delete'] = 'false';
$conf['settings']['reservation.notify']['resource.admin.approval'] = 'false';
$conf['settings']['reservation.notify']['application.admin.add'] = 'false';
$conf['settings']['reservation.notify']['application.admin.update'] = 'false';
$conf['settings']['reservation.notify']['application.admin.delete'] = 'false';
$conf['settings']['reservation.notify']['application.admin.approval'] = 'false';
$conf['settings']['reservation.notify']['group.admin.add'] = 'false';
$conf['settings']['reservation.notify']['group.admin.update'] = 'false';
$conf['settings']['reservation.notify']['group.admin.delete'] = 'false';
$conf['settings']['reservation.notify']['group.admin.approval'] = 'false';
/**end business rules
* File upload configuration
*/
$conf['settings']['uploads']['enable.reservation.attachments'] = 'false'; // if reservation attachments can be uploaded
$conf['settings']['uploads']['reservation.attachment.path'] = 'uploads/reservation'; // full or relative (to the root of your installation) filesystem path to store reservation attachments
$conf['settings']['uploads']['reservation.attachment.extensions'] = 'txt,jpg,gif,png,doc,docx,pdf,xls,xlsx,ppt,pptx,csv'; // comma separated list of file extensions that users are allowed to attach. leave empty to allow all extensions
/**
* Database configuration
*/
$conf['settings']['database']['type'] = 'mysql';
$conf['settings']['database']['user'] = 'booked_user'; // database user with permission to the booked database
$conf['settings']['database']['password'] = 'your_password'; fill with the booked_user password
$conf['settings']['database']['hostspec'] = '127.0.0.1'; // ip, dns or named pipe
$conf['settings']['database']['name'] = 'bookedscheduler';
/**TIP: if you have problems to conect to database, please, try with the user and passord of root, if it works, go back to user database permitions.
* Mail server configuration
*/To e-mail configurarion I need to use a relay to my e-mail server and in my server I instaled postfix and configurate it to send e-mails
$conf['settings']['phpmailer']['mailer'] = 'mail'; // options are 'mail', 'smtp' or 'sendmail'
$conf['settings']['phpmailer']['smtp.host'] = 'your-mx'; // 'smtp.company.com'
$conf['settings']['phpmailer']['smtp.port'] = '25';
$conf['settings']['phpmailer']['smtp.secure'] = ''; // options are '', 'ssl' or 'tls'
$conf['settings']['phpmailer']['smtp.auth'] = 'true'; // options are 'true' or 'false'
$conf['settings']['phpmailer']['smtp.username'] = '[email protected]';
$conf['settings']['phpmailer']['smtp.password'] = 'your-password';
$conf['settings']['phpmailer']['sendmail.path'] = '/usr/sbin/sendmail';
$conf['settings']['phpmailer']['smtp.debug'] = 'false';
/**
* Plugin configuration. For more on plugins, see readme_installation.html
*/
$conf['settings']['plugins']['Authentication'] = '';
$conf['settings']['plugins']['Authorization'] = '';
$conf['settings']['plugins']['Permission'] = '';
$conf['settings']['plugins']['PostRegistration'] = '';
$conf['settings']['plugins']['PreReservation'] = '';
$conf['settings']['plugins']['PostReservation'] = '';
/**
* Installation settings
*/
$conf['settings']['install.password'] = ''; //just to automated instalation
/**
* Pages
*/
$conf['settings']['pages']['enable.configuration'] = 'true';
/**
* API
*/
$conf['settings']['api']['enabled'] = 'false';
/**
* ReCaptcha
*/
$conf['settings']['recaptcha']['enabled'] = 'false';
$conf['settings']['recaptcha']['public.key'] = '';
$conf['settings']['recaptcha']['private.key'] = '';
/**
*/
$conf['settings']['email']['default.from.address'] = 'your-email-address';
$conf['settings']['email']['default.from.name'] = 'your-system-name';
/**
* Reports
*/
$conf['settings']['reports']['allow.all.users'] = 'false';
/**
* Account Password Rules
*/
$conf['settings']['password']['minimum.letters'] = '6';
$conf['settings']['password']['minimum.numbers'] = '0';
$conf['settings']['password']['upper.and.lower'] = 'false';
/**
* Label display settings
*/
$conf['settings']['reservation.labels']['ics.summary'] = '{title}';
$conf['settings']['reservation.labels']['ics.my.summary'] = '{title}';
$conf['settings']['reservation.labels']['rss.description'] = '<div><span>Start</span> {startdate}</div><div><span>End</span> {enddate}</div><div><span>Organizer</span> {name}</div><div><span>Description</span> {description}</div>';
$conf['settings']['reservation.labels']['my.calendar'] = '{resourcename} {title}';
$conf['settings']['reservation.labels']['resource.calendar'] = '{name}';
$conf['settings']['reservation.labels']['reservation.popup'] = ''; // Format for what to display in reservation popups. Possible values: {name} {dates} {title} {resources} {participants} {accessories} {description} {attributes}. Custom attributes can be added using att with the attribute id. For example {att1}
/**
* Security header settings
*/
$conf['settings']['security']['security.headers'] = 'false'; // Enable the following options
$conf['settings']['security']['security.strict-transport'] = 'true';
$conf['settings']['security']['security.x-frame'] = 'deny';
$conf['settings']['security']['security.x-xss'] = '1; mode=block';
$conf['settings']['security']['security.x-content-type'] = 'nosniff';
$conf['settings']['security']['security.content-security-policy'] = "default-src 'self'"; // Requires careful tuning (know what your doing)
/**
* Google Analytics settings
*/
$conf['settings']['google.analytics']['tracking.id'] = ''; // if set, Google Analytics tracking code will be added to every page in Booked
$conf['settings']['authentication']['allow.facebook.login'] = 'true';
$conf['settings']['authentication']['allow.google.login'] = 'true';
$conf['settings']['authentication']['required.email.domains'] = '';
/**
* Credits functionality
*/
$conf['settings']['credits']['enabled'] = 'false';
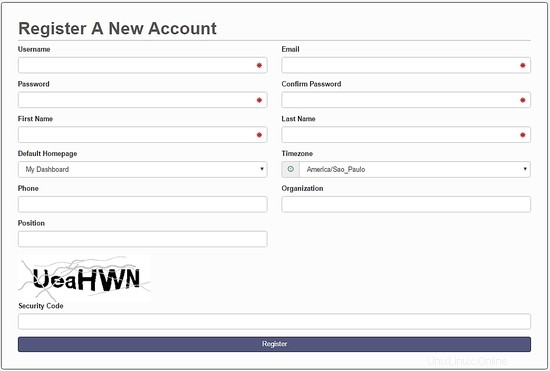
次のアドレスhttp://your-ipaddress/Web/index.phpにアクセスします。すべてが正常に機能している場合は、次の画面が表示されます。
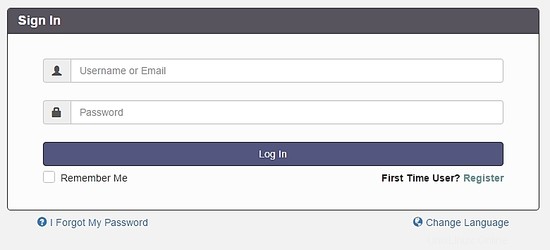
Select the option Register to create an admin account, remember, use the e-mail address previously configured at the file config.php.
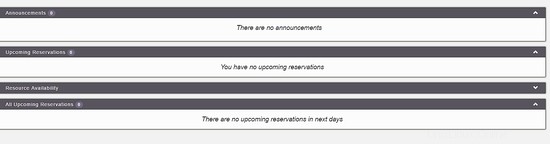
After creating your account, go to the login screen and authenticate. A dashboard will be load, like this image:
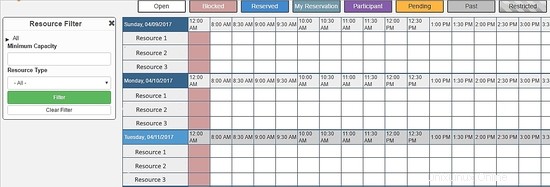
On the main menu, you can config all system, select Application Management :

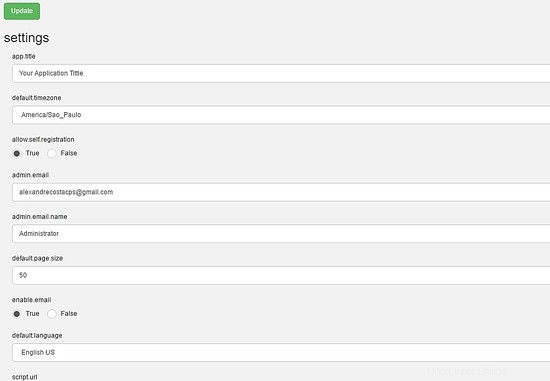
Through this menu, you can configure all resources of Booked Scheduler, to change the config.php, select the Application Configuration :
This article is a small overview about Booked Scheduler, this software has a lot of amazing features who can help any environment to provide a rational use of resources.
I hope this article can introduce you to the software, in case you have any problem with the installation, feel free to ask questions. If you want to get more information about Booked Scheduler access http://www.bookedscheduler.com/.