Wildflyは、Javaで記述され、RedHatによって開発されたアプリケーションサーバーです。これは、CLIと管理コンソールを備えたシンプルで軽量かつ強力なサーバーです。これはオープンソースでクロスプラットフォームであり、必要に応じて追加または削除できるプラグ可能なサブシステムに基づいています。 JavaWebアプリケーションを実行するために必要なすべての機能を提供します。
このチュートリアルでは、Debian11にリバースプロキシとしてNginxを使用してWildflyをインストールする方法を紹介します。
- Debian11を実行しているサーバー。
- サーバーIPで指定された有効なドメイン名。
- ルートパスワードはサーバーで構成されています。
JavaJDKをインストールします
WildflyはJavaベースのアプリケーションであるため、Javaをサーバーにインストールする必要があります。インストールされていない場合は、次のコマンドを実行してインストールできます。
apt-get install default-jdk -y
Javaをインストールしたら、次のコマンドを使用して確認できます。
java --version
次の出力にJavaバージョンが表示されます。
openjdk 11.0.12 2021-07-20
OpenJDK Runtime Environment (build 11.0.12+7-post-Debian-2deb10u1)
OpenJDK 64-Bit Server VM (build 11.0.12+7-post-Debian-2deb10u1, mixed mode, sharing)
まず、次のコマンドを使用して、Wildflyアプリケーションを実行するためのユーザーとグループを作成します。
groupadd -r wildfly
useradd -r -g wildfly -d /opt/wildfly -s /sbin/nologin wildfly
次に、wgetコマンドを使用してWildflyの最新バージョンをダウンロードします。
wget https://github.com/wildfly/wildfly/releases/download/25.0.1.Final/wildfly-25.0.1.Final.zip
ダウンロードが完了したら、次のコマンドを使用してダウンロードしたファイルを解凍します。
unzip wildfly-25.0.1.Final.zip
次に、次のコマンドを使用して、抽出したディレクトリを/optに移動します。
mv wildfly-25.0.1.Final /opt/wildfly
次に、/ opt/wildflyディレクトリの所有権を変更します。
chown -RH wildfly:wildfly /opt/wildfly
次に、次のコマンドを使用して/etc内にWildfly設定ディレクトリを作成します。
mkdir -p /etc/wildfly
次に、必要なすべてのファイルをWildflyディレクトリから/ etc/wildflyディレクトリにコピーします。
cp /opt/wildfly/docs/contrib/scripts/systemd/wildfly.conf /etc/wildfly/
cp /opt/wildfly/docs/contrib/scripts/systemd/wildfly.service /etc/systemd/system/
cp /opt/wildfly/docs/contrib/scripts/systemd/launch.sh /opt/wildfly/bin/
次に、すべてのシェルスクリプトファイルに実行権限を設定します。
chmod +x /opt/wildfly/bin/*.sh
次に、次のコマンドを使用してsystemdデーモンをリロードします。
systemctl daemon-reload
次に、次のコマンドを使用してWildflyサービスを開始して有効にします。
systemctl start wildfly
systemctl enable wildfly
Wildflyサービスのステータスを確認するには、次のコマンドを実行します。
systemctl status wildfly
次の出力が得られます:
? wildfly.service - The WildFly Application Server
   Loaded: loaded (/etc/systemd/system/wildfly.service; disabled; vendor preset: enabled)
   Active: active (running) since Fri 2021-12-10 14:55:07 UTC; 6s ago
 Main PID: 20928 (launch.sh)
    Tasks: 59 (limit: 4701)
   Memory: 171.6M
   CGroup: /system.slice/wildfly.service
           ??20928 /bin/bash /opt/wildfly/bin/launch.sh standalone standalone.xml 0.0.0.0
           ??20929 /bin/sh /opt/wildfly/bin/standalone.sh -c standalone.xml -b 0.0.0.0
           ??21022 java -D[Standalone] -server -Xms64m -Xmx512m -XX:MetaspaceSize=96M -XX:MaxMetaspaceSize=256m -Djava.net.preferIPv4Stack=tru

Dec 10 14:55:07 debian11 systemd[1]: Started The WildFly Application Server.
Wildfly管理コンソールを有効にする
デフォルトでは、Wildfly管理コンソールは無効になっています。 Wildflyアプリケーションを管理できるようにすることをお勧めします。
Wildfly設定ファイルを編集して有効にできます:
nano /etc/wildfly/wildfly.conf
次の行を変更します:
WILDFLY_BIND=127.0.0.1
WILDFLY_CONSOLE_BIND=127.0.0.1
ファイルを保存して閉じてから、Wildflyランチャースクリプトを編集して管理コンソールを有効にします。
nano /opt/wildfly/bin/launch.sh
以下に示すようにファイルを変更します:
if [[ "$1" == "domain" ]]; then
    $WILDFLY_HOME/bin/domain.sh -c $2 -b $3 -bmanagement $4
else
    $WILDFLY_HOME/bin/standalone.sh -c $2 -b $3 -bmanagement $4
fi
ファイルを保存して閉じてから、Wildflysystemdファイルを編集します。
nano /etc/systemd/system/wildfly.service
次の行を変更します:
ExecStart=/opt/wildfly/bin/launch.sh $WILDFLY_MODE $WILDFLY_CONFIG $WILDFLY_BIND $WILDFLY_CONSOLE_BIND
ファイルを保存して閉じてから、systemdデーモンをリロードして構成の変更を適用します。
systemctl daemon-reload
次に、Wildflyサービスを再起動して変更を適用します:
systemctl restart wildfly
次のコマンドを使用して、Wildflyのステータスを確認することもできます。
systemctl status wildfly
次の出力が得られます:
? wildfly.service - The WildFly Application Server
   Loaded: loaded (/etc/systemd/system/wildfly.service; disabled; vendor preset: enabled)
   Active: active (running) since Fri 2021-12-10 14:57:22 UTC; 3s ago
 Main PID: 21182 (launch.sh)
    Tasks: 64 (limit: 4701)
   Memory: 205.6M
   CGroup: /system.slice/wildfly.service
           ??21182 /bin/bash /opt/wildfly/bin/launch.sh standalone standalone.xml 127.0.0.1 127.0.0.1
           ??21183 /bin/sh /opt/wildfly/bin/standalone.sh -c standalone.xml -b 127.0.0.1 -bmanagement 127.0.0.1
           ??21282 java -D[Standalone] -server -Xms64m -Xmx512m -XX:MetaspaceSize=96M -XX:MaxMetaspaceSize=256m -Djava.net.preferIPv4Stack=tru

Dec 10 14:57:22 debian11 systemd[1]: Started The WildFly Application Server.
この時点で、Wildflyが起動し、ポート8080および9990でリッスンします。次のコマンドでそれらを確認できます。
ss -plnt
次の出力が得られます:
State        Recv-Q       Send-Q             Local Address:Port             Peer Address:Port
LISTEN       0            128                      0.0.0.0:22                    0.0.0.0:*           users:(("sshd",pid=678,fd=3))
LISTEN       0            128                    127.0.0.1:8443                  0.0.0.0:*           users:(("java",pid=21282,fd=485))
LISTEN       0            50                     127.0.0.1:9990                  0.0.0.0:*           users:(("java",pid=21282,fd=487))
LISTEN       0            80                     127.0.0.1:3306                  0.0.0.0:*           users:(("mysqld",pid=12461,fd=21))
LISTEN       0            128                    127.0.0.1:8080                  0.0.0.0:*           users:(("java",pid=21282,fd=476))
LISTEN       0            128                         [::]:22                       [::]:*           users:(("sshd",pid=678,fd=4))
終了したら、次のステップに進むことができます。
Wildfly管理者ユーザーの作成
次に、Wildfly管理コンソールにアクセスするための管理ユーザーも作成する必要があります。次のコマンドを実行して作成できます:
sh /opt/wildfly/bin/add-user.sh
ユーザーのタイプを選択するように求められます:
What type of user do you wish to add?
 a) Management User (mgmt-users.properties)
 b) Application User (application-users.properties)
(a): a
aと入力し、Enterキーを押して、管理ユーザーを追加します。以下に示すように、ユーザー名とパスワードを定義するように求められます。
Enter the details of the new user to add.
Using realm 'ManagementRealm' as discovered from the existing property files.
Username : hitesh
Password recommendations are listed below. To modify these restrictions edit the add-user.properties configuration file.
 - The password should be different from the username
 - The password should not be one of the following restricted values {root, admin, administrator}
 - The password should contain at least 8 characters, 1 alphabetic character(s), 1 digit(s), 1 non-alphanumeric symbol(s)
Password :
Re-enter Password :
ユーザー名とパスワードを入力し、 Enterを押します 。レルムにユーザーを追加するように求められます:
What groups do you want this user to belong to? (Please enter a comma separated list, or leave blank for none)[  ]:
About to add user 'hitesh' for realm 'ManagementRealm'
Is this correct yes/no? yes
yesと入力し、 Enterを押します 続行するためのキー。ユーザーが追加されると、次の出力が表示されます。
Added user 'hitesh' to file '/opt/wildfly/standalone/configuration/mgmt-users.properties'
Added user 'hitesh' to file '/opt/wildfly/domain/configuration/mgmt-users.properties'
Added user 'hitesh' with groups  to file '/opt/wildfly/standalone/configuration/mgmt-groups.properties'
Added user 'hitesh' with groups  to file '/opt/wildfly/domain/configuration/mgmt-groups.properties'
Is this new user going to be used for one AS process to connect to another AS process?
e.g. for a slave host controller connecting to the master or for a Remoting connection for server to server Jakarta Enterprise Beans calls.
yes/no? yes
To represent the user add the following to the server-identities definition
終了したら、次のステップに進むことができます。
Nginxをリバースプロキシとしてインストールして構成する
次に、ポート80を介してWildflyにアクセスするために、Nginxをリバースプロキシとして設定する必要があります。
まず、以下のコマンドを使用してNginxパッケージをインストールします。
apt-get install nginx -y
Nginxがインストールされたら、次のコマンドを使用してNginxプロキシファイルを作成します。
nano /etc/nginx/conf.d/proxy_headers.conf
次の行を追加します:
proxy_set_header Host $host;
proxy_set_header X-Forwarded-Proto $scheme;
add_header Front-End-Https on;
add_header Cache-Control no-cache;
ファイルを保存して閉じてから、Wildfly用のNginx仮想ホスト構成ファイルを作成します。
nano /etc/nginx/conf.d/wildfly.conf
次の行を追加します:
server {
  listen          80;
  server_name     wildfly.yourdomain.com;

  location / {
    include conf.d/proxy_headers.conf;
    proxy_pass http://127.0.0.1:8080;
  }

  location /management {
    include conf.d/proxy_headers.conf;
    proxy_pass http://127.0.0.1:9990/management;
  }

  location /console {
    include conf.d/proxy_headers.conf;
    proxy_pass http://127.0.0.1:9990/console;
  }

  location /logout {
    include conf.d/proxy_headers.conf;
    proxy_pass http://127.0.0.1:9990/logout;
  }

  location /error {
    include conf.d/proxy_headers.conf;
    proxy_pass http://127.0.0.1:9990;
  }

}
ファイルを保存して閉じ、次のコマンドを使用して構文エラーがないかNginxを確認します。
nginx -t
次の出力が表示されます。
nginx: the configuration file /etc/nginx/nginx.conf syntax is ok
nginx: configuration file /etc/nginx/nginx.conf test is successful
最後に、Nginxサービスを再起動して、変更を適用します。
systemctl restart nginx
以下のコマンドを使用して、Nginxのステータスを確認することもできます:
systemctl status nginx
次の出力が得られます:
? nginx.service - A high performance web server and a reverse proxy server
   Loaded: loaded (/lib/systemd/system/nginx.service; enabled; vendor preset: enabled)
   Active: active (running) since Fri 2021-12-10 15:12:26 UTC; 9s ago
     Docs: man:nginx(8)
  Process: 22115 ExecStartPre=/usr/sbin/nginx -t -q -g daemon on; master_process on; (code=exited, status=0/SUCCESS)
  Process: 22116 ExecStart=/usr/sbin/nginx -g daemon on; master_process on; (code=exited, status=0/SUCCESS)
 Main PID: 22117 (nginx)
    Tasks: 3 (limit: 4701)
   Memory: 3.8M
   CGroup: /system.slice/nginx.service
           ??22117 nginx: master process /usr/sbin/nginx -g daemon on; master_process on;
           ??22118 nginx: worker process
           ??22119 nginx: worker process

Dec 10 15:12:25 debian11 systemd[1]: Starting A high performance web server and a reverse proxy server...
Dec 10 15:12:26 debian11 systemd[1]: Started A high performance web server and a reverse proxy server.
この時点で、Nginxがインストールされ、Wildflyにサービスを提供するように構成されています。これで、次のステップに進むことができます。
WildflyWebUIにアクセス
次に、Webブラウザーを開き、URL http://wildfly.yourdomain.comを使用してWildflyアプリケーションページにアクセスします。 。次の画面にWildflyのデフォルトページが表示されます。
Wildfly管理コンソールにアクセスするには、URL http://wildfly.yourdomain.com/console/を入力します Webブラウザで。以下に示すように、管理者のユーザー名とパスワードを入力するように求められます。
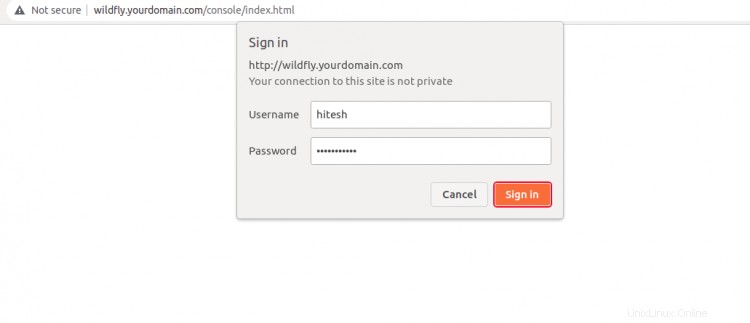
管理者のユーザー名とパスワードを入力し、サインインをクリックします ボタン。ログインすると、Wildfly管理ダッシュボードが表示されます。

おめでとう!これで、Debian 11にリバースプロキシとしてNginxを使用してWildflyが正常にインストールされました。これで、Wildflyを使用してインターネット上でJavaアプリケーションをホストできます。ご不明な点がございましたら、お気軽にお問い合わせください。