Polrは、独自のリンク短縮サービスをホストできる無料のオープンソースURL短縮サービスです。 PHPとLumenで記述されており、MariaDBを使用してデータを保存します。 Polrを使用すると、既存のコードを壊すことなく、新しいリンクを作成したり、既存のリンクを検索したりできます。
このチュートリアルでは、Debian10サーバーにPolrLinkShortenerソフトウェアをインストールする方法を紹介します。
- Debian10を実行しているサーバー。
- サーバーIPで指定された有効なドメイン名。このチュートリアルでは、polr.example.comドメインを使用します。
- ルートパスワードはサーバーで構成されています。
開始する前に、システムを最新バージョンに更新することをお勧めします。次のコマンドでシステムを更新できます:
apt-get update -y
 apt-get upgrade -y
システムを更新した後、システムを再起動して変更を実装します。
LAMPサーバーをインストールする
まず、Apache Webサーバー、MariaDBサーバー、PHP、およびその他のパッケージをシステムにインストールする必要があります。次のコマンドを使用して、それらすべてをインストールできます。
apt-get install apache2 mariadb-server libapache2-mod-php php php-pdo php-mysql php-mbstring php-tokenizer php-json php-curl git wget unzip -y
すべてのパッケージがインストールされたら、ApacheおよびMariaDBサービスを開始し、システムの再起動後にそれらを開始できるようにします。
systemctl start apache2
 systemctl start mariadb
 systemctl enable apache2
 systemctl enable mariadb
完了したら、次のステップに進むことができます。
MariaDBデータベースを構成する
デフォルトでは、MariaDBルートパスワードはDebian 10で設定されていないため、最初に設定する必要があります。
これを行うには、次のコマンドを使用してMariaDBシェルにログインします。
mysql
ログインしたら、次のコマンドを使用してMariaDBのrootパスワードを設定します。
MariaDB [(none)]> SET PASSWORD FOR 'root'@'localhost' = PASSWORD("newpassword"); 次に、次のコマンドを使用してPolrのデータベースとユーザーを作成します。
MariaDB [(none)]> CREATE DATABASE polrdb;
 MariaDB [(none)]> GRANT ALL ON polrdb.* TO 'polr' IDENTIFIED BY 'password';
次に、特権をフラッシュし、次のコマンドを使用してMariaDBシェルを終了します。
MariaDB [(none)]> FLUSH PRIVILEGES;
 MariaDB [(none)]> EXIT;
終了したら、次のステップに進むことができます。
次に、Composerをシステムにインストールする必要があります。 Composerは、プロジェクトのすべてのPHP依存関係をインストールするために使用されるPHPの依存関係マネージャーです。
まず、次のコマンドを使用してComposerをダウンロードします。
php -r "copy('https://getcomposer.org/installer', 'composer-setup.php');" 次に、スクリプトSHA-384ハッシュを最新のハッシュと比較して、ダウンロードしたスクリプトのデータ整合性を検証する必要があります。
これを行うには、Gitリポジトリから最新のComposerインストーラーの署名をダウンロードし、HASHという名前の変数に保存します。
HASH="$(wget -q -O - https://composer.github.io/installer.sig)"
次に、次のコマンドを使用してインストールスクリプトを確認します。
php -r "if (hash_file('SHA384', 'composer-setup.php') === '$HASH') { echo 'Installer verified'; } else { echo 'Installer corrupt'; unlink('composer-setup.php'); } echo PHP_EOL;" ハッシュが一致する場合、次の出力が表示されます:
Installer verified
最後に、次のコマンドを使用してComposerをインストールします。
php composer-setup.php --install-dir=/usr/local/bin --filename=composer
インストールが完了すると、次の出力が表示されます。
All settings correct for using Composer
Downloading...
Composer (version 1.9.2) successfully installed to: /usr/local/bin/composer
Use it: php /usr/local/bin/composer
終了したら、次のステップに進むことができます。
まず、最新バージョンのPolrをGitリポジトリからApacheWebルートディレクトリにダウンロードします。
cd /var/www/html
 git clone https://github.com/cydrobolt/polr.git --depth=1
ダウンロードしたら、ディレクトリをpolrに変更し、次のコマンドを使用して必要なすべての依存関係をインストールします。
cd polr
 composer install --no-dev -o
次に、次のファイルの名前を変更して、Webベースのインストーラーを有効にします。
mv .env.setup .env
次に、以下に示すように、polrディレクトリに適切な権限を付与します。
chown -R www-data:www-data /var/www/html/polr/
 chmod -R 755 /var/www/html/polr/
終了したら、次のステップに進むことができます。
ApacheをPolr用に構成する
次に、Polr用のApache仮想ホスト構成ファイルを作成する必要があります。次のコマンドで作成できます:
nano /etc/apache2/sites-available/polr.conf
次の行を追加します:
<VirtualHost *:80>
     ServerAdmin [email protected]
     DocumentRoot /var/www/html/polr/public
     ServerName polr.example.com

     <Directory /var/www/html/polr/public/>
          Options FollowSymlinks
          AllowOverride All
          Require all granted
     </Directory>

     ErrorLog ${APACHE_LOG_DIR}/polr_error.log
     CustomLog ${APACHE_LOG_DIR}/polr_access.log combined

</VirtualHost>
終了したら、ファイルを保存して閉じます。次に、Apache仮想ホストファイルを有効にして、次のコマンドでモジュールを書き換えます。
a2ensite polr.conf
 a2enmod rewrite
最後に、Apacheサービスを再起動して、変更を実装します。
systemctl restart apache2
この時点で、Polrがインストールおよび構成されています。これで、次のステップに進むことができます。
AccessPolrWebインターフェイス
次に、Webブラウザーを開き、URLhttp://polr.example.comを入力します。以下に示すように、Polrセットアップウィザードにリダイレクトされます。
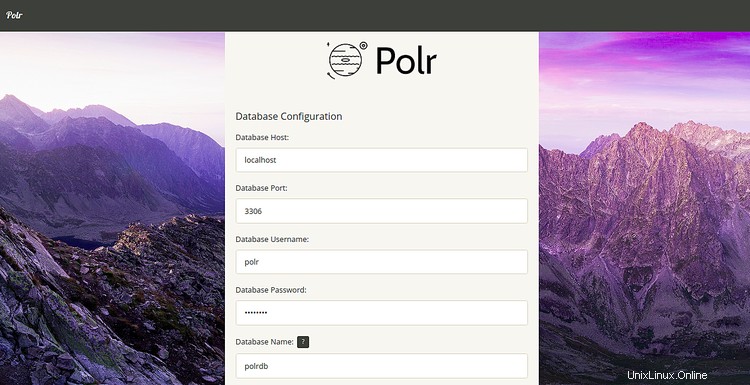
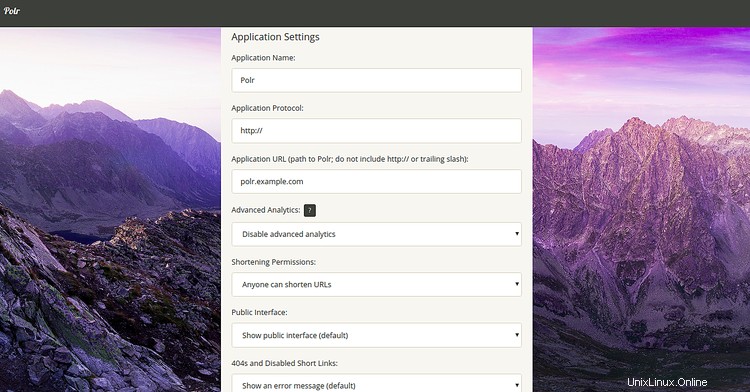
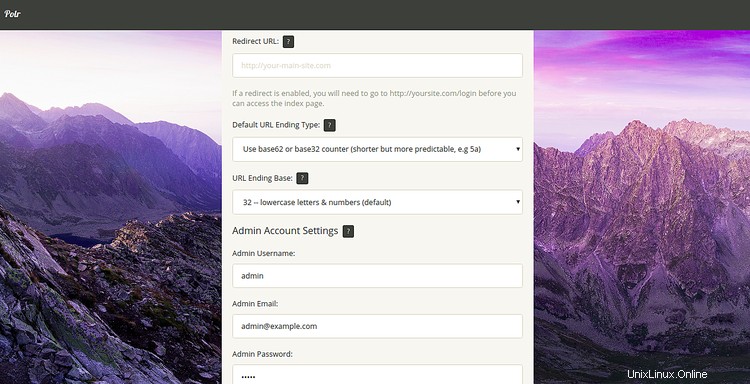
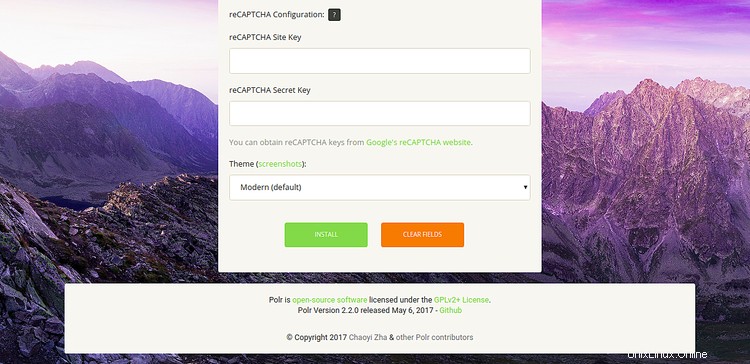
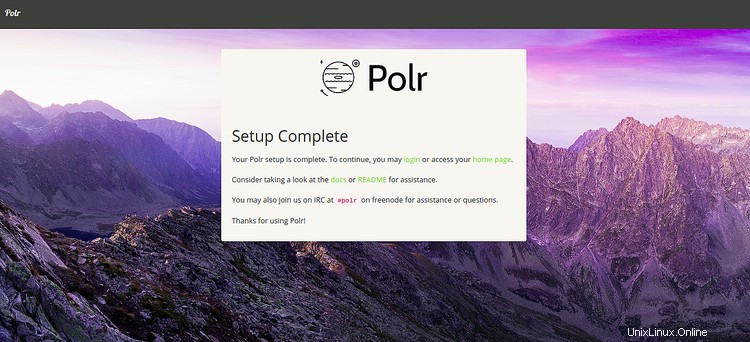
データベース情報、アプリケーション設定、管理者アカウント設定を提供し、インストールをクリックします ボタン。インストールが完了すると、次のページが表示されます。
ログインをクリックします ボタン。 Polrログインページにリダイレクトされます:
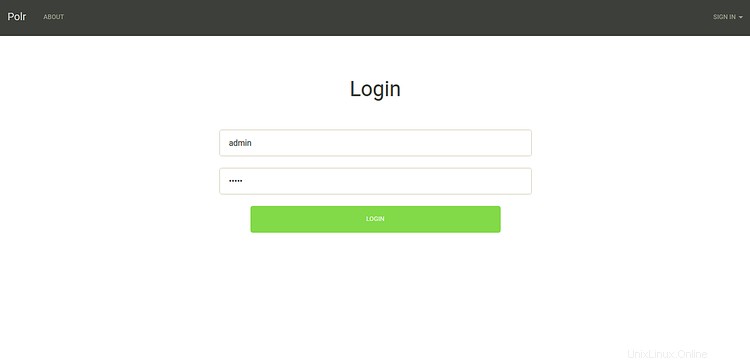
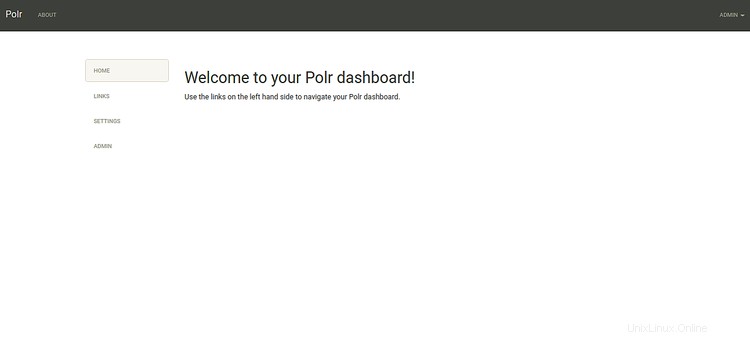
管理者のユーザー名とパスワードを入力し、ログインをクリックします ボタン。次のページが表示されます:


次に、管理者をクリックします =>ダッシュボード 右上隅にあります。次のページにPolrダッシュボードが表示されます。
まず、Certbot Let's Encryptクライアントをインストールして、ドメインのSSL証明書をダウンロードしてインストールする必要があります。
次のコマンドでインストールできます:
apt-get install python-certbot-apache -y
インストールしたら、次のコマンドを実行して、ドメインpolr.example.comのLet'sEncryptCertificateをインストールできます。
certbot --apache -d polr.example.com
インストール中に、以下に示すように、メールアドレスを入力し、利用規約に同意するよう求められます。
Saving debug log to /var/log/letsencrypt/letsencrypt.log
Plugins selected: Authenticator apache, Installer apache
Enter email address (used for urgent renewal and security notices) (Enter 'c' to
cancel): [email protected]

- - - - - - - - - - - - - - - - - - - - - - - - - - - - - - - - - - - - - - - -
Please read the Terms of Service at
https://letsencrypt.org/documents/LE-SA-v1.2-November-15-2017.pdf. You must
agree in order to register with the ACME server at
https://acme-v02.api.letsencrypt.org/directory
- - - - - - - - - - - - - - - - - - - - - - - - - - - - - - - - - - - - - - - -
(A)gree/(C)ancel: A

- - - - - - - - - - - - - - - - - - - - - - - - - - - - - - - - - - - - - - - -
Would you be willing to share your email address with the Electronic Frontier
Foundation, a founding partner of the Let's Encrypt project and the non-profit
organization that develops Certbot? We'd like to send you email about our work
encrypting the web, EFF news, campaigns, and ways to support digital freedom.

- - - - - - - - - - - - - - - - - - - - - - - - - - - - - - - - - - - - - - - -
(Y)es/(N)o: Y
Obtaining a new certificate
Performing the following challenges:
http-01 challenge for polr.example.com
Enabled Apache rewrite module
Waiting for verification...
Cleaning up challenges
Created an SSL vhost at /etc/apache2/sites-available/polr-le-ssl.conf
Deploying Certificate to VirtualHost /etc/apache2/sites-available/polr-le-ssl.conf
Enabling available site: /etc/apache2/sites-available/polr-le-ssl.conf

Please choose whether or not to redirect HTTP traffic to HTTPS, removing HTTP access.
- - - - - - - - - - - - - - - - - - - - - - - - - - - - - - - - - - - - - - - -
1: No redirect - Make no further changes to the webserver configuration.
2: Redirect - Make all requests redirect to secure HTTPS access. Choose this for
new sites, or if you're confident your site works on HTTPS. You can undo this
change by editing your web server's configuration.
- - - - - - - - - - - - - - - - - - - - - - - - - - - - - - - - - - - - - - - -
Select the appropriate number [1-2] then [enter] (press 'c' to cancel): 2
次に、 2と入力します Enterを押します ドメインの無料のSSL証明書をダウンロードしてインストールします。インストールが正常に完了したら。次の出力が得られるはずです:
Enabled Apache rewrite module
Redirecting vhost in /etc/apache2/sites-enabled/polr.conf to ssl vhost in /etc/apache2/sites-available/
polr-le-ssl.conf

- - - - - - - - - - - - - - - - - - - - - - - - - - - - - - - - - - - - - - - -
Congratulations! You have successfully enabled https://polr.example.com

You should test your configuration at:
https://www.ssllabs.com/ssltest/analyze.html?d=polr.example.com
- - - - - - - - - - - - - - - - - - - - - - - - - - - - - - - - - - - - - - - -
これで、PolrWebサイトがLet'sEncryptの無料SSLで保護されました。 URLhttps://polr.example.comを使用してアクセスできます。
おめでとう!これで、Debian 10サーバーにPolrが正常にインストールされ、Let'sEncryptSSLで保護されました。これで、PolrWebインターフェイスを使用して独自のリンク短縮サービスをホストできます。ご不明な点がございましたら、お気軽にお問い合わせください。