このチュートリアルでは、Ubuntu 20.04 LTSにYourlsをインストールする方法を示します。知らなかった方のために、YOURLSはYour OwnURLShortenerの略です。これは小さなセットです。独自のURL短縮サービスを実行できる無料のオープンソースPHPスクリプト。YOURLSを使用すると、データ、詳細な統計、分析、プラグインなどを完全に制御できます。
この記事は、少なくともLinuxの基本的な知識があり、シェルの使用方法を知っていること、そして最も重要なこととして、サイトを独自のVPSでホストしていることを前提としています。インストールは非常に簡単で、ルートアカウントで実行されていますが、そうでない場合は、' sudoを追加する必要があります。 ‘ルート権限を取得するコマンドに。 Ubuntu 20.04(Focal Fossa)にYourlsオープンソースURL短縮サービスを段階的にインストールする方法を紹介します。 Ubuntu 18.04、16.04、およびLinuxMintなどの他のDebianベースのディストリビューションでも同じ手順に従うことができます。
Ubuntu 20.04 LTSFocalFossaにYourlsをインストールする
手順1.まず、次の apt を実行して、すべてのシステムパッケージが最新であることを確認します。 ターミナルのコマンド。
sudo apt update
sudo apt upgrade
ステップ2.LAMPスタックをインストールします。
Ubuntu 20.04 LAMPサーバーが必要です。LAMPがインストールされていない場合は、こちらのガイドに従ってください。
ステップ3.Yourls用にMariaDBを構成します。
デフォルトでは、MariaDBは強化されていません。 mysql_secure_installationを使用してMariaDBを保護できます。 脚本。ルートパスワードを設定し、匿名ユーザーを削除し、リモートルートログインを禁止し、テストデータベースと安全なMariaDBへのアクセスを削除する各手順を注意深く読んでください。
mysql_secure_installation
次のように構成します:
- Set root password? [Y/n] y
- Remove anonymous users? [Y/n] y
- Disallow root login remotely? [Y/n] y
- Remove test database and access to it? [Y/n] y
- Reload privilege tables now? [Y/n] y
次に、MariaDBコンソールにログインして、Yourlsのデータベースを作成する必要があります。次のコマンドを実行します。
mysql -u root -p
これによりパスワードの入力を求められるので、MariaDBルートパスワードを入力してEnterキーを押します。データベースサーバーにログインしたら、次のデータベースを作成する必要があります。 Yourlsのインストール:
MariaDB [(none)]> create database yourlsdb character set utf8mb4;
MariaDB [(none)]> grant all on yourlsdb.* to 'yourls'@'localhost' identified by 'your-strong-password';
MariaDB [(none)]> flush privileges;
MariaDB [(none)]> exit;
ステップ4.Ubuntu20.04にYourlsをインストールします。
これで、Gitリポジトリから最新バージョンのYOURLSをダウンロードします:
cd /var/www/html
git clone https://github.com/YOURLS/YOURLS.git
次に、 user / config-sample.phpをコピーします user / config.phpへ :
cd YOURLS/user/
cp config-sample.php config.php
次に、構成ファイルを編集し、データベース設定を定義します。
nano config.php
データベース設定に一致する次の行を変更し、ドメイン名と管理者パスワードも指定します。
*
 ** MySQL settings - You can get this info from your web host
 */

/** MySQL database username */
define( 'YOURLS_DB_USER', 'yourls' );

/** MySQL database password */
define( 'YOURLS_DB_PASS', 'your-strong-password' );

/** The name of the database for YOURLS */
define( 'YOURLS_DB_NAME', 'yourlsdb' );

/** MySQL hostname.
 ** If using a non standard port, specify it like 'hostname:port', eg. 'localhost:9999' or '127.0.0.1:666' */
define( 'YOURLS_DB_HOST', 'localhost' );

/** MySQL tables prefix */
define( 'YOURLS_DB_PREFIX', 'yourls_' );
完了したら、YOURLSのWebサイトURLを設定します:
/** YOURLS installation URL -- all lowercase, no trailing slash at the end.
 ** If you define it to "http://sho.rt", don't use "http://www.sho.rt" in your browser (and vice-versa) */
define( 'YOURLS_SITE', 'http://yourls.your-domain.com' );
次に、ユーザーとパスワードを設定します:
/** Username(s) and password(s) allowed to access the site. Passwords either in plain text or as encrypted hashes
 ** YOURLS will auto encrypt plain text passwords in this file
 ** Read http://yourls.org/userpassword for more information */
$yourls_user_passwords = array(
  'admin' => 'Ngadimin',
  'jmutai' => 'Admin-Strong-Password',
   // You can have one or more 'login'=>'password' lines
   );
ファイルを保存して閉じてから、所有権を変更し、YOURLSディレクトリに適切な権限を付与します。
chown -R www-data:www-data /var/www/html/YOURLS
chmod -R 775 /var/www/html/YOURLS
ステップ5.Yourls用にApacheを構成します。
次に、Apacheで新しい仮想ホストディレクティブを作成します。たとえば、「 yourls.conf」という名前の新しいApache構成ファイルを作成します。 ’仮想サーバー上:
touch /etc/apache2/sites-available/yourls.conf
ln -s /etc/apache2/sites-available/yourls.conf /etc/apache2/sites-enabled/yourls.conf
nano /etc/apache2/sites-available/yourls.conf
次の行を追加します:
<VirtualHost *:80>
ServerAdmin admin@your-domain.com
DocumentRoot /var/www/html/YOURLS
ServerName your-domain.com
ServerAlias www.your-domain.com
<Directory /var/www/html/YOURLS/>
Options FollowSymLinks
AllowOverride All
Order allow,deny
allow from all
</Directory>
ErrorLog /var/log/apache2/your-domain.com-error_log
CustomLog /var/log/apache2/your-domain.com-access_log common
</VirtualHost>
これで、Apache Webサーバーを再起動して、変更を行うことができます:
sudo a2enmod rewrite
sudo a2ensite yourls.conf
sudo systemctl restart apache2.service
手順6.ファイアウォールを構成する
Apache WebサーバーのUFWファイアウォールとファイアウォールブロックリクエストを有効にした場合は、ファイアウォールでポートを開きます:
sudo ufw allow 80/tcp
sudo ufw allow 443/tcp
sudo ufw reload
ステップ7.YourlsWebインターフェイスへのアクセス。
YourlsはデフォルトでHTTPポート80で利用可能になります。お気に入りのブラウザを開き、http://yourls.your-domain.com インストールを完了するために必要な手順を完了します。
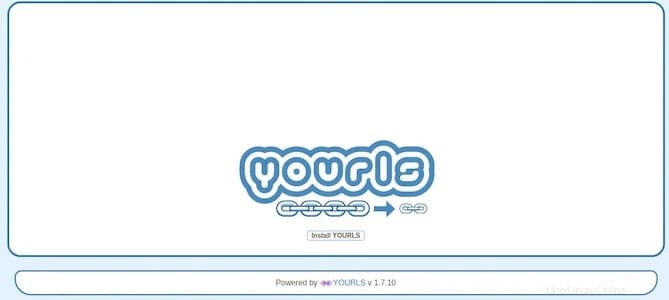
おめでとうございます!Yourlsが正常にインストールされました。Ubuntu20.04LTS Focal FossaシステムにYourls(独自のURL短縮サービス)をインストールするためにこのチュートリアルを使用していただきありがとうございます。追加のヘルプや役立つ情報については、 Yourlsの公式ウェブサイトを確認してください。