
このチュートリアルでは、Ubuntu 14.04にApacheをインストールする方法を紹介します。知らない人のために、Apacheは最も人気のあるHTTPWebサーバーです。 Webブラウザから要求されたときにWebページを提供します。WebサーバーでURLを入力してEnterキーを押すと、画面に表示されるページはApacheWebサーバーによって提供される可能性が高くなります。
この記事は、少なくともLinuxの基本的な知識があり、シェルの使用方法を知っていること、そして最も重要なこととして、独自のVPSでサイトをホストしていることを前提としています。インストールは非常に簡単です。 Ubuntu14.04サーバーへのApacheの段階的なインストールを示します。
Ubuntu14.04にApacheをインストールする
手順1.まず、すべてのパッケージが最新であることを確認します。
apt-get update
apt-get upgrade
ubuntuのデフォルトのパッケージマネージャーであるapt-getを使用してApacheをインストールします。
apt-get install apache2 apache2-utils
Apacheを起動して追加し、次を使用してシステムの起動時に自動的に起動します:
service apache2 start
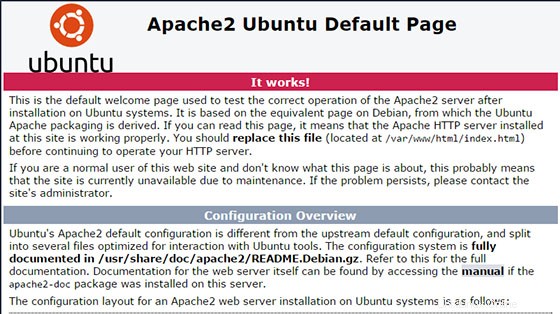
お気に入りのWebブラウザを開いてURL http://your-server's-addressを入力すると、Apacheが実際に実行されていることを確認できます。 、インストールされている場合は、次のように表示されます:
Apache(シングルホスト)の構成
次に、メインの構成ファイルを開いてApacheを構成し、それに応じてServerNameとServerAdminの行を編集します。
nano /etc/apache2/sites-available/000-default.conf
<VirtualHost *:80>
        # The ServerName directive sets the request scheme, hostname and port that
        # the server uses to identify itself. This is used when creating
        # redirection URLs. In the context of virtual hosts, the ServerName
        # specifies what hostname must appear in the request's Host: header to
        # match this virtual host. For the default virtual host (this file) this
        # value is not decisive as it is used as a last resort host regardless.
        # However, you must set it for any further virtual host explicitly.
        #ServerName www.example.com
        ServerAdmin webmaster@localhost
        DocumentRoot /var/www/html
        # Available loglevels: trace8, ..., trace1, debug, info, notice, warn,
        # error, crit, alert, emerg.
        # It is also possible to configure the loglevel for particular
        # modules, e.g.
        #LogLevel info ssl:warn
        ErrorLog ${APACHE_LOG_DIR}/error.log
        CustomLog ${APACHE_LOG_DIR}/access.log combined
        # For most configuration files from conf-available/, which are
        # enabled or disabled at a global level, it is possible to
        # include a line for only one particular virtual host. For example the
        # following line enables the CGI configuration for this host only
        # after it has been globally disabled with "a2disconf".
        #Include conf-available/serve-cgi-bin.conf
</VirtualHost>
これで、Apacheを再起動して、変更を加えることができます:
service apache2 restart
これで、Webコンテンツを作成してApacheのHTMLディレクトリにアップロードできます(既存のindex.htmlファイルを自分のindex.htmlに置き換えることを忘れないでください)。ホームページ)。
Apache(マルチホスト)の構成
複数のWebサイトをホストする場合は、メインの構成ファイルを開き、既存の仮想ホストエントリをコピーしてその下に貼り付けます。次に、ServerNameを編集します。 ServerAdmin、およびそれに応じたDocumentRoot行。
nano /etc/apache2/sites-available/000-default.conf
または、次のエントリをコピーして、それに応じて編集することもできます。
    <VirtualHost *:80>
    ServerAdmin youremail@address.com
    DocumentRoot /var/www/site1
    ServerName site1.com
    ServerAlias www.site1.com
    ErrorLog ${APACHE_LOG_DIR}/error.log
    CustomLog ${APACHE_LOG_DIR}/access.log combined
    </VirtualHost>
    <VirtualHost *:80>
    ServerAdmin youremail@address.com
    DocumentRoot /var/www/site2
    ServerName site2.com
    ServerAlias www.site2.com
    ErrorLog ${APACHE_LOG_DIR}/error.log
    CustomLog ${APACHE_LOG_DIR}/access.log combined
    </VirtualHost>
構成したばかりのサイト、site1とsite2のディレクトリを作成する必要があります。
mkdir -p /var/www/site1
mkdir -p /var/www/site2
これで、Apacheを再起動して、変更を加えることができます:
service apache2 restart
おめでとうございます!Apacheが正常にインストールされました。Ubuntu14.04システムにApache Webサーバーをインストールするためにこのチュートリアルを使用していただきありがとうございます。追加のヘルプや役立つ情報については、Apacheの公式Webサイトを確認することをお勧めします。