
このチュートリアルでは、Ubuntu 14.04にSeafileをインストールする方法を紹介します。知らなかった方のために、Seafileはオープンソースのクラウドストレージソフトウェアです。ファイル共有を提供します。個々のユーザーとグループの同期により、クライアント側の暗号化とモバイルデバイスからの簡単なアクセスを提供します。また、LDAPやWebDAVなどのローカルサービスと簡単に統合したり、高度なネットワークサービスやMySQL、SQLite、PostgreSQL、Memcachedなどのデータベースを使用して展開したりできます。 、Nginx、またはApacheWebサーバー。
この記事は、少なくともLinuxの基本的な知識があり、シェルの使用方法を知っていること、そして最も重要なこととして、サイトを独自のVPSでホストしていることを前提としています。インストールは非常に簡単です。 Ubuntu14.04にSeafileを段階的にインストールする方法を説明します。
Ubuntu14.04にSeafileをインストール
手順1.まず、システムを更新して、最新のソフトウェアがすべてインストールされていることを確認する必要があります。
apt-get update
手順2.必要なパッケージをインストールします。
LAMPのインストール:
sudo apt-get install apache2 mysql-server php5 libapache2-mod-php5
Pythonモジュールのインストール:
sudo apt-get install python2.7 sqlite python-simplejson python-setuptools python-imaging python-mysqldb
ステップ3.Seafileコンポーネントをダウンロードします。
Seafileの最新リリースをダウンロードする必要があります:
wget https://bitbucket.org/haiwen/seafile/downloads/seafile-server_4.0.6_x86-64.tar.gz
現在のディレクトリにtarballを抽出します:
tar xzvf seafile-server*
cd seafile-server*
ステップ4.SeafileサーバーをUbuntuにインストールします。
このスクリプトを実行すると、Seafileサーバーに必要なデータベースとディレクトリが作成され、スクリプトがすべてのPythonの存在を確認した後、次の構成オプションを使用してすべての質問に答えます。必要なモジュール:
./setup-seafile-mysql.sh
Seafileサーバーが正常にインストールされると、外部接続を許可するためにファイアウォールで開く必要のあるポートや、処理するスクリプトなど、いくつかの有用な情報が生成されます。サーバーを起動するため。
ステップ5.Seafileサービスを開始します。
次のようにSeafileサーバーの起動スクリプトを作成します:
nano /etc/init.d/seafile
#!/bin/bash
# Change the value of "user" to your linux user name
user=haiwen
# Change the value of "seafile_dir" to your path of seafile installation
seafile_dir=/data/haiwen
script_path=${seafile_dir}/seafile-server-latest
seafile_init_log=${seafile_dir}/logs/seafile.init.log
seahub_init_log=${seafile_dir}/logs/seahub.init.log
# Change the value of fastcgi to true if fastcgi is to be used
fastcgi=false
# Set the port of fastcgi, default is 8000. Change it if you need different.
fastcgi_port=8000
case "$1" in
        start)
                sudo -u ${user} ${script_path}/seafile.sh start >> ${seafile_init_log}
                if [  $fastcgi = true ];
                then
                        sudo -u ${user} ${script_path}/seahub.sh start-fastcgi ${fastcgi_port} >> ${seahub_init_log}
                else
                        sudo -u ${user} ${script_path}/seahub.sh start >> ${seahub_init_log}
                fi
        ;;
        restart)
                sudo -u ${user} ${script_path}/seafile.sh restart >> ${seafile_init_log}
                if [  $fastcgi = true ];
                then
                        sudo -u ${user} ${script_path}/seahub.sh restart-fastcgi ${fastcgi_port} >> ${seahub_init_log}
                else
                        sudo -u ${user} ${script_path}/seahub.sh restart >> ${seahub_init_log}
                fi
        ;;
        stop)
                sudo -u ${user} ${script_path}/seafile.sh $1 >> ${seafile_init_log}
                sudo -u ${user} ${script_path}/seahub.sh $1 >> ${seahub_init_log}
        ;;
        *)
                echo "Usage: /etc/init.d/seafile {start|stop|restart}"
                exit 1
        ;;
esac
ログファイル用のディレクトリを追加します:
mkdir /path/to/seafile/dir/logs
ファイルを作成します/etc/init/seafile.conf :
nano /etc/init/seafile.conf
start on (started mysql
and runlevel [2345])
stop on (runlevel [016])

pre-start script
/etc/init.d/seafile-server start
end script

post-stop script
/etc/init.d/seafile-server stop
end script,
seafile-severスクリプトを実行可能にします:
sudo chmod +x /etc/init.d/seafile
次に、サービスとコマンドを使用して、新しいSeafileサーバーインスタンスを起動してみます。
service seafile start
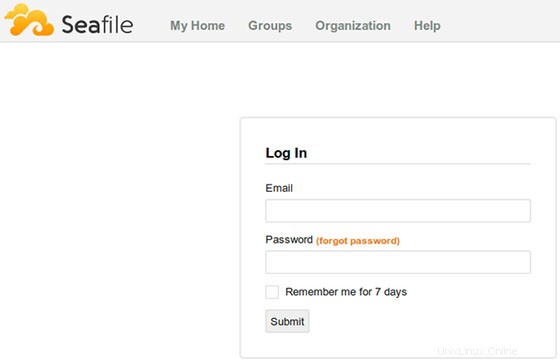
ステップ6.Seafileへのアクセス。
Seafileクラウドストレージは、デフォルトでHTTPポート8000で利用できます。お気に入りのブラウザを開き、http://your-domain.com:8000 またはhttp://server-ip:8000 。インストール時に作成したログイン用の管理者メールIDとパスワードを入力します。ファイアウォールを使用している場合は、ポート8000を開いて、コントロールパネルにアクセスできるようにしてください。
おめでとうございます!Seafileが正常にインストールされました。Ubuntu14.04システムにSeafileオープンソースクラウドストレージをインストールするためにこのチュートリアルを使用していただきありがとうございます。追加のヘルプや役立つ情報については、公式を確認することをお勧めしますSeafileのWebサイト。