このチュートリアルでは、Ubuntu 14.04にMuninをインストールする方法を紹介します。知らない人のために、Muninは無料のオープンソースネットワークリソース監視ツールです。サーバー、スイッチ、アプリケーション、およびサービスの監視およびアラートサービスを提供します。MuninはRRDtoolを使用して、Webブラウザーからアクセスできるグラフを作成します。また、Muninは、一部のサービス/アプリケーションなどが機能していないときにアラートを送信するように構成できます。問題が解決されると、Muninは自動的に追加の電子メールアラートを送信します。
この記事は、少なくともLinuxの基本的な知識があり、シェルの使用方法を知っていること、そして最も重要なこととして、独自のVPSでサイトをホストしていることを前提としています。インストールは非常に簡単です。 ubuntu14.04サーバーへのMuninの段階的なインストールを示します。
Ubuntu14.04にMuninをインストールする
手順1.まず、次のapt-getを実行して、すべてのシステムパッケージが最新であることを確認します。 ターミナルのコマンド。
sudo apt-get update
sudo apt-get upgrade
ステップ2.Ubuntuリポジトリから入手できるApacheをインストールします。
apt-get install apache2
ステップ3.Muninをインストールします。
次のコマンドを使用してMuninと追加のプラグインをインストールします:
apt-get install munin munin-node munin-plugins-extra
次に、監視情報を要求するときに、MuninのApache構成ファイルを編集してApacheを正しい方向に向けます。
mv /etc/munin/apache.conf /etc/munin/apache.conf.bak
「/etc/munin/apache.conf」を編集します の構成ファイルを作成し、次の行を追加します。
#nano /etc/munin/apache.conf
<VirtualHost *:80>
   ServerName munin.your-domain.com
   ServerAlias www.munin.your-domain.com
   ServerAdmin yours@email.com
      DocumentRoot "/var/cache/munin/www"
      DirectoryIndex index.html

   <Directory "/var/cache/munin/www">
      Options Indexes Includes FollowSymLinks MultiViews
      AllowOverride AuthConfig
      AuthUserFile /etc/munin/htpasswd
      AuthName "munin"
      AuthType Basic
      Require valid-user
      Order allow,deny
      Allow from all
   </Directory>

   CustomLog /var/log/apache2/munin.your-domain.com-access.log combined
   ErrorLog /var/log/apache2/munin.your-domain.com-error.log

   <Directory "/etc/munin/static">
      Require all granted
   </Directory>

   <Directory "/usr/lib/munin/cgi">
      Options +ExecCGI
      Require all granted
   <IfModule mod_fcgid.c>
      SetHandler fcgid-script
   </IfModule>
   <IfModule !mod_fcgid.c>
      SetHandler cgi-script
   </IfModule>
   </Directory>
</VirtualHost>
ステップ5.Muninサーバーの構成。
munin.confで参照したディレクトリパスを作成します ファイルを作成し、所有権を変更して、Muninが書き込みできるようにします。
sudo mkdir /var/cache/munin/www/
sudo chown munin:munin -R /var/cache/munin/www
元のMunin構成ファイルのバックアップを作成します:
cp /etc/munin/munin.conf /etc/munin/munin.conf.orig
Munin構成ファイルを編集し、次の行を追加/変更します。
#nano /etc/munin/munin.conf

dbdir /var/lib/munin
htmldir /var/cache/munin/www
logdir /var/log/munin
rundir /var/run/munin
tmpldir /etc/munin/templates

includedir /etc/munin/conf.d

graph_strategy cron
cgiurl_graph /munin-cgi/munin-cgi-graph
html_strategy cron

[localhost]
    address 127.0.0.1
    use_node_name yes
Munin管理者ユーザーのパスワードを作成します:
htpasswd -c /etc/munin/htpasswd munin
ステップ6.ApacheおよびMuninサービスを開始します。
service apache2 start
service munin-node start
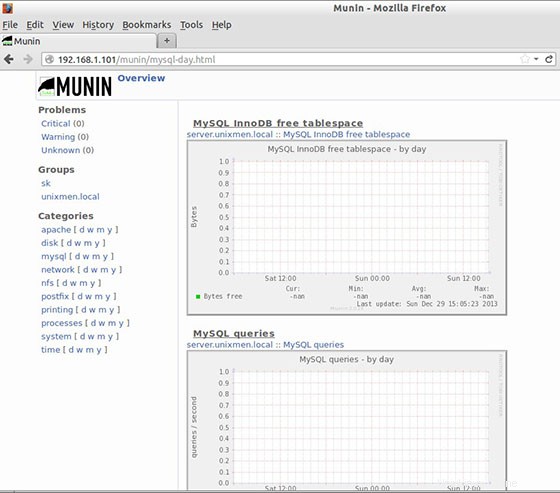
問題がなければ、http://munin.your-domain.comでMuninを開きます。 ユーザー名として「munin」を使用し、パスワードとして以前に生成されたMuninパスワードを使用すると、Muninのグラフとデータにアクセスできるようになります。
おめでとうございます!Muninが正常にインストールされました。ubuntu14.04システムにMuninサーバー監視をインストールするためにこのチュートリアルを使用していただきありがとうございます。追加のヘルプや役立つ情報については、公式メインWebサイトを確認することをお勧めします。