Apache Webサーバー、MySQLデータベース、PHP、およびWordPressのインストールを自動化しますか?次に、そのチュートリアルがあります。
Ubuntu20.04LTSフォーカルフォッサにLAMPをインストールするために必要なすべてのコマンドを含むスクリプトを作成しました そしてそのWordPressの上に。これは、各コマンドを1つずつパンチすることなく、UbuntuLinuxサーバーでWordPressブログまたはWebサイトを即座にセットアップして実行する場合に非常に便利です。
Ubuntu20.04LTSにスクリプトを使用してLAMPとWordPressをインストールする
あなたがしなければならないのは、コマンドターミナルを開くことです。 または、VPSホスティングまたはクラウドサーバーを使用している場合は、すでにそこにいます。
rootユーザーに切り替えます:
sudo su -
スクリプトファイルを作成します:
apt install nano -y
nano word.sh
次に、作成したファイルに、以下に示すすべてのコマンドをコピーして貼り付けます。
#/bin/sh

install_dir="/var/www/html"
#Creating Random WP Database Credenitals
db_name="wp`date +%s`"
db_user=$db_name
db_password=`date |md5sum |cut -c '1-12'`
sleep 1
mysqlrootpass=`date |md5sum |cut -c '1-12'`
sleep 1

#### Install Packages for https and mysql
apt -y update
apt -y upgrade
apt -y install apache2
apt -y install mysql-server


#### Start http
rm /var/www/html/index.html
systemctl enable apache2
systemctl start apache2

#### Start mysql and set root password

systemctl enable mysql
systemctl start mysql

/usr/bin/mysql -e "USE mysql;"
/usr/bin/mysql -e "UPDATE user SET Password=PASSWORD($mysqlrootpass) WHERE user='root';"
/usr/bin/mysql -e "FLUSH PRIVILEGES;"
touch /root/.my.cnf
chmod 640 /root/.my.cnf
echo "[client]">>/root/.my.cnf
echo "user=root">>/root/.my.cnf
echo "password="$mysqlrootpass>>/root/.my.cnf
####Install PHP
apt -y install php php-bz2 php-mysqli php-curl php-gd php-intl php-common php-mbstring php-xml

sed -i '0,/AllowOverride\ None/! {0,/AllowOverride\ None/ s/AllowOverride\ None/AllowOverride\ All/}' /etc/apache2/apache2.conf #Allow htaccess usage

systemctl restart apache2

####Download and extract latest WordPress Package
if test -f /tmp/latest.tar.gz
then
echo "WP is already downloaded."
else
echo "Downloading WordPress"
cd /tmp/ && wget "http://wordpress.org/latest.tar.gz";
fi

/bin/tar -C $install_dir -zxf /tmp/latest.tar.gz --strip-components=1
chown www-data: $install_dir -R

#### Create WP-config and set DB credentials
/bin/mv $install_dir/wp-config-sample.php $install_dir/wp-config.php

/bin/sed -i "s/database_name_here/$db_name/g" $install_dir/wp-config.php
/bin/sed -i "s/username_here/$db_user/g" $install_dir/wp-config.php
/bin/sed -i "s/password_here/$db_password/g" $install_dir/wp-config.php

cat << EOF >> $install_dir/wp-config.php
define('FS_METHOD', 'direct');
EOF

cat << EOF >> $install_dir/.htaccess
# BEGIN WordPress
<IfModule mod_rewrite.c>
RewriteEngine On
RewriteBase /
RewriteRule ^index.php$ – [L]
RewriteCond %{REQUEST_FILENAME} !-f
RewriteCond %{REQUEST_FILENAME} !-d
RewriteRule . /index.php [L]
</IfModule>
# END WordPress
EOF

chown www-data: $install_dir -R

##### Set WP Salts
grep -A50 'table_prefix' $install_dir/wp-config.php > /tmp/wp-tmp-config
/bin/sed -i '/**#@/,/$p/d' $install_dir/wp-config.php
/usr/bin/lynx --dump -width 200 https://api.wordpress.org/secret-key/1.1/salt/ >> $install_dir/wp-config.php
/bin/cat /tmp/wp-tmp-config >> $install_dir/wp-config.php && rm /tmp/wp-tmp-config -f
/usr/bin/mysql -u root -e "CREATE DATABASE $db_name"
/usr/bin/mysql -u root -e "CREATE USER '$db_name'@'localhost' IDENTIFIED WITH mysql_native_password BY '$db_password';"
/usr/bin/mysql -u root -e "GRANT ALL PRIVILEGES ON $db_name.* TO '$db_user'@'localhost';"

######Display generated passwords to log file.
echo "Database Name: " $db_name
echo "Database User: " $db_user
echo "Database Password: " $db_password
echo "Mysql root password: " $mysqlrootpass
スクリプトファイルを保存するには、 Crtl + Xを押します。 次に、 Yと入力します Enterを押します ボタン。
スクリプトを実行します:
sh word.sh
インターネット接続に応じて数分待ちます。Apache、MySQL、PHP、およびWordPressがセットアップされます。スクリプトが完了すると、作成されたデータベース、ユーザー名、およびMySQLルートパスワードも表示されます。 どこかに注意してください。
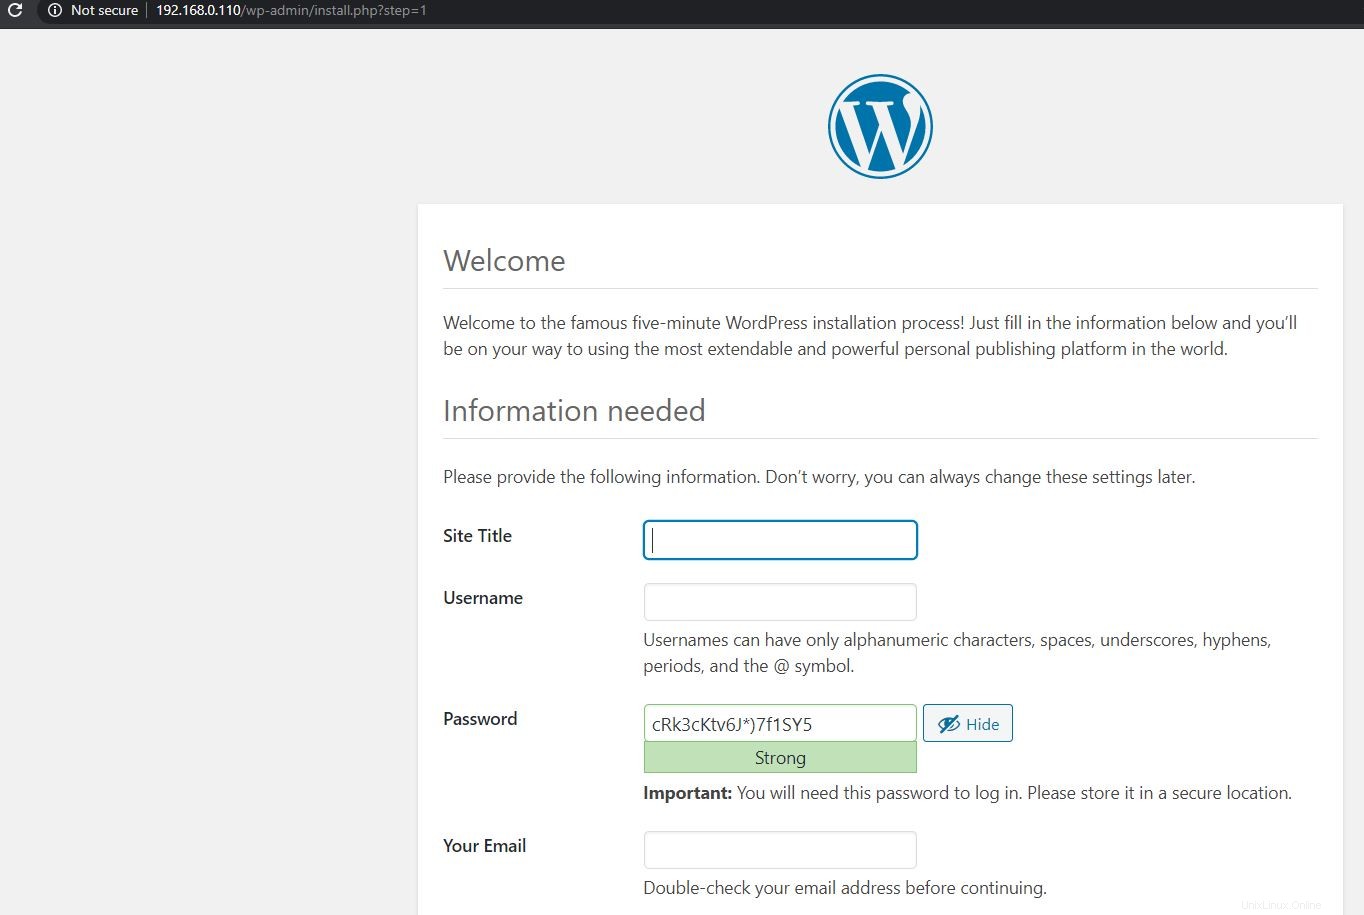
ブラウザを開きます サーバーまたはシステムのIPアドレスを入力します 上記のコマンドを実行した場所。 ユーザー名を含むWordPressウェブサイトを設定するプロセスが表示されます およびパスワード 同じように。
オプション :
phpMyAdminが必要な場合は、WordPressをインストールした後、以下のコマンドを使用してデータベースを簡単に処理します。
apt install phpmyadmin