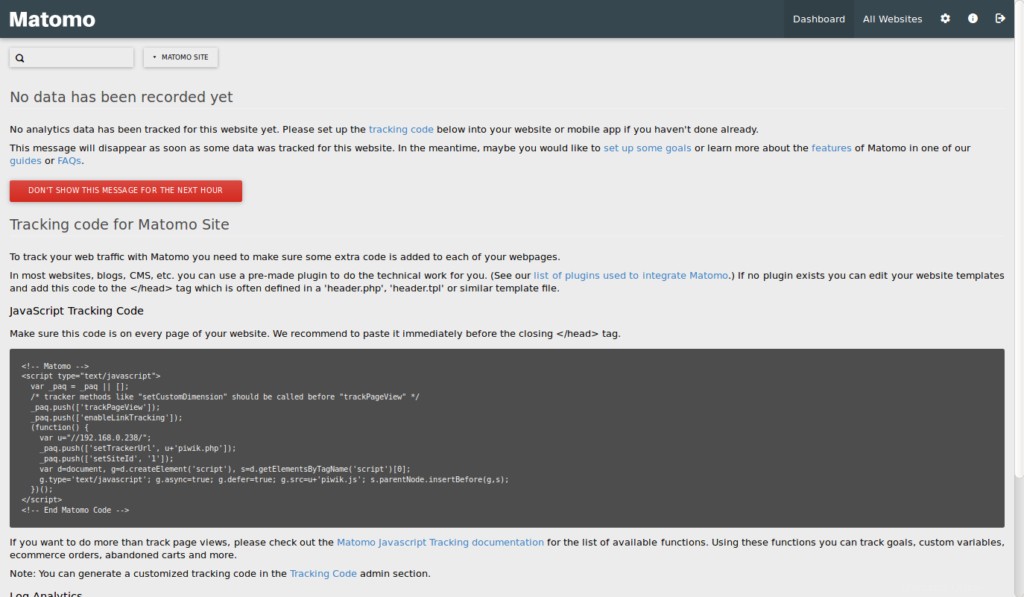
以前はPiwikとして知られていたMatomoは、1つ以上のWebサイトへのオンライン訪問を追跡し、分析のためにこれらの訪問に関するレポートを表示するために使用できる無料のWeb分析アプリケーションです。 Matomoには、Google AdWords、Facebook広告、Yahoo!などの多くの機能が付属しています。検索マーケティング、追跡およびレポートAPI、クリック単価(CPC)など。
このチュートリアルでは、Ubuntu18.04LTSサーバーにMatomoをインストールする方法を説明します。
要件
- Ubuntu18.04LTSを実行しているサーバー。
- sudo権限を持つroot以外のユーザー。
LAMPサーバーのインストール
Matomoは、PHP言語で記述されたWebサーバー上で実行され、MariaDBを使用してデータを保存します。そのため、Apache、MariaDB、PHP、およびその他の必要なPHPモジュールをシステムにインストールする必要があります。
次のコマンドを使用して、Ubuntuリポジトリを更新し、ApacheおよびMariaDBとともにPHPをインストールします。
sudo apt-get update -y
sudo apt-get install apache2 mariadb-server php7.2 libapache2-mod-php7.2 php7.2-common php7.2-sqlite php7.2-curl php7.2-intl php7.2-mbstring php7.2-xmlrpc php7.2-mysql php7.2-gd php7.2-xml php7.2-cli php7.2-zip wget unzip git -y
すべてのパッケージがインストールされたら、ApacheおよびMariaDBサービスを開始し、次のコマンドを使用して起動時に開始できるようにします。
sudo systemctl start apache2
sudo systemctl enable apache2
sudo systemctl start mariadb
sudo systemctl enable mariadb
次に、php.iniファイルを変更する必要があります。これは、次のコマンドで実行できます。
sudo nano /etc/php/7.2/apache2/php.ini
次の変更を行います:
memory_limit = 256M
upload_max_filesize = 200M
max_execution_time = 360
date.timezone = Europe/Berlin
終了したら、ファイルを保存して閉じます。
MariaDBを構成する
次に、MariaDBのインストールを保護する必要があります。これを行うには、次のスクリプトを実行します。
sudo mysql_secure_installation
以下に示すように、すべての質問に答えてください。
    Enter current password for root (enter for none):
    Set root password? [Y/n]: N
    Remove anonymous users? [Y/n]: Y
    Disallow root login remotely? [Y/n]: Y
    Remove test database and access to it? [Y/n]:  Y
    Reload privilege tables now? [Y/n]:  Y
MariaDBが保護されたら、MariaDBシェルにログインします。
mysql -u root
次のコマンドを使用してデータベースとユーザーを作成します。
MariaDB [(none)]> CREATE DATABASE matomodb;
MariaDB [(none)]> CREATE USER matomo;
次に、次のコマンドを使用してMatomoデータベースに特権を付与します。
MariaDB [(none)]> GRANT ALL PRIVILEGES ON matomodb.* TO 'matomo'@'localhost' IDENTIFIED BY 'mypassword';
「mypassword」という単語を、選択した安全なパスワードに置き換えます。次に、次のコマンドを使用して特権をフラッシュします。
MariaDB [(none)]> FLUSH PRIVILEGES;
次に、次のコマンドを使用してMariaDBコンソールを終了します。
MariaDB [(none)]> exit
Matomoをインストールする
まず、Matomoの最新バージョンを公式Webサイトから/tmpディレクトリにダウンロードします。
cd /tmp
wget https://builds.matomo.org/piwik.zip
次に、次のコマンドを使用して、ダウンロードしたファイルを解凍します。
unzip piwik.zip
次に、抽出したディレクトリをApacheルートディレクトリにコピーし、適切な権限を付与します。
sudo cp -r piwik /var/www/html/matomo
sudo chown -R www-data:www-data /var/www/html/matomo/
sudo chmod -R 755 /var/www/html/matomo/
最後に、次のコマンドを使用してMatomoのApache構成ファイルを作成します。
sudo nano /etc/apache2/sites-available/matomo.conf
次の行を追加します:
<VirtualHost *:80>
     ServerAdmin [email protected]
     DocumentRoot /var/www/html/matomo
     ServerName example.com

     <Directory /var/www/html/matomo/>
          Options FollowSymlinks
          AllowOverride All
          Require all granted
     </Directory>

     ErrorLog ${APACHE_LOG_DIR}/matomo_error.log
     CustomLog ${APACHE_LOG_DIR}/matomo_access.log combined

</VirtualHost>
example.comとメールアドレス[メール保護]を自分のドメイン名とメールアドレスに置き換えます。ファイルを保存して閉じ、次のコマンドで仮想ホストファイルとApacheリライトモジュールを有効にします。
sudo a2ensite matomo
sudo a2enmod rewrite
Apache Webサービスを再起動して、すべての変更を適用します。
sudo systemctl restart apache2
Matomo用に暗号化してSSLを有効にする
このステップでは、無料のLet's Encryption SSL証明書を使用して、MatomoのSSLを有効にします。最初のステップは、SSL証明書の取得に使用するcertbotLet'sEncryptクライアントをインストールすることです。
sudo apt-get install certbot python-certbot-apache次のコマンドでSSL証明書をリクエストします:
sudo certbot --apache重要:SSL証明書を取得するには、RoundCubeWebサイトに使用するドメイン名またはサブドメインにインターネットからアクセスできる必要があります。 Certbotは今いくつか質問をします。
[email protected]: certbot --apache
Saving debug log to /var/log/letsencrypt/letsencrypt.log
Plugins selected: Authenticator apache, Installer apache
Enter email address (used for urgent renewal and security notices) (Enter 'c' to
cancel): [email protected]
-------------------------------------------------------------------------------
Please read the Terms of Service at
https://letsencrypt.org/documents/LE-SA-v1.2-November-15-2017.pdf. You must
agree in order to register with the ACME server at
https://acme-v01.api.letsencrypt.org/directory
-------------------------------------------------------------------------------
(A)gree/(C)ancel: a-------------------------------------------------------------------------------
Would you be willing to share your email address with the Electronic Frontier
Foundation, a founding partner of the Let's Encrypt project and the non-profit
organization that develops Certbot? We'd like to send you email about EFF and
our work to encrypt the web, protect its users and defend digital rights.
-------------------------------------------------------------------------------
(Y)es/(N)o: nWhich names would you like to activate HTTPS for?
-------------------------------------------------------------------------------
1: example.com
-------------------------------------------------------------------------------
Select the appropriate numbers separated by commas and/or spaces, or leave input
blank to select all options shown (Enter 'c' to cancel): 1
Obtaining a new certificate
Performing the following challenges:
http-01 challenge for example.com
Waiting for verification...
Cleaning up challenges
Created an SSL vhost at /etc/apache2/sites-available/matomo-le-ssl.conf
Enabled Apache socache_shmcb module
Enabled Apache ssl module
Deploying Certificate to VirtualHost /etc/apache2/sites-available/matomo-le-ssl.conf
Enabling available site: /etc/apache2/sites-available/matomo-le-ssl.confPlease choose whether or not to redirect HTTP traffic to HTTPS, removing HTTP access.
-------------------------------------------------------------------------------
1: No redirect - Make no further changes to the webserver configuration.
2: Redirect - Make all requests redirect to secure HTTPS access. Choose this for
new sites, or if you're confident your site works on HTTPS. You can undo this
change by editing your web server's configuration.
-------------------------------------------------------------------------------
Select the appropriate number [1-2] then [enter] (press 'c' to cancel): 2
Redirecting vhost in /etc/apache2/sites-enabled/matomo.conf to ssl vhost in /etc/apache2/sites-available/matomo-le-ssl.conf-------------------------------------------------------------------------------
Congratulations! You have successfully enabled https://example.comYou should test your configuration at:
https://www.ssllabs.com/ssltest/analyze.html?d=example.com
-------------------------------------------------------------------------------IMPORTANT NOTES:
- Congratulations! Your certificate and chain have been saved at:
/etc/letsencrypt/live/example.com/fullchain.pem
Your key file has been saved at:
/etc/letsencrypt/live/example.com/privkey.pem
Your cert will expire on 2019-07-10. To obtain a new or tweaked
version of this certificate in the future, simply run certbot again
with the "certonly" option. To non-interactively renew *all* of
your certificates, run "certbot renew"
- Your account credentials have been saved in your Certbot
configuration directory at /etc/letsencrypt. You should make a
secure backup of this folder now. This configuration directory will
also contain certificates and private keys obtained by Certbot so
making regular backups of this folder is ideal.
- If you like Certbot, please consider supporting our work by:Donating to ISRG / Let's Encrypt: https://letsencrypt.org/donate
Donating to EFF: https://eff.org/donate-leMatomo仮想ホストにはhttpsからアクセスできます。
アクセスMatomo
ここで、Webブラウザーを開き、URL https://example.comを入力すると、Matomoウェルカムページにリダイレクトされます:
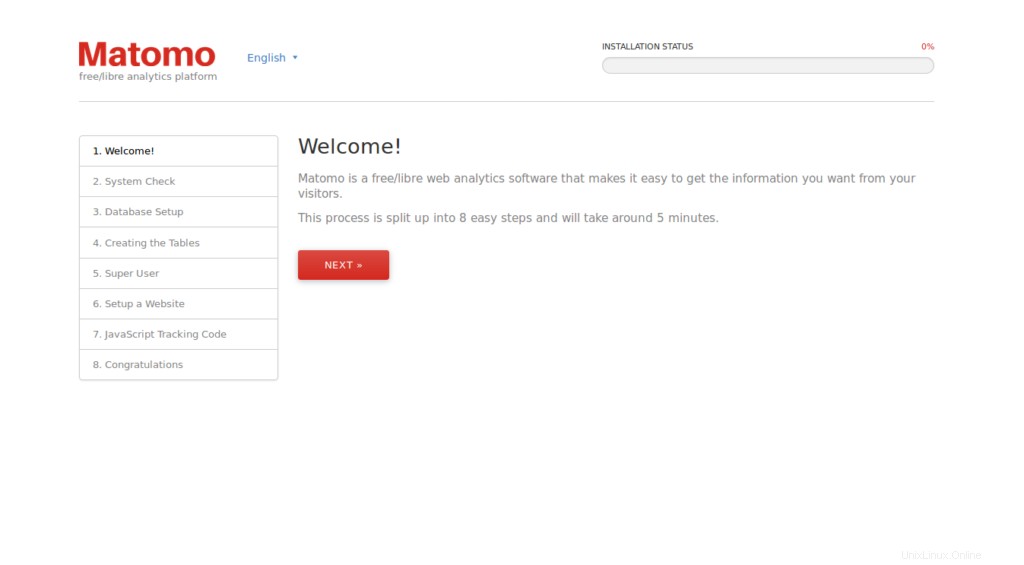
次に、次へをクリックします ボタン。次のページが表示されます:
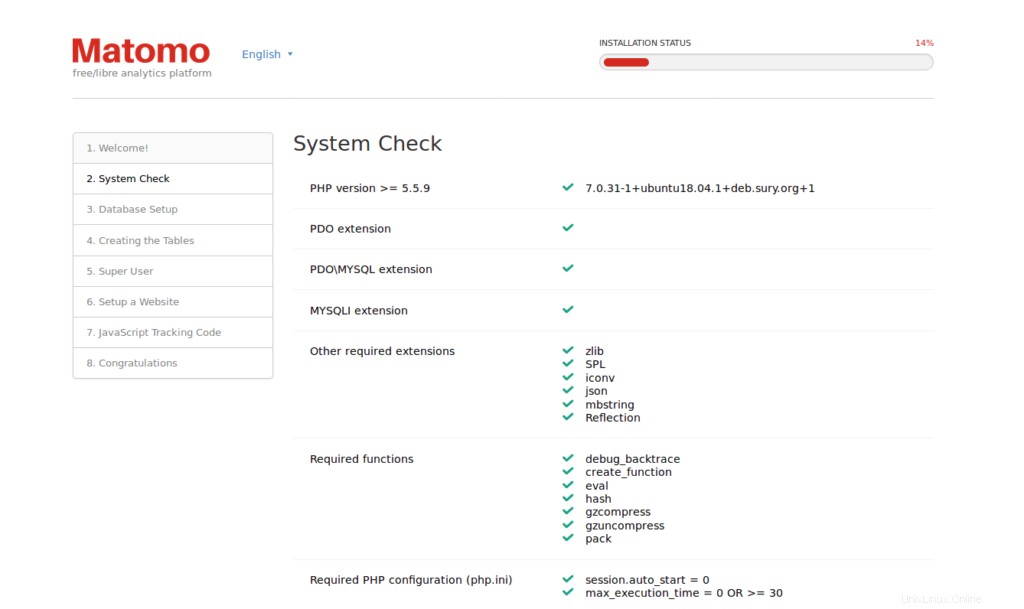
ここで、必要なモジュールがすべてインストールされていることを確認してください。次に、次へをクリックします ボタン。次のページが表示されます:
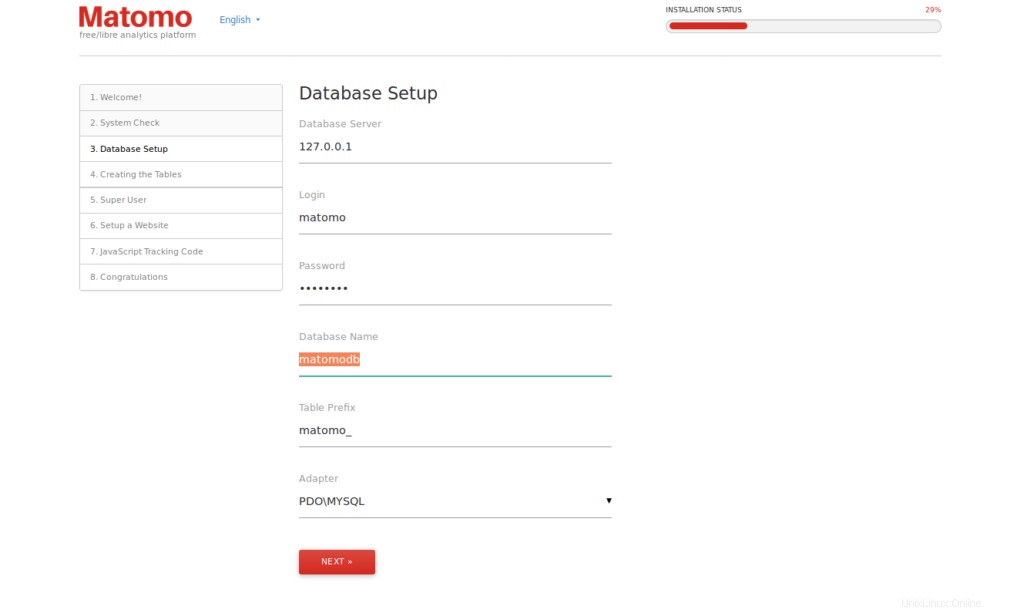
ここで、Matomoデータベースとユーザー名を入力します。次に、次へをクリックします ボタン。次のページが表示されます:
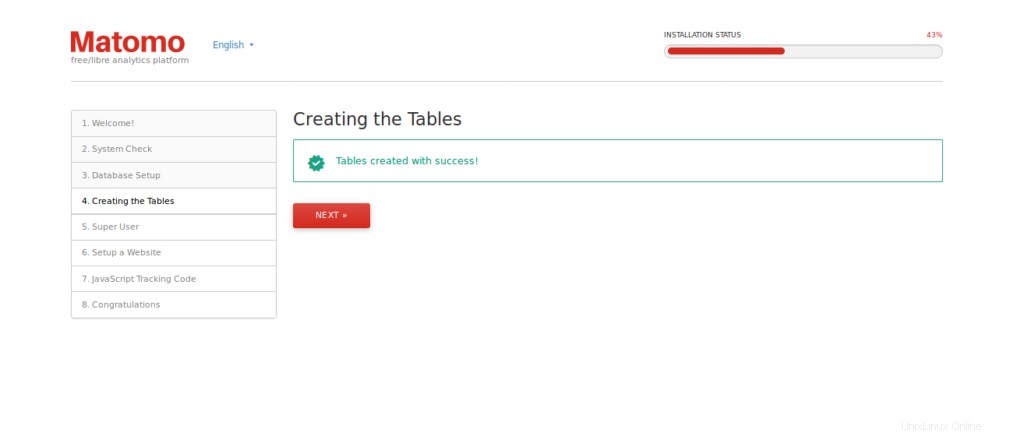
次に、次へをクリックします ボタン。次のページが表示されます:
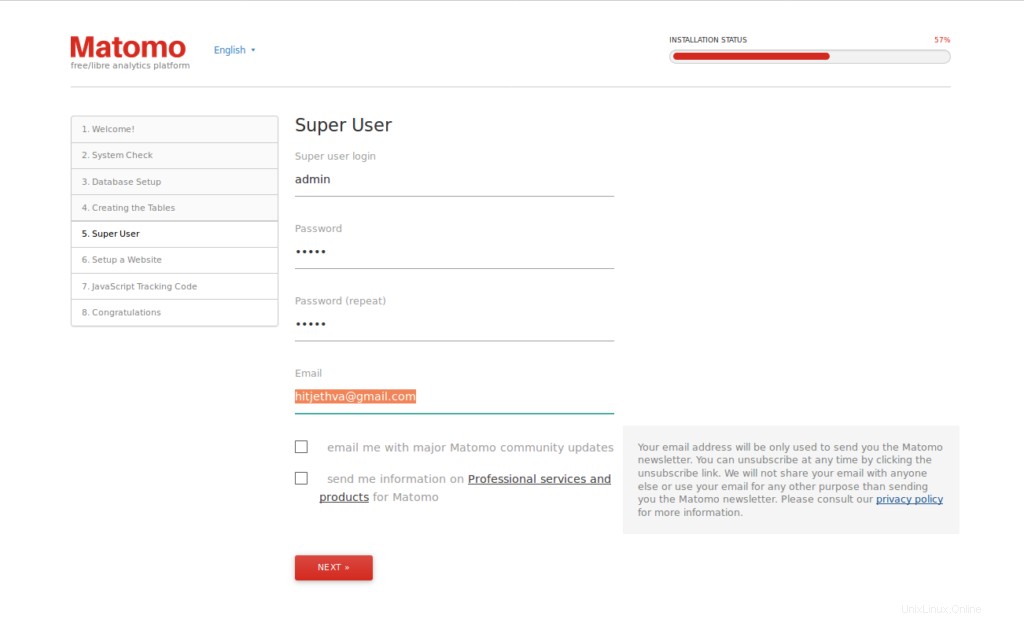
ここで、管理者のユーザー名とパスワードを入力します。次に、次へをクリックします ボタン。次のページが表示されます:
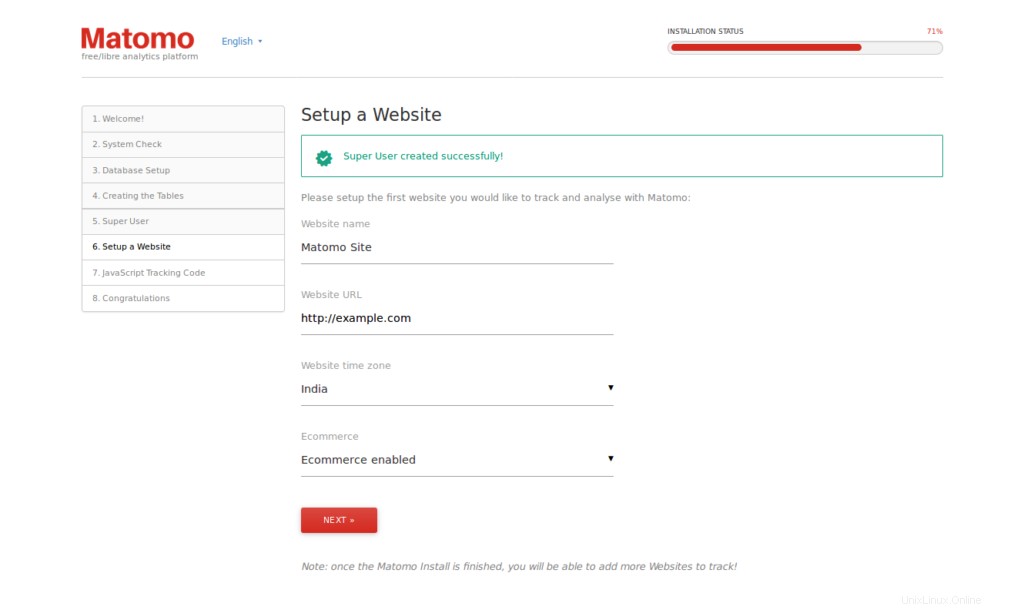
次に、サイト名、WebサイトのURLを入力します。次に、次へをクリックします ボタン。次のページにMatomoサイトのトラッキングコードが表示されます:
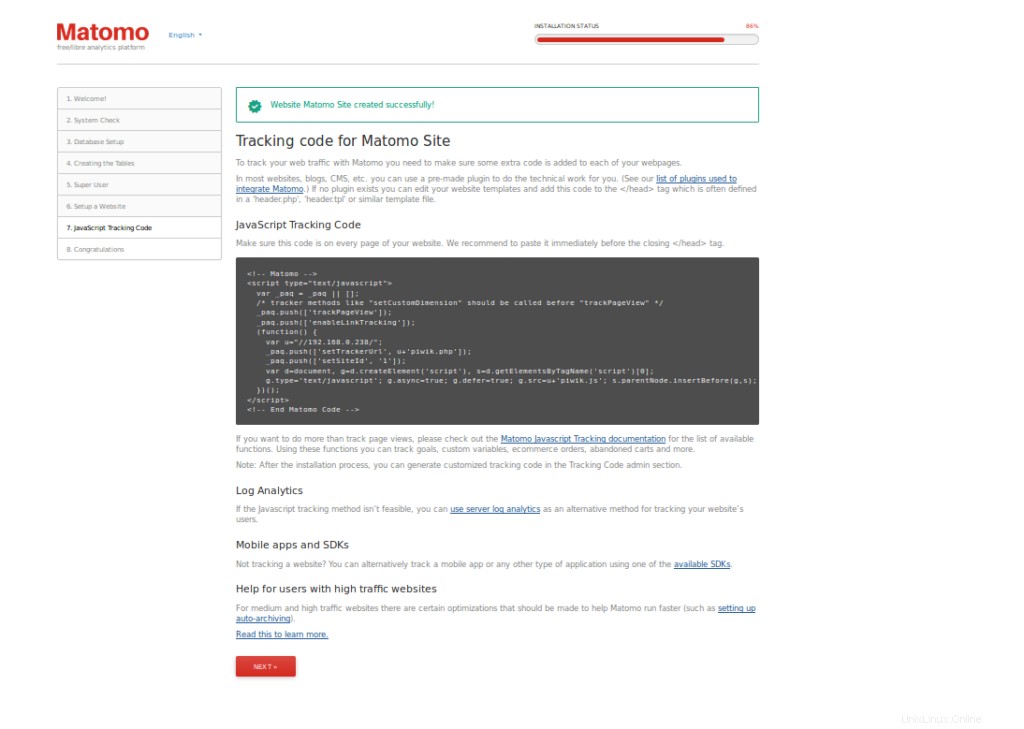
次に、次へをクリックします ボタン。インストールが完了したら。次のページが表示されます:
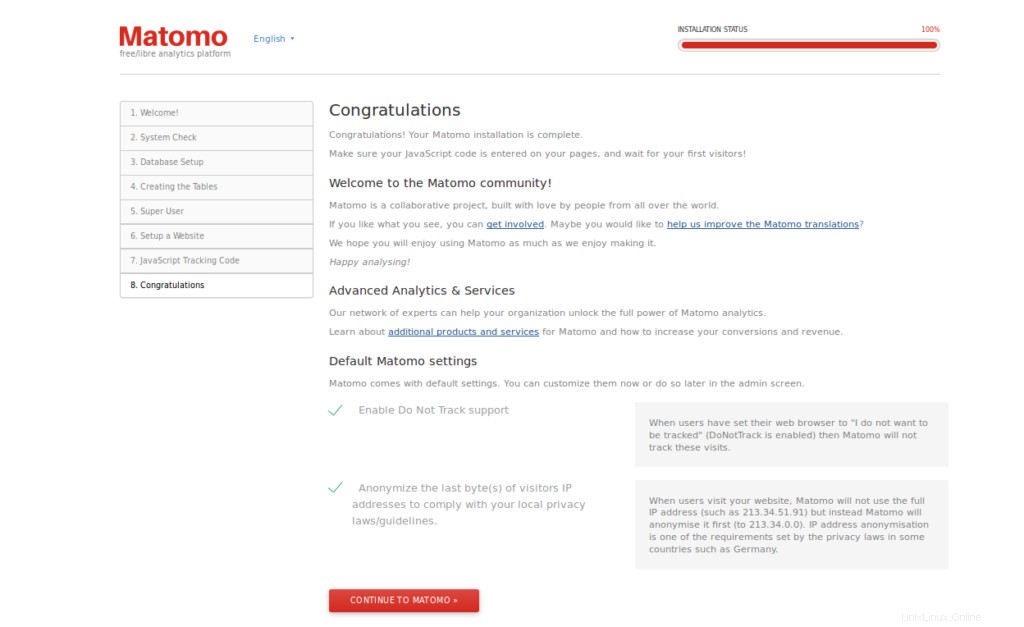
次に、 CONTINUE TO MATOMOをクリックします ボタン。次のページが表示されます:
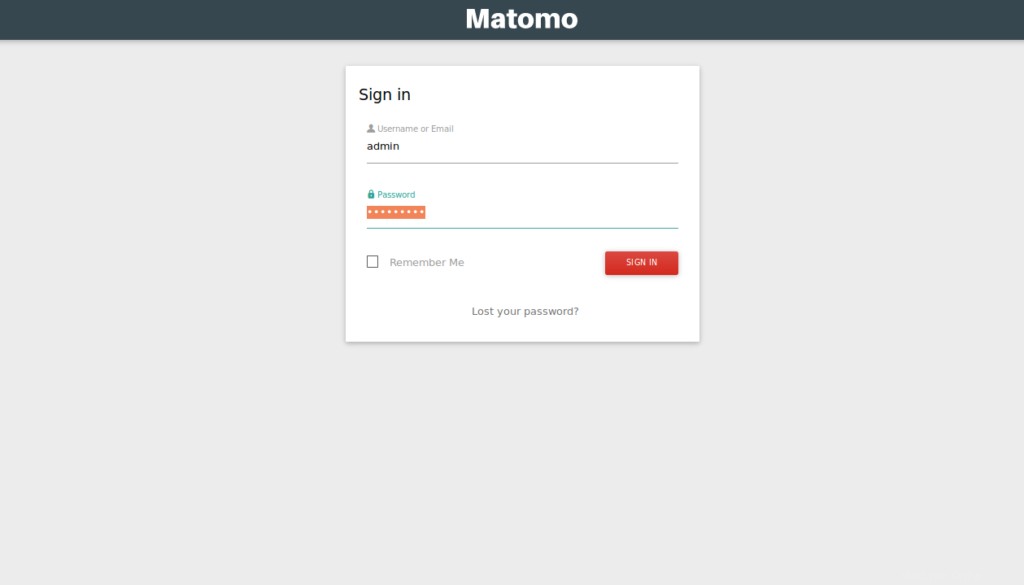
次に、管理者のログイン資格情報を入力し、サインインをクリックします。 ボタン。次のページにMatomoダッシュボードが表示されます:
