
XWikiは、Javaで記述された無料のオープンソースの高度なウィキソフトウェアです。 JBoss、Tomcatなどのサーブレットコンテナで実行されます。MySQLやPostgreSQLなどのデータベースを使用して情報を保存します。
このチュートリアルでは、XWikiに必要なすべてのコンポーネントがサーバーに自動的にインストールされるため、スタンドアロンのディストリビューションを使用して、Ubuntu18.04にXWikiソフトウェアをインストールする方法を説明します。このXWikiソフトウェアは、ポータブルデータベース(HSQLDB)と軽量Javaコンテナ(Jetty)を備えた組み込みのXWikiを提供します。
XWikiには、次のような便利な機能がたくさんあります。
- ページ編集用の非常に堅牢なWYSIWYGエディター
- 強力なwiki構文
- コンテンツ編成
- 独自のアプリケーションを作成する
- バージョン管理
- 高度な検索とその他多数
ハードウェアとソフトウェアの要件
- XWiki用にインストールされたJava1.8.0_101以降>=8.1(XWiki<8.1の場合はJava7以降、XWikiバージョン<6.0の場合はJava 6以降)。
- サーブレット3.0.1をサポートするサーブレットコンテナ(XWikiバージョン<7.0のサーブレット2.4)
- データベースとデータベース用のJDBC4ドライバー
- 十分なメモリ、少なくとも2 GBのRAM(または小さなWikiの場合は1 GB)
XWikiのインストール手順
インストールを開始する前に、apt-updateを使用してシステムソフトウェアを更新することをお勧めします。 。そして、wgetとscreenをインストールできます 以前にインストールされていない場合はパッケージします。
#apt-get update -y
#apt install wget screen
ステップ1:Javaをインストールする
前に説明したように、XwikiはJavaベースのアプリケーションであるため、Java 8をインストールする必要があります。 ソフトウェア要件を満たすために、またはそれ以上。デフォルトでは、Java8はデフォルトのUbuntuリポジトリでは使用できません。したがって、webupd8team PPAリポジトリをシステムに追加することで、サポートされているJavaをインストールできます。
#add-apt-repository ppa:webupd8team/java
#apt-get update -y
PPAリポジトリを追加した後、リポジトリパッケージを更新する必要があります。完了したら、以下のコマンドを実行して、必要なJava8をインストールできます。
#apt-get install oracle-java8-installer -yYou can confirm the Java version installed.
~# java -version
java version "1.8.0_181"
Java(TM) SE Runtime Environment (build 1.8.0_181-b13)
Java HotSpot(TM) 64-Bit Server VM (build 25.181-b13, mixed mode)ステップ2:XWikiをダウンロードしてインストールする
まず、このXWikiインストールの新しい画面セッションを開始する必要があります。次に、すべてのプラットフォームで動作する汎用インストーラーをダウンロードする必要があります。システムにインストールする必要があるのはJavaだけです。以下のコマンドを使用して、XWiki汎用インストーラーファイルをダウンロードできます。
#screen -U -S xwiki
#wget http://download.forge.ow2.org/xwiki/xwiki-enterprise-installer-generic-8.1-standard.jar
このインストーラーをダウンロードすると、Javaを使用してこのダウンロードしたパッケージをインストールできます。インストーラーは、以下に示すように、1 (accept or proceed)/ 2 (quit) /3 (redisplay)の入力などの出力を要求するさまざまなインタラクティブセクションに移動します。 インストールを続行するためにあなたから。ほとんどのプロンプトは、1 (accept or proceed)で回答できます。 。インストーラーは一目瞭然なので、指示に従うだけです。
# java -jar xwiki-enterprise-installer-generic-8.1-standard.jar
Aug 7, 2018 10:08:33 AM INFO: Logging initialized at level 'INFO'
Aug 7, 2018 10:08:33 AM INFO: Commandline arguments:
Aug 7, 2018 10:08:33 AM INFO: Detected platform: ubuntu_linux,version=4.15.0-29-generic,arch=x64,symbolicName=null,javaVersion=1.8.0_181
Welcome to the installation of XWiki Enterprise 8.1!
The homepage is at: http://xwiki.org/

Press 1 to continue, 2 to quit, 3 to redisplay
1を押しながら 続行するには、XWiki Enterprise - Readme Noteを提供します 以下のように:
Please read the following information:
XWiki Enterprise - Readme

XWiki Enterprise is a second generation Wiki engine, features professional features like
XWiki Enterprise also includes an advanced form and scripting engine which makes it an ideal
development environment for constructing data-based intranet applications. It has powerful extensibility features, supports scripting, extensions and is based on a highly modular
architecture. The scripting engine allows to access a powerful API for accessing the XWiki repository in read and write mode.
XWiki Enterprise is used by major companies around the world and has strong Support for a professional usage of XWiki.
Here are some pointers to get you started with XWiki once you have finished installing it:
The documentation can be found on the XWiki.org web site
If you wish to talk to XWiki users or developers please use our
You can also access XWiki's
If you need commercial support please visit the
Support page

Press 1 to continue, 2 to quit, 3 to redisplay
1
1を押して続行すると、使用許諾契約の通知が表示されます。
Press 1 to continue, 2 to quit, 3 to redisplay
1
See the NOTICE file distributed with this work for additional information regarding copyright ownership.
This is free software; you can redistribute it and/or modify it under the terms of the GNU Lesser General Public License as
published by the Free Software Foundation; either version 2.1 of the License, or (at your option) any later version.
This software is distributed in the hope that it will be useful, but WITHOUT ANY WARRANTY; without even the implied warranty of
MERCHANTABILITY or FITNESS FOR A PARTICULAR PURPOSE. See the GNU Lesser General Public License for more details.
You should have received a copy of the GNU Lesser General Public License along with this software; if not, write to the Free
Software Foundation, Inc., 51 Franklin St, Fifth Floor, Boston, MA 02110-1301 USA, or see the FSF site: http://www.fsf.org.

Press 1 to accept, 2 to reject, 3 to redisplay
1
使用許諾契約に同意すると、インストールフォルダー、自動インストーラー、デスクトップショートカット、ユーザーショートカットなどをセットアップするための、さまざまなインストール段階が表示されます。インストーラーによって選択されたデフォルトのパスを使用して続行します。必要に応じて、このセクションでカスタムパスを設定できます。
Select the installation path: [/usr/local/XWiki Enterprise 8.1]

Press 1 to continue, 2 to quit, 3 to redisplay
1

[x] Pack 'Core' required
────────────────────────────────────────────────────────────────────────────────────────────────────────────────────────────────────────────────────────────────────────────────────────────────────────────
[x] Include optional pack 'Default Wiki'
────────────────────────────────────────────────────────────────────────────────────────────────────────────────────────────────────────────────────────────────────────────────────────────────────────────
Enter Y for Yes, N for No:
Y
Done!

Press 1 to continue, 2 to quit, 3 to redisplay
1
[ Starting to unpack ]
[ Processing package: Core (1/2) ]
[ Processing package: Default Wiki (2/2) ]
[ Unpacking finished ]
────────────────────────────────────────────────────────────────────────────────────────────────────────────────────────────────────────────────────────────────────────────────────────────────────────────
Create shortcuts in the Start-Menu
────────────────────────────────────────────────────────────────────────────────────────────────────────────────────────────────────────────────────────────────────────────────────────────────────────────
Enter Y for Yes, N for No:
Y
────────────────────────────────────────────────────────────────────────────────────────────────────────────────────────────────────────────────────────────────────────────────────────────────────────────
Create additional shortcuts on the desktop
────────────────────────────────────────────────────────────────────────────────────────────────────────────────────────────────────────────────────────────────────────────────────────────────────────────
Enter Y for Yes, N for No:
Y
────────────────────────────────────────────────────────────────────────────────────────────────────────────────────────────────────────────────────────────────────────────────────────────────────────────
create shortcut for: all users
────────────────────────────────────────────────────────────────────────────────────────────────────────────────────────────────────────────────────────────────────────────────────────────────────────────
Enter Y for Yes, N for No:
Y
Aug 7, 2018 10:11:08 AM WARNING: Shortcut 'Go to my wiki' has URL but type ('Application') is not 'Link'
Aug 7, 2018 10:11:08 AM WARNING: Shortcut 'Go to my wiki' has URL but type ('Application') is not 'Link'
Aug 7, 2018 10:11:08 AM WARNING: Shortcut 'Documentation' has URL but type ('Application') is not 'Link'
Aug 7, 2018 10:11:08 AM WARNING: Shortcut 'Documentation' has URL but type ('Application') is not 'Link'
────────────────────────────────────────────────────────────────────────────────────────────────────────────────────────────────────────────────────────────────────────────────────────────────────────────
Generate an automatic installation script
────────────────────────────────────────────────────────────────────────────────────────────────────────────────────────────────────────────────────────────────────────────────────────────────────────────
Enter Y for Yes, N for No:
Y
Select the installation script (path must be absolute)[/usr/local/XWiki Enterprise 8.1/auto-install.xml]

Installation was successful
application installed on /usr/local/XWiki Enterprise 8.1
[ Writing the uninstaller data ... ]
[ Console installation done ]
インストールが完了すると、/usr/local/XWiki Enterprise 8.1にある出力に示されているようにアプリケーションインストールフォルダーが表示されます。 。次に、アプリケーションフォルダーに移動し、以下のようにXWiki起動スクリプトを実行する必要があります。
# cd /usr/local/XWiki\ Enterprise\ 8.1/
1:/usr/local/XWiki Enterprise 8.1# bash start_xwiki.sh
Starting Jetty on port 8080, please wait...
2018-08-09 09:31:08.832:INFO::main: Logging initialized @692ms
2018-08-09 09:31:09.354:INFO:oejs.Server:main: jetty-9.2.13.v20150730
2018-08-09 09:31:09.378:INFO:oejs.AbstractNCSARequestLog:main: Opened /usr/local/XWiki Enterprise 8.1/data/logs/2018_08_09.request.log
2018-08-09 09:31:09.383:INFO:oejdp.ScanningAppProvider:main: Deployment monitor [file:/usr/local/XWiki%20Enterprise%208.1/jetty/contexts/] at interval 0
2018-08-09 09:31:32,621 [main] INFO o.x.s.s.i.EmbeddedSolrInstance - Starting embedded Solr server...
2018-08-09 09:31:32,633 [main] INFO o.x.s.s.i.EmbeddedSolrInstance - Using Solr home directory: [data/solr]
2018-08-09 09:31:38,070 [coreLoadExecutor-6-thread-1] WARN o.a.s.c.SolrCore - [xwiki] Solr index directory '/usr/local/XWiki Enterprise 8.1/data/solr/xwiki/data/index' doesn't exist. Creating new index...
2018-08-09 09:31:39,756 [main] INFO o.x.s.s.i.EmbeddedSolrInstance - Started embedded Solr server.
2018-08-09 09:31:41.705:INFO:oejsh.ContextHandler:main: Started o.e.j.w.WebAppContext@6df97b55{/xwiki,file:/usr/local/XWiki%20Enterprise%208.1/webapps/xwiki/,AVAILABLE}{/xwiki}
2018-08-09 09:31:41.802:INFO:oejsh.ContextHandler:main: Started o.e.j.w.WebAppContext@389a9ff6{/,file:/usr/local/XWiki%20Enterprise%208.1/webapps/root/,AVAILABLE}{/root}
2018-08-09 09:31:41.862:INFO:oejs.ServerConnector:main: Started ServerConnector@6a6b8692{HTTP/1.1}{0.0.0.0:8080}
2018-08-09 09:31:41.862:INFO:oejs.Server:main: Started @33722ms
2018-08-09 09:31:41.862:INFO:oxtjl.NotifyListener:main: ----------------------------------
2018-08-09 09:31:41.869:INFO:oxtjl.NotifyListener:main: Server started, you can now open http://ubuntu18.example.com:8080/ in your browser to access your wiki.
2018-08-09 09:31:41.871:INFO:oxtjl.NotifyListener:main: ----------------------------------
アプリケーションはポート8080で自動的に起動します。アプリケーションを起動するには、数分待つ必要があります。完了したら、ドメインまたはサーバーIPを介してポート8080でXWikiにアクセスできます。表示される画面ターミナルウィンドウを閉じないでください。 XWikiサーバーが実行されている必要があります。この画面端末を終了することで、このXWikiサーバーを停止できます。
PS:デフォルトでは、アプリケーションはポート8080で実行されます。ただし、カスタムポート8081を使用する場合は、ポート8081で実行されているものがないことを確認し、次のコマンドでXWikiを起動します。
#bash start_xwiki.sh -p 8081ステップ3:アプリケーションを起動します
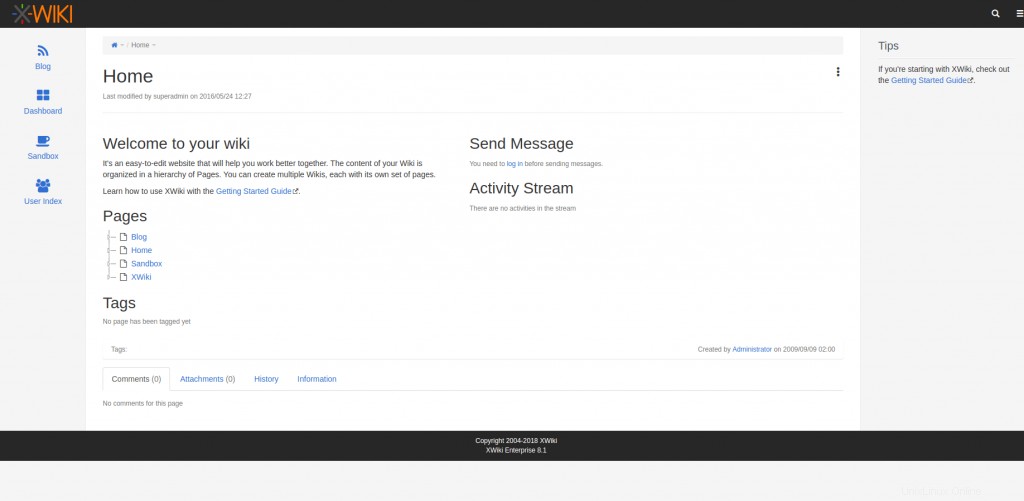
XWikiが起動したら、ブラウザでhttp://ServerIP or Hostname:8080/を指定できます。 Webインターフェイスにアクセスします。
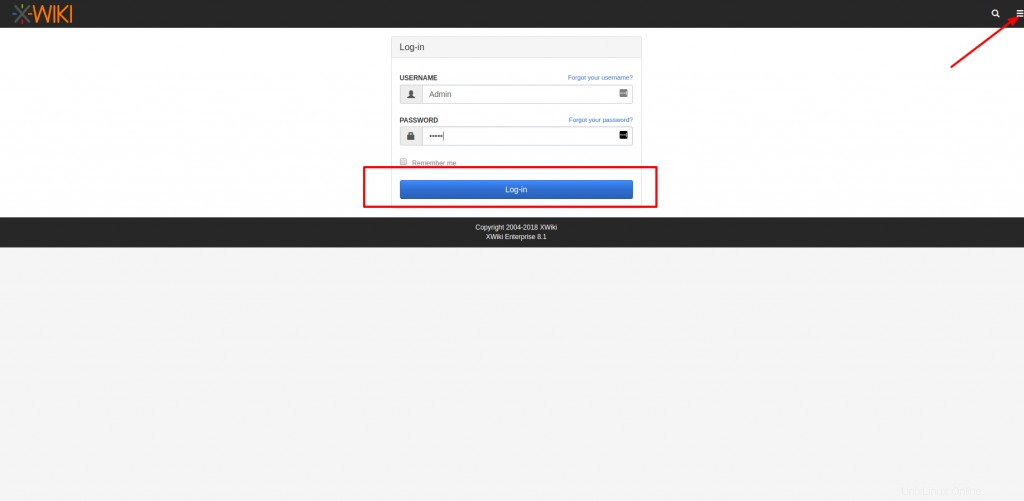
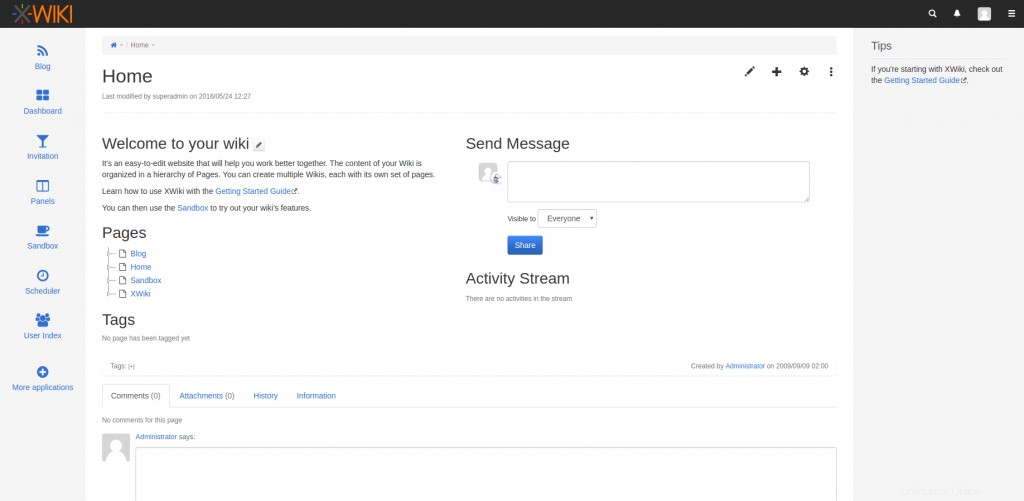
デフォルトのAdminを使用して管理パネルにログインできます ユーザー(最初の文字は大文字)で、デフォルトのパスワードはadminです。 (小文字)。
結論
やあ! XWikiのインストールと構成が正常に完了しました。このチュートリアルが、XWikiを使用して独自のセルフホストWikiを設定するのに役立つことを願っています。これに関する貴重な提案やコメントを投稿してください。
関連項目:
- ターミナルセッションを処理するための15のLinux画面コマンド
- Ubuntu18.04にJava8をインストールする方法