Nagiosは、システムとネットワークを監視するためのオープンソースソフトウェアです。 Nagiosはホストとそのサービスのアクティビティを確認でき、サーバーで何か問題が発生した場合に警告/アラートを提供します。 NagiosはLinuxオペレーティングシステムで実行できます。現時点では、インストールにUbuntu15.04を使用しています。
- Ubuntu15.04-64ビット
- ルート/Sudoアクセス
このチュートリアルで行うこと:
- パッケージのインストールが必要です-LAMPなど
- ユーザーとグループの構成
- Nagiosのインストール
- Apacheの構成
- Nagiosサーバーのテスト
- 監視するホストの追加
Nagiosにはgcc/buildが必要です-コンパイルには必須、Nagios WebベースにはLAMP(Apache、PHP、MySQL)、サーバーからアラートを送信するにはSendmailが必要です。これらすべてのパッケージといくつかの追加パッケージをインストールするには:
apt-get install apache2 libapache2-mod-php5 build-essential libgd2-xpm-dev libssl-dev sendmail-bin sendmail heirloom-mailx wget apache2-utils curl daemon apt-file libnet-snmp-perl libpq5 libsensors4 libsnmp-base libtalloc2 libtdb1 libwbclient0 samba-common samba-common-bin smbclient snmp whois mrtg libcgi-pm-perl librrds-perl libgd-gd2-perl libmysqlclient-dev libperl5.20 libmysqlclient18 libradiusclient-ng2
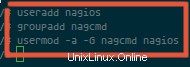
Nagiosを実行するには、Nagiosの新しいユーザーを作成する必要があります。ユーザーに"nagios"という名前を付けます さらに、 "nagcmd"という名前のグループを作成します 。次に、以下に示すように、新しいユーザーをグループに追加します。
useradd nagios
groupadd nagcmd
usermod -a -G nagcmd nagios
cd ~
wget http://prdownloads.sourceforge.net/sourceforge/nagios/nagios-4.0.8.tar.gz
tar -xzf nagios*.tar.gz
cd nagios-4.0.8/
Nagiosをビルドする前に、以前に作成したユーザーとグループでNagiosを構成する必要があります。
./configure --with-nagios-group=nagios --with-command-group=nagcmd
詳細については、./configure--helpを使用してください。
Nagiosをインストールする:
make all
sudo make install
sudo make install-commandmode
sudo make install-init
sudo make install-config
/usr/bin/install -c -m 644 sample-config/httpd.conf
/etc/apache2/sites-available/nagios.conf
nagiosプラグインをダウンロードして解凍します:
cd ~
wget http://nagios-plugins.org/download/nagios-plugins-2.0.3.tar.gz
tar -xzf nagios-plugins*.tar.gz
cd nagios-plugin*/
上記のようにしてください:
./configure --with-nagios-user=nagios --with-nagios-group=nagios --with-openssl
make && make install
インストールフェーズが完了すると、/ usr / local /nagios/でNagiosのデフォルト構成を見つけることができます。
次に、メールでnagiosの連絡先を設定します。
vim /usr/local/nagios/etc/nagios.cfg
行cfg_dir=/ usr / local / nagios / etc / servers
のコメントを解除します

サーバーという名前の新しいフォルダを追加します:
mkdir -p /usr/local/nagios/etc/servers
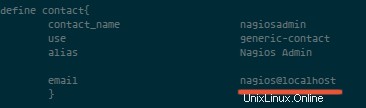
Nagiosの連絡先は、contact.cfgファイルで構成できます。開くには、次を使用します:
vim /usr/local/nagios/etc/objects/contacts.cfg
次に、デフォルトのメールを自分のメールに置き換えます。
sudo a2enmod rewrite
sudo a2enmod cgi
htpasswdを使用して、nagiosWebインターフェースのユーザーnagiosadminを構成できます
sudo htpasswd -c /usr/local/nagios/etc/htpasswd.users nagiosadmin
パスワードを入力してください。
sudo ln -s /etc/apache2/sites-available/nagios.conf /etc/apache2/sites-enabled/
/etc/init.d/apache2 restart
/etc/init.d/nagios start
Nagiosを起動すると、次のエラーが表示される場合があります:
Starting nagios (via systemctl): nagios.serviceFailed
そして、これはそれを修正する方法です:
cd /etc/init.d/
cp /etc/init.d/skeleton /etc/init.d/nagios
次に、Nagiosファイルを編集します:
vim /etc/init.d/nagios
...そして次のコードを追加します:
DESC="Nagios"
NAME=nagios
DAEMON=/usr/local/nagios/bin/$NAME
DAEMON_ARGS="-d /usr/local/nagios/etc/nagios.cfg"
PIDFILE=/usr/local/nagios/var/$NAME.lock
実行可能にしてNagiosを起動します:
chmod +x /etc/init.d/nagios
/etc/init.d/apache2 restart
/etc/init.d/nagios start
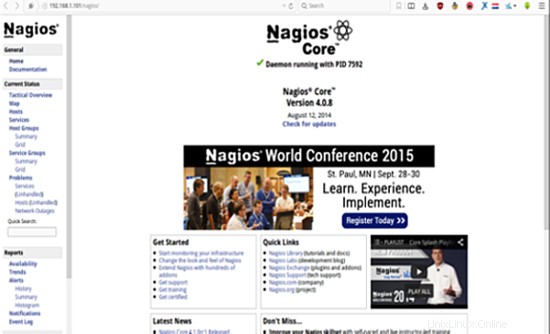
Nagiosサーバーのテスト
ブラウザを開いて、インストールされているNagiosサーバーのIPにアクセスしてください。 http://192.168.1.101/nagios。
このチュートリアルでは、監視するUbuntuホストを上記で作成したNagiosサーバーに追加します。
Nagios Server IP : 192.168.1.101
Ubuntu Host IP : 192.168.1.102
ssh [email protected]
sudo apt-get install nagios-nrpe-server nagios-plugins
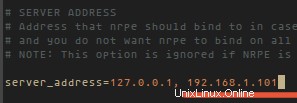
インストールが完了したら、nrpeファイル/etc/nagios/nrpe.cfgを編集します:
vim /etc/nagios/nrpe.cfg
...そしてNagiosサーバーIP192.168.1.101をserver_addressに追加します。
/etc/init.d/nagios-nrpe-server restart
Nagiosサーバーに接続してください:
ssh [email protected]
次に、/ usr / local / nagios / etc /servers/にホスト構成用の新しいファイルを作成します。
vim /usr/local/nagios/etc/servers/ubuntu_host.cfg
次の行を追加します:
# Ubuntu Host configuration file

define host {
        use                          linux-server
        host_name                    ubuntu_host
        alias                        Ubuntu Host
        address                      192.168.1.102 #Ubuntu host IP
        register                     1
}

define service {
      host_name                       ubuntu_host
      service_description             PING
      check_command                   check_ping!100.0,20%!500.0,60%
      max_check_attempts              2
      check_interval                  2
      retry_interval                  2
      check_period                    24x7
      check_freshness                 1
      contact_groups                  admins
      notification_interval           2
      notification_period             24x7
      notifications_enabled           1
      register                        1
}

define service {
      host_name                       ubuntu_host
      service_description             Check Users
      check_command		      check_local_users!20!50
      max_check_attempts              2
      check_interval                  2
      retry_interval                  2
      check_period                    24x7
      check_freshness                 1
      contact_groups                  admins
      notification_interval           2
      notification_period             24x7
      notifications_enabled           1
      register                        1
}

define service {
      host_name                       ubuntu_host
      service_description             Local Disk
      check_command                   check_local_disk!20%!10%!/
      max_check_attempts              2
      check_interval                  2
      retry_interval                  2
      check_period                    24x7
      check_freshness                 1
      contact_groups                  admins
      notification_interval           2
      notification_period             24x7
      notifications_enabled           1
      register                        1
}

define service {
      host_name                       ubuntu_host
      service_description             Check SSH
      check_command                   check_ssh
      max_check_attempts              2
      check_interval                  2
      retry_interval                  2
      check_period                    24x7
      check_freshness                 1
      contact_groups                  admins
      notification_interval           2
      notification_period             24x7
      notifications_enabled           1
      register                        1
}
多くのcheck_commandは/usr/local/nagios/etc/objects/commands.cfgファイルにあります。 DHCP、POPなどのサービスをさらに追加したい場合はそこを参照してください。
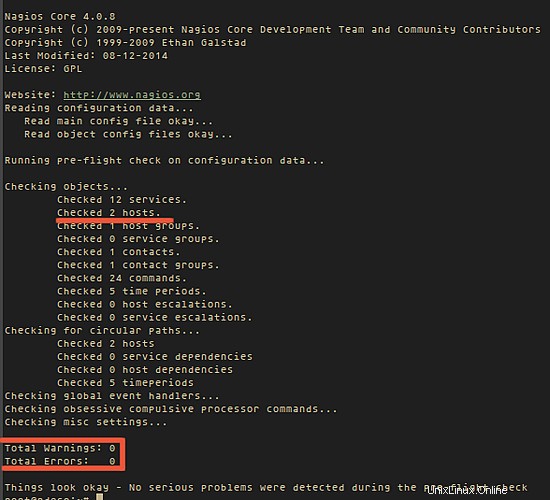
次に、構成を確認します:
/usr/local/nagios/bin/nagios -v /usr/local/nagios/etc/nagios.cfg
...構成が正しいかどうかを確認します。
UbuntuホストでNRPEサービスを開始します:
/etc/init.d/nagios-nrpe-server restart
...そしてNagiosサーバーで、ApacheとNagiosを起動します:
/etc/init.d/apache2 restart
/etc/init.d/nagios restart
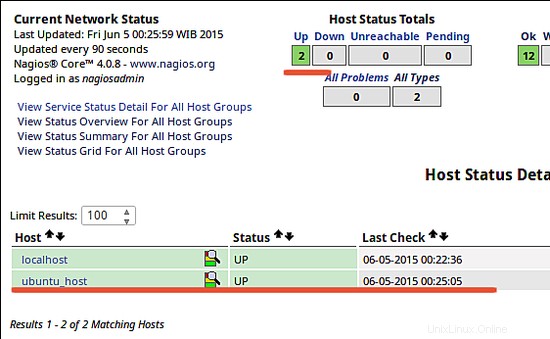
ブラウザからNagiosサーバーを開き、監視されているubuntu_hostを確認します。
Nagiosは、システムを監視するためのオープンソースアプリケーションです。 Nagiosは、構成が簡単なため、広く使用されています。 Nagiosはさまざまなプラグインでサポートされており、独自のプラグインを作成することもできます。詳細については、こちらをご覧ください。