これは「コピー&ペースト」です ハウツー! このチュートリアルに従う最も簡単な方法は、コマンドラインクライアント/ SSHクライアント(PuTTY for Windowsなど)を使用し、コマンドをコピーして貼り付けることです(IPアドレス、ホスト名、パスワードなどの独自の情報を提供する必要がある場合を除く)。 )。これはタイプミスを回避するのに役立ちます。
ISP-ServerSetup -Ubuntu 5.10 "Breezy Badger"
バージョン1.0
作成者:Till Brehm
これは、 Ubuntuをセットアップするために実行する手順の詳細な説明です。 ベースサーバー(Ubuntu 5.10-Breezy Badger)は、ISPおよびホスティング業者(Webサーバー(SSL対応)、メールサーバー(SMTP-AUTHおよびTLSを使用)、DNSサーバー、FTPサーバー、MySQLサーバー、POP3 / POP3s /)に必要なすべてのサービスを提供します。 IMAP / IMAP、クォータ、ファイアウォールなど)。
次のソフトウェアを使用します:
- Webサーバー:Apache2.0.x
- Mail Server:Postfix(sendmailよりも構成が簡単、sendmailよりもセキュリティホールの履歴が短い)
- DNSサーバー:BIND9
- FTPサーバー:proftpd
- POP3 / POP3s / IMAP / IMAPs:この例では、従来のUNIXメールボックス形式から選択できます(次にipopd /を使用します)。 uw-imapd)またはMaildir形式(この場合はCourier-POP3 / Courier-IMAPを使用します)。
- Webサイト統計用のWebalizer
最終的には、確実に動作し、無料のwebhostingコントロールパネルISPConfigの準備ができているシステムが必要です(つまり、ISPConfigはその上で実行されます。ボックス)。
最初に、このようなシステムを設定する方法はこれだけではないことをお伝えしたいと思います。この目標を達成する方法はたくさんありますが、これが私のやり方です。これがあなたのために働くという保証はありません!
要件
このようなシステムをインストールするには、次のものが必要です。
- Ubuntu installCD(http://www.ubuntu.com/download/で入手可能)
- このドキュメントでネットワークのインストールについて説明するので、インターネット接続。
1TheBaseシステム
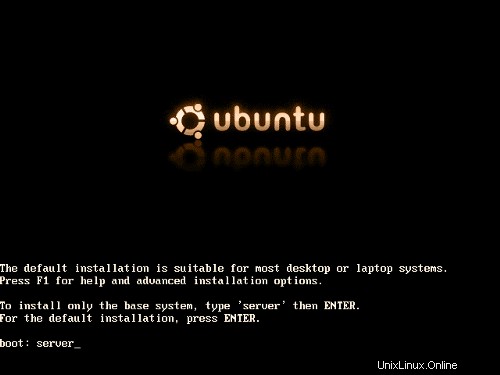
Ubuntuinstall CDをシステムに挿入し、そこから起動します( と入力します)サーバー ブートプロンプトで、サーバーに適したベースシステムのみをインストールします)。
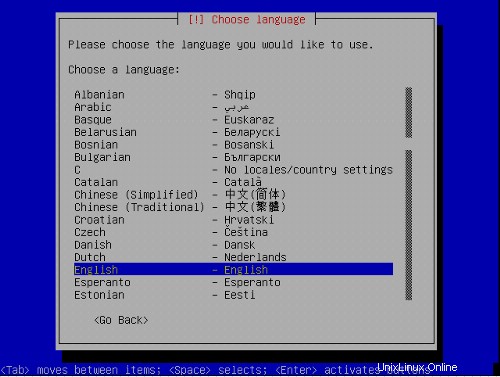
インストールが開始され、最初に言語を選択する必要があります:
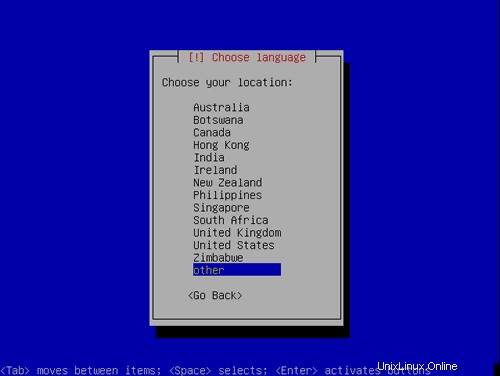
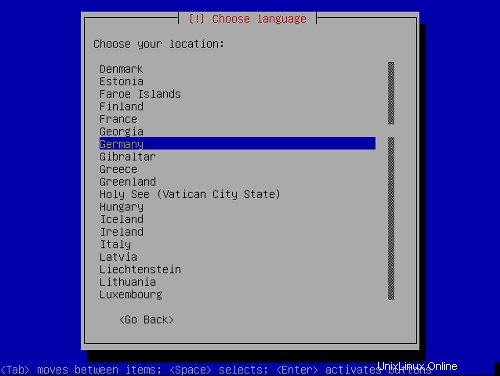
場所を選択してください:
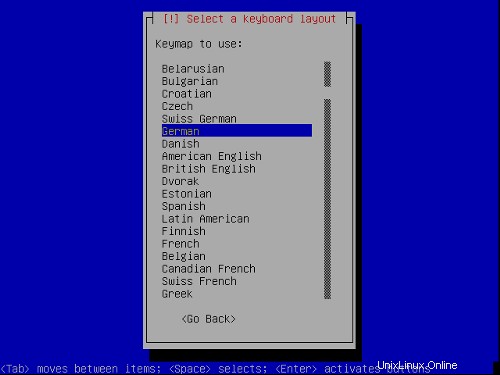
キーボードレイアウトを選択してください:

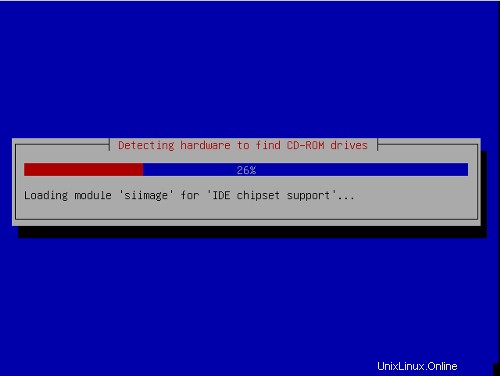
ハードウェアの検出が開始されます:
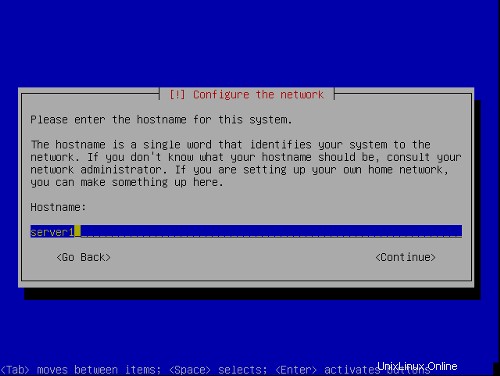
ホスト名を入力します。この例では、私のシステムの名前は server1 .example.com 、だから私は server1と入力します :
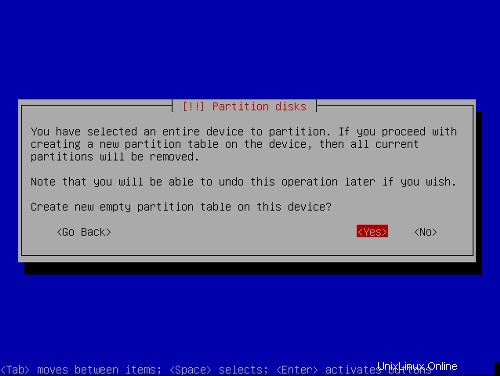
次に、パーティションを作成します。 パーティションテーブルを手動で編集を選択します 。すでにいくつかのパーティションがある場合は、最初にそれらを選択して削除し、リターンキーを押してから[削除]を選択します。

次のパーティションスキームを使用します:
/ boot 50 MB
/ swap 1GB
/ 10 GB
/ var 残りのハードディスク
パーティションの作成:ハードディスク(私の場合はSCSI1)を選択し、Enterキーを押してから:

パーティションテーブルの作成:無料スペースを選択します 、Enterキーを押してから:

1) 新しいパーティションの作成を選択します 。
2)パーティションのサイズを入力します。値はMBとGBまたはパーセント(%)で入力できます
3)パーティションのタイプを選択します:
4)パーティションの場所を選択します:
5)変更 用途 :スワップタイプのスワップパーティションを除くすべてのパーティションにEXT3を使用します。
6)変更:マウントポイントを選択します
7)<を選択します。 i>パーティションの設定が完了しました
上記のパーティションテーブルのすべてのパーティションに対してこの繰り返しを行います。
これで、パーティションテーブルは次のようになります。
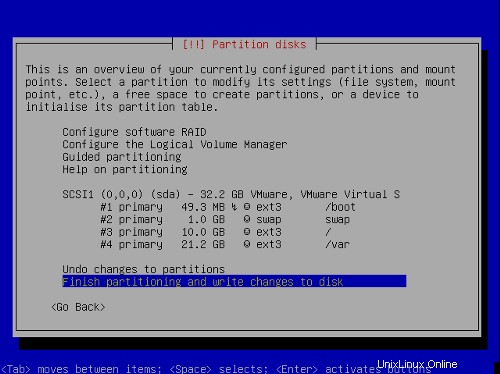
パーティションを完成させてディスクに変更を書き込むを選択します。 、次に はい 、次のステップに進みます。
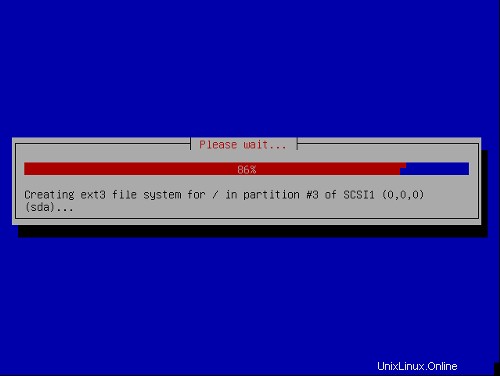
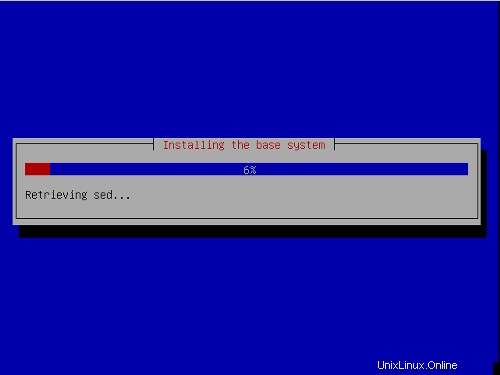
これでベースシステムがインストールされました:
タイムゾーンを構成します:

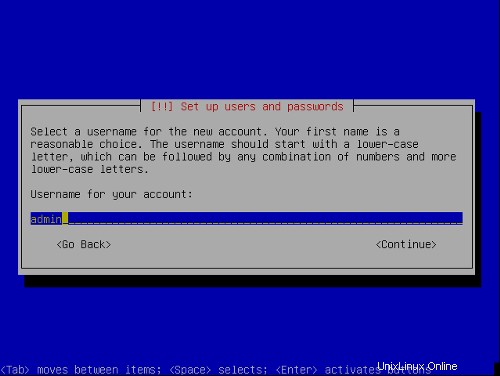
ユーザーの設定:
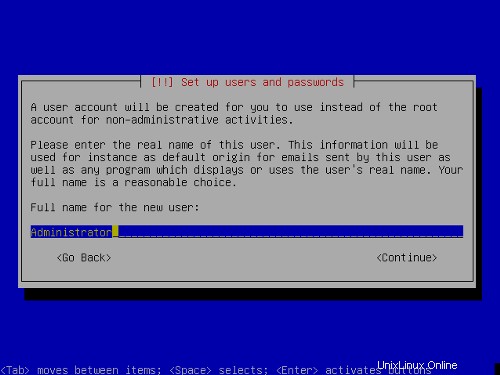

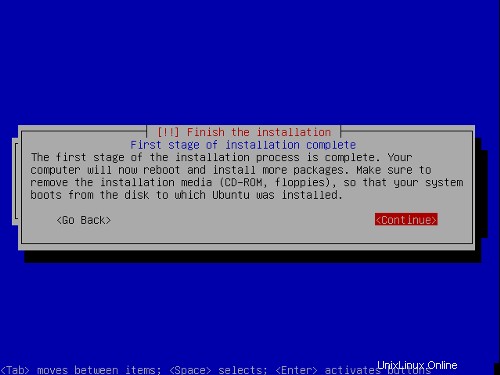
インストールプロセスの最初の段階が終了し、サーバーがインストールされたUbuntulinuxで起動します。
2システムの残りの部分のインストールと構成
rootユーザーを有効にする
これで、上記で入力したユーザー名とパスワードでログインできます。まず、インストールを簡単にするためにrootユーザーを有効にします。必要に応じて、後で無効にすることができます。
sudopasswd root
su
これで、rootユーザーとしてログインしました。
TheNetworkの構成
UbuntuinstallerはDHCP経由でネットワーク設定を取得するようにシステムを構成しているため、サーバーには静的IPアドレスが必要であるため、今すぐ変更する必要があります。 。 / etc / network / interfacesを編集します 必要に応じて調整します(このセットアップ例では、IPアドレス
# This file describes the network interfaces available on your system |
IPアドレスを追加する場合
# This file describes the network interfaces available on your system |
次に、ネットワークを再起動します:
/etc/init.d/networkingrestart
編集
127.0.0.1 localhost.localdomain localhost server1> |
ホスト名の設定
echo server1.example.com> / etc / hostname
/ bin / hostname -F / etc / hostname
/etc/apt/sources.listを編集してLinuxインストールを更新
編集
# deb cdrom:[Ubuntu 5.10 _Breezy Badger_ - Release i386 (20051012)]/ breezy main restricted |
apt-get update
apt-get upgrade
InstallSSHデーモン
apt-get install sshopenssh-server
一部のソフトウェアのインストール/削除
次に、必要なソフトウェアをインストールし、不要なパッケージを削除しましょう。
apt-get install binutilscpp cpp-4.0 fetchmail flex gcc gcc-4.0 libarchive-zip-perl libc6-dev libcompress-zlib-perllibdb4.3 -dev libpcre3 libpopt-dev linux-kernel-headers lynx m4 make ncftp nmapopenssl perl perl-modules unzip zip zlib1g-dev autoconf automake1.9 libtoolbison autotools-dev cpp g ++ (in1 Line !!)
割り当て
apt-getインストールクォータ
編集
# /etc/fstab: static file system information. |
次に実行:
touch /quota.user /quota.group
chmod 600/quota.*
mount -o remount /
touch /var/quota.user /var/quota.group
chmod 600/var/quota.*
mount -o remount / var
quotecheck -avugm
quoteon -avug
DNSサーバー
apt-getinstall bind9
セキュリティ上の理由から、BINDをchrootして実行したいので、次の手順を実行する必要があります。
/etc/init.d/bind9 stop
ファイルを編集 / etc / default / bind9 デーモンが非特権ユーザーとして実行されるように、' バインド '、chrooted to / var / lib / named 。行を変更します: OPTS =" -ubind " OPTIONS ="-u bind-t / var / lib / named"と表示されます。 :
OPTIONS="-u bind -t /var/lib/named" |
/ var / libの下に必要なディレクトリを作成します :
mkdir -p / var / lib / named / etc
mkdir / var / lib / named / dev
mkdir -p / var / lib / named / var / cache / bind
mkdir -p / var / lib / named / var / run / bind / run
次に、configdirectoryをから移動します / etc から / var / lib / named / etc :
mv / etc / bind / var / lib / named / etc
古い場所から新しい構成ディレクトリへのシンボリックリンクを作成します(将来、bindisがアップグレードされる際の問題を回避するため):
ln -s / var / lib / named / etc / bind / etc / bind
nullおよびrandomdevicesを作成し、ディレクトリの権限を修正します:
mknod / var / lib / named / dev / nullc 1 3
mknod / var / lib / named / dev / random c 1 8
chmod 666 / var / lib / named / dev / null / var / lib / named / dev / random
chown -R bind:bind / var / lib / named / var / *
chown -R bind:bind / var / lib / named / etc / bind
起動スクリプトを変更する必要があります
#! /bin/sh |
ロギングデーモンを再起動します:
/etc/init.d/sysklogd再起動
BINDを起動し、 / var / log /syslog<を確認します。 / font> エラーの場合:
/etc/init.d/bind9 start
MySQL
apt-getinstall mysql-server mysql-client libmysqlclient12-dev
mysqladmin -u root passwordyourrootsqlpassword
mysqladmin -h server1.example.com -u root password yourrootsqlpassword
netstat-tapを実行する場合 次のような行が表示されます:
tcp 0 0 localhost.localdo:mysql *:* LISTEN 2449/mysqld |
これは、ポート3306でMySQLにアクセスできることを意味します。次のセクション(Postfix)に進むことができます。この行が表示されない場合は、編集してください。 /etc/mysql/my.cnf スキップネットワーキングをコメントアウトします :
# skip-networking |
編集する必要がある場合
/etc/init.d/mysql restart
接尾辞
SMTP-AUTHおよびTLSを使用してPostfixをインストールするには、次の手順を実行します。
apt-get install postfixpostfix-tls libsasl2 sasl2-bin libsasl2-modules libdb3-util procmail (1行!)
dpkg-reconfigurepostfix
<-インターネットサイト
<-なし
<-server1.example.com
<-server1.example.com、localhost.example.com、localhost
<-いいえ
<-127.0.0.0/8
<-0
<-+
postconf -e'smtpd_sasl_local_domain ='
postconf -e'smtpd_sasl_auth_enable =yes'
postconf -e'smtpd_sasl_security_options =noanonymous'
postconf -e' broken_sasl_auth_clients =yes'
postconf -e' smtpd_recipient_restrictions =permit_sasl_authenticated、permit_mynetworks、reject_unauth_destination'
postconf -e' inet_interfaces =all'
e saslauthd'>> /etc/postfix/sasl/smtpd.conf
echo' mech_list:プレーンログイン'>> /etc/postfix/sasl/smtpd.conf
mkdir / etc / postfix / ssl
cd / etc / postfix / ssl /
openssl genrsa- des3 -rand / etc / hosts -out smtpd.key 1024
chmod 600 smtpd.key
openssl req -new -key smtpd.key -out smtpd.csr
openssl x509 -req -days 3650 -in smtpd.csr -signkey smtpd.key -out smtpd.crt
openssl rsa -in smtpd.key -out smtpd.key.unencrypted
mv -f smtpd.key.unencrypted smtpd.key
openssl req -new -x509 -extensions v3_ca -keyoutcakey.pem -out cacert.pem -days3650
postconf -e'smtpd_tls_auth_only =no'
postconf -e'smtp_use_tls =yes'
postconf- e'smtpd_use_tls =yes'
postconf -e'smtp_tls_note_starttls_offer =yes'
postconf -e'smtpd_tls_key_file =/etc/postfix/ssl/smtpd.key'
postconf -e'smtpd_tls_cert_file =/ etc / postfix / ssl / smtpd.crt'
postconf -e' smtpd_tls_CAfile =/etc/postfix/ssl/cacert.pem'
postconf -e' smtpd_tls_loglevel =1'
postconf -e 'smtpd_tls_received_header =yes'
postconf -e'smtpd_tls_session_cache_timeout =3600s'
postconf -e'tls_random_source =dev:/ dev / urandom'
postconf -e'myhostname =server1.example.com'
ファイル
# See /usr/share/postfix/main.cf.dist for a commented, more complete version |
/etc/init.d/postfixrestart
Authenticationwill be done by saslauthd .We have to change a few things to make it work properly. Because Postfix runschrooted in /var/spool/postfix we have to do the following:
mkdir -p /var/spool/postfix/var/run/saslauthd
rm -fr /var/run/saslauthd
Now we have toedit /etc/default/saslauthd in order to activate saslauthd .Remove # in front of START=yes and add the line PARAMS="-m/var/spool/postfix/var/run/saslauthd" :
# This needs to be uncommented before saslauthd will be run automatically |
Finally we haveto edit /etc/init.d/saslauthd .Change the line
dir=`dpkg-statoverride --list $PWDIR` |
to
#dir=`dpkg-statoverride --list $PWDIR` |
Then change thevariables PWDIR and PIDFILE and add the variable dir at the beginning of the file:
PWDIR="/var/spool/postfix/var/run/${NAME}" |
/etc/init.d/saslauthd should now looklike this:
#!/bin/sh -e |
Now start saslauthd :
/etc/init.d/saslauthd start
To see if SMTP-AUTHand TLS work properly now run the following command:
telnetlocalhost 25
After you haveestablished the connection to your postfix mail server type
ehlolocalhost
If you see thelines
250-STARTTLS
and
250-AUTH
everything is fine.

Type
quit
to return to thesystem's shell.
Courier-IMAP/Courier-POP3
Install Courier-IMAP/Courier-IMAP-SSL(for IMAPs on port 993) and Courier-POP3/Courier-POP3-SSL (for POP3s on port995).
apt-get install courier-authdaemoncourier-base courier-imap courier-imap-ssl courier-pop courier-pop-ssl courier-sslgamin libgamin0 libglib2.0-0 (oneline!)
<- No
<- OK
Then configurePostfix to deliver emails to a user's Maildir:
postconf -e 'home_mailbox=Maildir/'
postconf -e 'mailbox_command ='
/etc/init.d/postfix restart
Please go sureto enable Maildir underManagement -> Settings -> EMail in the ISPConfig web interface.
Apache
Run
apt-get install apache2apache2-common apache2-doc apache2-mpm-prefork apache2-utils libapr0 libexpat1ssl-cert (1line!)
apt-get install autoconf automake1.4 autotools-dev libapache2-mod-php4 libkrb53php4 php4-common php4-dev php4-imagick php4-mcrypt php4-rrdtool php4-sqlitephp4-curl php4-domxml php4-gd php4-imap php4-ldap php4-mcal php4-mhash php4-mysqlphp4-odbc php4-pear php4-xslt (1 line!)
<- Yes
Edit /etc/apache2/apache2.conf . Change
DirectoryIndex index.html index.cgi index.pl index.php index.xhtml |
to
DirectoryIndex index.html index.htm index.shtml index.cgi index.php index.php3 index.pl index.xhtml |
Edit /etc/mime.types and comment out the following lines:
#application/x-httpd-php phtml pht php |
Edit /etc/apache2/mods-enabled/php4.conf and comment out the following lines:
<IfModule mod_php4.c> |
Edit /etc/apache2/ports.conf and add Listen 443 :
Listen 80 |
Now we have toenable some Apache modules (SSL , rewrite and suexec ):
a2enmod ssl
a2enmod rewrite
a2enmod suexec
a2enmod include
Reload Apacheconfiguration:
/etc/init.d/apache2force-reload
Proftpd
apt-getinstall proftpd proftpd-common ucf
<- standalone
For security reasonsyou can add the following lines to /etc/proftpd.conf (thanks to Reinaldo Carvalho; more information can be found here:http://proftpd.linux.co.uk/localsite/Userguide/linked/userguide.html):
DefaultRoot ~
IdentLookups off
ServerIdent on "FTP Server ready."
and restart Proftpd:
/etc/init.d/proftpd restart
Webalizer
apt-getinstall webalizer
Install somePerl Modules needed by SpamAssassin (comes with ISPConfig)
apt-get installlibhtml-parser-perl libdb-file-lock-perl libnet-dns-perl
On To TheNext Step...
The configurationof the server is now finished, and we go on by installing ISPConfigon it.
3 Installing ISPConfig
I will installthe current ISPConfig version. Download the current ISPConfig version from http://www.ispconfig.org/downloads.htmto your /tmp directory.
Unpack the ISPConfig-archiveand change to the directory install_ispconfig :
tarxvfz ISPConfig*.tar.gz
cd install_ispconfig
Start the setupscript
./setup
The installer willnow compile an Apache with PHP5 that will run on port 81 and is needed by theISPConfig system itself. It will not interfere with your existing Apache installationso you can go on unworried.
When the ISPConfigApache is built, a custom SSL certificate is built. Therefore you are askeda few questions. You can accept the default values, or you can enter new valuesthere, this does not matter:
In step 7 (EncryptingRSA private key of CA with a pass phrase for security [ca.key] ) andstep 8 (Encrypting RSA private keyof SERVER with a pass phrase for security [server.key] ) of the certificatecreation process you are asked if you want to encrypt the respective key now.Choose n there becauseotherwise you will always be asked for a password whenever you want to restartthe ISPConfig system which means it cannot be restarted without human interaction!
If the compilationfails, the setup is stopped and all compiled files are removed. From the errormessage you get you should be able to see the reason for the failure (in mostcases a package (like the MySQL header files) is missing). Try to solve theproblem and the re-run ./setup .
In case of successthe setup goes on:
Pleasechoose your language. This is the language of the ISPConfig interface.
Afterwards youare shown the ISPConfig licence (BSD licence). Please read it carefully! Youaccept it by typing y .If you do not want to accept the ISPConfig licence, type n ,and the installation routine stops.
As installation mode I chose expert becausei want to set the website root to /var/www .When you are asked for installation mode, type 2 and hit return.
Now you are askif the daemons like postfix etc. are recognized correctly and for their filelocations, chose yes y .
When you are asked:
Web-Root:/home/www
Is this correct? [y/n]
choose n and enter /var/www as Web-Root.
Now you are askedfor some installation settings:
Pleaseenter your MySQL server: localhost
Please enter your MySQL user: root
Please enter your MySQL password: (Enter the password you chose when setting up the MySQL Server)
Please enter a name for the ISPConfigdatabase (e.g. db_ispconfig): db_ispconfig
Please enter the IP addressof the ISPConfig web (e.g. 192.168.0.1): 192.168.0.100 (Enteryour IP here)
Now you are askto enter the host and domain of your server. If your server has a host and domainname,enter them now. As this is a test install in my local network, I leave the hostempty and enter my IP address instead of the domain.
Pleaseenter the host name (e.g. www):
Please enter the domain (e.g.xyz.de): 192.169.0.100
Pleaseselect the protocol (http or https (SSL encryption)) to use to access the ISPConfigsystem:
1) HTTPS
2) HTTP
Your Choice: 1
After you haveanswered the questions ISPConfig should be duly installed. If you indicated www as host and xyz.com as the domain during the installation, you will find the ISPConfig interfaceunder https://www.xyz.de:81 or http://www.xyz.de:81 .Here you can login first with the user name admin and password admin 。 Itis recommended to change the password immediately! This can be done in the ISPConfigweb interface under Tools -> Changepassword .
Then go to Management-> Server -> Settings in the ISPConfig control panel and tickthe Maildir checkbox onthe EMail tab.
If your serverhas more than one IP address, please check if your additional IP addresses havebeen correctly detected by the installation routine under Management-> Server ->
Settings on the tab Server-> IP List .
You can find thewhole ISPConfig installation instructions here:http://www.ispconfig.org/manual_installation.htm
The ISPConfig manualscan be found here:http://www.ispconfig.org/documentation.htm
Links
- http://www.ubuntu.com
- http://www.ispconfig.org