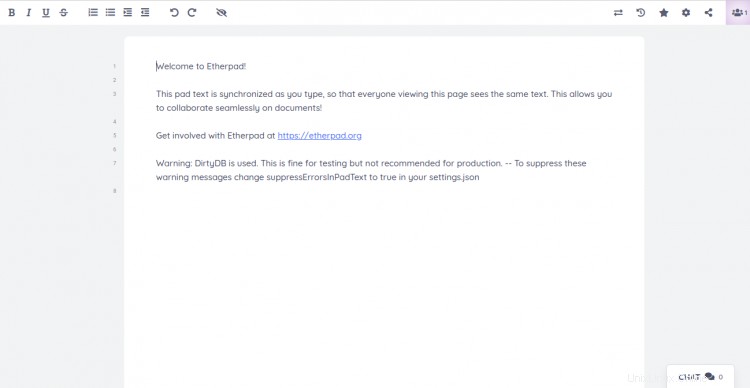
Etherpadは、ライターがテキストドキュメントを同時に編集し、すべての編集をリアルタイムで監視できるようにするWebベースのリアルタイムオンラインエディターです。これはオープンソースであり、カスタマイズ可能であり、各作成者のテキストを独自の色で表示する機能があります。また、アプリケーションと統合してユーザーとグループを管理できるHTTPAPIも提供します。それはあなたがEtherpadで電子メール通知、ファイルアップロード、ビデオ通話を統合するのを助けるいくつかのプラグインを提供します。このチュートリアルでは、EtherpadWebベースのエディターをUbuntu20.04サーバーにインストールする方法を示します。
- Ubuntu20.04を実行しているサーバー。
- サーバーIPで指定された有効なドメイン名。
- ルートパスワードがサーバーに設定されます。
開始する前に、システムパッケージを最新バージョンに更新する必要があります。次のコマンドを実行して更新できます:
apt-get update -y
すべてのパッケージが更新されたら、システムにいくつかの依存関係をインストールする必要があります。次のコマンドですべてをインストールできます:
apt-get install gnupg2 git unzip libssl-dev pkg-config gcc g++ make build-essential -y
すべてのパッケージがインストールされたら、次のステップに進むことができます。
MariaDBデータベースのインストールと構成
Etherpadは、MariaDBをデータベースバックエンドとして使用します。そのため、システムにMariaDBサーバーをインストールする必要があります。次のコマンドでインストールできます:
apt-get install mariadb-server -y
MariaDBをインストールした後、次のコマンドを使用してMariaDBシェルにログインします。
mysql
ログイン後、次のコマンドを使用してEtherpadのデータベースとユーザーを作成します。
MariaDB [(none)]> create database etherpad;
MariaDB [(none)]> grant all privileges on etherpad.* to [email protected] identified by 'password';
次に、特権をフラッシュし、次のコマンドでMariaDBを終了します。
MariaDB [(none)]> flush privileges;
MariaDB [(none)]> exit;
この時点で、データベースはEtherpad用に構成されています。これで、次のステップに進むことができます。
Node.jsをインストール
EtherpadはNode.jsに基づいています。そのため、システムにNode.jsをインストールする必要があります。デフォルトでは、最新バージョンのNode.jsはUbuntu20.04標準リポジトリでは利用できません。そのため、Node.jsリポジトリをシステムに追加する必要があります。次のコマンドで追加できます:
curl -sL https://deb.nodesource.com/setup_14.x -o nodesource_setup.sh
bash nodesource_setup.sh
リポジトリが追加されたら、次のコマンドを使用してNode.jsをインストールします。
apt-get install nodejs -y
Node.jsをインストールした後、次のコマンドを使用して、インストールされているNode.jsのバージョンを確認します。
node -v
次の出力が得られるはずです:
v14.15.0
終了したら、次のステップに進むことができます。
Etherpadのインストールと構成
前に、Etherpadをインストールします。別のユーザーとしてEtherpadを実行することをお勧めします。次のコマンドを使用して、Etherpadの新しいユーザーを作成できます。
adduser --home /opt/etherpad --shell /bin/bash etherpad
以下に示すように、パスワードを設定するように求められます。
Adding user `etherpad' ...
Adding new group `etherpad' (1000) ...
Adding new user `etherpad' (1000) with group `etherpad' ...
Creating home directory `/opt/etherpad' ...
Copying files from `/etc/skel' ...
New password:
Retype new password:
passwd: password updated successfully
Changing the user information for etherpad
Enter the new value, or press ENTER for the default
	Full Name []: Hitesh
	Room Number []: 1
	Work Phone []:
	Home Phone []:
	Other []:
Is the information correct? [Y/n] Y
次に、次のコマンドを使用して、Etherpadホームディレクトリに適切な権限を付与します。
install -d -m 755 -o etherpad -g etherpad /opt/etherpad
次に、ユーザーをEtherpadに切り替え、次のコマンドを使用してGitリポジトリから最新バージョンのEtherpadをダウンロードします。
su - etherpad
git clone --branch master https://github.com/ether/etherpad-lite.git
次に、ディレクトリをダウンロードしたディレクトリに変更し、次のコマンドを使用してEtherpadを実行します。
cd etherpad-lite
bin/run.sh
これにより、すべての依存関係がインストールされ、Etherpadサーバーが起動します。サーバーが正常に起動すると、次の出力が表示されます。
[2020-11-11 06:46:44.783] [INFO] console - Your Etherpad version is 1.8.6 (2c8769a)
[2020-11-11 06:46:44.958] [INFO] console - You can access your Etherpad instance at http://0.0.0.0:9001/
[2020-11-11 06:46:44.958] [WARN] console - Admin username and password not set in settings.json.  To access admin please uncomment and edit 'users' in settings.json
[2020-11-11 06:46:44.958] [WARN] console - Etherpad is running in Development mode.  This mode is slower for users and less secure than production mode.  You should set the NODE_ENV environment variable to production by using: export NODE_ENV=production
次に、CTRL+Cを押してサーバーを停止します。次に、settings.jsonファイルを編集し、データベースと管理者の設定を定義する必要があります。
nano settings.json
次の行を削除します:
"dbType" : "dirty",
  "dbSettings" : {
                   "filename" : "var/dirty.db"
                 },
以下に示すようにMySQL設定を変更します:
  "dbType" : "mysql",
  "dbSettings" : {
    "user":     "etherpad",
    "host":     "localhost",
    "port":     3306,
    "password": "password",
    "database": "etherpad",
    "charset":  "utf8mb4"
  },
行trustProxyをtrueに変更します:
"trustProxy": true,
管理者ユーザーのパスワードを定義します:
  "users": {
    "admin": {
      "password": "adminpassword",
      "is_admin": true
    },
ファイルを保存して閉じてから、次のコマンドを使用して必要な依存関係をインストールします。
./bin/installDeps.sh
すべての依存関係がインストールされたら、次のコマンドを使用してEtherpadユーザーを終了します。
exit
この時点で、Etherpadがインストールおよび構成されています。これで、次のステップに進むことができます。
次に、Etherpadサービスを管理するためのsystemdサービスファイルを作成する必要があります。次のコマンドで作成できます:
nano /etc/systemd/system/etherpad.service
次の行を追加します:
[Unit]
Description=Etherpad-lite, the collaborative editor.
After=syslog.target network.target

[Service]
Type=simple
User=etherpad
Group=etherpad
WorkingDirectory=/opt/etherpad/etherpad-lite
Environment=NODE_ENV=production

ExecStart=/usr/bin/node /opt/etherpad/etherpad-lite/src/node/server.js

Restart=always

[Install]
WantedBy=multi-user.target
ファイルを保存して閉じてから、次のコマンドを実行してsystemdデーモンをリロードします。
systemctl daemon-reload
次に、Etherpadサービスを開始し、次のコマンドを使用してシステムの再起動時に開始できるようにします。
systemctl start etherpad
systemctl enable etherpad
次のコマンドを使用して、Etherpadサービスのステータスを確認することもできます。
systemctl status etherpad
次の出力が表示されます。
? etherpad.service - Etherpad-lite, the collaborative editor.
     Loaded: loaded (/etc/systemd/system/etherpad.service; disabled; vendor preset: enabled)
     Active: active (running) since Wed 2020-11-11 06:50:49 UTC; 4s ago
   Main PID: 12269 (node)
      Tasks: 13 (limit: 4691)
     Memory: 119.1M
     CGroup: /system.slice/etherpad.service
             ??12269 /usr/bin/node /opt/etherpad/etherpad-lite/src/node/server.js
Etherpad用にNginxを構成する
この時点で、Etherpadが起動し、ポート9001でリッスンします。次に、Etherpadにアクセスするために、Nginxをリバースプロキシとしてインストールして構成する必要があります。まず、次のコマンドを使用してNginxをインストールします。
apt-get install nginx -y
次に、次のコマンドを使用して、新しいNginx仮想ホスト構成ファイルを作成します。
nano /etc/nginx/sites-available/etherpad.conf
次の行を追加します:
upstream etherpad {
   server localhost:9001;
   keepalive 32;
}

server {
   listen 80;
   server_name etherpad.mydomain.com;

   location / {
       client_max_body_size 50M;
       proxy_set_header X-Real-IP $remote_addr;
       proxy_http_version 1.1;
       proxy_pass http://etherpad;
   }
}
ファイルを保存して閉じてから、次のコマンドを使用してNginx仮想ホスト構成ファイルをアクティブ化します。
ln -s /etc/nginx/sites-available/etherpad.conf /etc/nginx/sites-enabled/
次に、次のコマンドを使用して、構文エラーがないかNginxを確認します。
nginx -t
次の出力が得られるはずです:
nginx: the configuration file /etc/nginx/nginx.conf syntax is ok
nginx: configuration file /etc/nginx/nginx.conf test is successful
次に、Nginxサービスを再起動して、変更を適用します。
systemctl restart nginx
次のコマンドを使用して、Nginxのステータスを確認することもできます。
systemctl status nginx
次の出力が得られるはずです:
? nginx.service - A high performance web server and a reverse proxy server
     Loaded: loaded (/lib/systemd/system/nginx.service; enabled; vendor preset: enabled)
     Active: active (running) since Wed 2020-11-11 06:53:44 UTC; 6s ago
       Docs: man:nginx(8)
    Process: 12984 ExecStartPre=/usr/sbin/nginx -t -q -g daemon on; master_process on; (code=exited, status=0/SUCCESS)
    Process: 12985 ExecStart=/usr/sbin/nginx -g daemon on; master_process on; (code=exited, status=0/SUCCESS)
   Main PID: 13001 (nginx)
      Tasks: 3 (limit: 4691)
     Memory: 3.5M
     CGroup: /system.slice/nginx.service
             ??13001 nginx: master process /usr/sbin/nginx -g daemon on; master_process on;
             ??13002 nginx: worker process
             ??13003 nginx: worker process

Nov 11 06:53:44 ubuntu2004 systemd[1]: Starting A high performance web server and a reverse proxy server...
Nov 11 06:53:44 ubuntu2004 systemd[1]: Started A high performance web server and a reverse proxy server.
次に、Webブラウザーを開き、URL http://etherpad.mydomain.comを入力します。 。次のページにリダイレクトされます:

ページ名を入力して、 OKをクリックします ボタン。次のページにEtherpadダッシュボードが表示されます:

おめでとう!これで、Ubuntu20.04サーバーにリバースプロキシとしてNginxを使用してEtherpadを正常にインストールおよび構成できました。実稼働環境でEtherpadを簡単に使用できます。ご不明な点がございましたら、お気軽にお問い合わせください。