Orangescrumは、無料のオープンソースプロジェクト管理およびコラボレーションアプリケーションです。中小企業にとって理想的であり、プロジェクト、チーム、ドキュメント、およびタスクを作成および管理し、他のチームメンバーと通信するのに役立ちます。これは、プロジェクトのタスクを計画、整理、および管理するのに役立つシンプルなインターフェイスを備えた非常に便利なプロジェクト管理アプリケーションです。スクラムボード、スプリントの計画とレポート、ストーリーポイント、プロジェクトのバックログなど、多くの機能が付属しています。
このチュートリアルでは、Ubuntu20.04サーバーにOrangeScrumプロジェクト管理ツールをインストールする方法を示します。
- Ubuntu20.04を実行しているサーバー。
- サーバーIPで指定された有効なドメイン名。
- ルートパスワードはサーバーで構成されています。
Apache、MariaDB、PHPをインストール
まず、次のコマンドを使用してApacheWebサーバーとMariaDBデータベースサーバーをインストールします。
apt-get install apache2 mariadb-server -y
上記のパッケージをインストールした後、PHPバージョン7.2およびその他の必要な拡張機能をシステムにインストールする必要があります。デフォルトでは、Ubuntu 20.04にはPHPバージョン7.4が付属しているため、システムにOndrejリポジトリを追加する必要があります。
まず、次のコマンドを使用して必要なパッケージをインストールします。
apt-get install software-properties-common gnupg2 -y
次に、次のコマンドを使用してOndrejリポジトリを追加します。
add-apt-repository ppa:ondrej/php
次に、リポジトリを更新し、次のコマンドを使用してPHPを他の必要なパッケージと一緒にインストールします。
apt-get install php7.2 php7.2-bcmath php7.2-cgi php7.2-cli php7.2-common php7.2-curl php7.2-dba php7.2-enchant php7.2-fpm php7.2-gd php7.2-imap php7.2-intl php7.2-ldap php7.2-mbstring php7.2-mysql php7.2-opcache php7.2-imagick php7.2-memcache php7.2-soap php7.2-tidy php7.2-xml php7.2-zip libapache2-mod-php7.2 xvfb libfontconfig wkhtmltopdf unzip wget -y
すべてのパッケージがインストールされたら、php.iniファイルを編集し、いくつかの必要な設定を変更します。
nano /etc/php/7.2/apache2/php.ini
次の値を変更します。
post_max_size = 200M
upload_max_filesize = 200M
max_execution_time = 300
memory_limit = 512M
max_input_vars = 5000
date.timezone = Asia/Kolkata
ファイルを保存して閉じてから、Apacheサービスを再起動して変更を適用します。
systemctl restart apache2
終了したら、次のステップに進むことができます。
OrangeScrumのデータベースを作成する
次に、OrangeScrumのデータベースとユーザーを作成する必要があります。まず、次のコマンドを使用してMariaDBシェルにログインします。
mysql
ログインしたら、次のコマンドを使用してデータベースとユーザーを作成します。
MariaDB [(none)]> CREATE DATABASE orangescrumdb;
MariaDB [(none)]> GRANT ALL PRIVILEGES ON orangescrumdb.* TO 'orangescrumuser'@'localhost' IDENTIFIED BY 'password';
次に、特権をフラッシュし、次のコマンドを使用してMariaDBシェルを終了します。
MariaDB [(none)]> FLUSH PRIVILEGES;
MariaDB [(none)]> exit;
次に、MariaDBの厳密モードを無効にする必要があります。これを行うには、disable_strict_mode.cnfファイルを作成します。
nano /etc/mysql/conf.d/disable_strict_mode.cnf
次の行を追加します:
[mysqld]
sql_mode="IGNORE_SPACE,NO_ZERO_IN_DATE,NO_ZERO_DATE,ERROR_FOR_DIVISION_BY_ZERO,NO_AUTO_CREATE_USER,NO_ENGINE_SUBSTITUTION"
ファイルを保存して閉じます。次に、MariaDBを再起動して、すべての変更を適用します。
systemctl restart mariadb
OrangeScrumをインストール
まず、OrangeScrumの最新バージョンを公式Webサイトからダウンロードする必要があります。ダウンロード後、次のコマンドでダウンロードしたファイルを解凍します。
unzip orangescrum-master.zip
次に、次のコマンドを使用して、抽出したディレクトリをApacheルートディレクトリに移動します。
mv orangescrum-master /var/www/html/orangescrum
次に、ディレクトリをOrangescrumに変更し、OrangeScrumデータベースをデータベースにインポートします。
cd /var/www/html/orangescrum
mysql -u orangescrumuser -p orangescrumdb < database.sql
mysqlコマンドで要求されたときに、「orangescrumuser」MySQLユーザー用に選択したパスワードを入力します。
次に、database.phpファイルを編集し、データベース設定を定義します。
nano app/Config/database.php
次の行を変更します:
class DATABASE_CONFIG {

        public $default = array(
                'datasource' => 'Database/Mysql',
                'persistent' => false,
                'host' => 'localhost',
                'login' => 'orangescrumuser',
                'password' => 'password',
                'database' => 'orangescrumdb',
                'prefix' => '',
                'encoding' => 'utf8',
        );
}
終了したら、ファイルを保存して閉じます。
次に、orangescrumディレクトリに適切な権限を付与します。
chown -R www-data:www-data /var/www/html/orangescrum
chmod -R 775 /var/www/html/orangescrum
OrangeScrum用にApacheを構成する
次に、OrangeScrum用の新しいApache仮想ホスト構成ファイルを作成する必要があります。次のコマンドで作成できます:
nano /etc/apache2/sites-available/orangescrum.conf
次の行を追加します:
<VirtualHost *:80>
        ServerAdmin [email protected]
        DocumentRoot /var/www/html/orangescrum/
        ServerName orangescrum.example.com
    <Directory /var/www/html/orangescrum/>
             DirectoryIndex index.php index.html
             AllowOverride All
             Allow from all
             Order allow,deny
             Options Indexes FollowSymlinks
    </Directory>
</VirtualHost>
ファイルを保存して閉じ、次のコマンドでApache仮想ホストファイルを有効にします。
a2ensite orangescrum.conf
次に、次のコマンドを使用して必要なモジュールを有効にします。
phpenmod mbstring
a2enmod rewrite
a2enmod headers
次に、Apacheサービスを再起動して、変更を適用します。
systemctl restart apache2
次のコマンドを使用して、Apacheのステータスを確認できるようになりました。
systemctl status apache2
次の出力が得られるはずです:
? apache2.service - The Apache HTTP Server
     Loaded: loaded (/lib/systemd/system/apache2.service; enabled; vendor preset: enabled)
     Active: active (running) since Thu 2020-09-17 15:36:20 UTC; 5min ago
       Docs: https://httpd.apache.org/docs/2.4/
    Process: 40670 ExecStart=/usr/sbin/apachectl start (code=exited, status=0/SUCCESS)
   Main PID: 40689 (apache2)
      Tasks: 11 (limit: 2353)
     Memory: 47.1M
     CGroup: /system.slice/apache2.service
             ??40689 /usr/sbin/apache2 -k start
             ??40690 /usr/sbin/apache2 -k start
             ??40692 /usr/sbin/apache2 -k start
             ??40694 /usr/sbin/apache2 -k start
             ??40698 /usr/sbin/apache2 -k start
             ??40699 /usr/sbin/apache2 -k start
             ??40700 /usr/sbin/apache2 -k start
             ??40706 /usr/sbin/apache2 -k start
             ??40808 /usr/sbin/apache2 -k start
             ??40809 /usr/sbin/apache2 -k start
             ??40810 /usr/sbin/apache2 -k start

Sep 17 15:36:20 ubuntu2004 systemd[1]: Starting The Apache HTTP Server...
SSLを暗号化してLet'sでOrangeScrumを保護
次に、Let'sEncryptSSLを使用してOrangeScrumを保護することをお勧めします。まず、CertbotクライアントをインストールしてSSLを管理します。
apt-get install python3-certbot-apache -y
Certbotクライアントをインストールした後、次のコマンドを実行して、ドメインにLet'sEncryptSSLをインストールします。
certbot --apache -d orangescrum.example.com
以下に示すように、メールアドレスを提供し、利用規約に同意するよう求められます。
Saving debug log to /var/log/letsencrypt/letsencrypt.log
Plugins selected: Authenticator apache, Installer apache
Enter email address (used for urgent renewal and security notices) (Enter 'c' to
cancel): [email protected]

- - - - - - - - - - - - - - - - - - - - - - - - - - - - - - - - - - - - - - - -
Please read the Terms of Service at
https://letsencrypt.org/documents/LE-SA-v1.2-November-15-2017.pdf. You must
agree in order to register with the ACME server at
https://acme-v02.api.letsencrypt.org/directory
- - - - - - - - - - - - - - - - - - - - - - - - - - - - - - - - - - - - - - - -
(A)gree/(C)ancel: A

- - - - - - - - - - - - - - - - - - - - - - - - - - - - - - - - - - - - - - - -
Would you be willing to share your email address with the Electronic Frontier
Foundation, a founding partner of the Let's Encrypt project and the non-profit
organization that develops Certbot? We'd like to send you email about our work
encrypting the web, EFF news, campaigns, and ways to support digital freedom.
- - - - - - - - - - - - - - - - - - - - - - - - - - - - - - - - - - - - - - - -
(Y)es/(N)o: Y
Obtaining a new certificate
Performing the following challenges:
http-01 challenge for orangescrum.example.com
Enabled Apache rewrite module
Waiting for verification...
Cleaning up challenges
Created an SSL vhost at /etc/apache2/sites-available/orangescrum-le-ssl.conf
Enabled Apache socache_shmcb module
Enabled Apache ssl module
Deploying Certificate to VirtualHost /etc/apache2/sites-available/orangescrum-le-ssl.conf
Enabling available site: /etc/apache2/sites-available/orangescrum-le-ssl.conf
次に、以下に示すように、HTTPトラフィックをHTTPSにリダイレクトするかどうかを選択します。
Please choose whether or not to redirect HTTP traffic to HTTPS, removing HTTP access.
- - - - - - - - - - - - - - - - - - - - - - - - - - - - - - - - - - - - - - - -
1: No redirect - Make no further changes to the webserver configuration.
2: Redirect - Make all requests redirect to secure HTTPS access. Choose this for
new sites, or if you're confident your site works on HTTPS. You can undo this
change by editing your web server's configuration.
- - - - - - - - - - - - - - - - - - - - - - - - - - - - - - - - - - - - - - - -
Select the appropriate number [1-2] then [enter] (press 'c' to cancel): 2
2と入力し、Enterキーを押して続行します。インストールが完了すると、次の出力が表示されます。
Enabled Apache rewrite module
Redirecting vhost in /etc/apache2/sites-enabled/orangescrum.conf to ssl vhost in /etc/apache2/sites-available/orangescrum-le-ssl.conf

- - - - - - - - - - - - - - - - - - - - - - - - - - - - - - - - - - - - - - - -
Congratulations! You have successfully enabled https://orangescrum.example.com

You should test your configuration at:
https://www.ssllabs.com/ssltest/analyze.html?d=orangescrum.example.com
- - - - - - - - - - - - - - - - - - - - - - - - - - - - - - - - - - - - - - - -

IMPORTANT NOTES:
 - Congratulations! Your certificate and chain have been saved at:
   /etc/letsencrypt/live/orangescrum.example.com/fullchain.pem
   Your key file has been saved at:
   /etc/letsencrypt/live/orangescrum.example.com/privkey.pem
   Your cert will expire on 2020-11-11. To obtain a new or tweaked
   version of this certificate in the future, simply run certbot again
   with the "certonly" option. To non-interactively renew *all* of
   your certificates, run "certbot renew"
 - If you like Certbot, please consider supporting our work by:

   Donating to ISRG / Let's Encrypt:   https://letsencrypt.org/donate
   Donating to EFF:                    https://eff.org/donate-le
これで、URLhttps://orangescrum.example.comを使用してOpenClassifiedsWebサイトに安全にアクセスできます。
次に、Webブラウザーを開き、URLhttps://orangescrum.example.comを入力します。 OrangeScrumのサインアップ画面が表示されます:
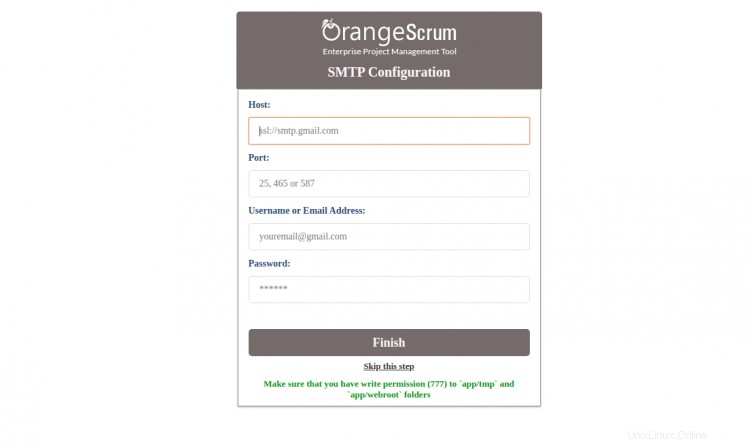
SMTPの詳細を入力するか、この手順をスキップをクリックします ボタン。次の画面が表示されます。
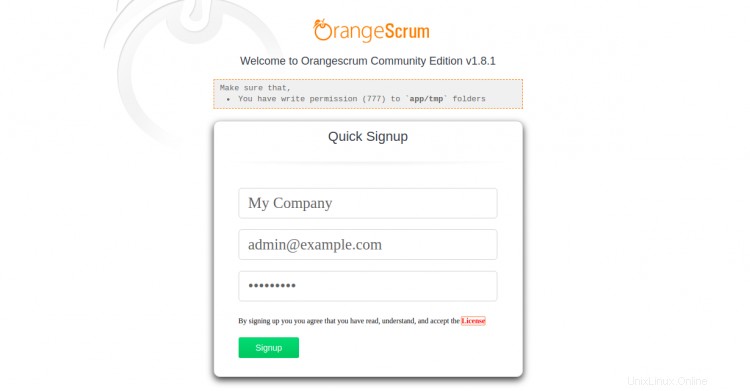
サイト名、メールアドレス、パスワードを入力し、登録をクリックします ボタン。次のページのOrangescrumダッシュボードにリダイレクトされます:
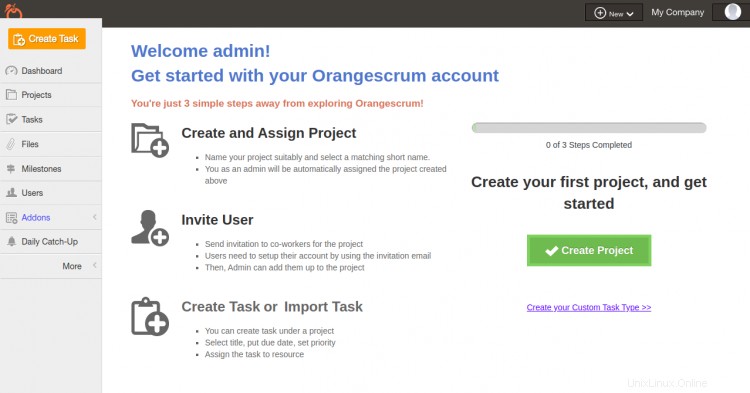
おめでとう!これで、Ubuntu20.04サーバーにLet'sEncryptSSLを使用してOrangeScrumが正常にインストールされました。これで、最初のプロジェクトを作成し、ユーザーを招待して、タスクを作成して割り当てることができます。ご不明な点がございましたら、お気軽にお問い合わせください。