Hugoは、Go言語で記述された無料のオープンソースフレームワークであり、Webサイトを簡単に作成するために使用できます。シンプルで高速かつ安全な静的サイトジェネレーターであり、実行するためにデータベースは必要ありません。 Hugoは、無制限のコンテンツタイプ、分類法、メニュー、動的API駆動型コンテンツなどをすべてプラグインなしでサポートします。 Hugoには、堅牢なコンテンツ管理、組み込みのテンプレート、ショートコード、カスタム出力、多言語などの豊富な機能セットが付属しています。
このチュートリアルでは、Ubuntu18.04LTSサーバーにHugoをインストールする方法を学習します。
- Ubuntu18.04を実行しているサーバー。
- 静的IPアドレス136.243.240.39がサーバーに構成されています。
- サーバーにルートパスワードが設定されています。
開始する前に、システムを最新バージョンに更新する必要があります。これを行うには、次のコマンドを実行します。
apt-get update -y
 apt-get upgrade -y
サーバーが更新されたら、サーバーを再起動して変更を適用します。
Hugoをインストール
デフォルトでは、Hugoの最新バージョンはUbuntu18.04デフォルトリポジトリでは利用できません。そのため、Gitリポジトリからダウンロードする必要があります。次のコマンドでダウンロードできます:
wget https://github.com/gohugoio/hugo/releases/download/v0.58.2/hugo_0.58.2_Linux-64bit.deb
ダウンロードが完了したら、次のコマンドを使用してHugoをインストールします。
dpkg -i hugo_0.58.2_Linux-64bit.deb
依存関係エラーが発生した場合は、次のコマンドを実行して依存関係を解決します。
apt-get install -f
次に、次のコマンドでHugoのバージョンを確認できます。
hugo version
次の出力が得られるはずです:
Hugo Static Site Generator v0.58.2-253E5FDC linux/amd64 BuildDate: 2019-09-13T08:05:59Z
次のコマンドを実行して、Hugoで使用可能なオプションのリストを表示することもできます。
hugo --help
次の出力が得られるはずです:
hugo is the main command, used to build your Hugo site.

Hugo is a Fast and Flexible Static Site Generator
built with love by spf13 and friends in Go.

Complete documentation is available at http://gohugo.io/.

Usage:
  hugo [flags]
  hugo [command]

Available Commands:
  config      Print the site configuration
  convert     Convert your content to different formats
  deploy      Deploy your site to a Cloud provider.
  env         Print Hugo version and environment info
  gen         A collection of several useful generators.
  help        Help about any command
  import      Import your site from others.
  list        Listing out various types of content
  mod         Various Hugo Modules helpers.
  new         Create new content for your site
  server      A high performance webserver
  version     Print the version number of Hugo

Flags:
  -b, --baseURL string         hostname (and path) to the root, e.g. http://spf13.com/
  -D, --buildDrafts            include content marked as draft
  -E, --buildExpired           include expired content
  -F, --buildFuture            include content with publishdate in the future
      --cacheDir string        filesystem path to cache directory. Defaults: $TMPDIR/hugo_cache/
      --cleanDestinationDir    remove files from destination not found in static directories
      --config string          config file (default is path/config.yaml|json|toml)
      --configDir string       config dir (default "config")
  -c, --contentDir string      filesystem path to content directory
      --debug                  debug output
  -d, --destination string     filesystem path to write files to
      --disableKinds strings   disable different kind of pages (home, RSS etc.)
      --enableGitInfo          add Git revision, date and author info to the pages
  -e, --environment string     build environment
      --forceSyncStatic        copy all files when static is changed.
      --gc                     enable to run some cleanup tasks (remove unused cache files) after the build
  -h, --help                   help for hugo
      --i18n-warnings          print missing translations
      --ignoreCache            ignores the cache directory
      --ignoreVendor           ignores any _vendor directory
  -l, --layoutDir string       filesystem path to layout directory
      --log                    enable Logging
      --logFile string         log File path (if set, logging enabled automatically)
      --minify                 minify any supported output format (HTML, XML etc.)
      --noChmod                don't sync permission mode of files
      --noTimes                don't sync modification time of files
      --path-warnings          print warnings on duplicate target paths etc.
      --quiet                  build in quiet mode
      --renderToMemory         render to memory (only useful for benchmark testing)
  -s, --source string          filesystem path to read files relative from
      --templateMetrics        display metrics about template executions
      --templateMetricsHints   calculate some improvement hints when combined with --templateMetrics
  -t, --theme strings          themes to use (located in /themes/THEMENAME/)
      --themesDir string       filesystem path to themes directory
      --trace file             write trace to file (not useful in general)
  -v, --verbose                verbose output
      --verboseLog             verbose logging
  -w, --watch                  watch filesystem for changes and recreate as needed
終了したら、次のステップに進むことができます。
Hugoを使用してWebサイトを作成する
Hugoがインストールされました。次は、Hugoを使用してWebサイトとコンテンツを作成します。
次のコマンドを実行して、test.example.comという名前の新しいWebサイトを作成できます。
hugo new site test.example.com
Webサイトが正常に作成されると、次の出力が表示されます。
Congratulations! Your new Hugo site is created in /root/test.example.com. Just a few more steps and you're ready to go: 1. Download a theme into the same-named folder. Choose a theme from https://themes.gohugo.io/, or create your own with the "hugo new theme" command. 2. Perhaps you want to add some content. You can add single files with "hugo new / . ". 3. Start the built-in live server via "hugo server". Visit https://gohugo.io/ for quickstart guide and full documentation.
次のコマンドを使用して、Webサイトで作成されたすべてのファイルを一覧表示することもできます。
ls test.example.com/
次の出力が表示されます。
archetypes config.toml content data layouts static themes
次に、ディレクトリをWebサイトに変更し、次のコマンドを使用してabout.mdページを作成します。
cd test.example.com
 hugo new about.md
次の出力が表示されます。
/root/test.example.com/content/about.md created
次に、about.mdファイルを開き、コンテンツを追加します。
nano content/about.md
次の変更を行います:
---
title: "About"
date: 2019-09-10T06:57:08Z
draft: false
---

I am hitesh jethva working as a technical writer.
終了したら、ファイルを保存して閉じます。次に、次のコマンドを使用して最初の投稿を作成します。
hugo new post/first.md
次の出力が表示されます。
/root/test.example.com/content/post/first.md created
次に、ファイルfirst.mdを開き、コンテンツを追加します。
nano content/post/first.md
次の変更を行います:
---
title: "First"
date: 2019-09-10T06:58:51Z
draft: false
---

## This is my first blog post

Hi How are you!
これで、概要ページとブログ投稿が作成されました。次は、最初のテーマを設定します。
まず、ディレクトリをthemesに変更し、次のコマンドを使用してhugo-strata-themeをダウンロードします。
cd themes
 wget https://github.com/digitalcraftsman/hugo-strata-theme/archive/master.zip
ダウンロードしたら、次のコマンドを使用してダウンロードしたテーマを抽出します。
unzip master.zip
次に、抽出したテーマの名前を次のように変更します。
mv hugo-strata-theme-master hugo-strata-theme
次に、サンプルのconfig.tomlファイルの内容をthemes/hugo-strata-themeから/root/test.example.com/config.tomlにあるサイトのconfig.tomlファイルにコピーする必要があります。
次のコマンドで実行できます:
cat hugo-strata-theme/exampleSite/config.toml > ../config.toml
次に、baseurl変数を更新し、次に示すように、config.tomlファイルのこのテーマのナビゲーションに新しいaboutページを含めます。
nano ../config.toml
以下に示すようにベースURLを更新します:
baseurl = "/"
また、次の行を追加して、新しい概要ページを含めます。
 [[menu.main]]
  name = "About"
  url  = "about"
  weight = 5
終了したら、ファイルを保存して閉じます。
次に、ランディングページのレイアウトを、 themes / hugo-strata-theme / layouts / index.htmlにあるテーマのテンプレートレイアウトで更新する必要があります。 test.example.com/layouts/index.htmlへ :
nano /root/test.example.com/layouts/index.html
次のコンテンツを追加します:
{{ define "main" }}
        {{ if not .Site.Params.about.hide }}
                {{ partial "about" . }}
        {{ end }}

        {{ if not .Site.Params.portfolio.hide }}
                {{ partial "portfolio" . }}
        {{ end }}

        {{ if not .Site.Params.recentposts.hide }}
                {{ partial "recent-posts" . }}
        {{ end }}

        {{ if not .Site.Params.contact.hide }}
                {{ partial "contact" . }}
        {{ end }}
{{ end }}
終了したら、ファイルを保存して閉じます。
終了したら、次のステップに進むことができます。
これで、テーマがWebサイト用に構成されました。それはあなたのウェブサイトを構築する時です。これを行うには、ディレクトリをWebサイトに変更し、次のコマンドを使用してサイトを構築します。
cd /root/test.example.com
 hugo
次の出力が表示されます。
                   | EN
+------------------+----+
  Pages            | 17
  Paginator pages  |  0
  Non-page files   |  0
  Static files     | 26
  Processed images |  0
  Aliases          |  5
  Sitemaps         |  1
  Cleaned          |  0

Total in 18 ms
次に、Hugoサーバーを起動し、次のコマンドを実行してサーバーのIPアドレスにバインドします。
hugo server --bind=0.0.0.0 --baseUrl=http://136.243.240.39 -D -F
サーバーが正常に起動すると、次の出力が表示されます。
                   | EN
+------------------+----+
  Pages            | 17
  Paginator pages  |  0
  Non-page files   |  0
  Static files     | 26
  Processed images |  0
  Aliases          |  5
  Sitemaps         |  1
  Cleaned          |  0

Total in 28 ms
Watching for changes in /root/test.example.com/{content,data,layouts,static,themes}
Watching for config changes in /root/test.example.com/config.toml
Serving pages from memory
Running in Fast Render Mode. For full rebuilds on change: hugo server --disableFastRender
Web Server is available at http://136.243.240.39:1313/ (bind address 0.0.0.0)
Press Ctrl+C to stop
完了したら、HugoWebインターフェイスへのアクセスに進むことができます。
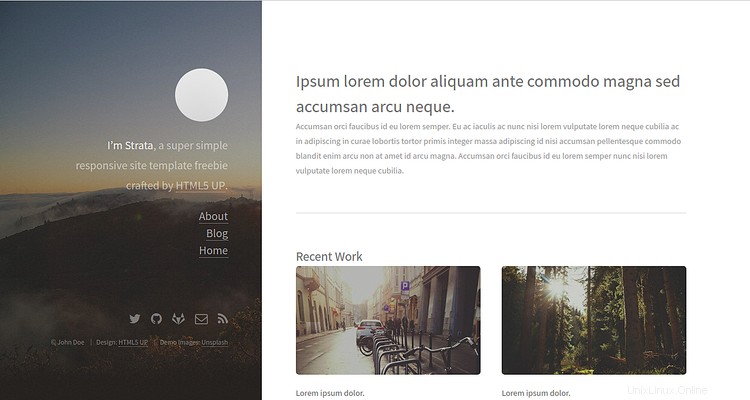
これでHugoサーバーが起動し、ポート1313でリッスンします。次に、Webブラウザーを開き、URLhttp://136.243.240.39:1313を入力します。以下に示すように、Hugoサーバーダッシュボードにリダイレクトされます。
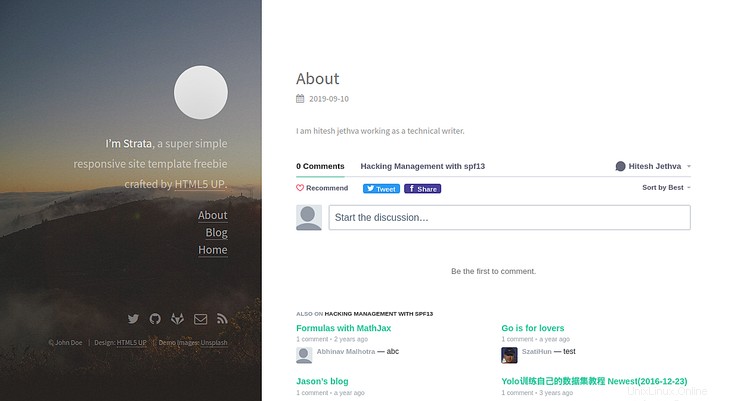
次に、概要をクリックします 左ペインにあります。次の画像に[概要]ページが表示されます。
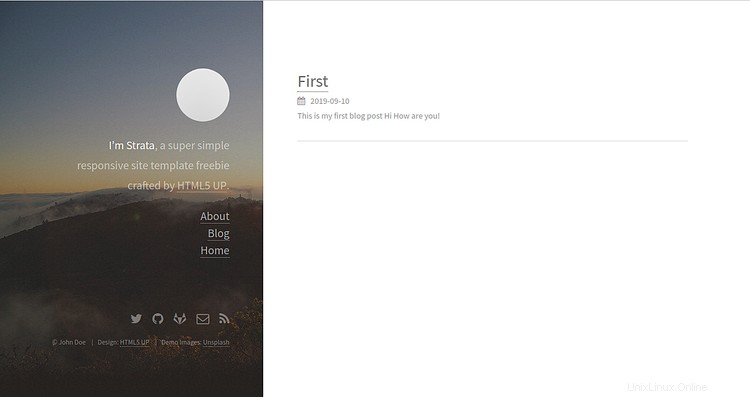
次に、ブログをクリックします 左ペインのボタン。次の画像にブログの投稿が表示されます。
上記のチュートリアルでは、Ubuntu18.04サーバーにHugoサーバーをインストールする方法を学びました。また、Hugoでページとテーマについてのサイトを作成する方法も学びました。 Hugoの詳細については、HugoDocのHugo公式ドキュメントにアクセスしてください。ご不明な点がございましたら、お気軽にお問い合わせください。