NetBoxは、コンピューターネットワークの管理と文書化に使用できる無料のオープンソースWebアプリケーションソフトウェアです。これは、Webブラウザを介してIPアドレスとデータセンターインフラストラクチャを管理するように特別に設計されています。 NetBoxはDjangoPythonフレームワークで記述されており、データベースにPostgreSQLを使用しています。 NetBoxを使用すると、仮想マシンとクラスター、データ回路、ネットワーク、コンソール、および電源接続を中央の場所から簡単に管理および文書化できます。
このチュートリアルでは、Ubuntu18.04サーバーにNetBoxをインストールする方法を説明します。
- Ubuntu18.04を実行しているサーバー。
- ルートパスワードがサーバーに設定されています。
まず、次のコマンドを使用して、システムのパッケージを最新バージョンに更新します。
apt-get update -y
apt-get upgrade -y
すべてのパッケージが更新されたら、システムを再起動してすべての構成変更を適用します。
次に、NetBoxを実行するために必要な依存関係をインストールする必要があります。次のコマンドですべてをインストールできます:
apt-get install wget ca-certificates nginx supervisor git gcc python3 python3-dev python3-pip python3-setuptools build-essential libxml2-dev libxslt1-dev libffi-dev graphviz libpq-dev libssl-dev zlib1g-dev unzip -y
すべての依存関係がインストールされたら、次のステップに進むことができます。
PostgreSQLのインストールと構成
次に、サーバーにPostgreSQLをインストールする必要があります。デフォルトでは、PostgreSQLの最新バージョンはUbuntu18.04のデフォルトリポジトリでは利用できません。したがって、PostgreSQLリポジトリをシステムに追加する必要があります。
まず、次のコマンドを使用してGPGキーをダウンロードして追加します。
wget --quiet -O - https://www.postgresql.org/media/keys/ACCC4CF8.asc | apt-key add -
次に、次のコマンドを使用してリポジトリを追加します。
nano /etc/apt/sources.list.d/postgres.list
次の行を追加します:
deb http://apt.postgresql.org/pub/repos/apt/ xanial-pgdg main
ファイルを保存して閉じます。次に、リポジトリを更新し、次のコマンドを使用してPostgreSQLをインストールします。
apt-get update -y
apt-get install postgresql postgresql-contrib -y
インストールしたら、次のコマンドでPostgreSQLのステータスを確認します。
systemctl status postgresql
次の出力が表示されます。
? postgresql.service - PostgreSQL RDBMS
   Loaded: loaded (/lib/systemd/system/postgresql.service; enabled; vendor preset: enabled)
   Active: active (exited) since Wed 2019-08-07 07:00:51 UTC; 23s ago
 Main PID: 13552 (code=exited, status=0/SUCCESS)
    Tasks: 0 (limit: 1098)
   CGroup: /system.slice/postgresql.service

Aug 07 07:00:50 hitesh systemd[1]: Starting PostgreSQL RDBMS...
Aug 07 07:00:51 hitesh systemd[1]: Started PostgreSQL RDBMS.
次に、NetBoxのデータベースとユーザーを作成する必要があります。まず、次のコマンドを使用してPostgreSQLシェルにログインします。
su - postgres
[email protected]:~$ psql
出力:
psql (11.4 (Ubuntu 11.4-1.pgdg18.04+1))
Type "help" for help.
次に、次のコマンドを使用してNetBoxのデータベースとユーザーを作成します。
postgres=# CREATE DATABASE netbox;
postgres=# CREATE USER netbox WITH PASSWORD 'password';
次に、次のコマンドを使用して、NetBoxにすべての権限を付与します。
postgres=# GRANT ALL PRIVILEGES ON DATABASE netbox TO netbox;
最後に、次のコマンドを使用してPostgreSQLシェルを終了します。
postgres=#exit
完了したら、次のステップに進むことができます。
NetBoxのインストールと構成
次のコマンドを使用して、最新バージョンのNetBoxを/optディレクトリにダウンロードできます。
cd /opt
git clone -b master https://github.com/digitalocean/netbox.git
次に、ディレクトリをnetboxに変更し、Django SECRET Keyを生成します:
cd /opt/netbox/netbox/netbox/
./generate_secret_key.py
生成されたキーが次の出力に表示されます。
+XHR3o&7K6isFk^DLc2%[email protected](jwN#tfGbV=O1hgMU$
次に、次のコマンドを使用して、デフォルトの構成ファイルの名前を変更します。
mv configuration.example.py configuration.py
次に、構成ファイルを開き、データベースの詳細と秘密鍵を定義します。
nano configuration.py
次の変更を行います:
#Replace your-server-ip with your server IP address:
# Example: ALLOWED_HOSTS = ['netbox.example.com', 'netbox.internal.local']
ALLOWED_HOSTS = ['your-server-ip']

# PostgreSQL database configuration.
DATABASE = {
    'NAME': 'netbox',         # Database name
    'USER': 'netbox',               # PostgreSQL username
    'PASSWORD': 'password',           # PostgreSQL password
    'HOST': 'localhost',      # Database server
    'PORT': '',               # Database port (leave blank for default)
}
SECRET_KEY = '+XHR3o&7K6isFk^DLc2%[email protected](jwN#tfGbV=O1hgMU$'
終了したら、ファイルを保存して閉じます。
次に、次のコマンドを使用して、NetBoxに必要なすべての依存関係をインストールします。
pip3 install -r /opt/netbox/requirements.txt
インストールしたら、次のコマンドを使用してデータベースを移行します。
cd /opt/netbox/netbox/
python3 manage.py migrate
正常に移行されると、次の出力が表示されます。
  Applying secrets.0004_tags... OK
  Applying secrets.0005_change_logging... OK
  Applying secrets.0006_custom_tag_models... OK
  Applying ipam.0021_vrf_ordering... OK
  Applying ipam.0022_tags... OK
  Applying ipam.0023_change_logging... OK
  Applying ipam.0024_vrf_allow_null_rd... OK
  Applying ipam.0025_custom_tag_models... OK
  Applying dcim.0067_device_type_remove_qualifiers... OK
  Applying dcim.0068_rack_new_fields... OK
  Applying dcim.0069_deprecate_nullablecharfield... OK
  Applying dcim.0070_custom_tag_models... OK
  Applying extras.0020_tag_data... OK
  Applying extras.0021_add_color_comments_changelog_to_tag... OK
  Applying dcim.0071_device_components_add_description... OK
  Applying dcim.0072_powerfeeds... OK
  Applying dcim.0073_interface_form_factor_to_type... OK
  Applying extras.0022_custom_links... OK
  Applying extras.0023_fix_tag_sequences... OK
  Applying ipam.0026_prefix_ordering_vrf_nulls_first... OK
  Applying ipam.0027_ipaddress_add_dns_name... OK
  Applying sessions.0001_initial... OK
  Applying taggit.0003_taggeditem_add_unique_index... OK
  Applying users.0001_api_tokens_squashed_0002_unicode_literals... OK
  Applying users.0003_token_permissions... OK
次に、NetBoxの管理者アカウントを作成する必要があります。次のコマンドで実行できます:
python3 manage.py createsuperuser
管理者のユーザー名とパスワードを入力してEnterキーを押すと、次の出力が表示されます。
Username (leave blank to use 'root'): netboxadmin
Email address: [email protected]
Password:
Password (again):
Superuser created successfully.
次に、静的ファイルを移動し、次のコマンドを使用して初期データをロードします。
python3 manage.py collectstatic
python3 manage.py loaddata initial_data
NetBox用のGunicornのインストールと構成
次に、GunicornforNetBoxをインストールする必要があります。以下に示すように、pipコマンドを使用してインストールできます。
pip3 install gunicorn
次に、次のコマンドを使用してNetBoxのGunicorn構成ファイルを作成します。
nano /opt/netbox/gunicorn_config.py
次の行を追加します:
command = '/usr/local/bin/gunicorn'
pythonpath = '/opt/netbox/netbox'
bind = 'your-server-ip:8001'
workers = 3
user = 'www-data'
終了したら、ファイルを保存して閉じます。
次に、NetBoxサービスを管理するようにSupervisorを構成する必要があります。次のコマンドで実行できます:
nano /etc/supervisor/conf.d/netbox.conf
次の行を追加します:
[program:netbox]
command = gunicorn -c /opt/netbox/gunicorn_config.py netbox.wsgi
directory = /opt/netbox/netbox/
user = www-data
ファイルを保存して閉じ、スーパーバイザサービスを再起動し、次のコマンドを使用してシステムの再起動後に開始できるようにします。
systemctl restart supervisor
systemctl enable supervisor
次のコマンドを使用して、スーパーバイザサービスを確認することもできます。
systemctl status supervisor
出力:
? supervisor.service - Supervisor process control system for UNIX
   Loaded: loaded (/lib/systemd/system/supervisor.service; enabled; vendor preset: enabled)
   Active: active (running) since Wed 2019-08-07 07:13:26 UTC; 8s ago
     Docs: http://supervisord.org
  Process: 15013 ExecStop=/usr/bin/supervisorctl $OPTIONS shutdown (code=exited, status=0/SUCCESS)
 Main PID: 15015 (supervisord)
    Tasks: 5 (limit: 1098)
   CGroup: /system.slice/supervisor.service
           ??15015 /usr/bin/python /usr/bin/supervisord -n -c /etc/supervisor/supervisord.conf
           ??15037 /usr/bin/python3 /usr/local/bin/gunicorn -c /opt/netbox/gunicorn_config.py netbox.wsgi
           ??15042 /usr/bin/python3 /usr/local/bin/gunicorn -c /opt/netbox/gunicorn_config.py netbox.wsgi
           ??15043 /usr/bin/python3 /usr/local/bin/gunicorn -c /opt/netbox/gunicorn_config.py netbox.wsgi
           ??15044 /usr/bin/python3 /usr/local/bin/gunicorn -c /opt/netbox/gunicorn_config.py netbox.wsgi

Aug 07 07:13:26 hitesh systemd[1]: Started Supervisor process control system for UNIX.
Aug 07 07:13:27 hitesh supervisord[15015]: 2019-08-07 07:13:27,087 CRIT Supervisor running as root (no user in config file)
Aug 07 07:13:27 hitesh supervisord[15015]: 2019-08-07 07:13:27,089 INFO Included extra file "/etc/supervisor/conf.d/netbox.conf" during parsing
Aug 07 07:13:27 hitesh supervisord[15015]: 2019-08-07 07:13:27,117 INFO RPC interface 'supervisor' initialized
Aug 07 07:13:27 hitesh supervisord[15015]: 2019-08-07 07:13:27,117 CRIT Server 'unix_http_server' running without any HTTP authentication check
Aug 07 07:13:27 hitesh supervisord[15015]: 2019-08-07 07:13:27,118 INFO supervisord started with pid 15015
Aug 07 07:13:28 hitesh supervisord[15015]: 2019-08-07 07:13:28,123 INFO spawned: 'netbox' with pid 15037
Aug 07 07:13:29 hitesh supervisord[15015]: 2019-08-07 07:13:29,610 INFO success: netbox entered RUNNING state, process has st
NetBox用にNginxを構成する
次に、ポート80を使用してNetBoxにアクセスするようにNginxを構成する必要があります。これを行うには、次のコマンドを使用して仮想ホスト構成ファイルを作成します。
nano /etc/nginx/sites-available/netbox
次の行を追加します:
server {
    listen 80;
    server_name your-domain-name;
    client_max_body_size 25m;

    location /static/ {
        alias /opt/netbox/netbox/static/;
    }

    location / {
        proxy_pass http://your-server-ip:8001;
    }
}
ファイルを保存して閉じます。次に、次のコマンドを使用して仮想ホストを有効にします。
ln -s /etc/nginx/sites-available/netbox.conf /etc/nginx/sites-enabled/
最後に、次のコマンドを使用してNginxサービスを再起動し、すべての構成変更を適用します。
systemctl restart nginx
NetBoxWebインターフェイスにアクセス
これでNetBoxがインストールおよび構成されたので、NetBoxWebインターフェイスにアクセスします。
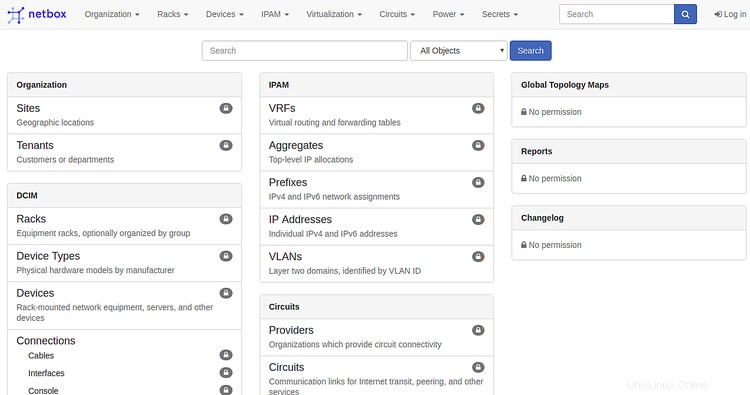
Webブラウザーを開き、URLhttp://your-domain.comを入力します。次のページにリダイレクトされます:
次に、ログインをクリックします 右上隅のボタン。次のページが表示されます:
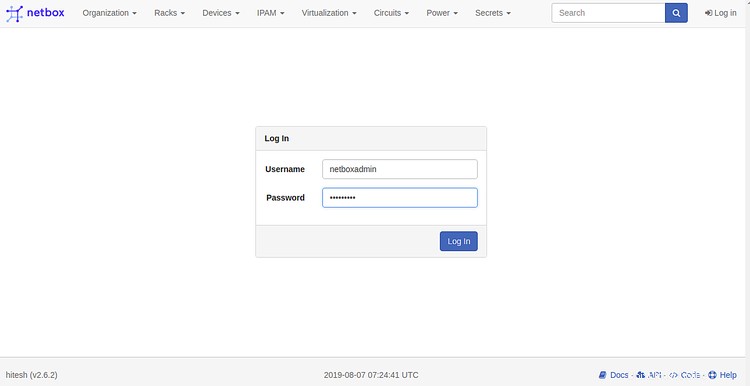
次に、管理者のユーザー名とパスワードを入力し、ログをクリックします。 で ボタン。次のページにNetBoxのデフォルトのダッシュボードが表示されます。
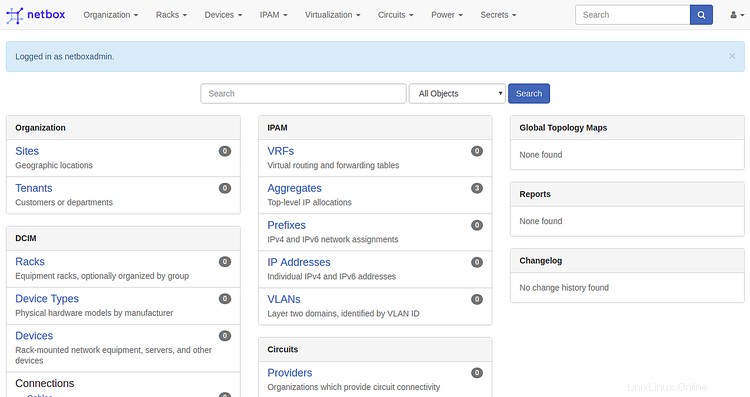
おめでとう!これで、Ubuntu18.04サーバーにNetBoxが正常にインストールおよび構成されました。これで、中央の場所からネットワークとIPアドレスを管理および文書化できます。ご不明な点がございましたら、お気軽にお問い合わせください。