OpenShiftは、RedHatによって開発された無料のオープンソースのPlatform-as-a-Serviceです。 OpenShiftは、クラウド環境でアプリケーションを開発、ホスト、スケーリングするために使用されます。 OpenShiftは、Java EE6、Ruby、PHP、Python、Perl、MongoDB、MySQL、PostgreSQLなどの多くの言語をサポートします。 OpenShiftは、1000を超える企業から信頼されている主要なクラウドおよびエンタープライズKubernetesアプリケーションプラットフォームです。 Openshiftを使用すると、要件に応じてアプリケーションを作成、変更、およびデプロイできます。
このチュートリアルでは、Ubuntu18.04LTSサーバーにシングルノードのOpenShiftOriginをインストールする方法を学習します。
- 2GB以上のRAMを搭載したUbuntu18.04を実行しているサーバー。
- ルートパスワードはサーバーで構成されています。
開始する前に、システムを最新の安定バージョンで更新してください。次のコマンドで実行できます:
apt-get update -y
apt-get upgrade -y
更新したら、サーバーを再起動してすべての構成変更を適用します。
DockerCEをインストールする
OpenShiftはDockerコンテナーで実行されます。そのため、サーバーにDockerCEをインストールする必要があります。デフォルトでは、DockerCEの最新バージョンはUbuntu18.04のデフォルトリポジトリでは利用できません。そのため、DockerCEリポジトリをシステムに追加する必要があります。
Docker CEをインストールするには、次のコマンドを使用してDockerGPGキーをダウンロードして追加します。
curl -fsSL https://download.docker.com/linux/ubuntu/gpg | apt-key add -
追加したら、次のコマンドを使用してDockerCEリポジトリを追加します。
add-apt-repository "deb [arch=amd64] https://download.docker.com/linux/ubuntu $(lsb_release -cs) stable"
次に、次のコマンドを使用してDockerCEを更新してインストールします。
apt-get update -y
apt-get install docker-ce -y
インストールしたら、次のコマンドを使用してDockerCEのステータスを確認します。
systemctl status docker
次の出力が表示されます。
? docker.service - Docker Application Container Engine
   Loaded: loaded (/lib/systemd/system/docker.service; enabled; vendor preset: enabled)
   Active: active (running) since Wed 2019-08-07 08:06:57 UTC; 33s ago
     Docs: https://docs.docker.com
 Main PID: 19052 (dockerd)
    Tasks: 8
   CGroup: /system.slice/docker.service
           ??19052 /usr/bin/dockerd -H fd:// --containerd=/run/containerd/containerd.sock

Aug 07 08:06:57 hitesh dockerd[19052]: time="2019-08-07T08:06:57.372084572Z" level=warning msg="Your kernel does not support swap memory limit"
Aug 07 08:06:57 hitesh dockerd[19052]: time="2019-08-07T08:06:57.372483783Z" level=warning msg="Your kernel does not support cgroup rt period"
Aug 07 08:06:57 hitesh dockerd[19052]: time="2019-08-07T08:06:57.372711298Z" level=warning msg="Your kernel does not support cgroup rt runtime"
Aug 07 08:06:57 hitesh dockerd[19052]: time="2019-08-07T08:06:57.373275104Z" level=info msg="Loading containers: start."
Aug 07 08:06:57 hitesh dockerd[19052]: time="2019-08-07T08:06:57.612047102Z" level=info msg="Default bridge (docker0) is assigned with an IP ad
Aug 07 08:06:57 hitesh dockerd[19052]: time="2019-08-07T08:06:57.712918131Z" level=info msg="Loading containers: done."
Aug 07 08:06:57 hitesh dockerd[19052]: time="2019-08-07T08:06:57.938574106Z" level=info msg="Docker daemon" commit=74b1e89 graphdriver(s)=overl
Aug 07 08:06:57 hitesh dockerd[19052]: time="2019-08-07T08:06:57.939341612Z" level=info msg="Daemon has completed initialization"
Aug 07 08:06:57 hitesh systemd[1]: Started Docker Application Container Engine.
Aug 07 08:06:57 hitesh dockerd[19052]: time="2019-08-07T08:06:57.989385865Z" level=info msg="API listen on /var/run/docker.sock"
完了したら、次のステップに進むことができます。
まず、GitリポジトリーからOpenShiftの最新の安定バージョンをダウンロードする必要があります。次のコマンドを使用して、GitリポジトリーからOpenShiftの最新バージョンをダウンロードできます。
cd /opt
wget https://github.com/openshift/origin/releases/download/v3.9.0/openshift-origin-client-tools-v3.9.0-191fece-linux-64bit.tar.gz
ダウンロードしたら、次のコマンドを使用してダウンロードしたファイルを抽出します。
tar -zvxf openshift-origin-client-tools-v3.9.0-191fece-linux-64bit.tar.gz
次に、ディレクトリを抽出ディレクトリに変更し、次のコマンドを使用してocbinaryを/usr / local/binディレクトリにコピーします。
cd openshift-origin-client-tools-v3.9.0-191fece-linux-64bit
cp oc /usr/local/bin/
これで、次のコマンドを使用してocのバージョンを確認できます。
oc version
次の出力が表示されます。
oc v3.9.0+191fece
kubernetes v1.9.1+a0ce1bc657
features: Basic-Auth GSSAPI Kerberos SPNEGO
次に、安全でないレジストリをdockerデーモンに追加する必要があります。次のコマンドで実行できます:
nano /etc/docker/daemon.json
次の行を追加します:
{
    "insecure-registries" : [ "172.30.0.0/16" ]
}
終了したら、ファイルを保存して閉じます。次に、Dockerサービスを再起動して、構成の変更を適用します。
systemctl restart docker
完了したら、次のステップに進むことができます。
OpenShiftクラスターを開始します
次に、以下に示すようにIPアドレスまたはホスト名を指定してOpenShiftクラスターを開始します。
oc cluster up --public-hostname=38.143.69.14
サーバーが正常に起動すると、次の出力が表示されます。
WARNING: Binding DNS on port 8053 instead of 53, which may not be resolvable from all clients.
Using Docker shared volumes for OpenShift volumes
Using public hostname IP 38.143.69.14 as the host IP
Using 38.143.69.14 as the server IP
Starting OpenShift using openshift/origin:v3.9.0 ...
OpenShift server started.

The server is accessible via web console at:
    https://38.143.69.14:8443

You are logged in as:
    User:     developer
    Password:

To login as administrator:
    oc login -u system:admin
注:サーバーのIPアドレスを38.143.69.14に置き換えてください。
次に、次のコマンドを使用してクラスターにログインします。
oc login -u system:admin
次の出力が表示されます。
Logged into "https://38.143.69.14:8443" as "system:admin" using existing credentials. You have access to the following projects and can switch between them with 'oc project': default kube-public kube-system * myproject openshift openshift-infra openshift-node openshift-web-console Using project "myproject".
これで、次のコマンドを使用してプロジェクトをデフォルトに変更できます。
oc project default
次の出力が表示されます。
Now using project "default" on server "https://38.143.69.14:8443".
次のコマンドを使用して、プロジェクトのステータスを確認できるようになりました。
oc status
次の出力が表示されます:
In project default on server https://38.143.69.14:8443

svc/docker-registry - 172.30.1.1:5000
  dc/docker-registry deploys docker.io/openshift/origin-docker-registry:v3.9.0
    deployment #1 deployed 3 minutes ago - 1 pod

svc/kubernetes - 172.30.0.1 ports 443->8443, 53->8053, 53->8053

svc/router - 172.30.106.228 ports 80, 443, 1936
  dc/router deploys docker.io/openshift/origin-haproxy-router:v3.9.0
    deployment #1 deployed 3 minutes ago - 1 pod

View details with 'oc describe /' or list everything with 'oc get all'.
OpenShiftでテストプロジェクトを作成する
これでOpenShiftがインストールされ、機能します。次に、開発者ユーザーでOpenShiftにログインします:
oc login
開発者/開発者としてユーザー名とパスワードを入力し、Enterキーを押します。次の出力が表示されます。
Authentication required for https://38.143.69.14:8443 (openshift)
Username: developer
Password:
Login successful.

You have one project on this server: "myproject"

Using project "myproject".
次に、次のコマンドを使用して新しいテストプロジェクトを作成します。
oc new-project dev --display-name="test - Dev" --description="Test Project"
次の出力が表示されます。
Now using project "dev" on server "https://38.143.69.14:8443".

You can add applications to this project with the 'new-app' command. For example, try:

    oc new-app centos/ruby-22-centos7~https://github.com/openshift/ruby-ex.git

to build a new example application in Ruby.
次に、次のコマンドを使用して、このプロジェクトで新しいRubyアプリケーションをビルドします。
oc new-app centos/ruby-22-centos7~https://github.com/openshift/ruby-ex.git
次に、次のコマンドを使用して現在のプロジェクトのステータスを確認します。
oc status
次の出力が表示されます。
In project test - Dev (dev) on server https://38.143.69.14:8443

svc/ruby-ex - 172.30.16.207:8080
  dc/ruby-ex deploys istag/ruby-ex:latest <- bc="" ruby-ex="" source="" builds="" https:="" github="" com="" openshift="" git="" on="" istag="" ruby-22-centos7:latest="" build="" 1="" running="" for="" 54="" seconds="" -="" c00ecd7:="" merge="" pull="" request="" 25="" from="" pvalena="" master="" honza="" horak="" hhorak="" redhat="">)
    deployment #1 waiting on image or update
完了したら、次のステップに進むことができます。
OpenShiftWebコンソールにアクセス
次に、Webブラウザーを開き、URL https:// your-server-ip:8443を入力します。次のページにリダイレクトされます:
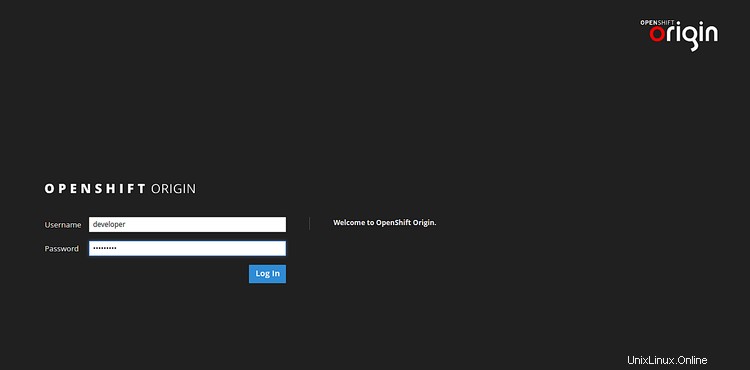
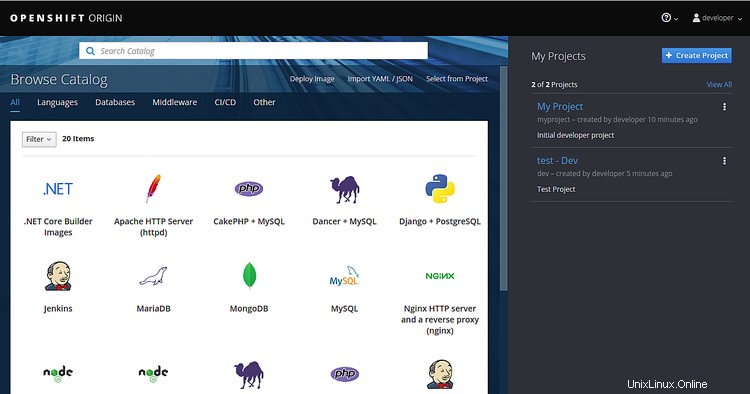
開発者のユーザー名とパスワードを入力します。次に、ログインをクリックします ボタン。次のページにOpenShiftのデフォルトダッシュボードが表示されます。
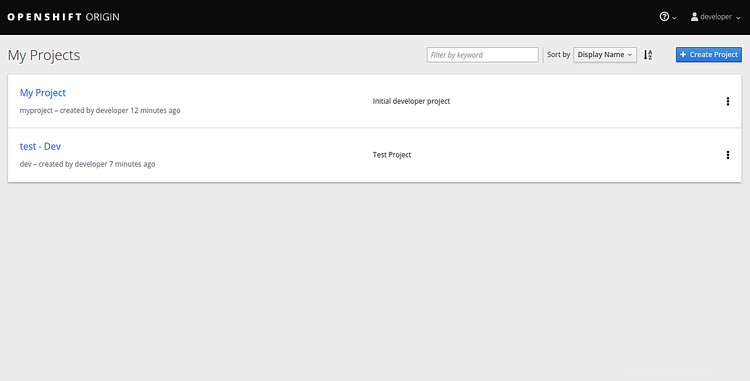
次に、マイプロジェクトをクリックします 右側に。次のページが表示されます:
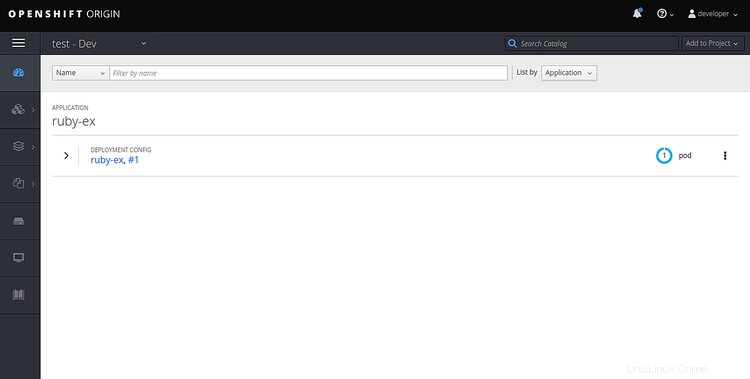
次に、テストをクリックします-Dev。デプロイされたRubyアプリが次のページに表示されます。
おめでとう!これで、Ubuntu18.04サーバーにOpenShiftが正常にインストールおよび設定されました。 OpenShiftを使用して、新しいプロジェクトを作成し、独自のアプリケーションをデプロイできます。ご不明な点がございましたら、お気軽にお問い合わせください。この記事は本番環境での使用はお勧めしません。詳細については、OpenShiftの公式ドキュメントを参照してください。