Roundcubeは、PHPで記述された無料のオープンソースのWebベースのWebメールソリューションです。これはWebベースのIMAPクライアントであるため、Webブラウザから電子メールサーバーにアクセスすることもできます。デスクトップメールクライアントからメールを読んだり送信したりする必要はありません。このチュートリアルでは、Apache Webサーバーを使用してRoundCubeをインストールし、Ubuntu 18.04 LTS(Bionic Beaver)でSSL証明書を暗号化して保護する方法を示します。
RoundCubeの機能
- MIMEサポート、メッセージ検索、スペルチェック。
- アドレス帳のLDAPディレクトリ統合。
- 複数の言語をサポートします。
- 共有/グローバルフォルダとIMAPACLのサポート。
- 高速メールボックスアクセスのための組み込みキャッシュ。
- 外部SMTPサーバーとIDNAのサポート。
- Ubuntu18.04LTSを実行しているサーバー。
- sudo権限を持つroot以外のユーザー。
LAMPサーバーをインストールする
開始する前に、パッケージリストを更新し、保留中の更新をインストールする必要があります:
sudo apt-get update
sudo apt-get upgrade
次に、次のコマンドを使用してApacheとMariaDBをインストールします。
sudo apt-get install apache2 mariadb-server php7.2 php7.2-gd php-mysql php7.2-curl php7.2-zip php7.2-ldap php7.2-mbstring php-imagick php7.2-intl php7.2-xml unzip wget curl -y
すべてのパッケージをインストールしたら、php.iniファイルのタイムゾーン設定を変更する必要があります。これは、次のコマンドで実行できます。
sudo nano /etc/php/7.2/apache2/php.ini
次の変更を行います:
date.timezone = Europe/Berlin
ファイルを保存して閉じてから、ApacheおよびMariaDBサービスを開始し、次のコマンドを使用して起動時に開始できるようにします。
sudo systemctl start apache2
sudo systemctl enable apache2
sudo systemctl start mariadb
sudo systemctl enable mariadb
まず、最新バージョンのRoundcubeをシステムにダウンロードする必要があります。次のコマンドでダウンロードできます:
cd /tmp
wget https://github.com/roundcube/roundcubemail/releases/download/1.3.8/roundcubemail-1.3.8-complete.tar.gz
ダウンロードが完了したら、次のコマンドを使用してダウンロードしたファイルを抽出します。
tar -xvzf roundcubemail-1.3.8-complete.tar.gz
次に、抽出したディレクトリをApacheWebルートディレクトリに移動します。
mv roundcubemail-1.3.8 /var/www/html/roundcube
次に、roundcubeディレクトリに適切な権限を付与します:
sudo chown -R www-data:www-data /var/www/html/roundcube
sudo chmod -R 775 /var/www/html/roundcube
デフォルトでは、MariaDBのインストールは保護されていません。したがって、最初にそれを保護する必要があります。次のスクリプトを実行することで保護できます:
mysql_secure_installation
以下に示すように、すべての質問に答えてください。
Change the password for root ? N
Remove anonymous users? Y
Disallow root login remotely? Y
Remove test database and access to it? Y
Reload privilege tables now? Y
MariaDBが保護されたら、次のコマンドを使用してMariaDBシェルにログインします。
mysql -u root -p
ルートパスワードを入力し、Roundcubeのデータベースとユーザーを作成します:
MariaDB [(none)]> CREATE DATABASE roundcubedb;
MariaDB [(none)]> CREATE USER 'roundcube'@'localhost' IDENTIFIED BY 'password';
MariaDB [(none)]> GRANT ALL PRIVILEGES ON roundcubedb.* to 'roundcube'@'localhost';
「password」という単語を選択した安全なパスワードに置き換え、このパスワードを覚えておいてください。後でroundcubeをインストールするときに必要になります。次に、特権をフラッシュし、次のコマンドを使用してMariaDBシェルを終了します。
MariaDB [(none)]> FLUSH PRIVILEGES;
MariaDB [(none)]> exit;
次に、初期テーブルをroundcubedbデータベースにインポートする必要があります。これは、次のコマンドを使用して実行できます。
cd /var/www/html/roundcube
mysql -u roundcube -p roundcubedb < SQL/mysql.initial.sql
要求されたら、roundcubeデータベースのユーザーパスワードを入力します。
Roundcube用にApacheを設定する
次に、Roundcube用のApache仮想ホストファイルを作成する必要があります。これは、次のコマンドで実行できます。
sudo nano /etc/apache2/sites-available/roundcube.conf
次の行を追加します:
<VirtualHost *:80>
        ServerName example.com
        ServerAdmin [email protected]
        DocumentRoot /var/www/html/roundcube

        ErrorLog ${APACHE_LOG_DIR}/roundcube_error.log
        CustomLog ${APACHE_LOG_DIR}/roundcube_access.log combined

        <Directory /var/www/html/roundcube>
                Options -Indexes
                AllowOverride All
                Order allow,deny
                allow from all
        </Directory>
</VirtualHost>
example.comをドメイン名に置き換えます。ファイルを保存して閉じ、次のコマンドを使用して仮想ホストファイルを有効にします。
sudo a2ensite roundcube
次に、Apacheリライトモジュールを有効にし、次のコマンドでApacheサーバーを再起動します。
sudo a2enmod rewrite
sudo systemctl restart apache2
RoundCube用に暗号化してSSLを有効にする
このステップでは、無料のLet's Encryption SSL証明書を使用して、RoundCubeのSSLを有効にします。最初のステップは、certbotをインストールすることです。SSL証明書を取得するために使用するクライアントを暗号化しましょう。
sudo apt-get install certbot python-certbot-apache
次のコマンドでSSL証明書をリクエストします:
sudo certbot --apache
重要:SSL証明書を取得するには、RoundCubeWebサイトに使用するドメイン名またはサブドメインにインターネットからアクセスできる必要があります。 Certbotは今いくつか質問をします。赤字の回答をご覧ください。
[email protected]: certbot --apache
Saving debug log to /var/log/letsencrypt/letsencrypt.log
Plugins selected: Authenticator apache, Installer apache
Enter email address (used for urgent renewal and security notices) (Enter 'c' to
cancel): [email protected]
-------------------------------------------------------------------------------
Please read the Terms of Service at
https://letsencrypt.org/documents/LE-SA-v1.2-November-15-2017.pdf. You must
agree in order to register with the ACME server at
https://acme-v01.api.letsencrypt.org/directory
-------------------------------------------------------------------------------
(A)gree/(C)ancel: a
-------------------------------------------------------------------------------
Would you be willing to share your email address with the Electronic Frontier
Foundation, a founding partner of the Let's Encrypt project and the non-profit
organization that develops Certbot? We'd like to send you email about EFF and
our work to encrypt the web, protect its users and defend digital rights.
-------------------------------------------------------------------------------
(Y)es/(N)o: n
Which names would you like to activate HTTPS for?
-------------------------------------------------------------------------------
1: roundcube.example.com
-------------------------------------------------------------------------------
Select the appropriate numbers separated by commas and/or spaces, or leave input
blank to select all options shown (Enter 'c' to cancel): 1
Obtaining a new certificate
Performing the following challenges:
http-01 challenge for roundcube.example.com
Waiting for verification...
Cleaning up challenges
Created an SSL vhost at /etc/apache2/sites-available/roundcube-le-ssl.conf
Enabled Apache socache_shmcb module
Enabled Apache ssl module
Deploying Certificate to VirtualHost /etc/apache2/sites-available/roundcube-le-ssl.conf
Enabling available site: /etc/apache2/sites-available/roundcube-le-ssl.conf
Please choose whether or not to redirect HTTP traffic to HTTPS, removing HTTP access.
-------------------------------------------------------------------------------
1: No redirect - Make no further changes to the webserver configuration.
2: Redirect - Make all requests redirect to secure HTTPS access. Choose this for
new sites, or if you're confident your site works on HTTPS. You can undo this
change by editing your web server's configuration.
-------------------------------------------------------------------------------
Select the appropriate number [1-2] then [enter] (press 'c' to cancel): 2
Redirecting vhost in /etc/apache2/sites-enabled/roundcube.conf to ssl vhost in /etc/apache2/sites-available/roundcube-le-ssl.conf
-------------------------------------------------------------------------------が正常に有効になりました
Congratulations! You have successfully enabled https://roundcube.example.com
You should test your configuration at:
https://www.ssllabs.com/ssltest/analyze.html?d=roundcube.example.com
-------------------------------------------------------------------------------
IMPORTANT NOTES:
- Congratulations! Your certificate and chain have been saved at:
/etc/letsencrypt/live/roundcube.example.com/fullchain.pem
Your key file has been saved at:
/etc/letsencrypt/live/roundcube.example.com/privkey.pem
Your cert will expire on 2019-06-25. To obtain a new or tweaked
version of this certificate in the future, simply run certbot again
with the "certonly" option. To non-interactively renew *all* of
your certificates, run "certbot renew"
- Your account credentials have been saved in your Certbot
configuration directory at /etc/letsencrypt. You should make a
secure backup of this folder now. This configuration directory will
also contain certificates and private keys obtained by Certbot so
making regular backups of this folder is ideal.
- If you like Certbot, please consider supporting our work by:
Donating to ISRG / Let's Encrypt: https://letsencrypt.org/donate
Donating to EFF: https://eff.org/donate-le
RoundCube仮想ホストにはhttpsからアクセスできます。
次に、Webブラウザーを開き、URL https://example.com/installerを入力します。 (example.comをURLのドメイン名に置き換えてください!)。次のページにリダイレクトされます:
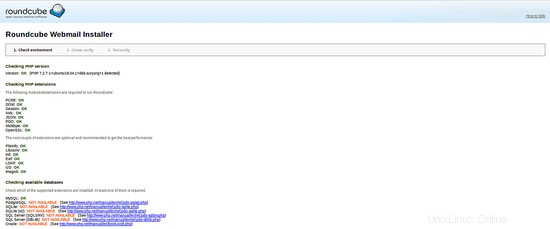

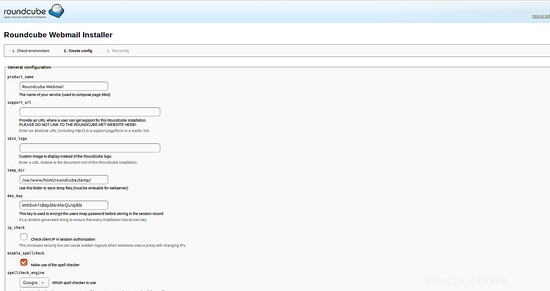
すべての要件が完了したら、次へをクリックします ボタン。次のページが表示されます:
一般的な構成:
ロギングとデータベース設定:
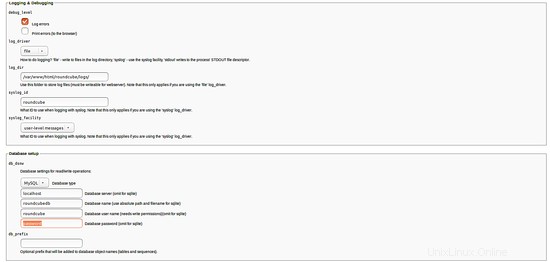
データベースのセットアップ手順で作成したroundcubedbのデータベースの詳細をここに入力します。
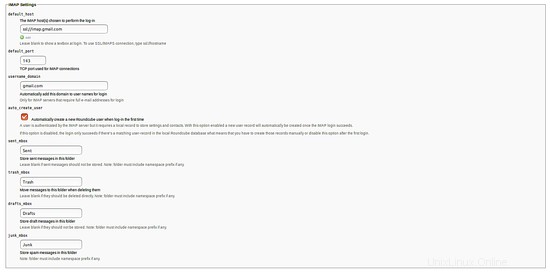
SMTPおよびIMAP設定:

プラグイン:
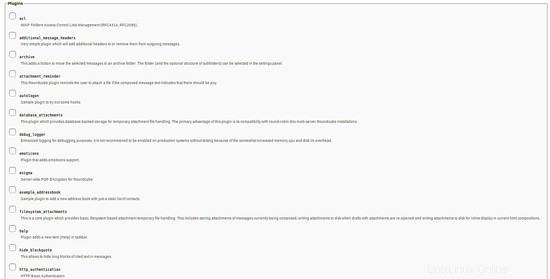
ここで、必要に応じてすべての詳細を入力し、 CREATE CONFIGをクリックします。 ボタン。次のページが表示されます:

次に、続行をクリックします ボタン。次のページが表示されます:
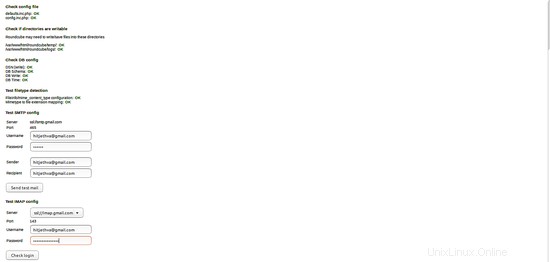
次に、ログインの確認をクリックします ボタン。インストールが完了したら、ディレクトリ/ var / www / html / roundcube/installerを削除します。
sudo rm -rf /var/www/html/roundcube/installer
次に、URL http:// your-ip-addressを使用してウェブメールにアクセスします。 またはhttp://your-domain.com メールを使用してログインします。
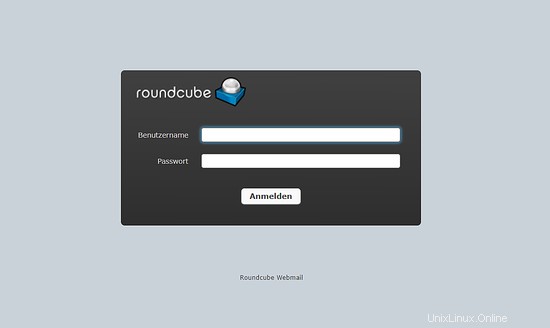
RoundCubeはUbuntu18.04LTSに正常にインストールされました。