Monicaは、Laravelフレームワークで記述された無料のオープンソースのWebベースの個人関係管理ソフトウェアです。それはあなたの友人や家族についてのすべての重要な詳細を追跡するために使用されます。 Monicaを使用すると、連絡先の追加と管理、連絡先間の関係の定義、誕生日の自動リマインダーの設定を簡単に行うことができます。 Monicaを使用してソーシャルメディアまたはSMSで行われた会話を追跡することもできます。モニカには、コンタクトシートに表示するセクションを定義する機能があります。
このチュートリアルでは、Ubuntu18.04サーバーにMonicaPRMをインストールする方法を学習します。
- Ubuntu18.04を実行しているサーバー。
- ルートパスワードがサーバーに設定されています。
まず、システムを最新バージョンに更新する必要があります。次のコマンドで実行できます:
apt-get update -y
apt-get upgrade -y
システムが更新されたら、システムを再起動してこれらの変更を適用します。
Nginx、MariaDB、PHPをインストール
まず、Nginx、MariaDBサーバー、PHP、およびその他のPHPモジュールをサーバーにインストールする必要があります。次のコマンドを実行して、それらすべてをインストールできます。
apt-get install nginx mariadb-server php7.2 php7.2-cli php7.2-fpm php7.2-common php7.2-mbstring php7.2-xml php7.2-mysql php7.2-curl php7.2-zip php7.2-intl git wget unzip -y
すべてのパッケージがインストールされたら、次のステップに進むことができます。
デフォルトでは、MariaDBのインストールは保護されていないため、最初に保護する必要があります。次のコマンドで保護できます:
mysql_secure_installation
    Enter current password for root (enter for none):
    Set root password? [Y/n]: N
    Remove anonymous users? [Y/n]: Y
    Disallow root login remotely? [Y/n]: Y
    Remove test database and access to it? [Y/n]:  Y
    Reload privilege tables now? [Y/n]:  Y
MariaDBが保護されたら、次のコマンドを使用してMariaDBシェルにログインします。
mysql -u root -p
ルートパスワードを入力します。次に、次のコマンドを使用してMonicaのデータベースとユーザーを作成します。
MariaDB [(none)]> create database monica;
MariaDB [(none)]> create user [email protected] identified by 'password';
次に、次のコマンドを使用して、モニカにすべての特権を付与します。
MariaDB [(none)]> GRANT ALL ON monica.* TO 'monica'@'localhost' IDENTIFIED BY 'password' WITH GRANT OPTION;
次に、特権をフラッシュし、次のコマンドを使用してMariaDBシェルを終了します。
MariaDB [(none)]> FLUSH PRIVILEGES;
MariaDB [(none)]> EXIT;
ComposerとNode.jをインストールします
次に、Composerをシステムにインストールする必要があります。 Composerは、PHPプログラミング言語のパッケージマネージャーです。 PHPによって必要なすべての依存関係をインストールするために使用されます。
まず、次のコマンドを使用してコンポーザーインストーラーをダウンロードします。
php -r "copy('https://getcomposer.org/installer', 'composer-setup.php');" 次に、スクリプトSHA-384ハッシュをComposer公開鍵ページにある最新のインストーラーハッシュと比較して、スクリプトのデータ整合性を検証する必要があります。次のコマンドで実行できます:
HASH="$(wget -q -O - https://composer.github.io/installer.sig)"
php -r "if (hash_file('SHA384', 'composer-setup.php') === '$HASH') { echo 'Installer verified'; } else { echo 'Installer corrupt'; unlink('composer-setup.php'); } echo PHP_EOL;"
すべてが正常に機能する場合は、次の出力が表示されます。
Installer verified
次に、次のコマンドを使用してComposerをインストールします。
php composer-setup.php --install-dir=/usr/local/bin --filename=composer
次の出力が表示されます。
All settings correct for using Composer
Downloading...

Composer (version 1.8.4) successfully installed to: /usr/local/bin/composer
Use it: php /usr/local/bin/composer
次に、次のコマンドを使用してNode.jsをインストールします。
curl -sL https://deb.nodesource.com/setup_10.x | bash -
apt-get install -y nodejs
Monicaをインストールして構成する
次に、Monicaのディレクトリ構造を作成する必要があります。これは、次のコマンドで実行できます。
mkdir -p /var/www/monica
次に、ディレクトリをmonicaに変更し、次のコマンドを使用して最新バージョンのMonicaをダウンロードします。
cd /var/www/monica
git clone https://github.com/monicahq/monica.git .
git checkout tags/v2.1.1
次の出力が表示されます。
Note: checking out 'tags/v2.1.1'. You are in 'detached HEAD' state. You can look around, make experimental changes and commit them, and you can discard any commits you make in this state without impacting any branches by performing another checkout. If you want to create a new branch to retain commits you create, you may do so (now or later) by using -b with the checkout command again. Example: git checkout -bHEAD is now at dcfd15fa Update translations (#1324)
次に、サンプル環境変数ファイルの名前を変更する必要があります。次のコマンドで実行できます:
mv .env.example .env
次に、.envファイルを開き、データベースとユーザー名を定義します。
nano .env
次の変更を行います:
# Database information
# To keep this information secure, we urge you to change the default password
DB_CONNECTION=mysql
DB_HOST=127.0.0.1
DB_PORT=3306
# You can use mysql unix socket if available, it overrides DB_HOST and DB_PORT values.
#DB_UNIX_SOCKET=/var/run/mysqld/mysqld.sock
DB_DATABASE=monica
DB_USERNAME=monica
DB_PASSWORD=password
次に、次のコマンドでComposerを使用して、必要なすべてのPHP依存関係をインストールします。
composer install --no-interaction --no-suggest --no-dev --ignore-platform-reqs
次に、次のコマンドを使用してすべてのフロントエンド依存関係をインストールします。
npm install
次に、次のコマンドを使用してJSとCSSをコンパイルします。
npm run production
次に、次のコマンドを使用してアプリケーションキーを生成します。
php artisan key:generate
次に、次のコマンドを使用してデータベースを移行およびシードします。
php artisan setup:production
次の出力が表示されます。
 You are about to setup and configure Monica. Do you wish to continue? (yes/no) [no]:
 > yes


-----------------------------
|
| Welcome to Monica v2.1.1
|
-----------------------------
| You can now register to the first account by opening the application:
| URL:      http://localhost
-----------------------------
Setup is done. Have fun.
次に、次のコマンドを使用して、monicaディレクトリに適切な権限を付与します。
chown -R www-data:www-data /var/www/monica
完了したら、次のステップに進むことができます。
Monica用にNginxを構成する
次に、Monica用のNginx仮想ホストファイルを作成する必要があります。これを行うには、次のコマンドを使用して/ etc / nginx /sites-available/ディレクトリにmonica.confファイルを作成します。
nano /etc/nginx/sites-available/monica.conf
次の行を追加します:
server {
    listen 80;
    listen [::]:80;

    server_name example.com;
    root /var/www/monica/public;

    index index.php;

    location / {
        try_files $uri $uri/ /index.php?$args;
    }

    location ~ \.php$ {
        include snippets/fastcgi-php.conf;
        fastcgi_pass unix:/var/run/php/php7.2-fpm.sock;
    }
}
ファイルを保存して閉じます。次に、次のコマンドを使用してNginxサービスを再起動します。
systemctl restart nginx
次のコマンドでNginxのステータスを確認できるようになりました:
systemctl status nginx
出力:
? nginx.service - A high performance web server and a reverse proxy server
   Loaded: loaded (/lib/systemd/system/nginx.service; enabled; vendor preset: enabled)
   Active: active (running) since Fri 2019-02-15 10:03:53 UTC; 2min 12s ago
     Docs: man:nginx(8)
  Process: 22598 ExecStop=/sbin/start-stop-daemon --quiet --stop --retry QUIT/5 --pidfile /run/nginx.pid (code=killed, signal=TERM)
  Process: 22612 ExecStart=/usr/sbin/nginx -g daemon on; master_process on; (code=exited, status=0/SUCCESS)
  Process: 22601 ExecStartPre=/usr/sbin/nginx -t -q -g daemon on; master_process on; (code=exited, status=0/SUCCESS)
 Main PID: 22613 (nginx)
    Tasks: 2 (limit: 1114)
   CGroup: /system.slice/nginx.service
           ??22613 nginx: master process /usr/sbin/nginx -g daemon on; master_process on;
           ??22615 nginx: worker process

Feb 15 10:03:53 ubuntu1804 systemd[1]: nginx.service: Failed with result 'timeout'.
Feb 15 10:03:53 ubuntu1804 systemd[1]: Stopped A high performance web server and a reverse proxy server.
Feb 15 10:03:53 ubuntu1804 systemd[1]: Starting A high performance web server and a reverse proxy server...
Feb 15 10:03:53 ubuntu1804 systemd[1]: nginx.service: Failed to parse PID from file /run/nginx.pid: Invalid argument
Feb 15 10:03:53 ubuntu1804 systemd[1]: Started A high performance web server and a reverse proxy server.
これで、Monicaがインストールおよび構成されました。モニカのウェブインターフェースにアクセスする時が来ました。
次に、Webブラウザーを開き、URLhttp://example.comを入力します。次のページにリダイレクトされます:
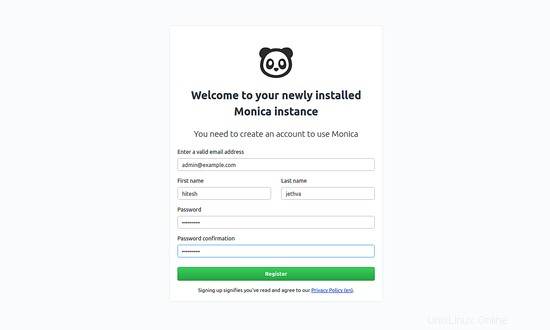
メールアドレス、名前、パスワードを入力してください。次に、[登録]ボタンをクリックします。次のページにMonicaダッシュボードが表示されます。
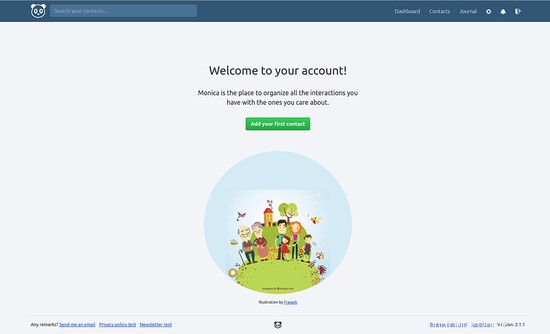
おめでとう!これで、Ubuntu18.04サーバーにMonicaが正常にインストールされました。中央の場所からMonicaを使用して連絡先を簡単に管理できるようになりました。ご不明な点がございましたら、お気軽にお問い合わせください。