NGINX( "engine x" と発音) )は、高い同時実行性を念頭に置いて設計されたオープンソースのウェブサーバーソフトウェアであり、 HTTP/HTTPSサーバーとして使用できます。 、リバースプロキシサーバー 、メールプロキシサーバー 、ソフトウェアロードバランサー 、TLSターミネータ 、キャッシュサーバー ...
これは非常にモジュール化されたソフトウェアです。 GZIPやSSLなど、一見「組み込み」に見えるソフトウェアの一部でさえ、実際には、ビルド時に有効または無効にできるモジュールとしてビルドされます。
コアがあります (ネイティブ )モジュール およびサードパーティ(外部)モジュール コミュニティによって作成されました。現在、利用できるサードパーティのモジュールは100を超えています。
Cで書かれています 言語、それは非常に高速で軽量なソフトウェアです。
ソースコードからのNGINXのインストールは比較的「簡単」です。最新バージョンのNGINXソースコードをダウンロードし、構成、ビルド、インストールします。
メインラインをダウンロードするかどうかを選択する必要があります または安定 バージョンですが、それらの構築はまったく同じです。

このチュートリアルでは、オープンソースバージョンのNGINXで利用可能なすべてのモジュールを使用してNGINXを構築し、メインラインを使用します。 1.15.0のバージョン この記事の執筆時点で。新しいバージョンが利用可能になったら、バージョン番号を更新します。
NGINXオープンソースには2つのバージョンがあります:
- メインライン –最新の機能とバグ修正が含まれており、常に最新です。信頼性はありますが、いくつかの実験モジュールが含まれている可能性があり、いくつかの新しいバグが含まれている可能性もあります。
- 安定 –すべての最新機能が含まれているわけではありませんが、常にメインラインバージョンにバックポートされる重大なバグ修正があります。
NGINXには、利用できる2種類のモジュールがあります。コアモジュール およびサードパーティモジュール 。
コアモジュールはコアNGINX開発者によって構築され、ソフトウェア自体の一部です。
サードパーティのモジュールはコミュニティによって構築されており、それらを使用してNGINX機能を拡張できます。役立つサードパーティモジュールはたくさんありますが、その中で最も有名なものは、PageSpeed、ModSecurity、RTMP、Luaなどです...
静的モジュールは、最初のバージョンからNGINXに存在します。動的モジュールは、2016年2月にNGINX1.9.11+で導入されました。
静的モジュールの場合、NGINXバイナリを構成するモジュールのセットは、コンパイル時に./configureによって固定されます。 脚本。静的モジュールは--with-foo_bar_moduleを使用します または--add-module=PATH 構文。
コア(標準)モジュールを動的としてコンパイルするには、=dynamicを追加します 例:--with-http_image_filter_module=dynamic 。
サードパーティのモジュールを動的としてコンパイルするには、--add-dynamic-module=/path/to/moduleを使用します 構文を入力してから、load_moduleを使用してロードします nginx.confのグローバルコンテキストでのディレクティブ ファイル。
他のUNIX/Linuxソフトウェアと比較すると、NGINXは非常に軽量で、ライブラリへの依存関係はあまりありません。デフォルトのビルド構成は、インストールする3つのライブラリのみに依存します: OpenSSL / LibreSSL / BoringSSL 、 Zlib およびPCRE 。
- 必須要件:
- GNUコンパイラコレクション( GCC )
- 1.0.2間のOpenSSLライブラリバージョン - 1.1.1 またはLibreSSLライブラリまたはBoringSSLライブラリ
- 1.1.3間のZlibライブラリバージョン - 1.2.11
- 4.4間のPCREライブラリバージョン - 8.42
- オプションの要件:
- Perl
- LibGD
- MaxMindGeoIPレガシーCライブラリ
- libxml2
- libxslt
注 :NGINXは、 LibreSSLに対してコンパイルすることもできます およびBoringSSL OpenSSLの代わりに暗号化ライブラリ 。
- Ubuntu18.04LTSを実行しているサーバー。
- sudo権限を持つroot以外のユーザー。
Ubuntuのバージョンを確認してください:
lsb_release -ds
# Ubuntu 18.04 LTS
タイムゾーンを設定します:
timedatectl list-timezones
sudo timedatectl set-timezone 'Region/City'
オペレーティングシステムのパッケージを更新します:
sudo apt update && sudo apt upgrade -y
NGINXは、 Cで記述されたプログラムです。 、したがって、最初にコンパイラツールをインストールする必要があります。 build-essentialをインストールします 、git およびtree パッケージ:
sudo apt install -y build-essential git tree
NGINXソースコードの最新のメインラインバージョンをダウンロードして解凍します。 NGINXソースコードは、ほとんどのUnixおよびLinuxソフトウェアと同様に、圧縮アーカイブ(gzip圧縮されたtarball)として配布されます。
wget https://nginx.org/download/nginx-1.15.0.tar.gz && tar zxvf nginx-1.15.0.tar.gz
必須のNGINX依存関係のソースコードをダウンロードして抽出します:
# PCRE version 8.42
wget https://ftp.pcre.org/pub/pcre/pcre-8.42.tar.gz && tar xzvf pcre-8.42.tar.gz

# zlib version 1.2.11
wget https://www.zlib.net/zlib-1.2.11.tar.gz && tar xzvf zlib-1.2.11.tar.gz

# OpenSSL version 1.1.0h
wget https://www.openssl.org/source/openssl-1.1.0h.tar.gz && tar xzvf openssl-1.1.0h.tar.gz
オプションのNGINX依存関係をインストールします:
sudo add-apt-repository -y ppa:maxmind/ppa
sudo apt update && sudo apt upgrade -y
sudo apt install -y perl libperl-dev libgd3 libgd-dev libgeoip1 libgeoip-dev geoip-bin libxml2 libxml2-dev libxslt1.1 libxslt1-dev
すべての.tar.gzをクリーンアップします ファイル。もう必要ありません:
rm -rf *.tar.gz
NGINXソースディレクトリを入力します:
cd ~/nginx-1.15.0
treeを使用してNGINXソースコードを構成するディレクトリとファイルを適切にリストします。 ユーティリティ:
tree -L 2 .
NGINXのマニュアルページを/usr/share/man/man8/にコピーします ディレクトリ:
sudo cp ~/nginx-1.15.0/man/nginx.8 /usr/share/man/man8
sudo gzip /usr/share/man/man8/nginx.8
ls /usr/share/man/man8/ | grep nginx.8.gz
# Check that Man page for NGINX is working:
man nginx
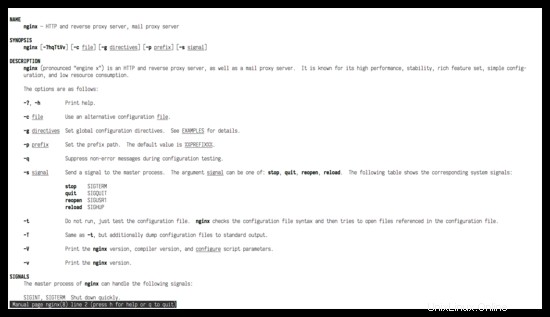
ヘルプが必要な場合は、次を実行して、最新のNGINXコンパイル時オプションの完全なリストを確認できます。
./configure --help
# To see want core modules can be build as dynamic run:
./configure --help | grep -F =dynamic
NGINXの構成、コンパイル、インストール:
./configure --prefix=/etc/nginx \
            --sbin-path=/usr/sbin/nginx \
            --modules-path=/usr/lib/nginx/modules \
            --conf-path=/etc/nginx/nginx.conf \
            --error-log-path=/var/log/nginx/error.log \
            --pid-path=/var/run/nginx.pid \
            --lock-path=/var/run/nginx.lock \
            --user=nginx \
            --group=nginx \
            --build=Ubuntu \
            --builddir=nginx-1.15.0 \
            --with-select_module \
            --with-poll_module \
            --with-threads \
            --with-file-aio \
            --with-http_ssl_module \
            --with-http_v2_module \
            --with-http_realip_module \
            --with-http_addition_module \
            --with-http_xslt_module=dynamic \
            --with-http_image_filter_module=dynamic \
            --with-http_geoip_module=dynamic \
            --with-http_sub_module \
            --with-http_dav_module \
            --with-http_flv_module \
            --with-http_mp4_module \
            --with-http_gunzip_module \
            --with-http_gzip_static_module \
            --with-http_auth_request_module \
            --with-http_random_index_module \
            --with-http_secure_link_module \
            --with-http_degradation_module \
            --with-http_slice_module \
            --with-http_stub_status_module \
            --with-http_perl_module=dynamic \
            --with-perl_modules_path=/usr/share/perl/5.26.1 \
            --with-perl=/usr/bin/perl \
            --http-log-path=/var/log/nginx/access.log \
            --http-client-body-temp-path=/var/cache/nginx/client_temp \
            --http-proxy-temp-path=/var/cache/nginx/proxy_temp \
            --http-fastcgi-temp-path=/var/cache/nginx/fastcgi_temp \
            --http-uwsgi-temp-path=/var/cache/nginx/uwsgi_temp \
            --http-scgi-temp-path=/var/cache/nginx/scgi_temp \
            --with-mail=dynamic \
            --with-mail_ssl_module \
            --with-stream=dynamic \
            --with-stream_ssl_module \
            --with-stream_realip_module \
            --with-stream_geoip_module=dynamic \
            --with-stream_ssl_preread_module \
            --with-compat \
            --with-pcre=../pcre-8.42 \
            --with-pcre-jit \
            --with-zlib=../zlib-1.2.11 \
            --with-openssl=../openssl-1.1.0h \
            --with-openssl-opt=no-nextprotoneg \
            --with-debug


make
sudo make install
NGINXをビルドしたら、ホームに移動します(~ )ディレクトリ:
cd ~
シンボリックリンク/usr/lib/nginx/modules /etc/nginx/modulesへ ディレクトリ。 etc/nginx/modules NGINXモジュールの標準的な場所です:
sudo ln -s /usr/lib/nginx/modules /etc/nginx/modules
NGINXバージョン、コンパイラバージョンを印刷し、スクリプトパラメータを構成します。
sudo nginx -V
# nginx version: nginx/1.15.0 (Ubuntu)
# built by gcc 7.3.0 (Ubuntu 7.3.0-16ubuntu3)
# built with OpenSSL 1.1.0h  27 Mar 2018
# TLS SNI support enabled
# configure arguments: --prefix=/etc/nginx --sbin-path=/usr/sbin/nginx --modules-path=/usr/lib/nginx/modules
# . . .
# . . .
NGINXシステムグループとユーザーを作成します:
sudo adduser --system --home /nonexistent --shell /bin/false --no-create-home --disabled-login --disabled-password --gecos "nginx user" --group nginx
NGINX構文と潜在的なエラーを確認してください:
sudo nginx -t
# Will throw this error -> nginx: [emerg] mkdir() "/var/cache/nginx/client_temp" failed (2: No such file or directory)

# Create NGINX cache directories and set proper permissions
sudo mkdir -p /var/cache/nginx/client_temp /var/cache/nginx/fastcgi_temp /var/cache/nginx/proxy_temp /var/cache/nginx/scgi_temp /var/cache/nginx/uwsgi_temp
sudo chmod 700 /var/cache/nginx/*
sudo chown nginx:root /var/cache/nginx/*

# Re-check syntax and potential errors.
sudo nginx -t
NGINX systemdユニットファイルを作成します:
sudo vim /etc/systemd/system/nginx.service
以下のコンテンツをコピーして/etc/systemd/system/nginx.serviceに貼り付けます ファイル:
[Unit]
Description=nginx - high performance web server
Documentation=https://nginx.org/en/docs/
After=network-online.target remote-fs.target nss-lookup.target
Wants=network-online.target

[Service]
Type=forking
PIDFile=/var/run/nginx.pid
ExecStartPre=/usr/sbin/nginx -t -c /etc/nginx/nginx.conf
ExecStart=/usr/sbin/nginx -c /etc/nginx/nginx.conf
ExecReload=/bin/kill -s HUP $MAINPID
ExecStop=/bin/kill -s TERM $MAINPID

[Install]
WantedBy=multi-user.target
NGINXを起動時に起動し、すぐにNGINXを起動できるようにします:
sudo systemctl enable nginx.service
sudo systemctl start nginx.service
再起動後にNGINXが自動的に開始されるかどうかを確認します:
sudo systemctl is-enabled nginx.service
# enabled
次のいずれかのコマンドを実行して、NGINXが実行されているかどうかを確認します。
sudo systemctl status nginx.service
# or
ps aux | grep nginx
# or
curl -I 127.0.0.1
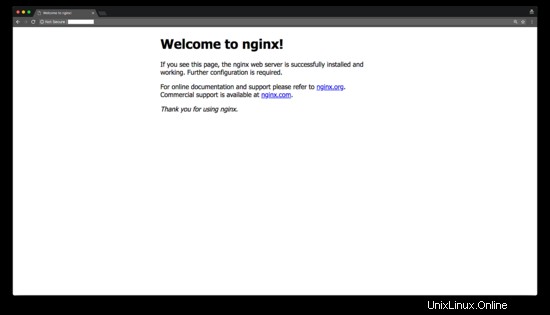
ブラウザを開いてドメイン/ IPアドレスに移動し、デフォルトのNGINXページを表示することもできます。これは、NGINXが稼働していることを示しています。
複雑でないファイアウォールを作成する( UFW )NGINXアプリケーションプロファイル:
sudo vim /etc/ufw/applications.d/nginx
以下のコンテンツをコピーして/etc/ufw/applications.d/nginxに貼り付けます ファイル:
[Nginx HTTP]
title=Web Server (Nginx, HTTP)
description=Small, but very powerful and efficient web server
ports=80/tcp

[Nginx HTTPS]
title=Web Server (Nginx, HTTPS)
description=Small, but very powerful and efficient web server
ports=443/tcp

[Nginx Full]
title=Web Server (Nginx, HTTP + HTTPS)
description=Small, but very powerful and efficient web server
ports=80,443/tcp
UFWアプリケーションプロファイルが作成され、認識されていることを確認します:
sudo ufw app list

# Available applications:
 # Nginx Full
 # Nginx HTTP
 # Nginx HTTPS
 # OpenSSH
NGINXはデフォルトで、バックアップ.defaultを生成します /etc/nginx内のファイル 。 .defaultを削除します /etc/nginxのファイル ディレクトリ:
sudo rm /etc/nginx/*.default
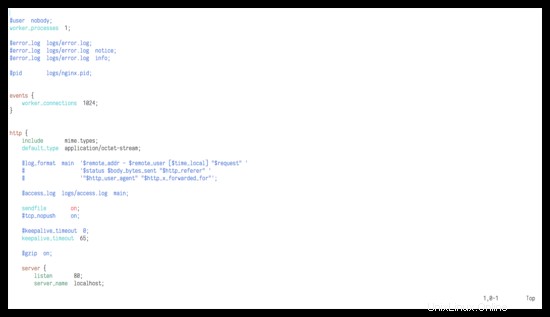
VimエディターのNGINX構成のシンタックスハイライトを~/.vimに配置します :
# For regular non-root user
mkdir ~/.vim/
cp -r ~/nginx-1.15.0/contrib/vim/* ~/.vim/
# For root user
sudo mkdir /root/.vim/
sudo cp -r ~/nginx-1.15.0/contrib/vim/* /root/.vim/
注 :上記の手順を実行すると、VimエディターでNGINX構成ファイルを編集するときに構文が強調表示されます。
conf.dを作成します 、snippets 、sites-available およびsites-enabled /etc/nginxのディレクトリ ディレクトリ:
sudo mkdir /etc/nginx/{conf.d,snippets,sites-available,sites-enabled} NGINXログファイルの権限とグループ所有権を変更します:
sudo chmod 640 /var/log/nginx/*
sudo chown nginx:adm /var/log/nginx/access.log /var/log/nginx/error.log
NGINXのログローテーション構成を作成します。
sudo vim /etc/logrotate.d/nginx
ファイルに以下のテキストを入力し、保存して終了します:
/var/log/nginx/*.log {
    daily
    missingok
    rotate 52
    compress
    delaycompress
    notifempty
    create 640 nginx adm
    sharedscripts
    postrotate
            if [ -f /var/run/nginx.pid ]; then
                    kill -USR1 `cat /var/run/nginx.pid`
            fi
    endscript
}
を強制終了します。 ダウンロードしたすべてのファイルをホームディレクトリから削除します:
cd ~
rm -rf nginx-1.15.0/ openssl-1.1.0h/ pcre-8.42/ zlib-1.2.11/
それでおしまい。これで、ソースコードからビルドして最新バージョンのNGINXをインストールできました。 OpenSSLなどのいくつかの重要なライブラリに対して静的にコンパイルされます。多くの場合、OpenSSLのシステム提供バージョンは古くなっています。新しいバージョンのOpenSSLでインストールするこの方法を使用すると、CHACHA20_POLY1305などの新しい暗号を利用できます。 およびTLS1.3などのプロトコル OpenSSL1.1.1. また、独自のバイナリをコンパイルすることで、NGINXが提供する機能を調整できます。これは、ビルド済みのバイナリをインストールするよりもはるかに柔軟です。