Seafileは、無料のオープンソースのクラウドベースのファイル共有プラットフォームであり、ファイルの保存や複数のデバイス間でのデータの同期に使用できます。 Seafileは、自己ホスト型の高性能ストレージシステムであり、独自のプライベートサーバーでホストできます。 Seafileは無料で使用でき、OwnCloud、NextCloud、Googleドライブ、DropBoxなどの他のストレージプロバイダーと非常によく似ています。
Seafileを使用すると、PCやモバイルデバイス間でファイル、連絡先、データにアクセスして同期できます。
Seafileには、クライアント暗号化のサポート、バージョン管理のサポート、LDAP認証、2要素認証、アンチウイルス統合、Office Webアプリ統合、パブリックリンク共有、信頼性の高いファイル同期、ドライブクライアントサポートなどの豊富な機能セットが付属しています。 。
このチュートリアルでは、Ubuntu18.04でリバースプロキシとしてNginxを使用してSeafileサーバーをインストールおよび構成する方法について説明します。
前提条件
- Atlantic.Netクラウドプラットフォーム上の新しいUbuntu18.04VPS。
- VPSIPアドレスを指す有効なドメイン名。このチュートリアルでは、seafile.example.comを使用します。
注 :大西洋DNSガイドを参照してDNSレコードを管理できます。
ステップ1-Atlantic.Netクラウドサーバーを作成する
まず、Atlantic.Netクラウドサーバーにログインします。 2GB以上のRAMを搭載したオペレーティングシステムとしてUbuntu18.04を選択して、新しいサーバーを作成します。 SSH経由でクラウドサーバーに接続し、ページの上部で強調表示されているクレデンシャルを使用してログインします。
Ubuntu 18.04サーバーにログインしたら、次のコマンドを実行して、ベースシステムを最新の利用可能なパッケージで更新します。
apt-get update -y
ステップ2–必要な依存関係をインストールする
まず、Seafileサーバーのインストールに必要なすべての依存関係をインストールする必要があります。次のコマンドを実行して、それらすべてをインストールできます。
apt-get install python2.7 libpython2.7 python-setuptools python-pil python-ldap python-urllib3 ffmpeg python-pip python-mysqldb python-memcache python-requests unzip wget -y
すべての依存関係がインストールされたら、次のステップに進むことができます。
ステップ3–NginxとMariaDBをインストールする
次に、サーバーにNginxWebサーバーとMariaDBデータベースサーバーをインストールする必要があります。次のコマンドを実行してインストールできます:
apt-get install nginx mariadb-server mariadb-client -y
インストールが完了したら、NginxおよびMariaDBサービスを開始し、システムの再起動後に開始できるようにします。
systemctl start nginx
systemctl start mariadb
systemctl enable nginx
systemctl enable mariadb
終了したら、次のステップに進むことができます。
ステップ4–Seafile用のデータベースを作成する
Seafileは、Seahub、Seafileサーバー、Ccnetサーバーの3つの主要コンポーネントで構成されています。各コンポーネントには、データを格納するための個別のデータベースが必要です。これらのコンポーネントごとに個別のデータベースを作成する必要があります。
これを行うには、次のコマンドを使用してMariaDBシェルにログインします。
mysql -u root -p
プロンプトが表示されたらrootパスワードを入力し、次のコマンドを使用して必要なデータベースを作成します。
CREATE DATABASE seafiledb character set = 'utf8';
CREATE DATABASE ccnetdb character set = 'utf8';
CREATE DATABASE seahubdb character set = 'utf8';
次に、次のコマンドを使用してデータベースユーザーを作成します。
CREATE USER 'seafileuser'@'localhost' IDENTIFIED BY 'password';
次に、次のコマンドを使用して、Seafileデータベースユーザーにすべての権限を付与します。
GRANT ALL ON seafiledb.* TO 'seafileuser'@'localhost' IDENTIFIED BY 'password' WITH GRANT OPTION;
GRANT ALL ON ccnetdb.* TO 'seafileuser'@'localhost' IDENTIFIED BY 'password' WITH GRANT OPTION;
GRANT ALL ON seahubdb.* TO 'seafileuser'@'localhost' IDENTIFIED BY 'password' WITH GRANT OPTION;
次に、特権をフラッシュし、次のコマンドを使用してMariaDBシェルを終了します。
FLUSH PRIVILEGES;
EXIT;
この時点で、Seafileデータの保存に必要なすべてのデータベースが作成されました。
ステップ5–Seafileサーバーをインストールする
次に、wgetコマンドを使用して公式Webサイトから最新バージョンのSeafileをダウンロードします。
wget https://download.seadrive.org/seafile-server_7.0.5_x86-64.tar.gz
ダウンロードしたら、次のコマンドを使用してダウンロードしたファイルを抽出します。
tar -xvzf seafile-server_7.0.5_x86-64.tar.gz
次に、抽出したディレクトリをNginxWebルートディレクトリにコピーします。
cp -r seafile-server-7.0.5 /var/www/html/seafile
次に、次のコマンドを使用してSeafileインストールスクリプトを開始します。
cd /var/www/html/seafile
./setup-seafile-mysql.sh
インストール中に、以下に示すようにいくつかの質問に答えるように求められます。
Checking python on this machine ...
  Checking python module: python-mysqldb ... Done.

-----------------------------------------------------------------
This script will guide you to setup your seafile server using MySQL.
Make sure you have read seafile server manual at

        https://github.com/haiwen/seafile/wiki

Press ENTER to continue
-----------------------------------------------------------------


What is the name of the server? It will be displayed on the client.
3 - 15 letters or digits
[ server name ] seafile

What is the ip or domain of the server?
For example: www.mycompany.com, 192.168.1.101
[ This server's ip or domain ] seafile.example.com

Where do you want to put your seafile data?
Please use a volume with enough free space
[ default "/var/www/html/seafile-data" ]

Which port do you want to use for the seafile fileserver?
[ default "8082" ]

-------------------------------------------------------
Please choose a way to initialize seafile databases:
-------------------------------------------------------

[1] Create new ccnet/seafile/seahub databases
[2] Use existing ccnet/seafile/seahub databases

[ 1 or 2 ] 2

What is the host of mysql server?
[ default "localhost" ]

What is the port of mysql server?
[ default "3306" ]

Which mysql user to use for seafile?
[ mysql user for seafile ] seafileuser

What is the password for mysql user "seafileuser"?
[ password for seafileuser ]

verifying password of user seafileuser ...  done

Enter the existing database name for ccnet:
[ ccnet database ] ccnetdb

verifying user "seafileuser" access to database ccnetdb ...  done

Enter the existing database name for seafile:
[ seafile database ] seafiledb

verifying user "seafileuser" access to database seafiledb ...  done

Enter the existing database name for seahub:
[ seahub database ] seahubdb

verifying user "seafileuser" access to database seahubdb ...  done

---------------------------------
This is your configuration
---------------------------------

    server name:            seafile
    server ip/domain:       seafile.example.com

    seafile data dir:       /var/www/html/seafile-data
    fileserver port:        8082

    database:               use existing
    ccnet database:         ccnetdb
    seafile database:       seafiledb
    seahub database:        seahubdb
    database user:          seafileuser


---------------------------------
Press ENTER to continue, or Ctrl-C to abort
---------------------------------
インストールが正常に完了すると、次の出力が表示されます。
-----------------------------------------------------------------
Your seafile server configuration has been finished successfully.
-----------------------------------------------------------------

run seafile server:     ./seafile.sh { start | stop | restart }
run seahub  server:     ./seahub.sh  { start <port> | stop | restart <port> }

-----------------------------------------------------------------
If you are behind a firewall, remember to allow input/output of these tcp ports:
-----------------------------------------------------------------

port of seafile fileserver:   8082
port of seahub:               8000

When problems occur, Refer to

        https://github.com/haiwen/seafile/wiki

for information.
次に、次のコマンドを使用してSeafileにアクセス許可を付与します。
chown -R www-data:www-data /var/www/html/
次に、ファイルseahub_settings.pyにFILE_SERVER_ROOT設定を追加する必要があります:
nano /var/www/html/conf/seahub_settings.py
以下に示すように、FILE_SERVER_ROOT設定を追加します。
SECRET_KEY = "x)0=j*l6b+4amq2n^&)c=q5p==exn13%s&6x!*48u4p0p97k)4"
FILE_SERVER_ROOT = 'http://seafile.example.com/seafhttp'
DATABASES = {
    'default': {
        'ENGINE': 'django.db.backends.mysql',
:        'NAME': 'seahubdb',
        'USER': 'seafileuser',
        'PASSWORD': 'password',
        'HOST': '127.0.0.1',
        'PORT': '3306'
    }
}
終了したら、ファイルを保存して閉じます。
ステップ6–Seafileの管理者ユーザーを作成する
次に、管理者ユーザーを作成し、Seafileのパスワードを設定する必要があります。これを行うには、ディレクトリをseafileに変更し、次のコマンドでseafileサービスを開始します。
cd /var/www/html/seafile
su -p -l www-data -s /bin/bash -c "./seafile.sh start"
次に、seahubサービスを開始し、次のコマンドを使用して管理者アカウントを作成します。
su -p -l www-data -s /bin/bash -c "./seahub.sh start"
以下に示すように、メールアドレスと管理者パスワードを入力するように求められます。
LC_ALL is not set in ENV, set to en_US.UTF-8
Starting seahub at port 8000 ...

----------------------------------------
It's the first time you start the seafile server. Now let's create the admin account
----------------------------------------

What is the email for the admin account?
[ admin email ] example@unixlinux.online

What is the password for the admin account?
[ admin password ]

Enter the password again:
[ admin password again ]


----------------------------------------
Successfully created seafile admin
----------------------------------------

Seahub is started

Done.
完了したら、seafileおよびseahubサービスを停止します。
su -p -l www-data -s /bin/bash -c "./seafile.sh stop"
su -p -l www-data -s /bin/bash -c "./seahub.sh stop"
ステップ7–SeafileおよびSeahubのSystemdファイルを作成する
次に、サービスを管理するためにSeafileとSeahubのsystemdユニットファイルを作成する必要があります。
まず、次のコマンドを使用してSeafileサービスファイルを作成します。
nano /etc/systemd/system/seafile.service
次の行を追加します:
[Unit]
Description=Seafile
After= mysql.service
After=network.target

[Service]
User=www-data
Group=www-data

Type=forking
ExecStart=/var/www/html/seafile-server-latest/seafile.sh start
ExecStop=/var/www/html/seafile-server-latest/seafile.sh stop

[Install]
WantedBy=multi-user.target
ファイルを保存して閉じます。次に、次のコマンドを使用してSeahubのsystemdサービスファイルを作成します。
nano /etc/systemd/system/seahub.service
次の行を追加します:
[Unit]
Description=Seafile
After= mysql.service
After=network.target

[Service]
User=www-data
Group=www-data
Type=forking

ExecStart=/var/www/html/seafile-server-latest/seahub.sh start
ExecStop=/var/www/html/seafile-server-latest/seahub.sh stop

[Install]
WantedBy=multi-user.target
ファイルを保存して閉じます。次に、次のコマンドを使用してsystemdデーモンをリロードします。
systemctl daemon-reload
次に、SeafileとSeahubサービスを再起動し、次のコマンドを使用してシステムの再起動後に開始できるようにします。
systemctl start seafile
systemctl enable seafile
systemctl start seahub
systemctl enable seahub
Seafileサービスを確認するには、次のコマンドを実行します。
systemctl status seafile
出力:
● seafile.service - Seafile
   Loaded: loaded (/etc/systemd/system/seafile.service; disabled; vendor preset: enabled)
   Active: active (running) since Thu 2019-11-28 08:48:31 UTC; 8s ago
  Process: 15487 ExecStart=/var/www/html/seafile-server-latest/seafile.sh start (code=exited, status=0/SUCCESS)
    Tasks: 16 (limit: 1150)
   CGroup: /system.slice/seafile.service
           ├─15522 /var/www/html/seafile/seafile/bin/seafile-controller -c /var/www/html/ccnet -d /var/www/html/seafile-data -F /var/www/html/c
           ├─15524 ccnet-server -F /var/www/html/conf -c /var/www/html/ccnet -f /var/www/html/logs/ccnet.log -d -P /var/www/html/pids/ccnet.pid
           └─15527 seaf-server -F /var/www/html/conf -c /var/www/html/ccnet -d /var/www/html/seafile-data -l /var/www/html/logs/seafile.log -P

Nov 28 08:48:28 ubuntu1804 systemd[1]: Starting Seafile...
Seahubサービスを確認するには、次のコマンドを実行します。
systemctl status seahub
出力:
● seahub.service - Seafile
   Loaded: loaded (/etc/systemd/system/seahub.service; disabled; vendor preset: enabled)
   Active: active (running) since Thu 2019-11-28 08:50:49 UTC; 18s ago
  Process: 15547 ExecStart=/var/www/html/seafile-server-latest/seahub.sh start (code=exited, status=0/SUCCESS)
 Main PID: 15573 (python2.7)
    Tasks: 6 (limit: 1150)
   CGroup: /system.slice/seahub.service
           ├─15573 python2.7 /var/www/html/seafile/seahub/thirdpart/gunicorn seahub.wsgi:application -c /var/www/html/conf/gunicorn.conf --prel
           ├─15579 python2.7 /var/www/html/seafile/seahub/thirdpart/gunicorn seahub.wsgi:application -c /var/www/html/conf/gunicorn.conf --prel
           ├─15580 python2.7 /var/www/html/seafile/seahub/thirdpart/gunicorn seahub.wsgi:application -c /var/www/html/conf/gunicorn.conf --prel
           ├─15581 python2.7 /var/www/html/seafile/seahub/thirdpart/gunicorn seahub.wsgi:application -c /var/www/html/conf/gunicorn.conf --prel
           ├─15582 python2.7 /var/www/html/seafile/seahub/thirdpart/gunicorn seahub.wsgi:application -c /var/www/html/conf/gunicorn.conf --prel
           └─15583 python2.7 /var/www/html/seafile/seahub/thirdpart/gunicorn seahub.wsgi:application -c /var/www/html/conf/gunicorn.conf --prel

Nov 28 08:50:43 ubuntu1804 systemd[1]: Starting Seafile...
ステップ8–Nginxを使用してリバースプロキシを構成する
次に、ポート8000および8082からNginxポート80にクライアント要求を転送するために、SeafileのリバースプロキシとしてNginxをインストールして構成する必要があります。
これを行うには、次のコマンドを使用してNginx仮想ホスト構成ファイルを作成します。
nano /etc/nginx/sites-available/seafile
次の行を追加します:
server {
    listen 80;
    listen [::]:80;
    root /var/www/html/seafile;
    server_name  seafile.example.com;

     client_max_body_size 100M;

     autoindex off;

     access_log /var/log/nginx/example.com.access.log;
     error_log /var/log/nginx/example.com.error.log;

     location / {
            proxy_pass         http://127.0.0.1:8000;
            proxy_set_header   Host $host;
            proxy_set_header   X-Real-IP $remote_addr;
            proxy_set_header   X-Forwarded-For $proxy_add_x_forwarded_for;
            proxy_set_header   X-Forwarded-Host $server_name;
            proxy_read_timeout  1200s;
        }

     location /seafhttp {
            rewrite ^/seafhttp(.*)$ $1 break;
            proxy_pass http://127.0.0.1:8082;
            proxy_set_header   X-Forwarded-For $proxy_add_x_forwarded_for;
            proxy_connect_timeout  36000s;
            proxy_read_timeout  36000s;
            proxy_send_timeout  36000s;
            send_timeout  36000s;
        }
    location /media {
            root /var/www/html/seafile-server-latest/seahub;
        }
}
終了したら、ファイルを保存して閉じます。次に、次のコマンドを使用してNginx仮想ホストを有効にします。
ln -s /etc/nginx/sites-available/seafile /etc/nginx/sites-enabled/
最後に、次のコマンドを使用してNginxサービスを再起動します。
systemctl restart nginx
ステップ9–SeafileWebインターフェースにアクセスする
次に、Webブラウザーを開き、URLhttp://seafile.example.comに移動します。 Seafileログインページが表示されます:
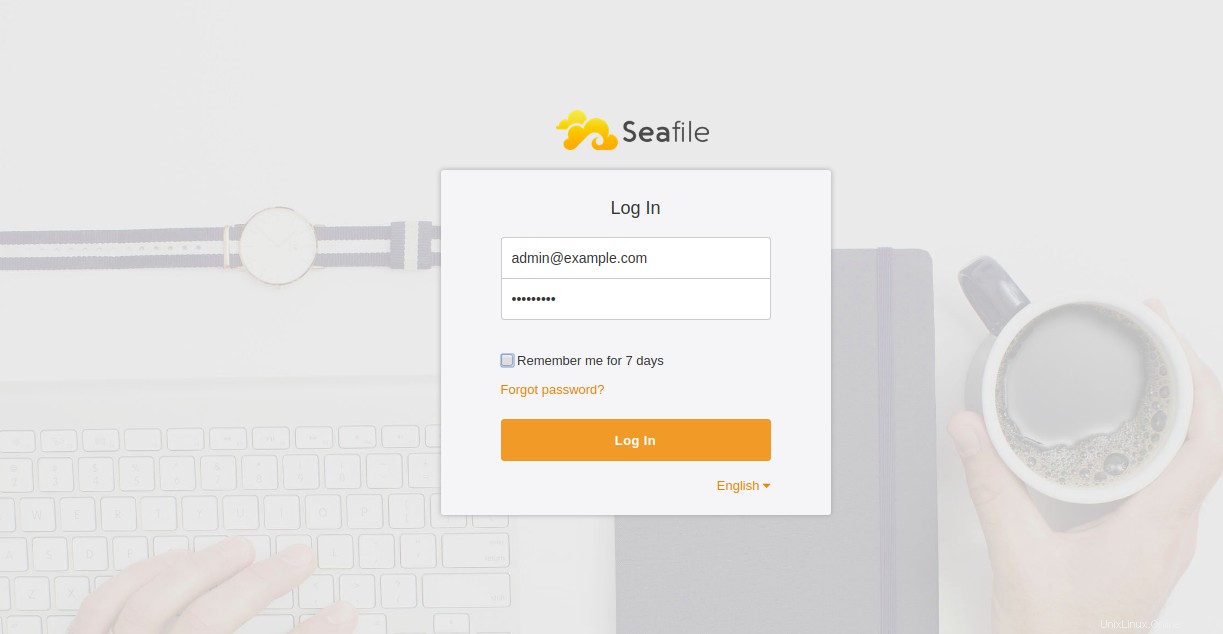
管理者のユーザー名とパスワードを入力し、ログインをクリックします ボタン。 Seafileのデフォルトのダッシュボードが表示されます:

結論
上記のチュートリアルでは、Ubuntu18.04VPSにリバースプロキシとしてNginxを使用してSeafileサーバーをインストールする方法を学習しました。 Seafileを使用して独自のファイル共有サーバーをホストするための十分な知識が得られたことを願っています。 Atlantic.NetのVPSでSeafileを今すぐ始めましょう!