このチュートリアルでは、AlmaLinux 8にLaravelをインストールする方法を紹介します。知らない人のために、Laravelは表現力豊かでエレガントな構文を備えたPHPWebアプリケーションフレームワークです。 Laravelは、Artisan、MVCアーキテクチャ、オブジェクトリレーショナルマッピング、テンプレートエンジン、ユニットテスト、データベース移行システムなどの強力な機能を提供します。
この記事は、少なくともLinuxの基本的な知識があり、シェルの使用方法を知っていること、そして最も重要なこととして、サイトを独自のVPSでホストしていることを前提としています。インストールは非常に簡単で、ルートアカウントで実行されていますが、そうでない場合は、'sudoを追加する必要があります。 ルート権限を取得するコマンドに‘。 AlmaLinux8へのLaravelPHPフレームワークのステップバイステップのインストールを紹介します。CentOSとRockyLinuxでも同じ手順に従うことができます。
前提条件
- 次のオペレーティングシステムのいずれかを実行しているサーバー:AlmaLinux 8、CentOS、およびRockyLinux8。
- 潜在的な問題を防ぐために、OSの新規インストールを使用することをお勧めします。
- サーバーへのSSHアクセス(またはデスクトップを使用している場合はターミナルを開く)
non-root sudo userまたはroot userへのアクセス 。non-root sudo userとして行動することをお勧めします ただし、ルートとして機能するときに注意しないと、システムに害を及ぼす可能性があるためです。
AlmaLinux8にLaravelをインストールする
ステップ1.まず、システムが最新であることを確認することから始めましょう。
sudo dnf clean all
sudo dnf install epel-release
sudo dnf update
ステップ2.LEMPサーバーをインストールします。
AlmaLinux LEMPサーバーが必要です。LEMPがインストールされていない場合は、こちらのガイドに従ってください。
ステップ3.Composerをインストールします。
次に、次のコマンドを使用して、必要なLaravel依存関係をインストールするためのComposer(PHPの依存関係マネージャー)をインストールします。
curl -sS https://getcomposer.org/installer | php
mv composer.phar /usr/local/bin/composer
chmod +x /usr/local/bin/composer
Composerのバージョンを確認します:
composer --version
ステップ4.AlmaLinux8にLaravelをインストールします。
デフォルトでは、LaravelはAlmaLinux 8ベースリポジトリでは利用できません。次に、次のコマンドを実行して、Composerを使用してLaravelをインストールします。
cd /var/www/html/
composer create-project --prefer-dist laravel/laravel laravel
いくつかのフォルダの権限を変更する必要があります:
chown -R nginx:nginx /var/www/html/laravel/
chown -R nginx:nginx /var/www/html/laravel/storage/
chown -R nginx:nginx /var/www/html/laravel/bootstrap/cache/
chmod -R 0777 /var/www/html/laravel/storage/
chmod -R 0775 /var/www/html/laravel/bootstrap/cache/
ステップ5.Nginxを構成します。
次に、LaravelのNginx構成ファイルを作成します:
nano /etc/nginx/conf.d/laravel.conf
次の行を追加します:
server {
       listen 80;
       server_name laravel.your-domain.com;
       root        /var/www/html/laravel/public;
       index       index.php;
       charset utf-8;
       gzip on;
	gzip_types text/css application/javascript text/javascript application/x-javascript  image/svg+xml text/plain text/xsd text/xsl text/xml image/x-icon;
        location / {
        	try_files $uri $uri/ /index.php?$query_string;
        }

        location ~ \.php {
                include fastcgi.conf;
                fastcgi_split_path_info ^(.+\.php)(/.+)$;
                fastcgi_pass unix:/run/php-fpm/www.sock;
        }
        location ~ /\.ht {
                deny all;
        }
}
ファイルを保存して閉じ、Apacheサービスを再起動して変更を有効にします:
sudo systemctl restart php-fpm
sudo systemctl restart nginx
手順5.ファイアウォールを構成します。
AlmaLinuxにはデフォルトでfirewalldが有効になっており、Laravelサービスにアクセスしようとしている他のコンピューターからの他の接続をブロックします。適切なポートを開いて、 Laravelリソースには他のマシンからアクセスできます:
sudo firewall-cmd --zone=public --permanent --add-service=http
sudo firewall-cmd --zone=public --permanent --add-service=https
sudo firewall-cmd --reload
ステップ6.Let'sEncryptSSL無料証明書でNginxを保護する
まず、以下のコマンドを使用してCertbotをインストールします。
sudo dnf install certbot python3-certbot-nginx
次に、以下のようにApacheのSSL証明書をインストールします。
sudo certbot --nginx -d laravel.your-domain.com
対話型プロンプトに進み、証明書をインストールします。証明書がインストールされている場合は、以下のお祝いメッセージが表示されます。
- - - - - - - - - - - - - - - - - - - - - - - - - - - - - - - - - - - - - - - -
Congratulations! You have successfully enabled https://laravel.your-domain.com

You should test your configuration at:
https://www.ssllabs.com/ssltest/analyze.html?d=laravel.your-domain.com
- - - - - - - - - - - - - - - - - - - - - - - - - - - - - - - - - - - - - - - -

IMPORTANT NOTES:
 - Congratulations! Your certificate and chain have been saved at:
   /etc/letsencrypt/live/laravel.your-domain.com/fullchain.pem
   Your key file has been saved at:
   /etc/letsencrypt/live/laravel.your-domain.com/privkey.pem
   Your cert will expire on 2022-04-11. To obtain a new or tweaked
   version of this certificate in the future, simply run certbot again
   with the "certonly" option. To non-interactively renew *all* of
   your certificates, run "certbot renew"
 - Your account credentials have been saved in your Certbot
   configuration directory at /etc/letsencrypt. You should make a
   secure backup of this folder now. This configuration directory will
   also contain certificates and private keys obtained by Certbot so
   making regular backups of this folder is ideal.
 - If you like Certbot, please consider supporting our work by:

   Donating to ISRG / Let's Encrypt:   https://letsencrypt.org/donate
   Donating to EFF:                    https://eff.org/donate-le

 - We were unable to subscribe you the EFF mailing list because your
   e-mail address appears to be invalid. You can try again later by
   visiting https://act.eff.org.
ステップ7.LaravelWebインターフェースへのアクセス。
正常にインストールされたら、Webブラウザーを開き、URL https://laravel.your-domain.comを使用してMediaWikiにアクセスします。 。次のページにリダイレクトされます:
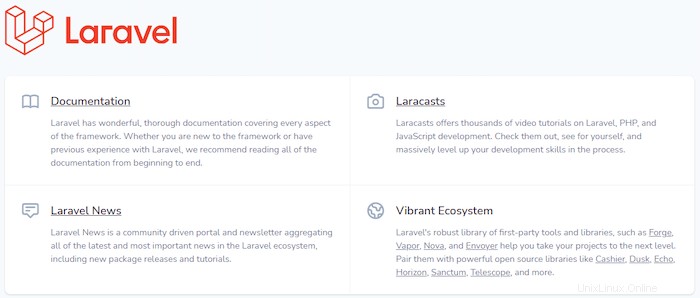
おめでとうございます!Laravelが正常にインストールされました。AlmaLinux8システムにLaravel PHP Frameworkをインストールするためにこのチュートリアルを使用していただき、ありがとうございます。追加のヘルプや役立つ情報については、Laravelの公式Webサイトを確認することをお勧めします。 。