
Djangoは、PythonWebアプリケーションの開発に使用される無料のオープンソースの高レベルWebフレームワークです。 Djangoには、安全でスケーラブルなWebアプリケーションの構築に役立つ一連のツールが付属しています。その主な目的は、複雑なアプリケーションの作成を容易にし、内部構造を維持することです。
このチュートリアルでは、Djangoをインストールし、RockyLinux8およびCentOS8でDjangoのリバースプロキシとしてNginxを構成する方法を学習します。
前提条件
- CentOS8オペレーティングシステムを搭載したサーバー。
- rootまたはsudo権限を持つユーザーとしてログインします
必要なパッケージをインストールする
DjangoはPythonベースのフレームワークであるため、システムにPythonとPIPをインストールする必要があります。インストールできるようにするには、次のコマンドを実行します。
dnf install python36 python3-pip -y両方のパッケージがインストールされたら、次の手順に進みます。
RockyLinux8にDjangoをインストールする
以下に示すように、PIPコマンドを使用してDjangoをインストールできます。
pip3 install DjangoDjangoをインストールした後、次のコマンドでDjangoのバージョンを確認します。
django-admin --version次の出力にDjangoバージョンが表示されます:
3.0.3
この記事を書いている時点では、Djangoのバージョンはバージョン3.0.3です。
Djangoプロジェクトを作成する
この時点で、Djangoは正常にインストールされています。それでは、Djangoアプリを作成しましょう。
ディレクトリ/optでdjango-adminコマンドを使用して、Djangoアプリケーションを作成できます。 以下に示すように:
cd /opt
 django-admin startproject djangoproject
djangoプロジェクトが作成されたら、ディレクトリをdjangoprojectに変更します 次のコマンドで変更を移行します:
cd djangoproject
 python3 manage.py migrate
次の出力が得られます:
Operations to perform:
  Apply all migrations: admin, auth, contenttypes, sessions
Running migrations:
  Applying contenttypes.0001_initial... OK
  Applying auth.0001_initial... OK
  Applying admin.0001_initial... OK
  Applying admin.0002_logentry_remove_auto_add... OK
  Applying admin.0003_logentry_add_action_flag_choices... OK
  Applying contenttypes.0002_remove_content_type_name... OK
  Applying auth.0002_alter_permission_name_max_length... OK
  Applying auth.0003_alter_user_email_max_length... OK
  Applying auth.0004_alter_user_username_opts... OK
  Applying auth.0005_alter_user_last_login_null... OK
  Applying auth.0006_require_contenttypes_0002... OK
  Applying auth.0007_alter_validators_add_error_messages... OK
  Applying auth.0008_alter_user_username_max_length... OK
  Applying auth.0009_alter_user_last_name_max_length... OK
  Applying auth.0010_alter_group_name_max_length... OK
  Applying auth.0011_update_proxy_permissions... OK
  Applying sessions.0001_initial... OK
次に、次のコマンドを使用してDjangoプロジェクトを管理するための管理者ユーザーアカウントを作成する必要があります。
python3 manage.py createsuperuserユーザー名、メールアドレス、パスワードの入力を求められます。以下に示すように、選択に従って提供できます。
Username (leave blank to use 'root'): dadmin
Email address:  [email protected]
Password:
Password (again):
Superuser created successfully.
完了したら、次のステップに進むことができます。
Djangoアプリを起動します
デフォルトでは、Djangoアプリケーションはローカルホストからのみアクセスできます。Djangoをインターネットに接続するには、外部ホストに対してDjangoを許可する必要があります。これを行うには、サーバーのIPをIP settings.py:に追加します。
nano /opt/djangoproject/djangoproject/settings.py次の行を変更します:
ALLOWED_HOSTS = ['ip_server_Anda']
ファイルを保存して閉じます。次に、次のコマンドを使用してDjangoアプリケーションを実行します。
cd /opt/djangoproject
 python3 manage.py runserver 0.0.0.0:8000
次の出力が表示されます:
Watching for file changes with StatReloader
Performing system checks...

System check identified no issues (0 silenced).
March 03, 2020 - 02:31:19
Django version 3.0.3, using settings 'djangoproject.settings'
Starting development server at http://0.0.0.0:8000/
Quit the server with CONTROL-C.

Django application is now started and runs on port 8000.
この時点で、Djangoアプリケーションはポート8000で稼働しています。これで、次のステップに進むことができます。
RockyLinux8でSELinuxとファイアウォールを構成する
次に、firewalldを介してポート8000と80を許可する必要があります。次のコマンドで許可できます:
firewall-cmd --permanent --add-port=8000/tcp
 firewall-cmd --permanent --add-port=80/tcp
 firewall-cmd --reload
次に、次のコマンドを使用してSELinuxを構成します。
setsebool httpd_can_network_connect on -P完了したら、次のステップに進むことができます。
Djangoアプリケーションへのアクセス
URL http:// your-server-ip:8000にアクセスすると、Djangoアプリケーションにアクセスできます。次のページが表示されます:

URL http:// server-ip:8000 / adminを使用して、Djangoの管理インターフェースにアクセスすることもできます。次のページが表示されます:
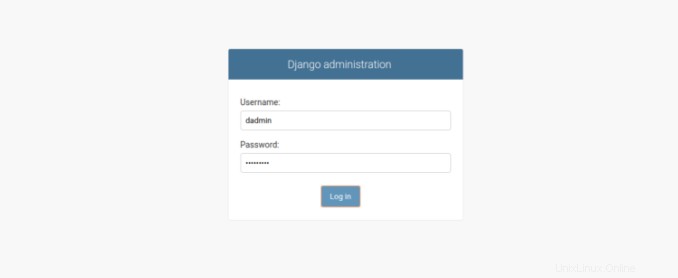
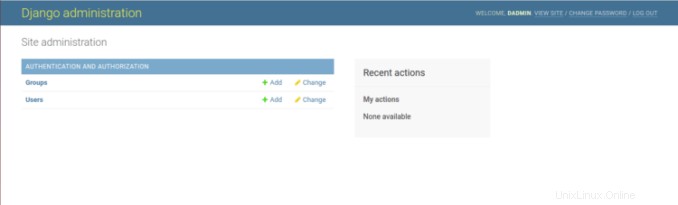
管理者のユーザー名とパスワードを入力し、[ログ]ボタンをクリックします で 。次のページが表示されます:
RockyLinux8にNginxとGunicornをインストールする
このセクションでは、GunicornをインストールしてDjangoサービスを作成および管理し、NginxをインストールしてDjangoアプリケーションを提供します。
まず、次のコマンドを使用してNginxをインストールします。
dnf install nginx -y次に、以下に示すように、PIPコマンドを使用してGunicornをインストールします。
pip3 install gunicorn両方のパッケージがインストールされたら、次のコマンドを使用してNginxサービスを開始し、システムの再起動後に開始できるようにします。
systemctl start nginx
 systemctl enable nginx
次に、ディレクトリの所有権を変更します/opt/djangoproject 以下に示すようにNginxに:
chown -R nginx:nginx /opt/djangoprojectDjangoのファイルSystemdサービスを作成する
次に、次のコマンドを使用してDjangoサービスを管理するsystemdサービスファイルを作成します。
nano /etc/systemd/system/django.service次の行を追加します:
[Unit]
Description=django daemon
After=network.target

[Service]
User=nginx
Group=nginx
WorkingDirectory=/opt/djangoproject
ExecStart=/usr/local/bin/gunicorn --workers 3 --bind unix:/opt/djangoproject/djangoproject.sock djangoproject.wsgi:application

[Install]
WantedBy=multi-user.target
ファイルを保存して閉じてから、次のコマンドを使用してsystemdデーモンをリロードします。
systemctl daemon-reload次に、次のコマンドを使用して、Djangoサービスを開始し、システムの再起動後に開始できるようにします。
systemctl start django
 systemctl enable django
次のコマンドを使用して、Djangoサービスのステータスを確認できるようになりました。
systemctl status django次の出力が表示されます:
? django.service - django daemon
   Loaded: loaded (/etc/systemd/system/django.service; disabled; vendor preset: disabled)
   Active: active (running) since Mon 2020-03-02 22:27:51 UTC; 3min 32s ago
 Main PID: 960 (django)
    Tasks: 4 (limit: 25028)
   Memory: 95.2M
   CGroup: /system.slice/django.service
           ??960 /usr/bin/python3.6 /usr/local/bin/gunicorn --workers 3 --bind unix:/opt/djangoproject/djangoproject.sock djangoproject.wsgi:a>
           ??964 /usr/bin/python3.6 /usr/local/bin/gunicorn --workers 3 --bind unix:/opt/djangoproject/djangoproject.sock djangoproject.wsgi:a>
           ??965 /usr/bin/python3.6 /usr/local/bin/gunicorn --workers 3 --bind unix:/opt/djangoproject/djangoproject.sock djangoproject.wsgi:a>
           ??966 /usr/bin/python3.6 /usr/local/bin/gunicorn --workers 3 --bind unix:/opt/djangoproject/djangoproject.sock djangoproject.wsgi:a>

Mar 02 22:27:51 centos8 systemd[1]: Started django daemon.
Mar 02 22:27:52 centos8 django[960]: [2020-03-02 22:27:52 -0500] [960] [INFO] Starting django 20.0.4
Mar 02 22:27:52 centos8 django[960]: [2020-03-02 22:27:52 -0500] [960] [INFO] Listening at: unix:/opt/djangoproject/djangoproject.sock (960)
Mar 02 22:27:52 centos8 django[960]: [2020-03-02 22:27:52 -0500] [960] [INFO] Using worker: sync
Mar 02 22:27:52 centos8 django[960]: [2020-03-02 22:27:52 -0500] [964] [INFO] Booting worker with pid: 964
Mar 02 22:27:52 centos8 django[960]: [2020-03-02 22:27:52 -0500] [965] [INFO] Booting worker with pid: 965
Mar 02 22:27:52 centos8 django[960]: [2020-03-02 22:27:52 -0500] [966] [INFO] Booting worker with pid: 966
h pid: 966
Django用にNginxを構成する
次に、NginxをDjangoのリバースプロキシとして構成します。これを行うには、次のコマンドを使用して新しいNginx構成ファイルを作成します。
nano /etc/nginx/conf.d/django.conf次の行を追加します:
server {
    listen 80;
    server_name your-server-ip

    location =https://cdn.linuxid.net/favicon.ico?x87109 { access_log off; log_not_found off; }
    location /static/ {
        root /opt/djangoproject;
    }

    location / {
        proxy_set_header Host $http_host;
        proxy_set_header X-Real-IP $remote_addr;
        proxy_set_header X-Forwarded-For $proxy_add_x_forwarded_for;
        proxy_set_header X-Forwarded-Proto $scheme;
        proxy_pass http://unix:/opt/djangoproject/djangoproject.sock;
    }
}
完了したら、ファイルを保存して閉じます。次に、次のコマンドを使用して、構文エラーがないかnginxをテストします。
nginx -tエラーがない場合は、次の出力が表示されます。
nginx: the configuration file /etc/nginx/nginx.conf syntax is ok
nginx: configuration file /etc/nginx/nginx.conf test is successful
次に、Nginxサービスを再起動して、変更を実装します。
systemctl start nginx次のコマンドを使用してNginxを確認することもできます:
systemctl status nginx次の出力が得られます:
? nginx.service - The nginx HTTP and reverse proxy server
   Loaded: loaded (/usr/lib/systemd/system/nginx.service; disabled; vendor preset: disabled)
   Active: active (running) since Mon 2020-03-02 22:28:13 EST; 4min 14s ago
  Process: 984 ExecStart=/usr/sbin/nginx (code=exited, status=0/SUCCESS)
  Process: 982 ExecStartPre=/usr/sbin/nginx -t (code=exited, status=0/SUCCESS)
  Process: 980 ExecStartPre=/usr/bin/rm -f /run/nginx.pid (code=exited, status=0/SUCCESS)
 Main PID: 985 (nginx)
    Tasks: 3 (limit: 25028)
   Memory: 5.5M
   CGroup: /system.slice/nginx.service
           ??985 nginx: master process /usr/sbin/nginx
           ??986 nginx: worker process
           ??987 nginx: worker process

Mar 02 22:28:12 centos8 systemd[1]: Starting The nginx HTTP and reverse proxy server...
Mar 02 22:28:12 centos8 nginx[982]: nginx: the configuration file /etc/nginx/nginx.conf syntax is ok
Mar 02 22:28:12 centos8 nginx[982]: nginx: configuration file /etc/nginx/nginx.conf test is successful
Mar 02 22:28:13 centos8 systemd[1]: Started The nginx HTTP and reverse proxy server.
これで、URL http://server_IP_addressを使用してDjangoアプリケーションにアクセスできます。
結論
このガイドでは、Rocky Linux8およびCentOS8にDjangoをインストールする方法を学びました。また、Gunicornを使用してDjangoサービスを作成および管理し、Djangoアプリケーションを提供するリバースプロキシとしてNginxを構成する方法も学びました。