
このチュートリアルでは、CentOSにSquid 3をインストールして構成する方法を示します。知らない人のために、SquidはHTTP、HTTPSをサポートするWebのキャッシュプロキシです。 、FTPなど。Squidプロキシは、帯域幅を減らし、応答時間を増やすために、さまざまな組織やインターネットプロバイダーによって使用されています。
この記事は、少なくともLinuxの基本的な知識があり、シェルの使用方法を知っていること、そして最も重要なこととして、サイトを独自のVPSでホストしていることを前提としています。インストールは非常に簡単で、ルートアカウントで実行されていますが、そうでない場合は、'sudoを追加する必要があります。 ルート権限を取得するコマンドに‘。 CentOSLinuxサーバーにSquidを段階的にインストールする方法を説明します。
CentOSにSquid3をインストールして構成する
ステップ1.インストールするには、最初にyumを更新する必要があります 次のコマンドを入力して、リポジトリとパッケージを作成します。
sudo yum -y update
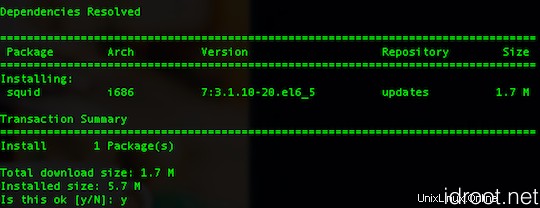
ステップ2.CentOSにSquid3をインストールして構成します。
次のコマンドを使用してsquidパッケージと依存関係をインストールします:
sudo yum -y install squid
ステップ3.構成イカ。
squid構成ファイル‘/etc/squid/squid.confを編集します ’
nano /etc/squid/squid.conf
# Recommended minimum configuration:
auth_param basic program /usr/lib/squid/ncsa_auth /etc/squid/squid_passwd
acl ncsa_users proxy_auth REQUIRED
http_access allow ncsa_users

acl manager proto cache_object
acl localhost src 127.0.0.1/32
acl to_localhost dst 127.0.0.0/8 0.0.0.0/32
acl SSL_ports port 443
acl Safe_ports port 80        # http
acl Safe_ports port 21        # ftp
acl Safe_ports port 443        # https
acl Safe_ports port 1025-65535    # unregistered ports
acl Safe_ports port 280        # http-mgmt
acl Safe_ports port 488        # gss-http
acl Safe_ports port 591        # filemaker
acl Safe_ports port 777        # multiling http
acl CONNECT method CONNECT

http_access allow manager localhost
http_access deny manager
http_access deny !Safe_ports
http_access deny CONNECT !SSL_ports
http_access deny all
http_port 3128

hierarchy_stoplist cgi-bin ?
coredump_dir /var/spool/squid
cache deny all

refresh_pattern ^ftp:        1440    20%    10080
refresh_pattern ^gopher:    1440    0%    1440
refresh_pattern -i (/cgi-bin/|\?) 0    0%    0
refresh_pattern .        0    20%    4320

icp_port 3130

forwarded_for off

request_header_access Allow allow all
request_header_access Authorization allow all
request_header_access Proxy-Authorization allow all
request_header_access Proxy-Authenticate allow all
request_header_access Cache-Control allow all
request_header_access Content-Encoding allow all
request_header_access Content-Length allow all
request_header_access Content-Type allow all
request_header_access Date allow all
request_header_access Expires allow all
request_header_access Host allow all
request_header_access If-Modified-Since allow all
request_header_access Last-Modified allow all
request_header_access Location allow all
request_header_access Pragma allow all
request_header_access Accept allow all
request_header_access Accept-Charset allow all
request_header_access Accept-Encoding allow all
request_header_access Accept-Language allow all
request_header_access Content-Language allow all
request_header_access Mime-Version allow all
request_header_access Retry-After allow all
request_header_access Title allow all
request_header_access Connection allow all
request_header_access Proxy-Connection allow all
request_header_access User-Agent allow all
request_header_access Cookie allow all
request_header_access All deny all
visible_hostname idroot.us
ステップ4. Squidがユーザー認証の検証に使用できる認証ファイルを作成します:
htpasswd -b /etc/squid/squid_passwd username password
例:
htpasswd -b -c /etc/squid/squid_passwd ranty ratna
おめでとうございます!squidが正常にインストールされました。CentOSシステムにsquidプロキシをインストールするためにこのチュートリアルを使用していただきありがとうございます。追加のヘルプや役立つ情報については、squidの公式Webサイトを確認することをお勧めします。