はじめに
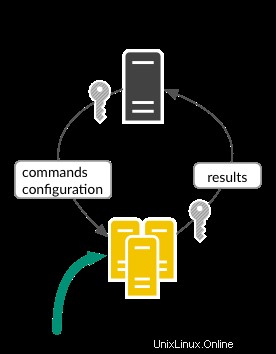
塩 ( SaltStackと呼ばれることもあります )は、イベント駆動型IT自動化、リモートタスク実行、および構成管理のためのPythonベースのオープンソースソフトウェアです。データセンターシステムとネットワークの展開と管理、構成の自動化、SecOpsオーケストレーション、脆弱性の修正、ハイブリッドクラウド制御への「Infrastructureascode」アプローチをサポートします。
SaltStackミニオン 管理対象ノードにインストールされているエージェントソフトウェアです。
そのノードでコマンドを実行および実行し、SaltStackマスターサーバーに報告するために使用されます。
以下のインストールガイドにアクセスして、Saltstackマスターのインストールを開始してください。
ソルトスタックマスターそのため、このチュートリアルでは、saltstackミニオンをインストールして構成し、CentOS&RHEL8でマスターからミニオンにコマンドを実行する方法を示します。
インストール
以下の手順と注意事項に従ってください
- システムを更新する
dnf update -y- SaltStackでは、SaltStackコマンドのコンパイルと実行にPython言語のサポートが必要です。したがって、Python3をインストールします
dnf install python3 -y- EPELyumリポジトリから入手できるSaltStackをインストールします。
dnf install https://repo.saltstack.com/py3/redhat/salt-py3-repo-latest.el8.noarch.rpm -y- 次に、追加された新しいリポジトリのキャッシュを構築します。
dnf makecache- 次に、SaltStackMinionをインストールします。
dnf install salt-minion -y構成
- サービスを開始する前に、SaltStackMinionの構成を調整する必要があります。
vim /etc/salt/minion- このディレクティブを検索
#master: salt- 次に、次のように置き換えます。
master: saltstack-master.unixcop.com注 : saltstack-master.unixcop.com は、Saltstackマスターのインストールの記事で構成したSaltStackマスターサーバーです。
注 :また、SaltStackミニオンホスト名はsaltstackマスターサーバーで解決可能である必要があります。したがって、 / etc / hosts でミニオンサーバーのIPとそのホスト名を変更して、ローカルDNSリゾルバーを使用してこれを行います。 図のようにマスターサーバー上のファイル。

- salt-minionを有効にして開始します 。
systemctl enable --now salt-minion- Saltstack-マスターサーバーに移動 次に、SaltStackマスターサーバーに認識されているすべての公開鍵を一覧表示します。
salt-key -L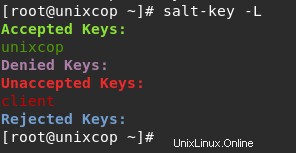
注 :未承認のキーが1つあることがわかります これはクライアントです (これは私のsaltstack-Minionサーバーのホスト名です)。これは、SaltStackミニオンの公開鍵です。
- このキーを受け入れます。
salt-key -A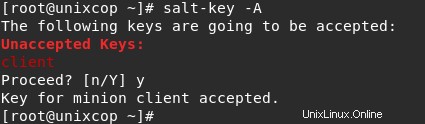
- ミニオンがSaltStackマスターに追加されました 下のスクリーンショットに示されている在庫。
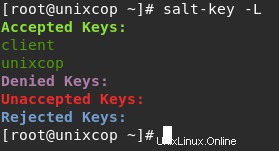
- このミニオンサーバーでコマンドを実行できるようになりました 。
SaltStackMinionでコマンドを実行する
- 例 :nginx Webサービスをインストールし、Saltminionサーバーで有効にします。
salt 'client' cmd.run 'dnf install nginx -y'
OR
salt 'saltstack-minion.unixcop.com' cmd.run 'dnf install nginx -y'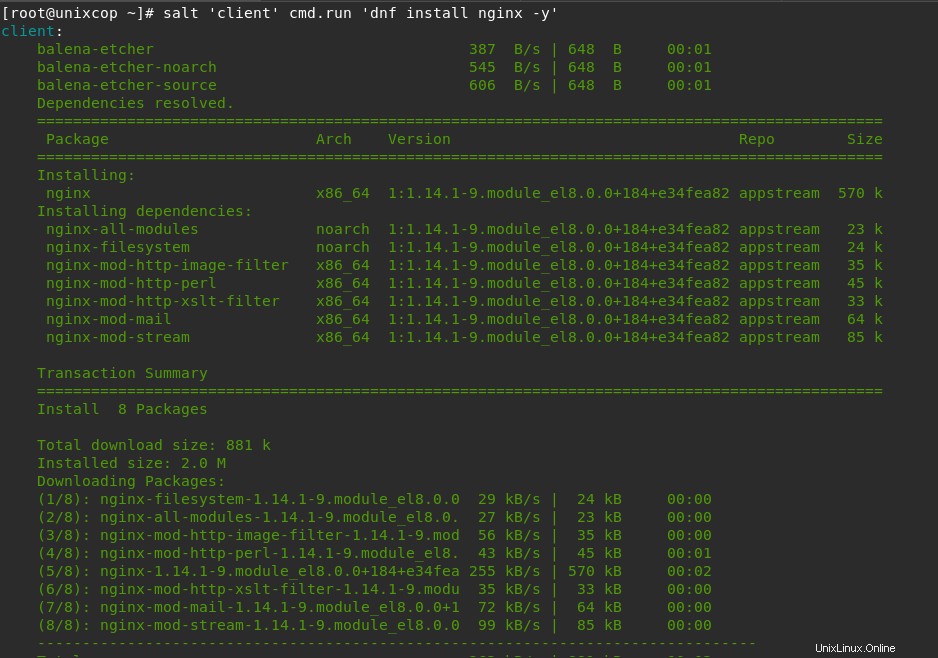
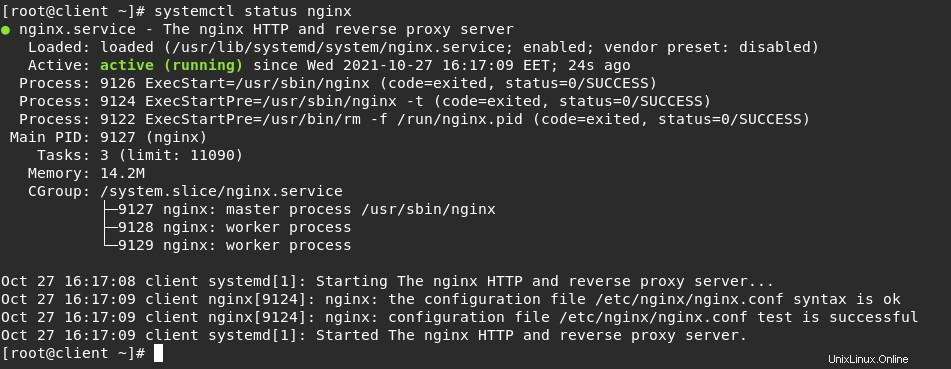
salt 'client' cmd.run 'systemctl enable --now nginx.service'
OR
salt 'saltstack-minion.unixcop.com' cmd.run 'systemctl enable --now nginx.service'
- また、図のように、nginxがSaltstack-masterサーバーに追加する前後に、ミニオンサーバーにインストールされていることを確認および確認できます。
前

後
- また、 curlを使用して新しいWebサーバーにアクセスします 。
curl -I 192.168.13.140       #the ip of minion server
OR
curl -I http://saltstack-minion-unixcop.com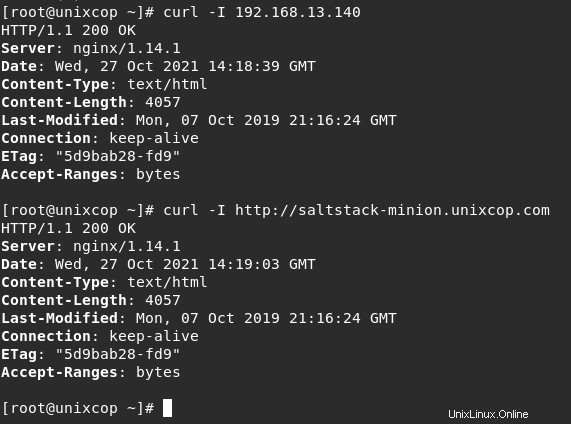
結論
このチュートリアルでは、 CentOS /RHEL8サーバーにSaltStackMinionをインストールして構成する方法を説明しました。 minion Public ipをsalt-masterサーバーに追加した後、リモートでコマンドを実行します。