はじめに
バニラ は、カナダのケベック州モントリオールで2009年に設立されたカナダのソフトウェア会社です。これは、クラウドベース(SaaS)のコミュニティフォーラムソフトウェアであり、オープンソースのコミュニティでサポートされているソフトウェアでもあります。同社の主な製品はVanillaCloudです。
そのオープンソース製品であるVanillaOSSは、Gardenフレームワークを使用してPHPスクリプト言語で記述された軽量のインターネットフォーラムパッケージです。ソフトウェアはGNUGPLの下でリリースされています。 Vanilla Forumsは、自由ソフトウェア、標準に準拠した、カスタマイズ可能なディスカッションフォーラムです。 2009年以降、クラウドでホストされるバージョン(Vanillaが提供)もあります。
インストール
以下の手順に従ってください:
- php、php-fpmとそのモジュールをインストールします
dnf instal php php php-mysqlnd php-opcache php-xml php-xmlrpc php-gd php-mbstring php-json php-fpm php-curl php-pear php-openssl php-intl unzip -y- php-fpmを起動して有効にします。
 systemctl start php-fpm
systemctl enable php-fpm- nginxをインストールして起動します。
dnf install nginx -y && systemctl start nginx- mariadbをインストール、起動、有効化します。
dnf install -y mariadb mariadb-server && systemctl start mariadb && systemctl enable mariadb- MariaDBデータベースを構成し、MariaDBを保護します。
mysql_secure_installation- 以下に示すようにすべての質問に答えてください
Enter current password for root (enter for none):
Set root password? [Y/n] Y
New password:
Re-enter new password:
Remove anonymous users? [Y/n] Y
Disallow root login remotely? [Y/n] Y
Remove test database and access to it? [Y/n] Y
Reload privilege tables now? [Y/n] Y- MariaDBシェルにログインします
mysql -u root -p- データベースとデータベースユーザーを作成し、すべての権限を付与します。
CREATE DATABASE vanilla_db CHARACTER SET utf8 COLLATE utf8_general_ci;
CREATE USER 'vanilla_usr'@'localhost' IDENTIFIED BY 'unixcopPassword';
GRANT ALL PRIVILEGES ON vanilla_db.* TO 'vanilla_usr'@'localhost';
FLUSH PRIVILEGES;
\q;- バニラフォーラムをダウンロードします。
wget https://open.vanillaforums.com/get/vanilla-core-3.3.zip最新のバニラフォーラムは公式ウェブサイトからダウンロードできます。
最新のバニラフォーラム注 :VanillaForumsのスタッフとコアチームによって保守されている最新の製品。
- ダウンロードしたファイルを解凍します。
unzip vanilla-core-3.3.zip- 抽出したディレクトリをNginxWebルートディレクトリに移動します。
mv package /var/www/html/vanilla- バニラディレクトリの所有権をNginxに設定します
chown -R nginx:nginx /var/www/html/vanilla- PHP-FPMプールを構成します。これは、ファイル/etc/php-fpm.d/www.confを編集することで実行できます
vim /etc/php-fpm.d/www.conf- 次の行をnginxに変更します。
user = nginx
group = nginx
- PHPのセッションディレクトリを作成し、その所有権を変更します
mkdir -p /var/lib/php/session
chown -R nginx:nginx /var/lib/php/session- PHP-FPMサービスを再起動します
systemctl restart php-fpm- Nginx仮想ホストファイルを作成して、Vanilla用にNginxを構成します。
vim /etc/nginx/conf.d/vanilla.conf- 次に、次の行を追加します
server {

  listen 80;
  server_name vanilla.unixcop.com;
  root /var/www/html/vanilla;
  index index.php;

  location ~* /\.git { deny all; return 403; }
  location /build/ { deny all; return 403; }
  location /cache/ { deny all; return 403; }
  location /cgi-bin/ { deny all; return 403; }
  location /uploads/import/ { deny all; return 403; }
  location /conf/ { deny all; return 403; }
  location /tests/ { deny all; return 403; }
  location /vendor/ { deny all; return 403; }

  location ~* ^/index\.php(/|$) {
    fastcgi_split_path_info ^(.+\.php)(/.+)$;
    try_files $fastcgi_script_name =404;
    set $path_info $fastcgi_path_info;
    fastcgi_param PATH_INFO $path_info;
    fastcgi_index index.php;
    include fastcgi.conf;
    fastcgi_param SCRIPT_NAME /index.php;
    fastcgi_param SCRIPT_FILENAME $realpath_root/index.php;
    fastcgi_param X_REWRITE 1;
    fastcgi_pass unix:/var/run/php-fpm/www.sock;
  }

  location ~* \.php(/|$) {
    rewrite ^ /index.php$uri last;
  }
  location / {
    try_files $uri $uri/ @vanilla;
  }

  location @vanilla {
    rewrite ^ /index.php$uri last;
  }

}- Nginxサービスを再起動します
systemctl restart nginx- ファイアウォールでポート80と443を許可します。
firewall-cmd --permanent --add-service=http
firewall-cmd --permanent --add-service=https
rewall-cmd --reload- また、Vanillaフォーラム用にSELinuxを構成する必要があります
setsebool httpd_can_network_connect on -P
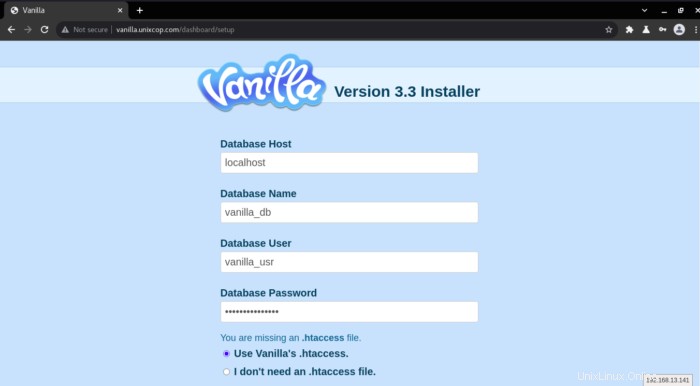
chcon -R -u system_u -t httpd_sys_rw_content_t -r object_r /var/www/html/vanilla- Webブラウザを開いてVanillaフォーラムにアクセスし、URL https://vanilla.unixcop.comにアクセスします。 。

- データベース情報とその他の必要な入力を入力し、続行をクリックします 。

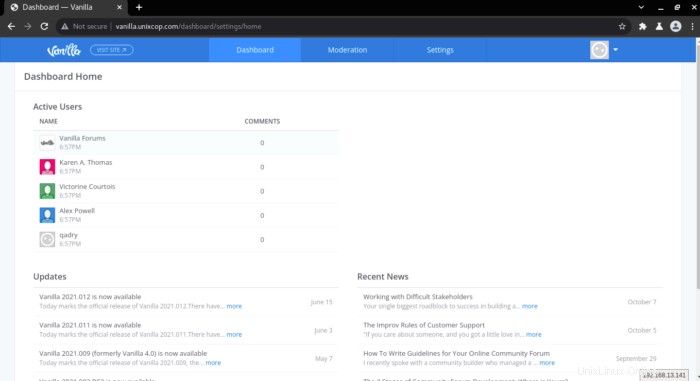
- 上記のようにVanillaダッシュボードが表示されます。
結論
このインストールガイドでは、Vanilla-Forumsのインストール方法を説明しました。 CentOS8で。
それで全部です。ありがとうございます。