MariaDBは、中小企業から大企業で使用される最も人気のあるオープンソースデータベース管理システムの1つです。これは、MariaDB Corporation Abによって開発され、MySQLの元の開発者によって率いられた有名なデータベースサーバーMySQLのフォークです。
MariaDBは、ドロップイン置換機能を保証するためにMySQLと完全に互換性があります。 MariaDBは、LAMPおよびLEMPスタックのデータベースサーバーとしてよく使用されます。
読む: CentOS 8 /RHEL8にLAMPスタックをインストールする方法
読む: CentOS 8 /RHEL8にLEMPスタックをインストールする方法
この投稿では、CentOS 8 /RHEL8にMariaDBをインストールする方法を説明します。
CentOS 8 /RHEL8にMariaDBをインストールする
CentOS 8 /RHEL8のMariaDBパッケージは2つの方法で入手できます。
- Red Hatリポジトリ(v10.3)
- 公式のMariaDBミラー(v10.4)
AppStreamリポジトリからMariaDBをインストール
AppStreamリポジトリからのMariaDBのインストールは簡単です。ただし、リポジトリには少し古いバージョンのMariaDBパッケージが含まれている可能性があります。
yum -y install @mariadb
MariaDB Foundationは、CentOS 8 / RHEL 8用のMariaDBパッケージを提供しています。MariaDBが提供するパッケージは常に最新であり、MariaDBコミュニティによってサポートされています。
CentOS 8
cat <<EOF >> /etc/yum.repos.d/mariadb.repo
[mariadb]
name = MariaDB
baseurl = http://yum.mariadb.org/10.4/centos8-amd64
gpgkey=https://yum.mariadb.org/RPM-GPG-KEY-MariaDB
gpgcheck=1
EOF
RHEL 8
cat <<EOF >> /etc/yum.repos.d/mariadb.repo
[mariadb]
name = MariaDB
baseurl = http://yum.mariadb.org/10.4/rhel8-amd64
gpgkey=https://yum.mariadb.org/RPM-GPG-KEY-MariaDB
gpgcheck=1
EOF
次のコマンドを使用してMariaDBサーバーをインストールします。
yumがMariaDBミラーからパッケージをダウンロードできるようにするには、RHEL8とCentOS8でそれぞれrhel-8-for-x86_64-appstream-rpmsとAppStreamリポジトリを一時的に無効にする必要があります。### CentOS 8 ### yum install -y boost-program-options yum --disablerepo=AppStream install -y MariaDB-server MariaDB-client ### RHEL 8 ### yum --disablerepo=rhel-8-for-x86_64-appstream-rpms install -y MariaDB-server MariaDB-client
MariaDBサービスの管理
MariaDBサービスを開始/停止する場合は、次のコマンドを使用できます。
systemctl start mariadb

systemctl stop mariadb
MariaDBが実行されているかどうかを確認します。
systemctl status mariadb

安全なMariaDBのインストール
mysql_secure_installationコマンドを使用して、MariaDBサーバーの初期セットアップを実行します。このコマンドは、実稼働サーバーで実行することをお勧めします。匿名ユーザー、テストデータベースを削除し、リモートルートログインを禁止します。
mysql_secure_installation
NOTE: RUNNING ALL PARTS OF THIS SCRIPT IS RECOMMENDED FOR ALL MariaDB
      SERVERS IN PRODUCTION USE!  PLEASE READ EACH STEP CAREFULLY!

In order to log into MariaDB to secure it, we'll need the current
password for the root user. If you've just installed MariaDB, and
haven't set the root password yet, you should just press enter here.

Enter current password for root (enter for none):  << Just Press Enter
OK, successfully used password, moving on...

Setting the root password or using the unix_socket ensures that nobody
can log into the MariaDB root user without the proper authorisation.

You already have your root account protected, so you can safely answer 'n'.

Switch to unix_socket authentication [Y/n] N  << Disable Unix Socket Authendication to Enable Password Authentication
 ... skipping.

You already have your root account protected, so you can safely answer 'n'.

Change the root password? [Y/n] Y  << Set MariaDB root password
New password:  << Enter root password
Re-enter new password:  << Re-Enter root password
Password updated successfully!
Reloading privilege tables..
 ... Success!


By default, a MariaDB installation has an anonymous user, allowing anyone
to log into MariaDB without having to have a user account created for
them.  This is intended only for testing, and to make the installation
go a bit smoother.  You should remove them before moving into a
production environment.

Remove anonymous users? [Y/n] Y  << Remove Anonymous user
 ... Success!

Normally, root should only be allowed to connect from 'localhost'.  This
ensures that someone cannot guess at the root password from the network.

Disallow root login remotely? [Y/n] Y  << Disallow root login remotely
 ... Success!

By default, MariaDB comes with a database named 'test' that anyone can
access.  This is also intended only for testing, and should be removed
before moving into a production environment.

Remove test database and access to it? [Y/n] Y  << Remove test database
 - Dropping test database...
 ... Success!
 - Removing privileges on test database...
 ... Success!

Reloading the privilege tables will ensure that all changes made so far
will take effect immediately.

Reload privilege tables now? [Y/n] Y  << Reload privilege tables
 ... Success!

Cleaning up...

All done!  If you've completed all of the above steps, your MariaDB
installation should now be secure.

Thanks for using MariaDB!
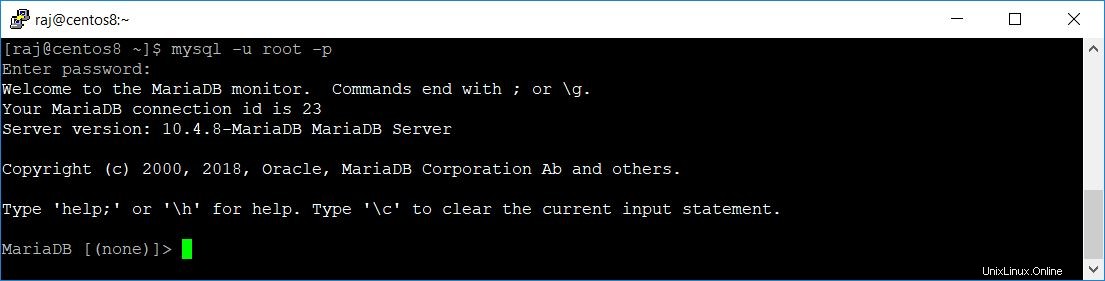
MariaDBにアクセス
以下のコマンドでMariaDBサーバーにログインします。
mysql -u root -pパスワードが必要
結論
それで全部です。この投稿では、CentOS 8 /RHEL8にMariaDBをインストールして初期設定を行う方法を学びました。初心者のMariaDBの記事を読んで、MariaDBの操作について詳しく学んでください。