前回の投稿では、CentOS 8 / RHEL8にIcinga2をインストールする方法について説明しました。次に、すべてのサーバーを監視できるIcinga2のWebインターフェイスであるIcingaweb2のインストールを続けます。
ここでは、Icinga web 2 CentOS 8 /RHEL8をインストールする方法を説明します。
IcingaWeb2をインストールする
PHPおよびPHP拡張機能をインストールする
PHP(v7.2)パッケージとIcingaWeb2の拡張機能をインストールします。
読む: CentOS 8 /RHEL8にPHP7.4/7.3をインストールする方法
dnf install -y php php-json php-xml php-intl php-common php-pdo php-mysqlnd php-cli php-mbstring php-fpm php-gd php-zip php-ldap
IcingaWeb2をインストールする
yumコマンドを使用して、IcingaCLIおよびApacheWebサーバーとともにIcingaWeb2パッケージをインストールします。
dnf install -y icingaweb2 icingacli httpd
ApacheWebサーバーとPHPFPMを起動します。
systemctl start httpd

systemctl start php-fpm
システムの起動時にApacheWebサーバーとPHPFPMが自動的に起動するようにします。
systemctl enable httpd

systemctl enable php-fpm
SELinux
システムでSELinuxが有効になっている場合は、以下のパッケージをインストールして、IcingaWeb2のSELinuxポリシーを設定します。
dnf install -y icingaweb2-selinux
ファイアウォールのHTTPトラフィックが外部マシンからIcingaWebインターフェースにアクセスできるようにします。
firewall-cmd --permanent --add-service=http

firewall-cmd --reload
IcingaWeb2のセットアップ
以下のURLにアクセスして、Icinga Web 2セットアップウィザードにアクセスします。このウィザードでは、IcingaWeb2をインストールするためのすべての手順をガイドします。
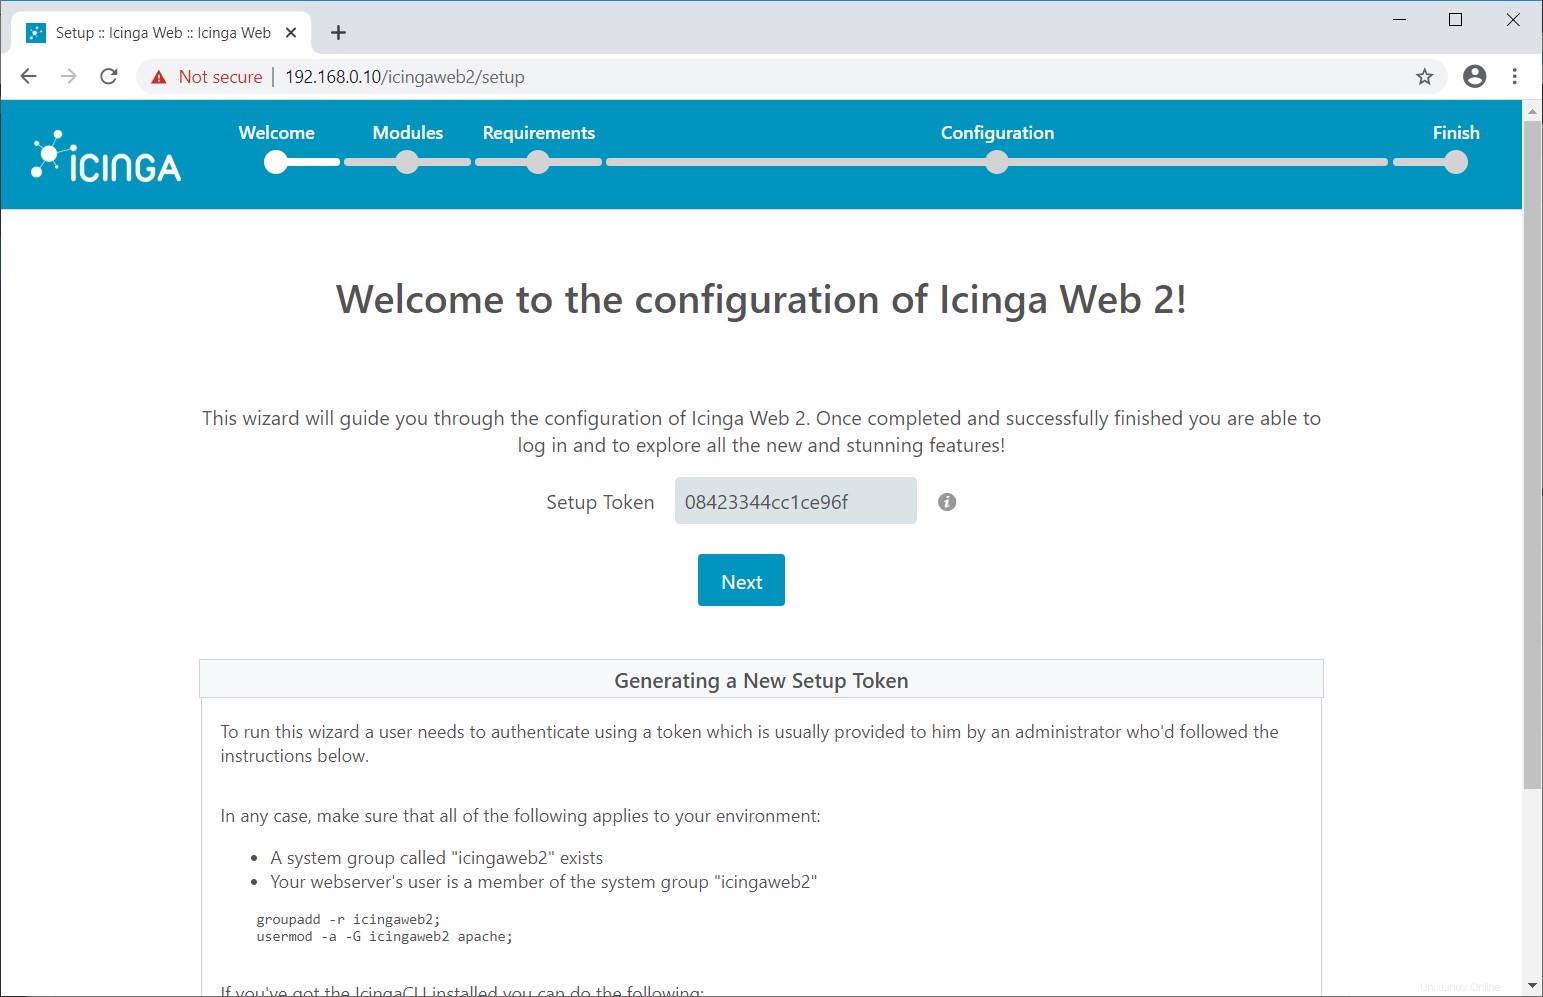
http://your.ip.addr.ess/icingaweb2/setupセキュリティ上の理由から、IcingaWeb2のインストールを開始するにはトークンを生成する必要があります。
icingacli setup token create
Output:

The newly generated setup token is: 08423344cc1ce96f
生成されたトークンをコピーしてセットアップページに貼り付け、[次へ]をクリックします 。
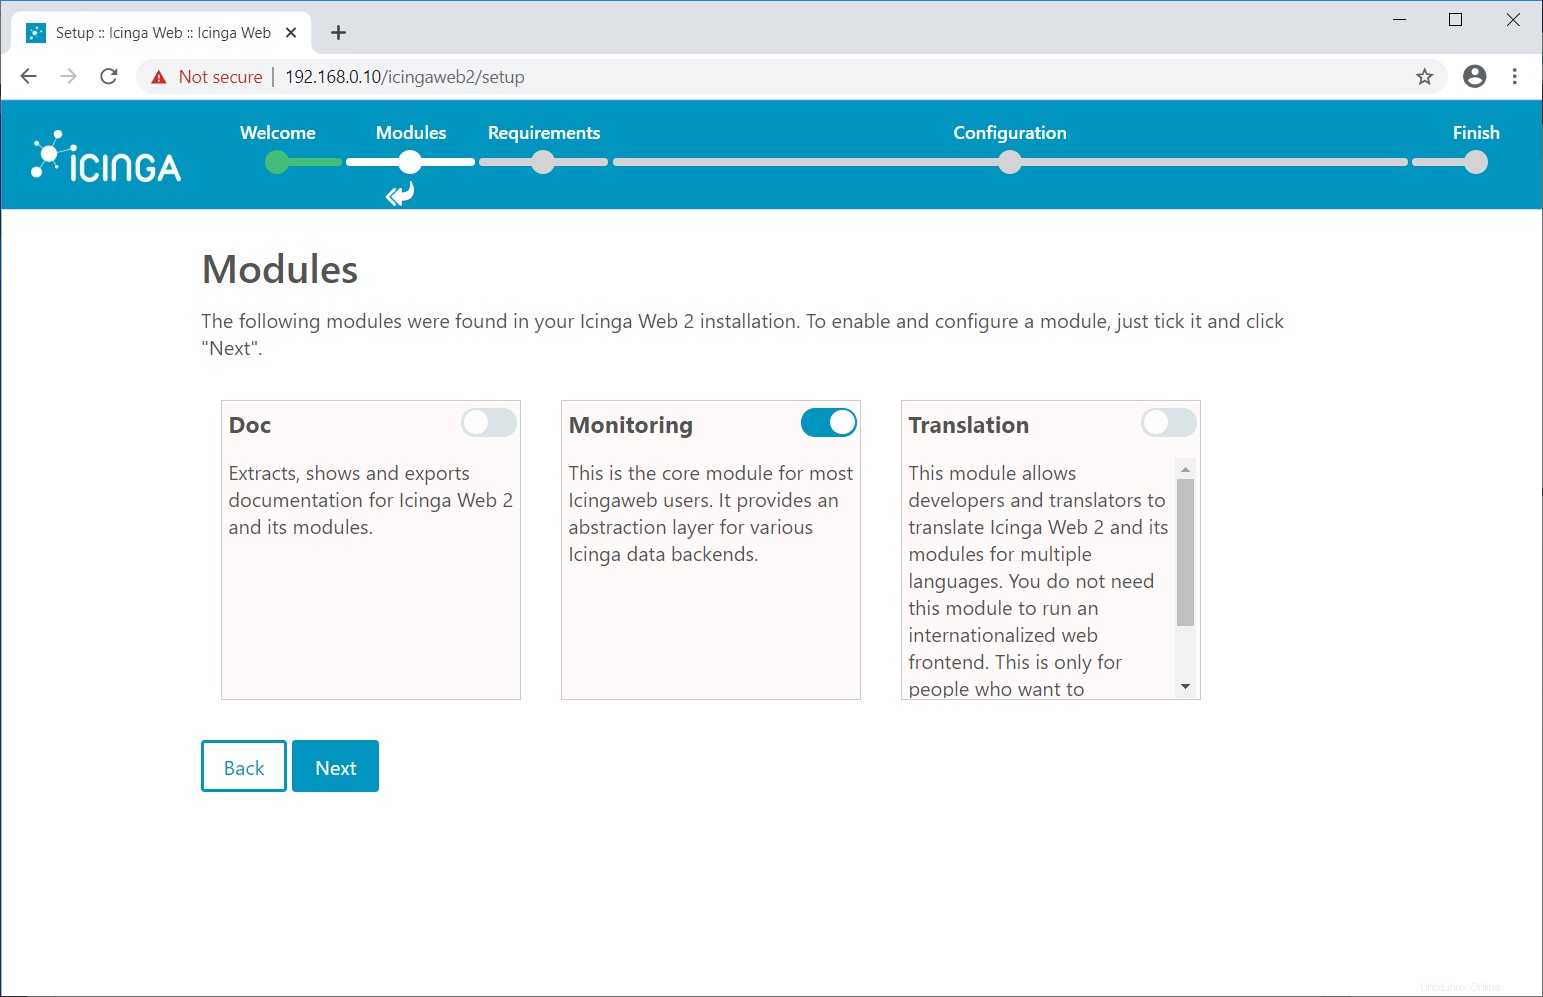
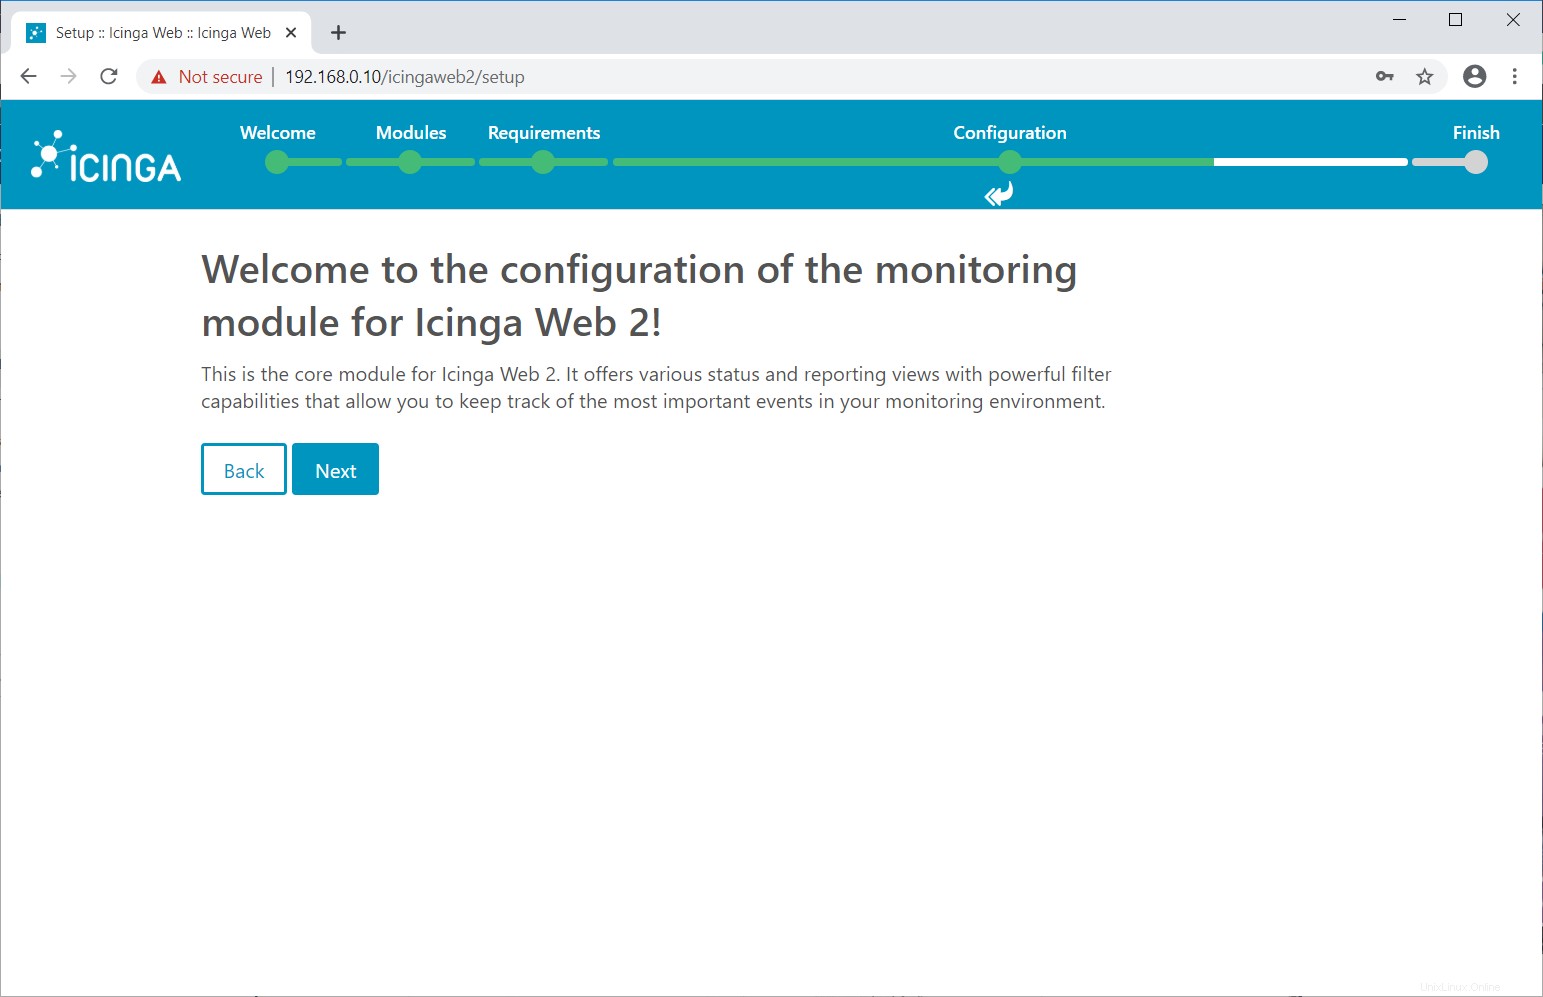
次の画面で、有効にするモジュールを選択して構成します。これらのモジュールは、Icinga2のインストール中にインストールされました。次に、[次へ]をクリックします 。
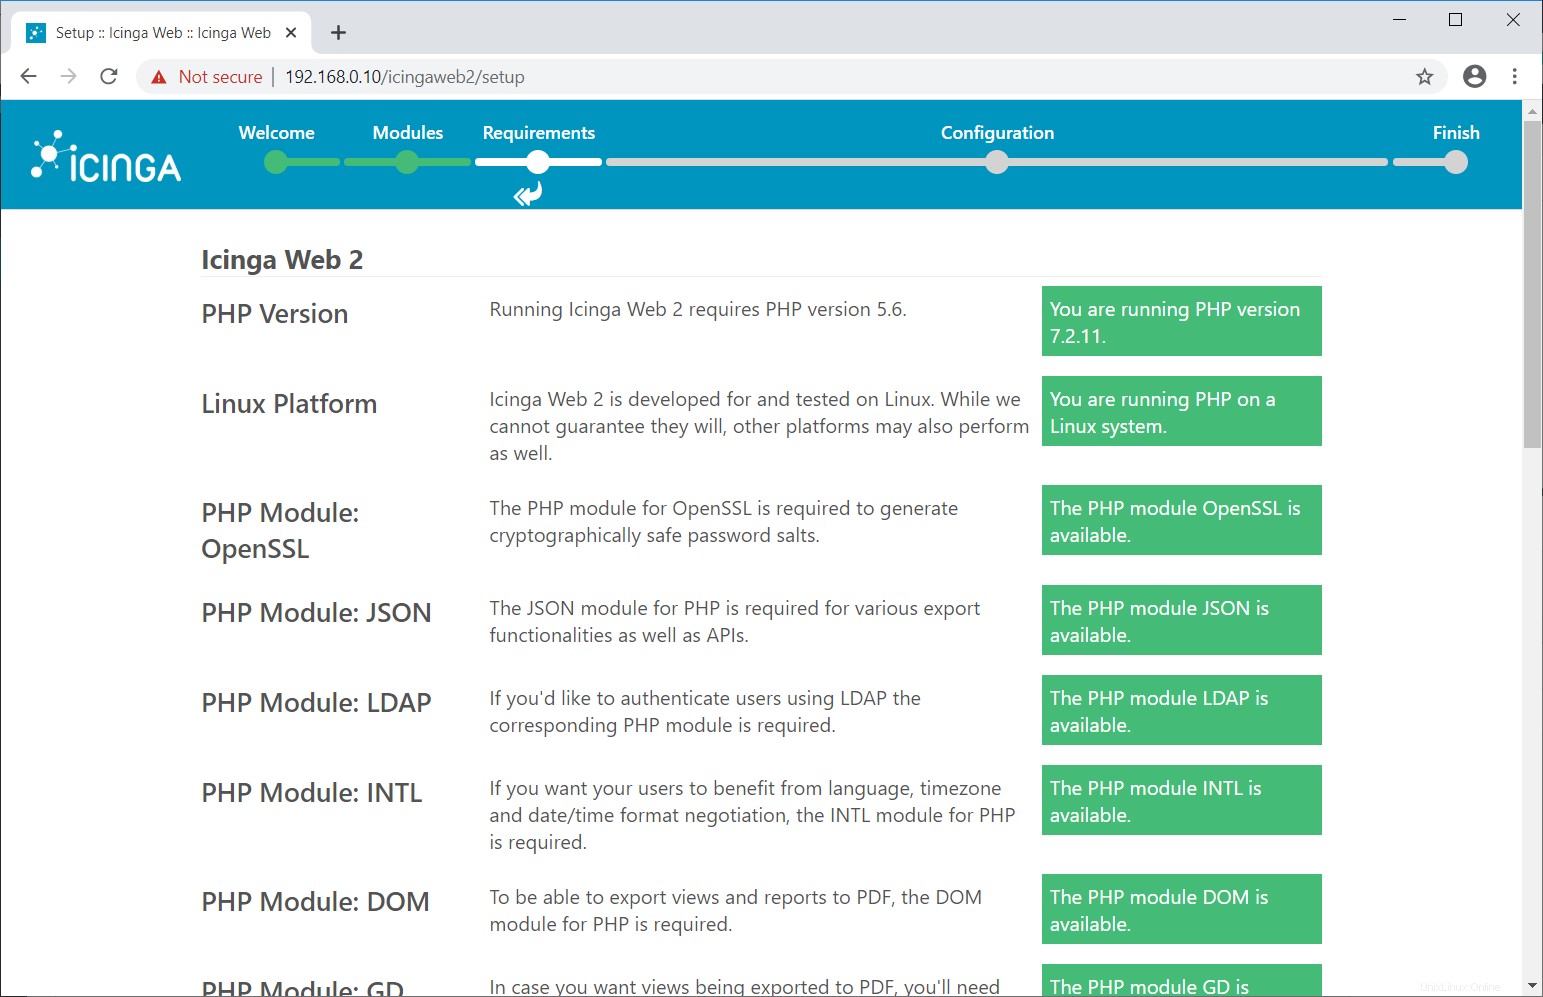
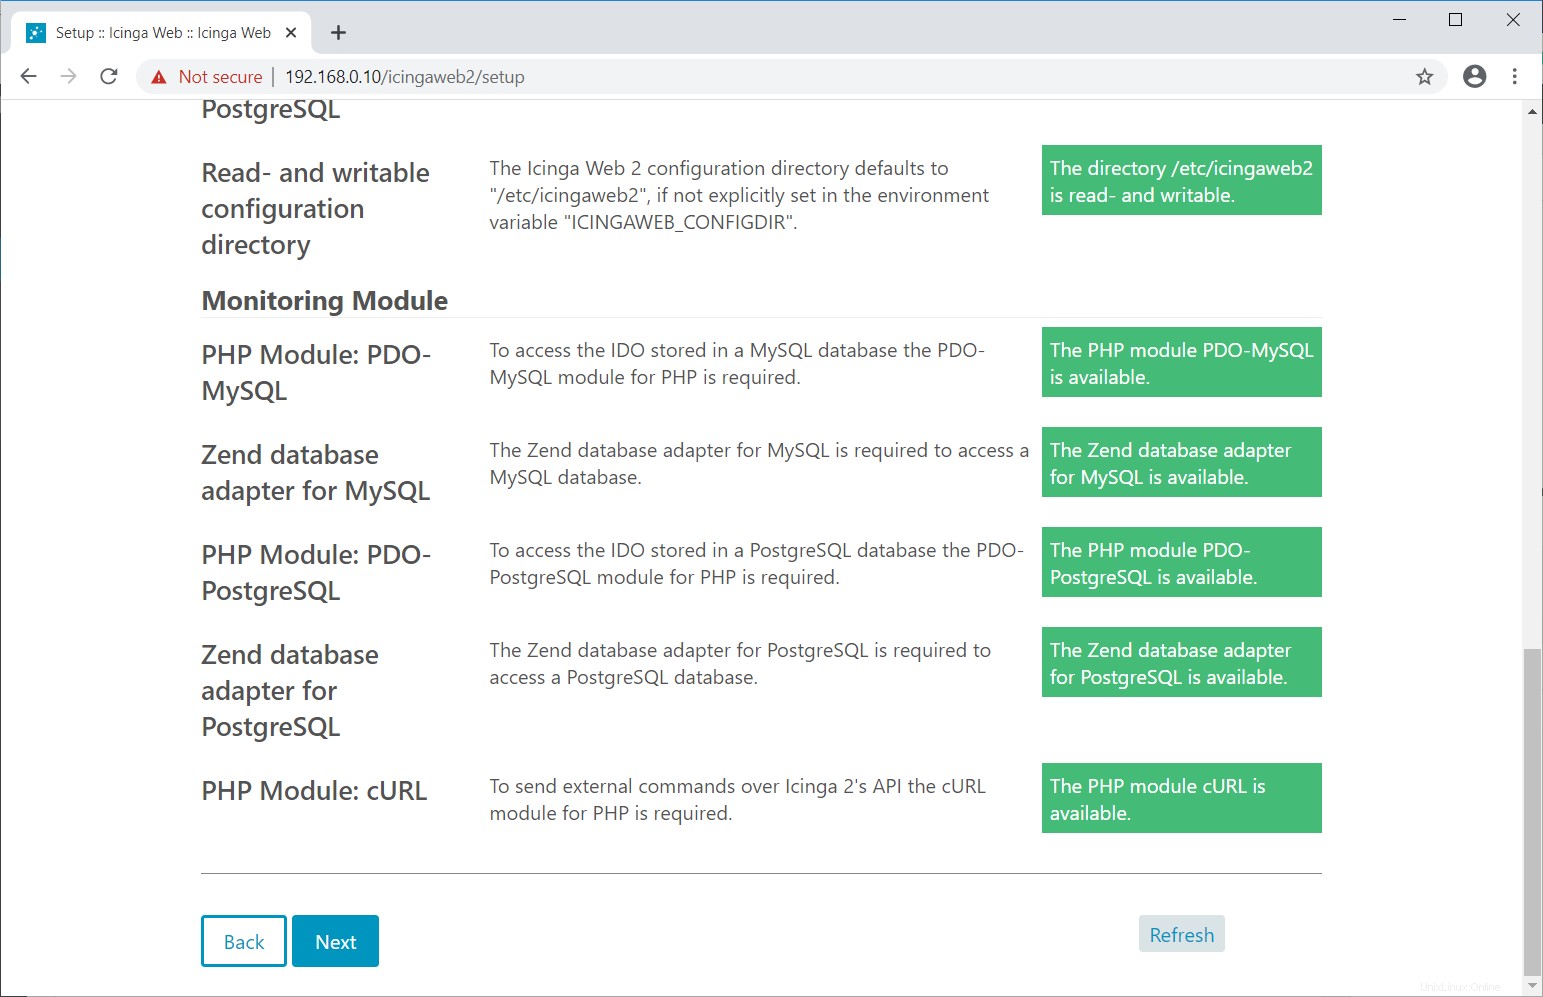
次のページは、システム、PHP、および必要なPHP拡張機能に関する情報を示しています。
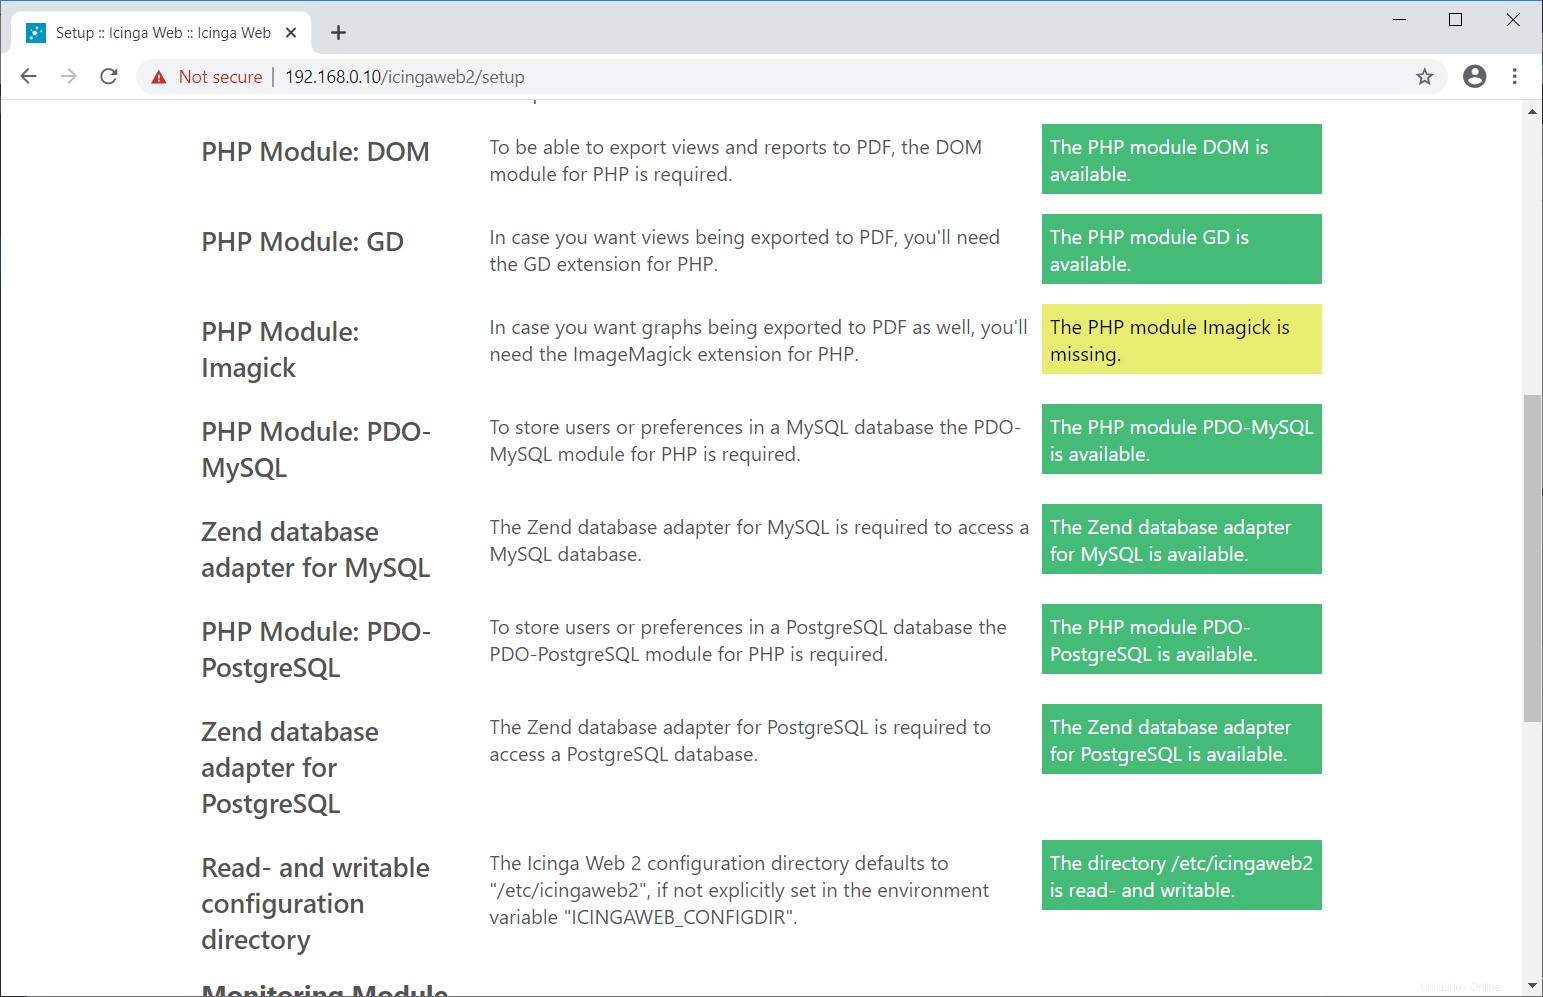 PHPImagick拡張機能がないという警告メッセージが表示される場合があります。
 Image MagickのPHP拡張機能は、OSリポジトリでは利用できません。以下のリンクからインストールしてください。
読む: CentOS 8 /RHEL8にPHPImagickをインストールする方法
RHEL 8の場合、(Red Hatポリシーに反して)インストールするか、ImageMagickのPHP拡張機能をインストールせずに先に進むかを選択します。Imagick用のPHPモジュールをインストールした後、ApacheおよびPHP FPMサービスを再起動し、更新をクリックします。 ボタンをクリックし、[次へ]をクリックします または単に次へをクリックします PHPモジュールImagickをインストールしていない場合。
systemctl restart httpd

systemctl restart php-fpm
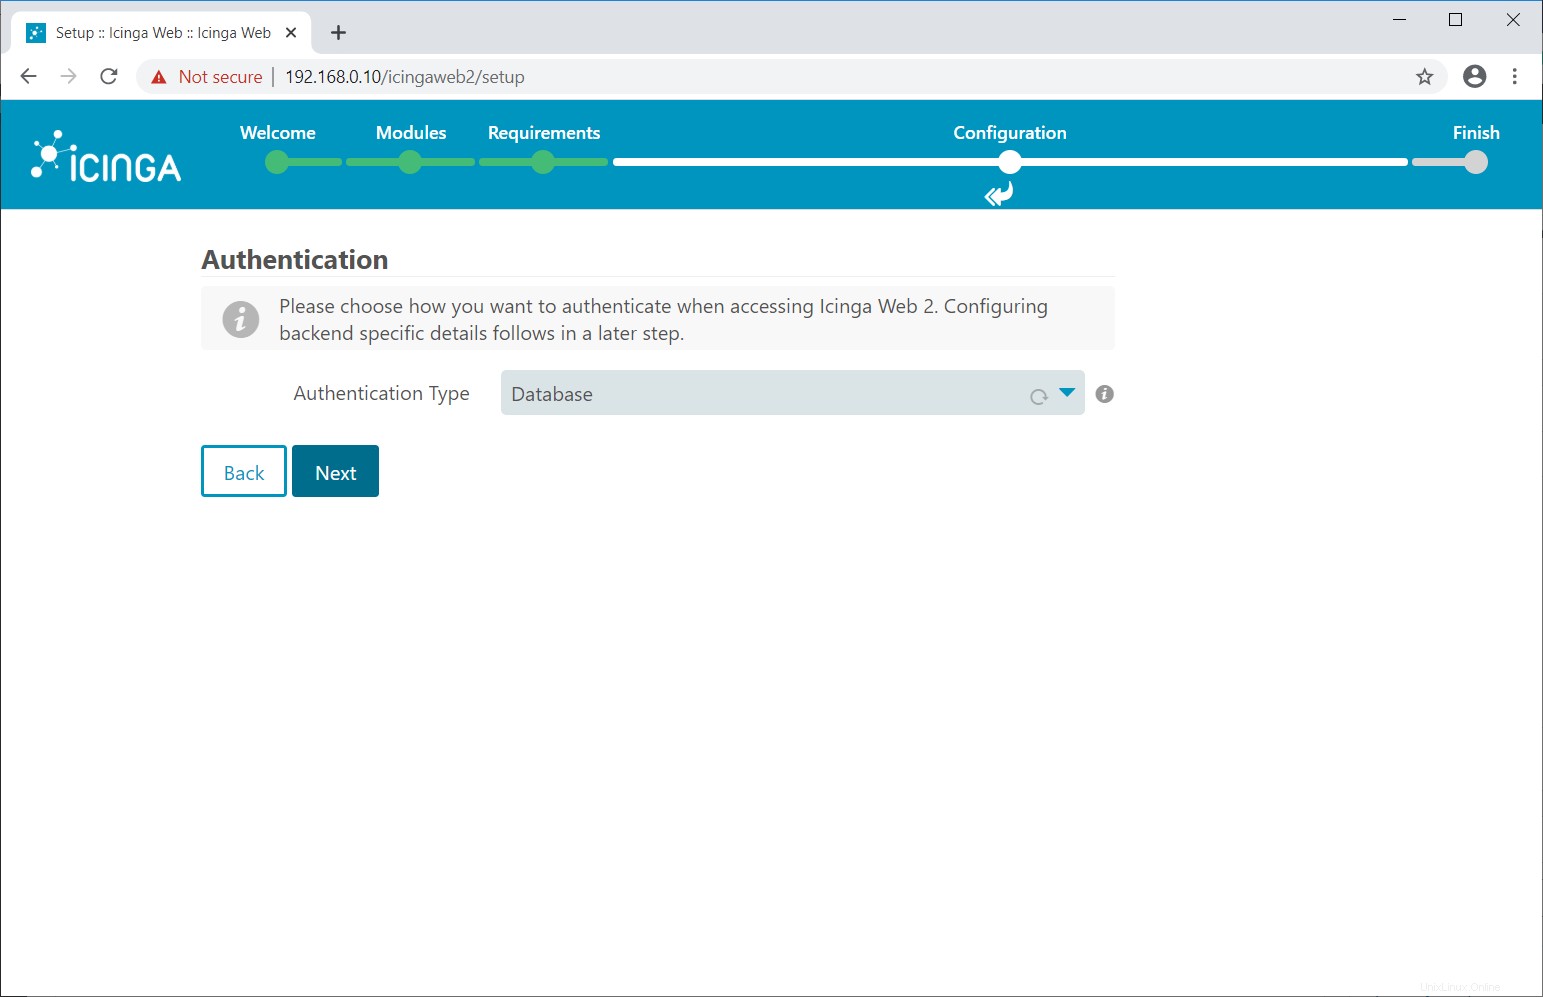
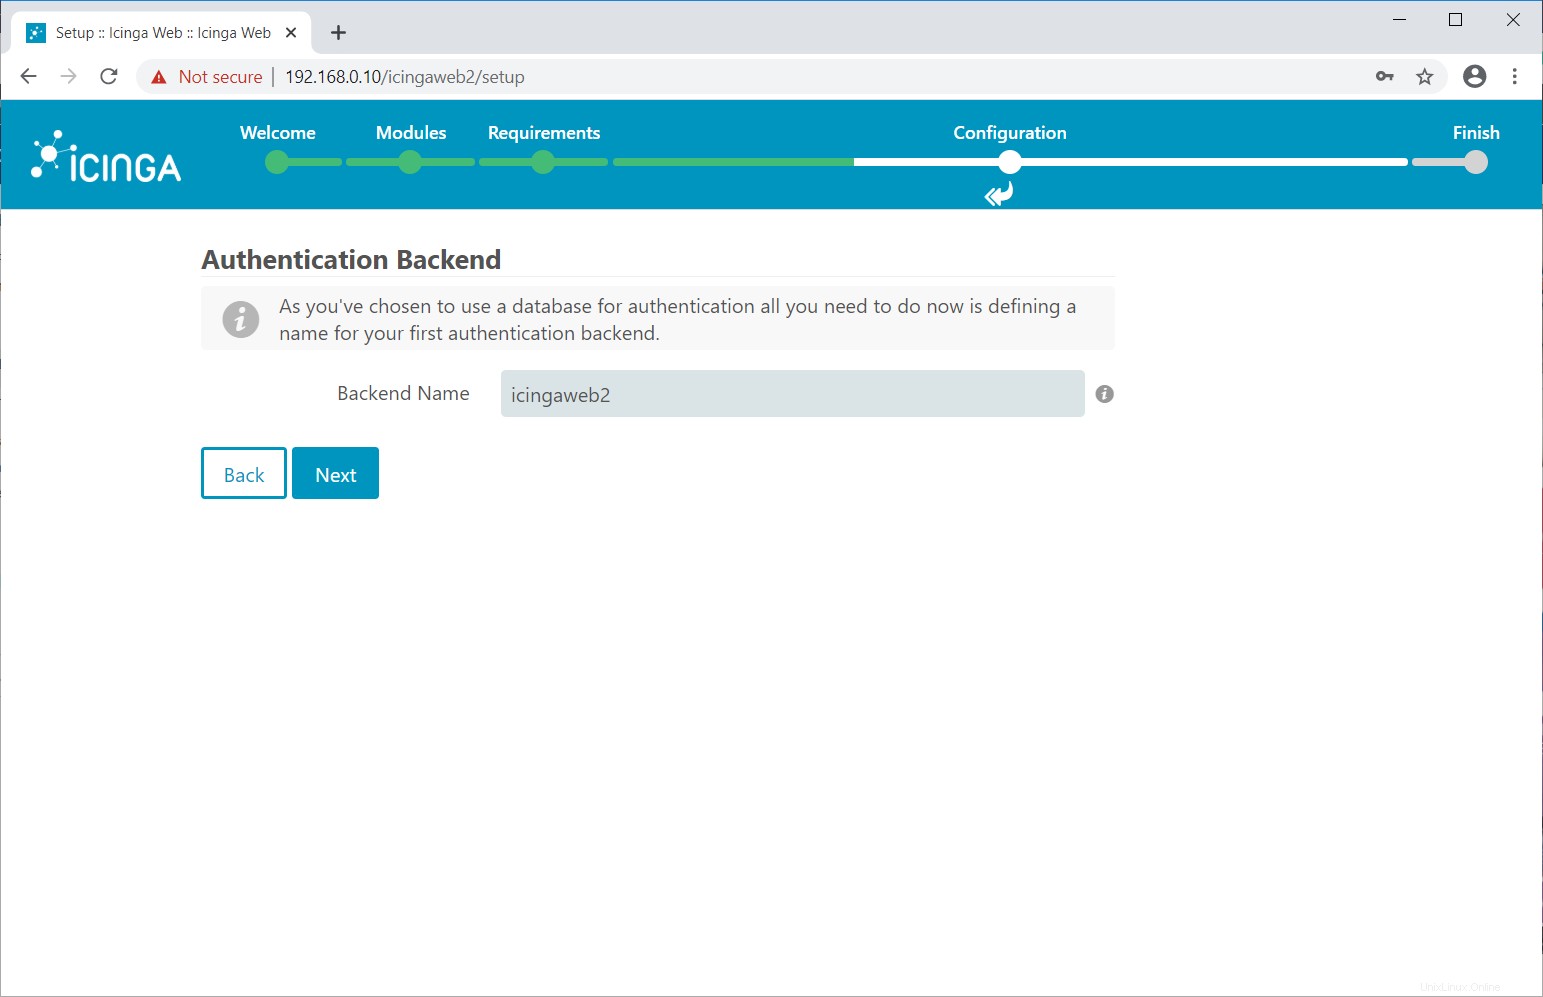
次のページでは、IcingaWeb2認証を構成します。 Icinga Web 2は、Active Directory、LDAP、およびローカル認証メカニズムをサポートしています。
ここでは、このデモのために、ローカルのIcingaWeb2ユーザーアカウントを作成します。したがって、認証タイプをデータベースとして選択します 次へをクリックします 。
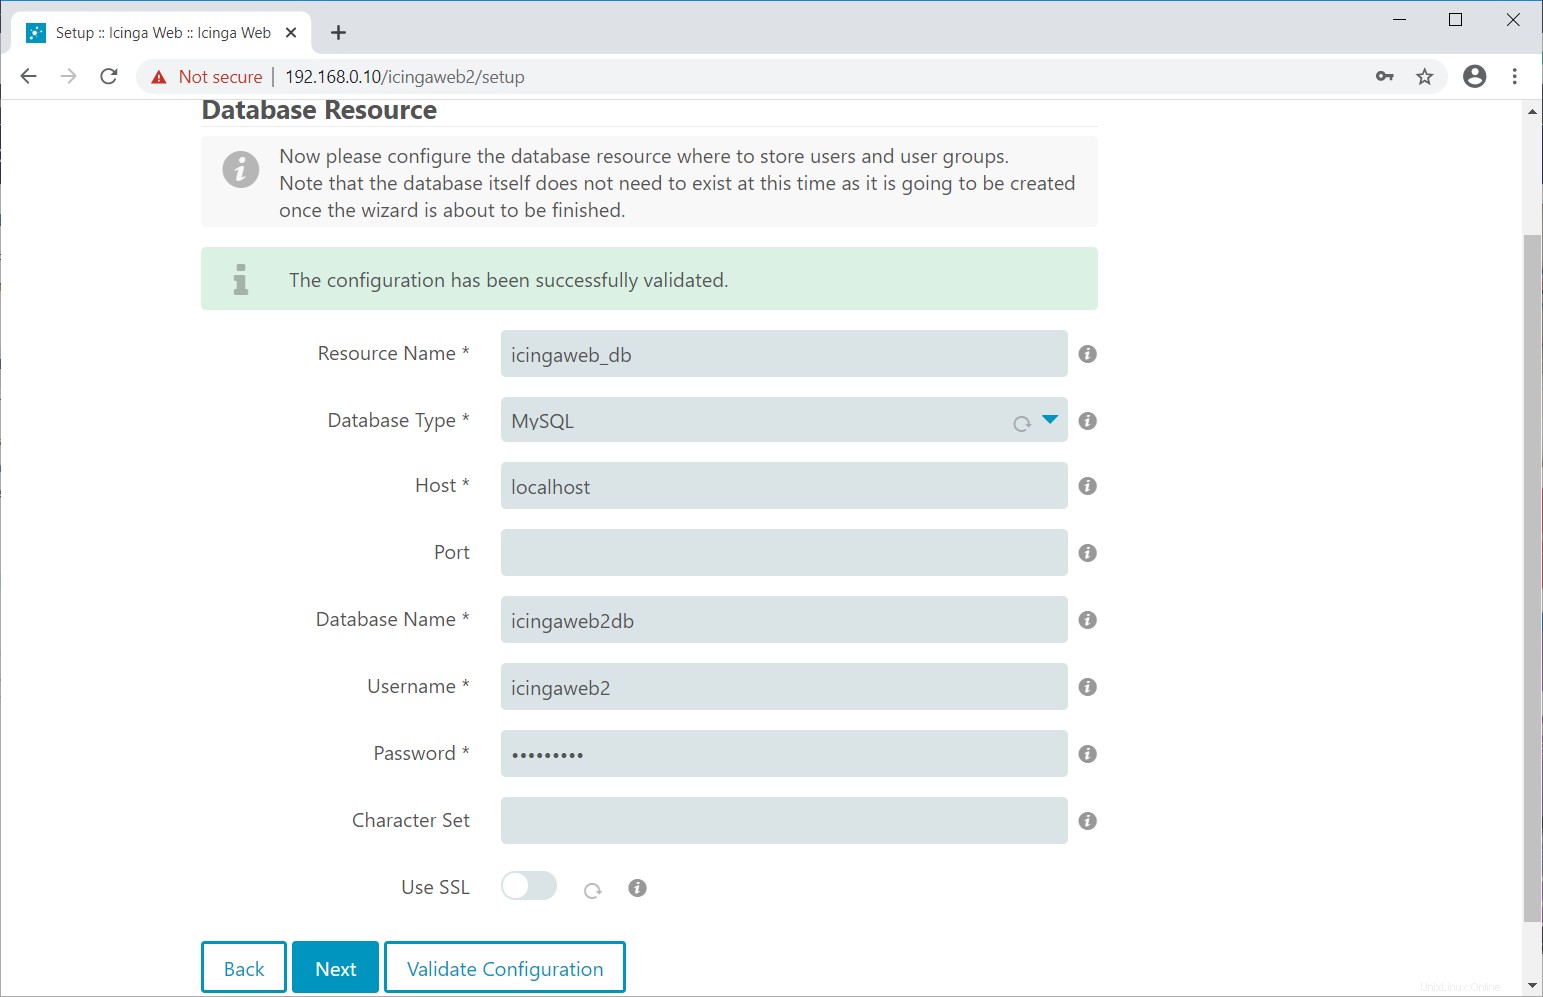
MySQL/MariaDBサーバーにログインします。
mysql -u root -p
認証の詳細を保存するデータベースを作成します。
CREATE DATABASE icingaweb2db;

grant all privileges on icingaweb2db.* to icingaweb2@localhost identified by 'icinga123';

quit
次のページにデータベースの詳細を入力し、[次へ]をクリックします 。
次へをクリックします 。
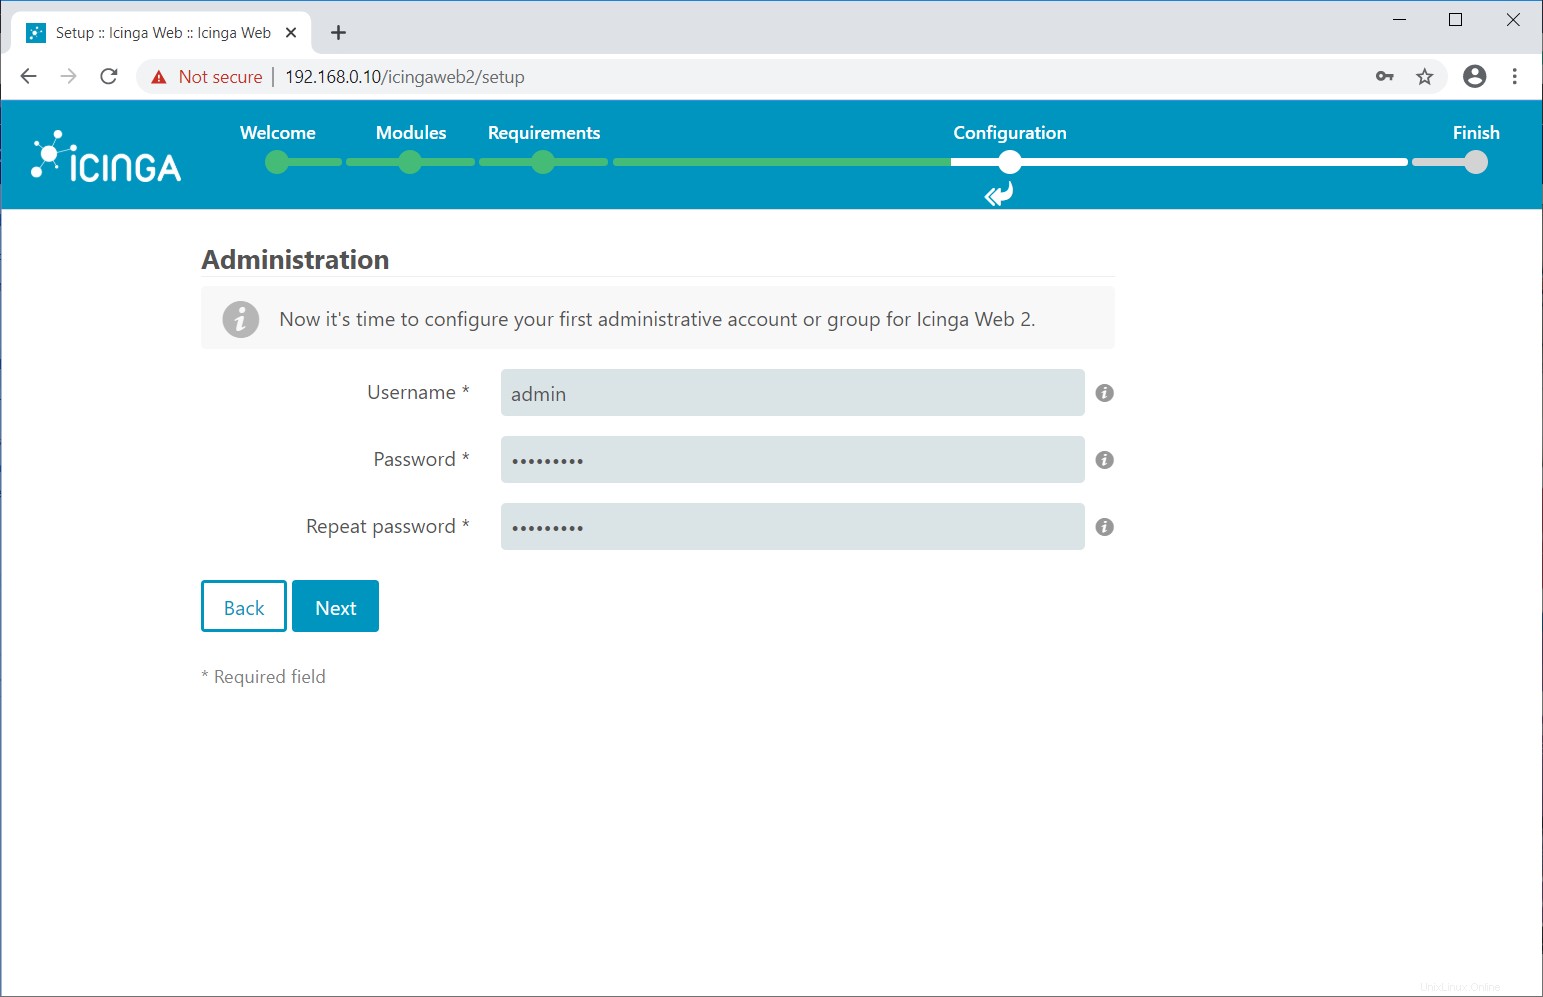
IcingaWeb2管理者アカウントに必要なユーザー名とパスワードを入力します。
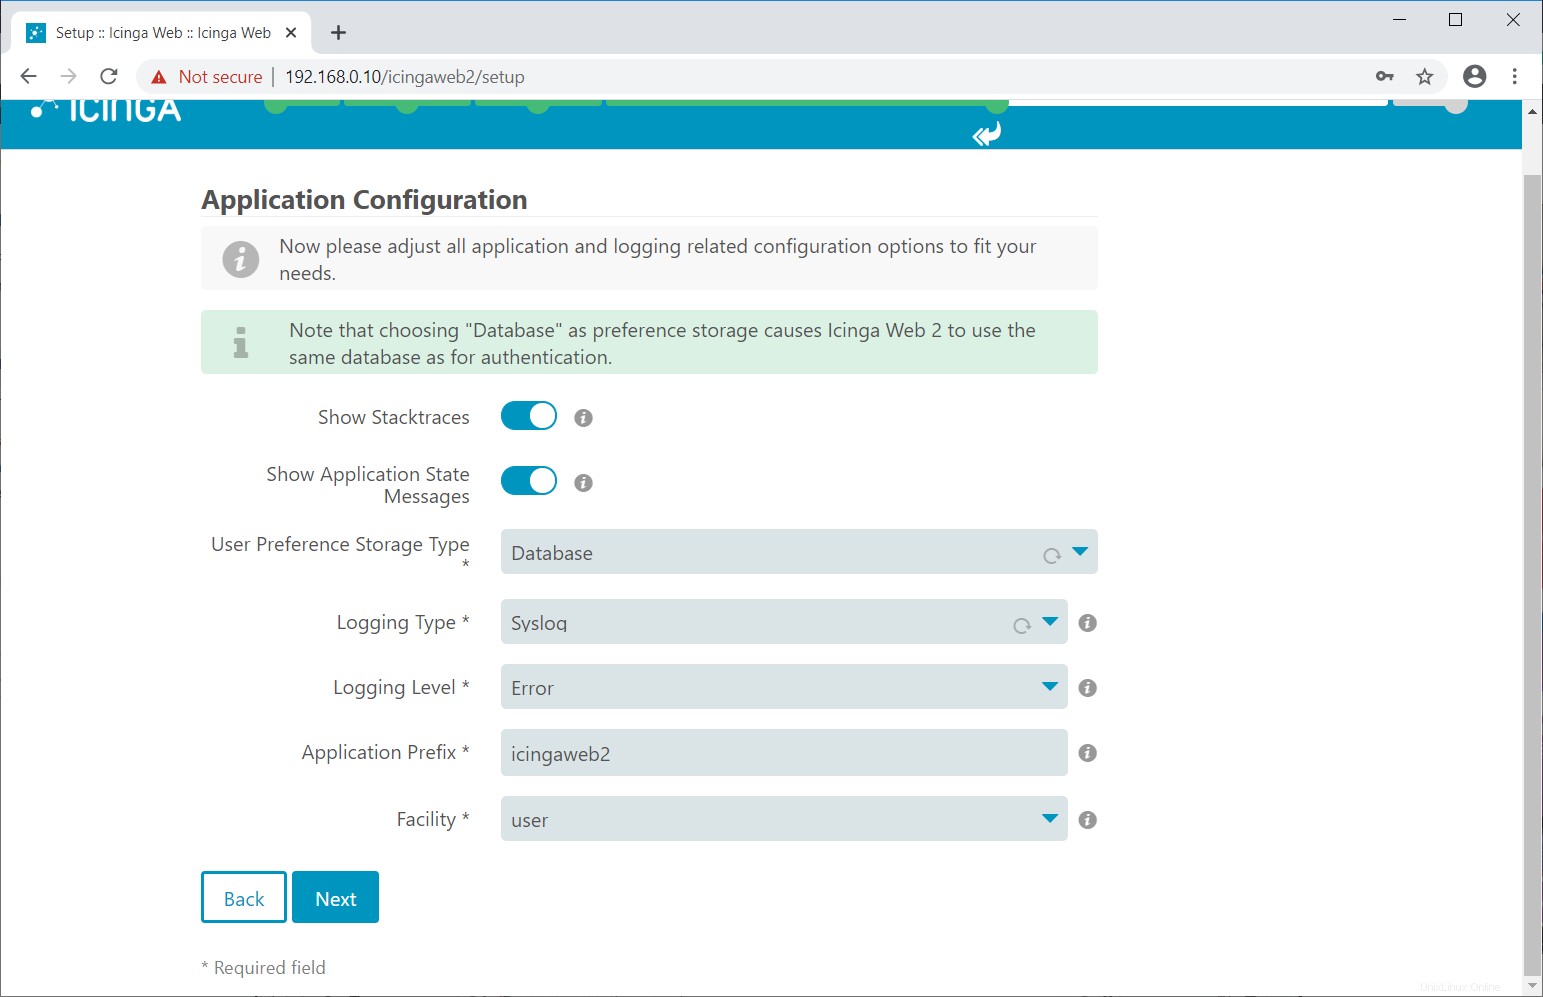
アプリケーションとログ関連の構成を保存する場所を選択します。 次へをクリックします 。
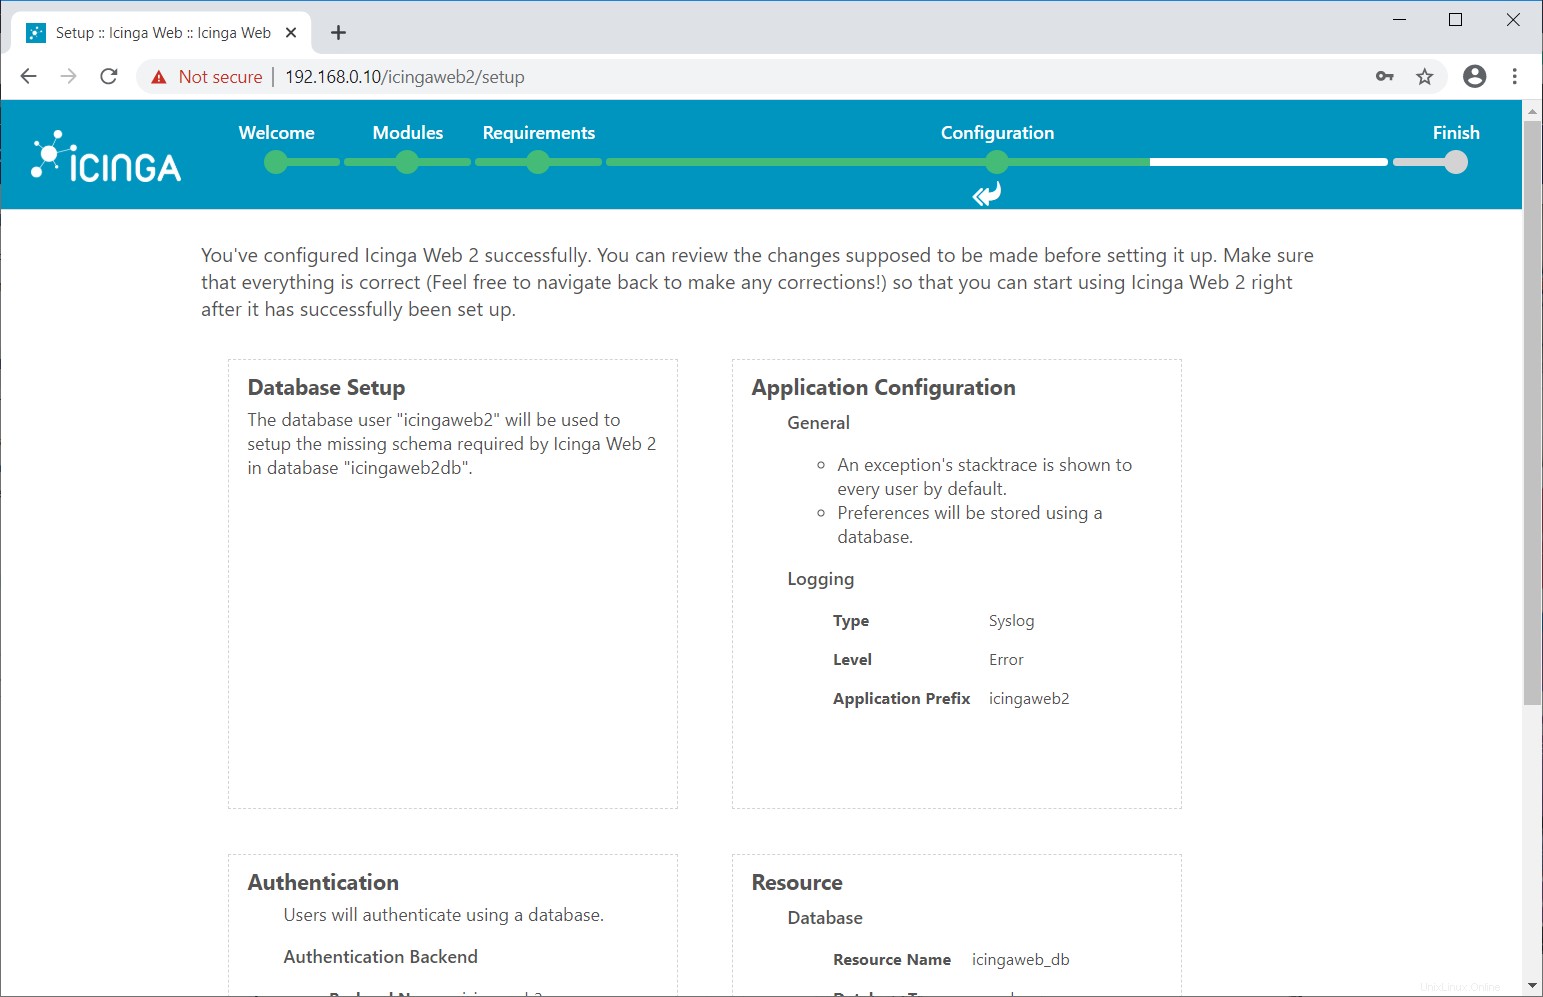
次の画面で設定を確認します。
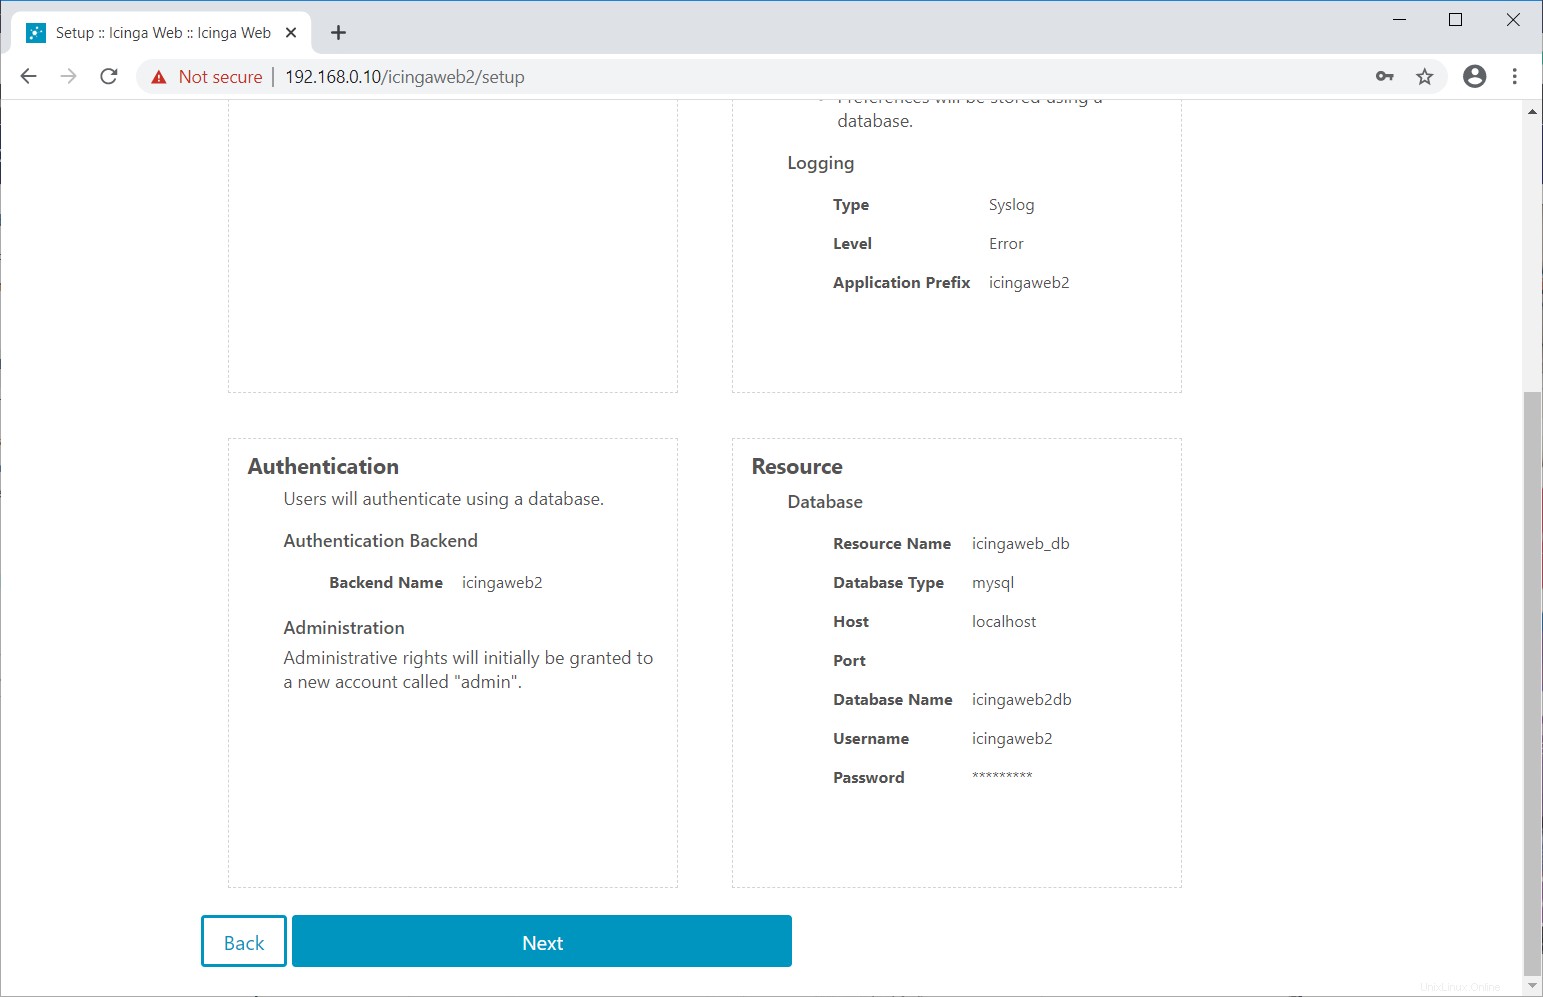
次へをクリックします 。
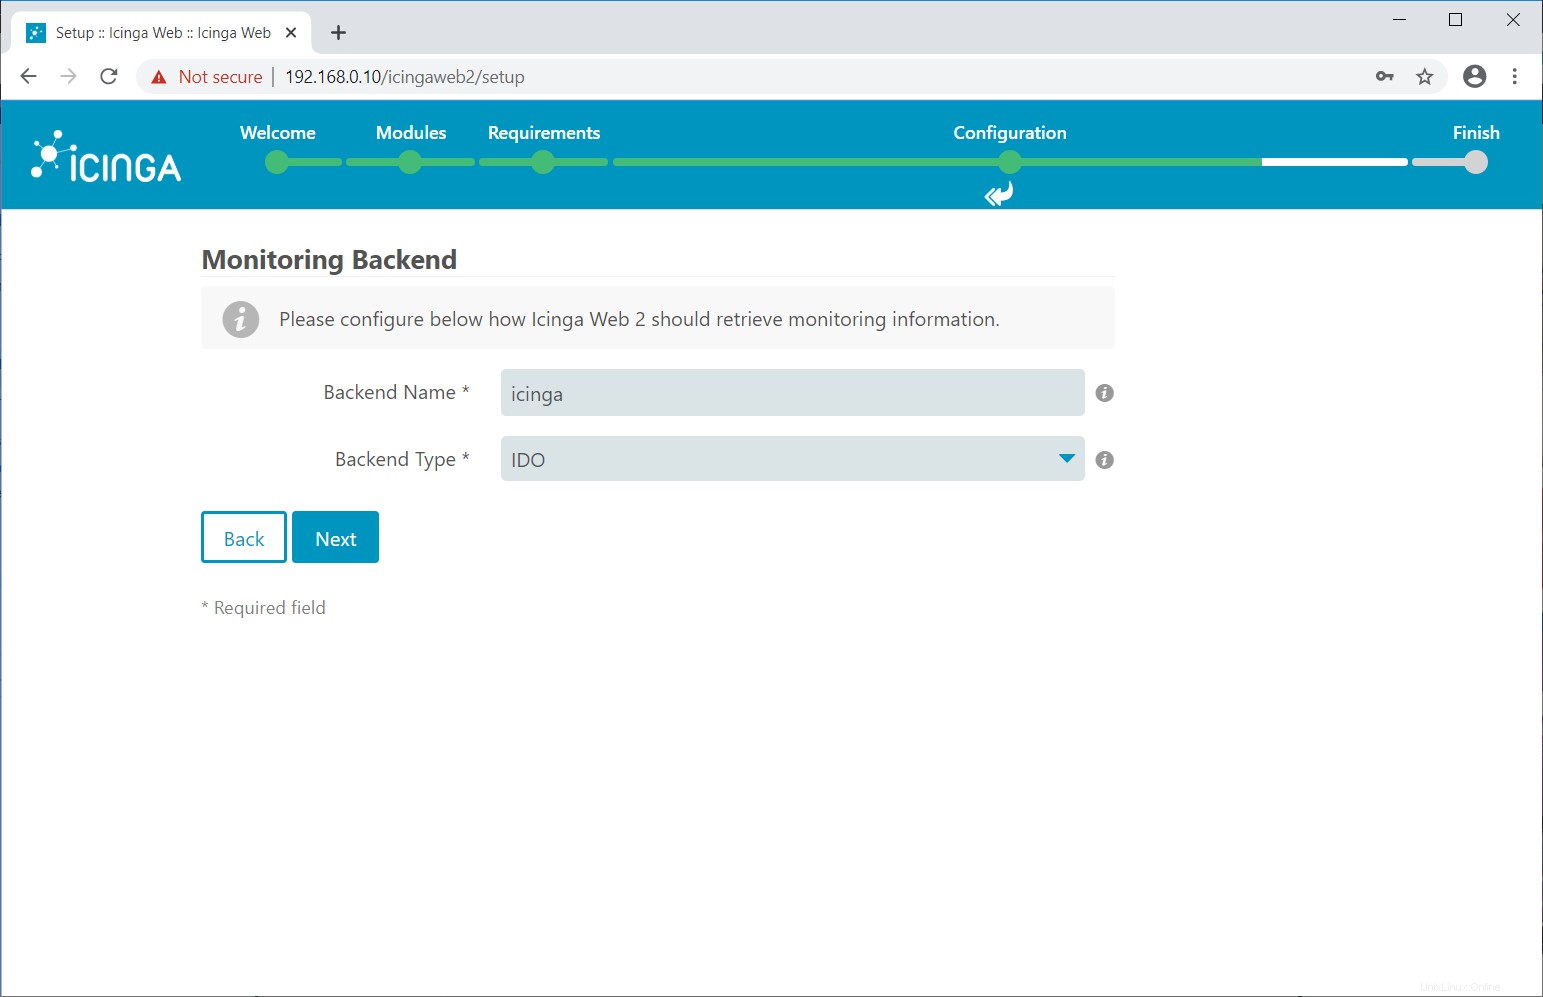
次へをクリックします IcingaWeb2ページの監視モジュールの構成について。
監視バックエンドにより、IcingaWeb2はIcinga2データベースから監視情報を取得できます。ここでは、IDOを使用します。
次のページでIDOデータベースの詳細を入力し、[次へ]をクリックします 。
IDOデータベースはIcinga2のインストール中に作成されました。データベースの詳細を取得するには、ここをクリックしてください。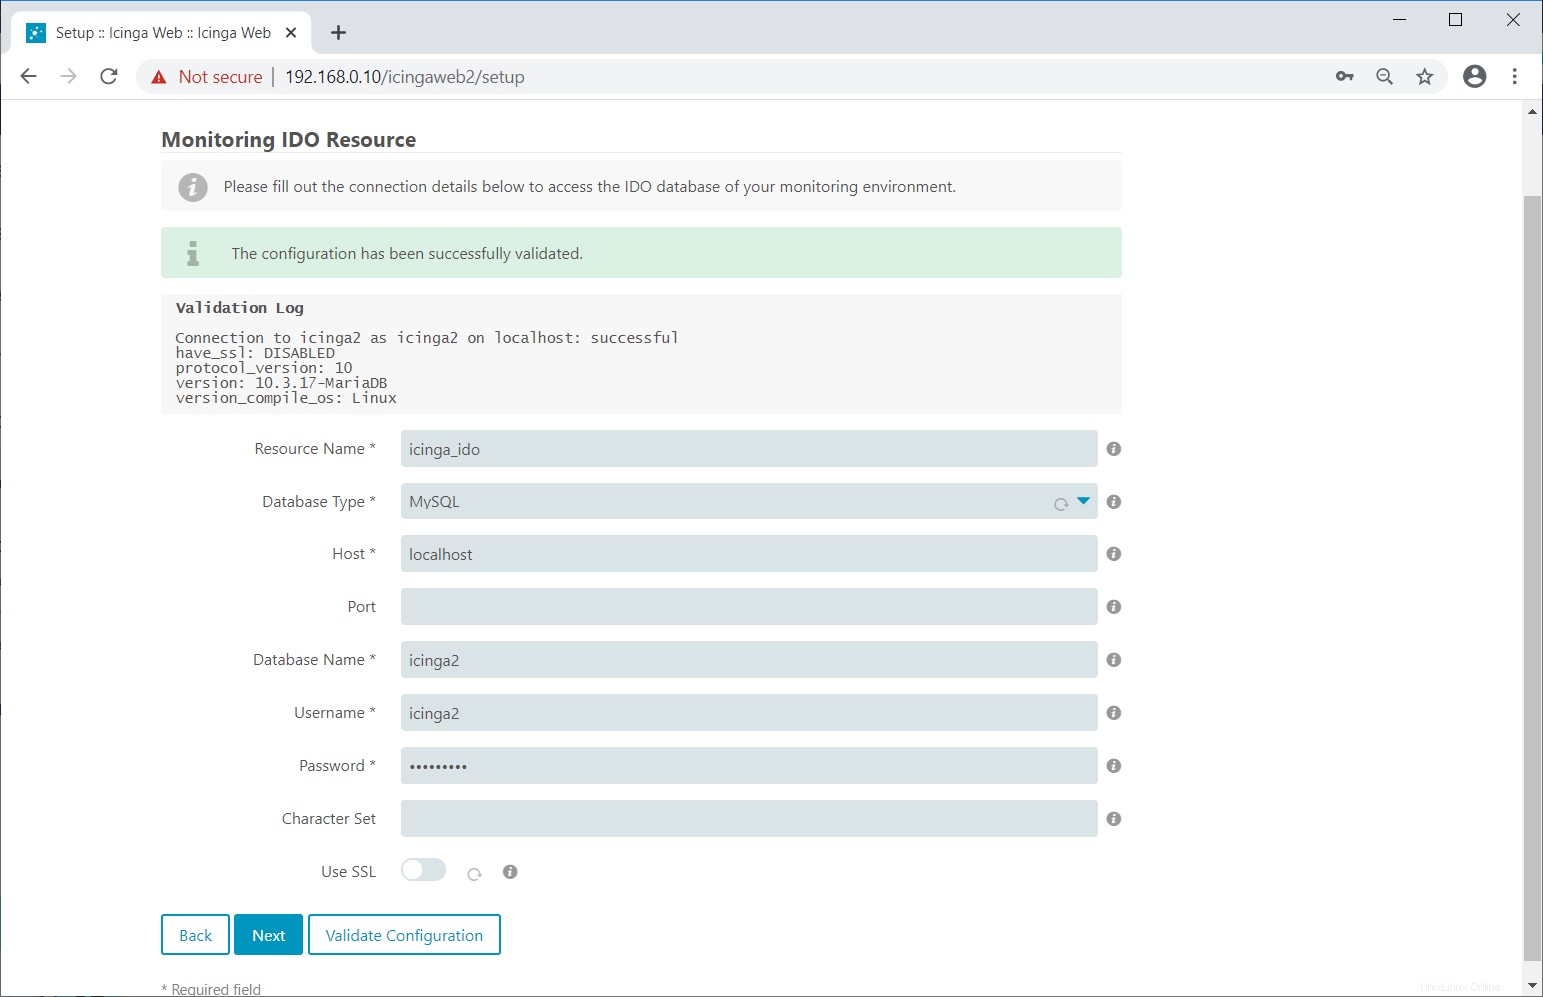
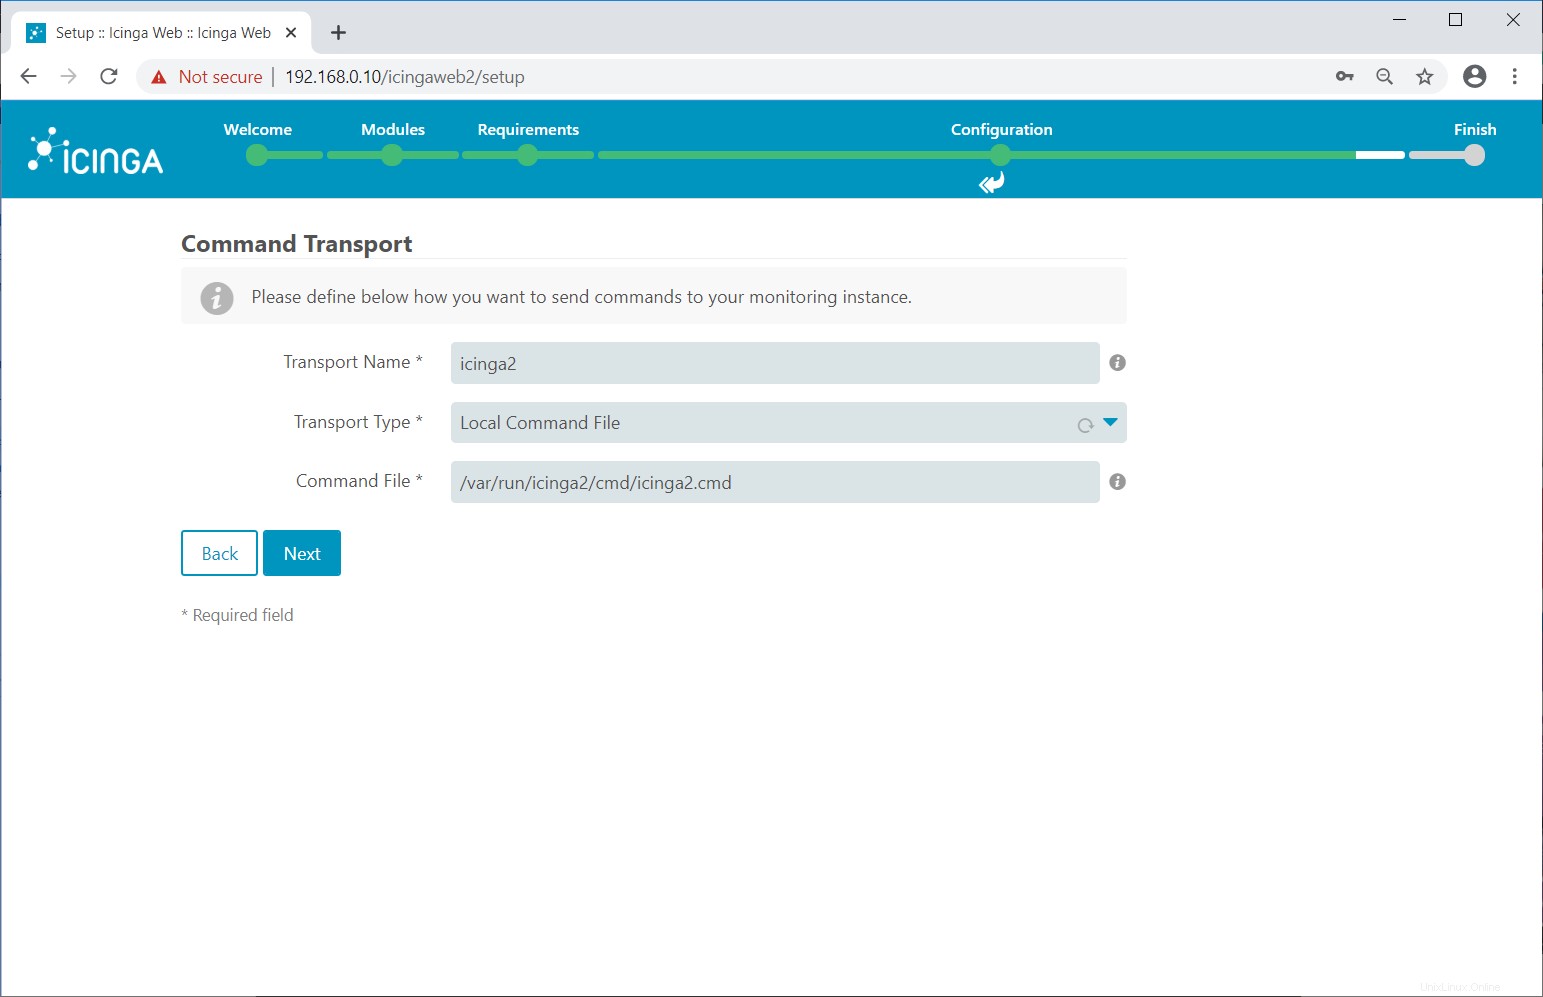
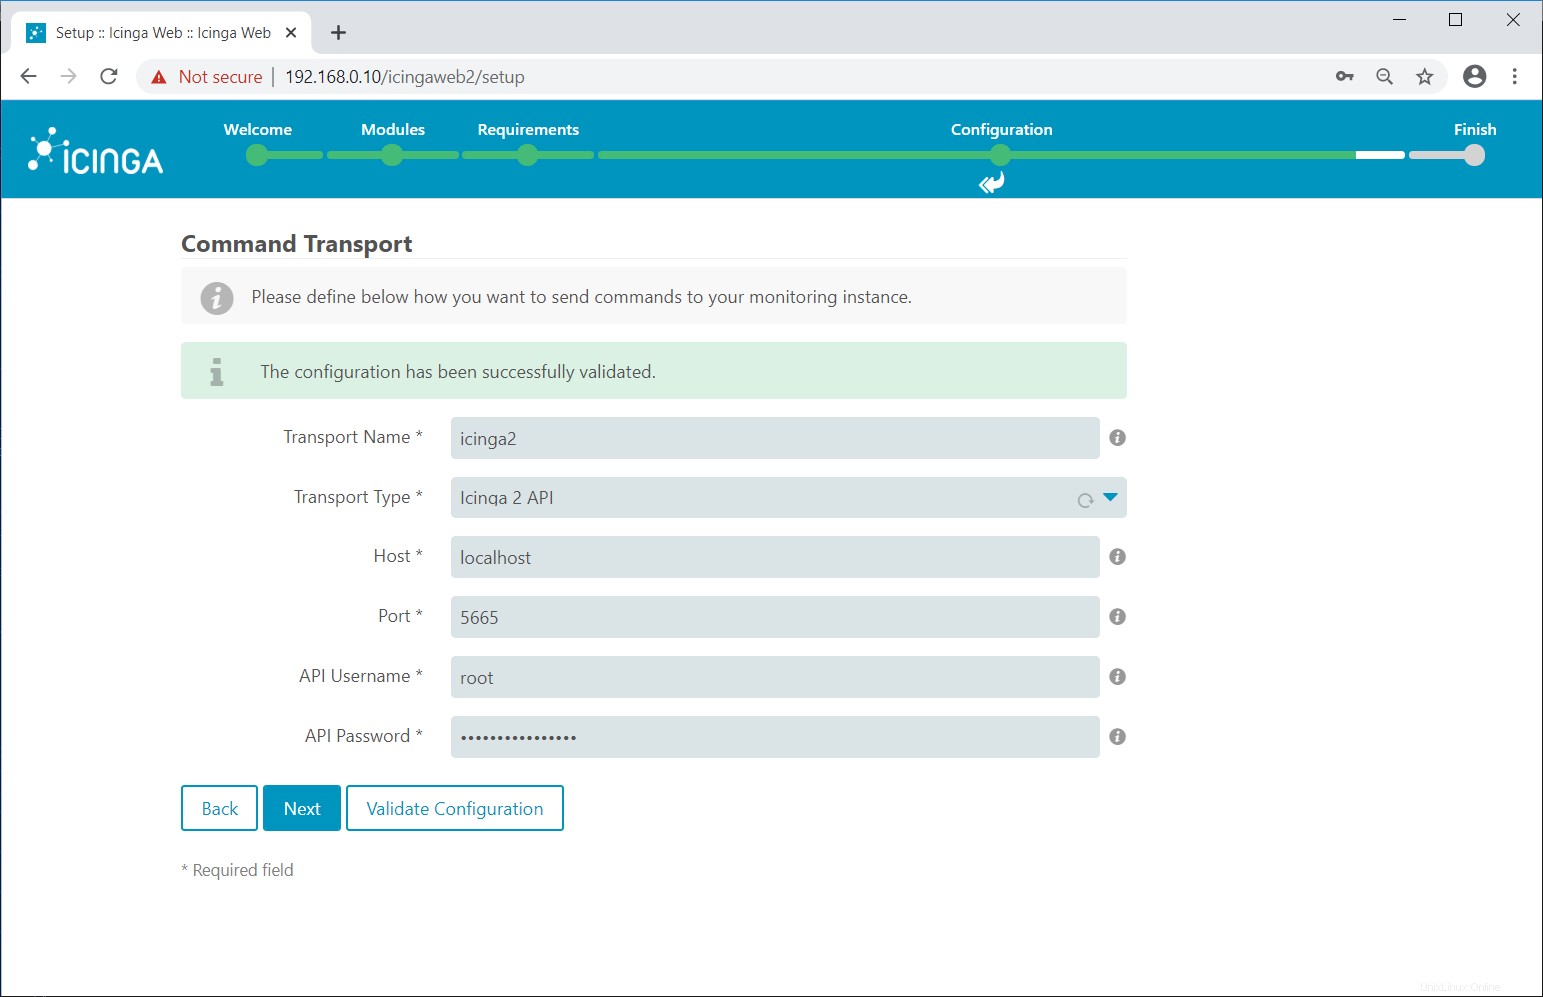
このページでは、監視のためにリモートサーバーにコマンドを送信する方法を説明します。
Icinga Web 2は、コマンドトランスポートとしてローカルコマンドファイル、リモートコマンドファイル、およびIcinga2APIをサポートしています。
ここでは、このデモのために、単一のコマンドトランスポートを使用してIcingaWeb2を構成します。以下のコマンドトランスポートのいずれかを選択してください
- ローカルコマンドファイル
- Icinga 2 API(推奨)
- リモートコマンドファイル
IcingaWeb2では複数の転送コマンドモードを定義できます。
Icinga 2 API
以下のコマンドを実行して、Icinga2APIをセットアップします。
icinga2 api setup
Output:

information/cli: Generating new CA.
information/base: Writing private key to '/var/lib/icinga2/ca//ca.key'.
information/base: Writing X509 certificate to '/var/lib/icinga2/ca//ca.crt'.
information/cli: Generating new CSR in '/var/lib/icinga2/certs//centos8.itzgeek.local.csr'.
information/base: Writing private key to '/var/lib/icinga2/certs//centos8.itzgeek.local.key'.
information/base: Writing certificate signing request to '/var/lib/icinga2/certs//centos8.itzgeek.local.csr'.
information/cli: Signing CSR with CA and writing certificate to '/var/lib/icinga2/certs//centos8.itzgeek.local.crt'.
information/pki: Writing certificate to file '/var/lib/icinga2/certs//centos8.itzgeek.local.crt'.
information/cli: Copying CA certificate to '/var/lib/icinga2/certs//ca.crt'.
information/cli: Adding new ApiUser 'root' in '/etc/icinga2/conf.d/api-users.conf'.
information/cli: Reading '/etc/icinga2/icinga2.conf'.
information/cli: Enabling the 'api' feature.
Enabling feature api. Make sure to restart Icinga 2 for these changes to take effect.
information/cli: Updating 'NodeName' constant in '/etc/icinga2/constants.conf'.
information/cli: Created backup file '/etc/icinga2/constants.conf.orig'.
information/cli: Updating 'ZoneName' constant in '/etc/icinga2/constants.conf'.
information/cli: Backup file '/etc/icinga2/constants.conf.orig' already exists. Skipping backup.
Done.

Now restart your Icinga 2 daemon to finish the installation!
/etc/icinga2/conf.d/api-users.confファイルからAPIユーザーの詳細を取得します。
cat /etc/icinga2/conf.d/api-users.conf
Output:

/**
 * The ApiUser objects are used for authentication against the API.
 */
object ApiUser "root" {
  password = "c6bbfdd8afceceb1"
  // client_cn = ""

  permissions = [ "*" ]
}
Icinga2サービスを再起動します。
systemctl restart icinga2
以下のコマンドトランスポートページで上記のユーザー名とパスワードを使用してください。
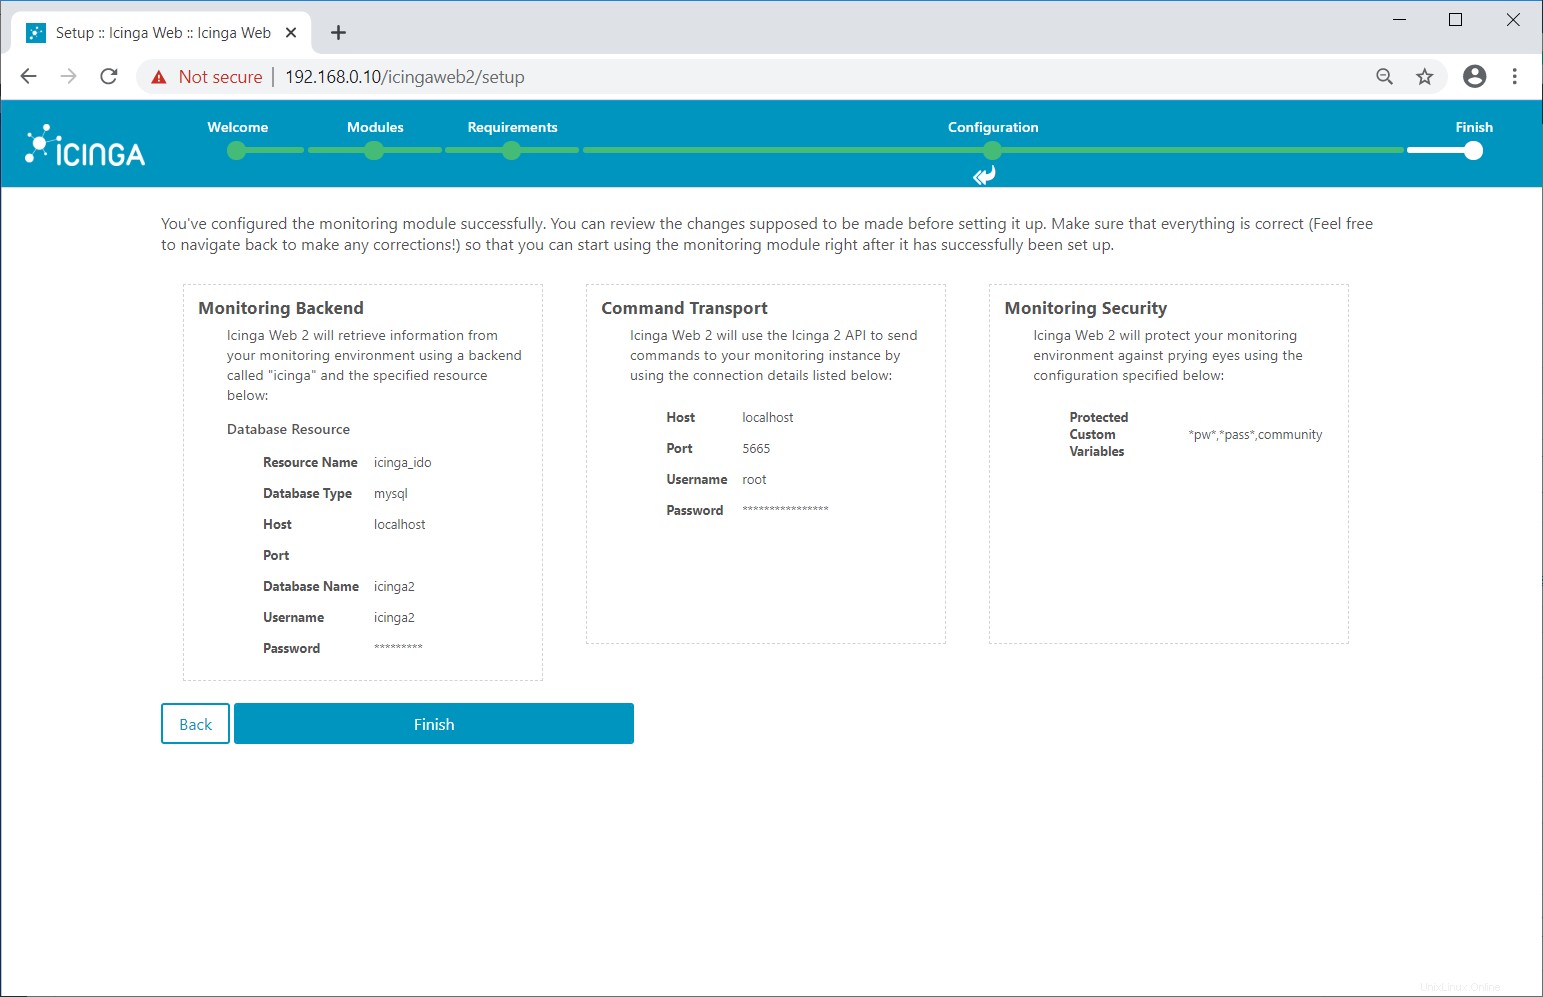
悪い変数から保護するために変数の詳細を入力してください。

監視構成を確認します。
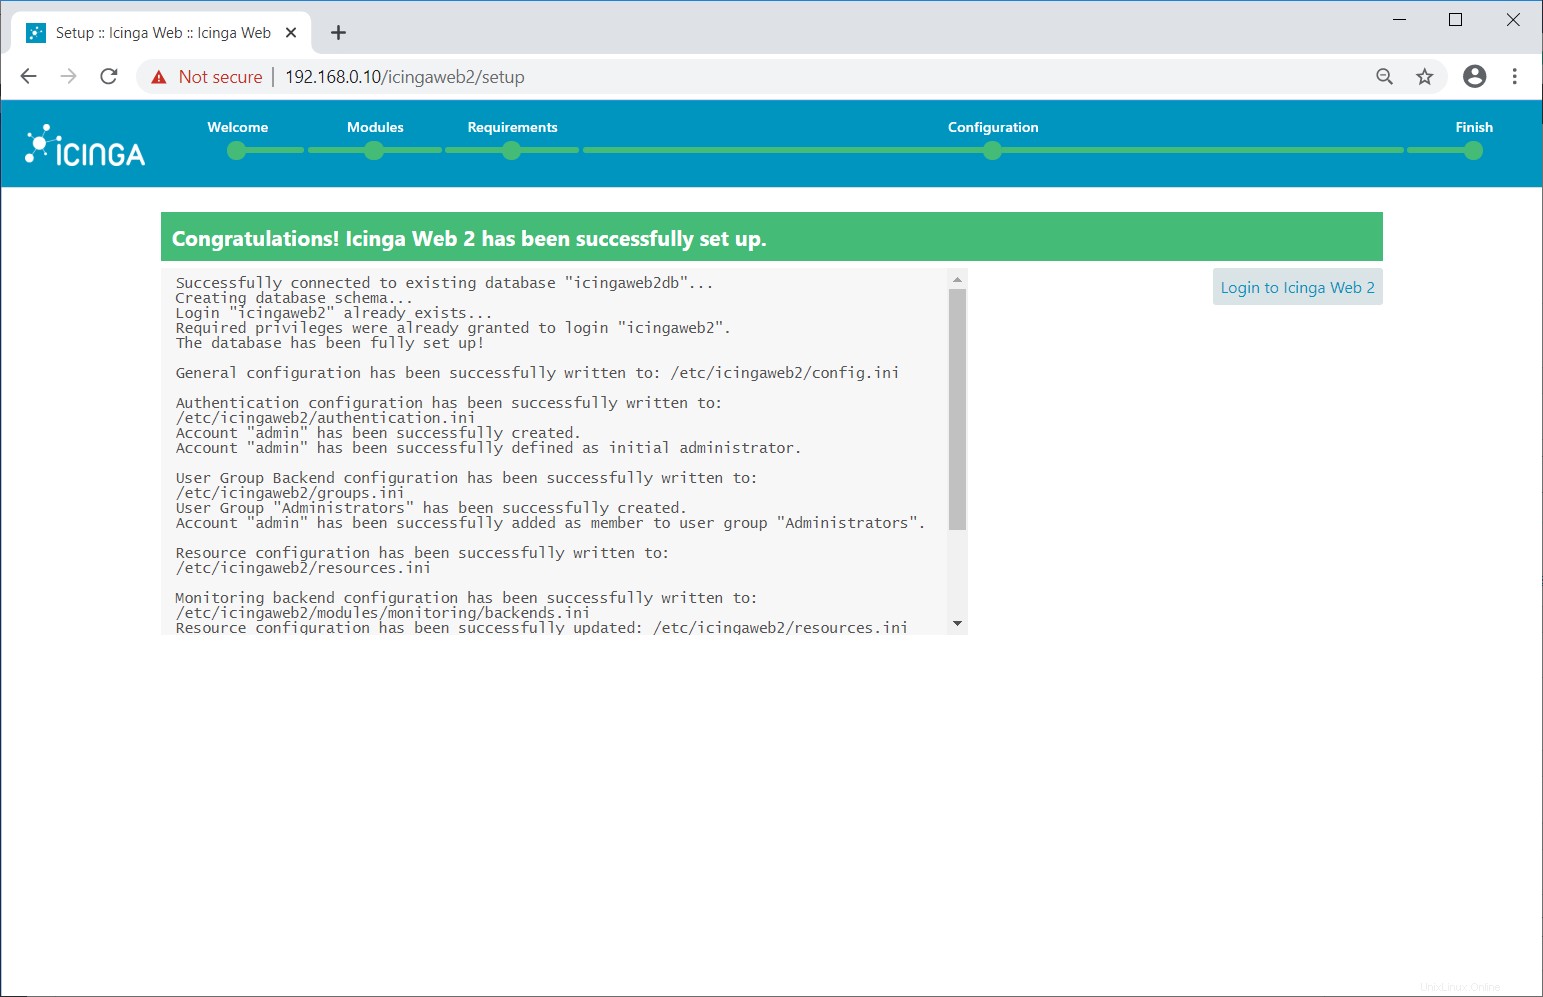
IcingaWeb2が正常にセットアップされました。 IcingaWeb2にログインをクリックします 。
IcingaWeb2にアクセス
以前に作成した管理者アカウントを使用してIcingaWeb2にログインします。
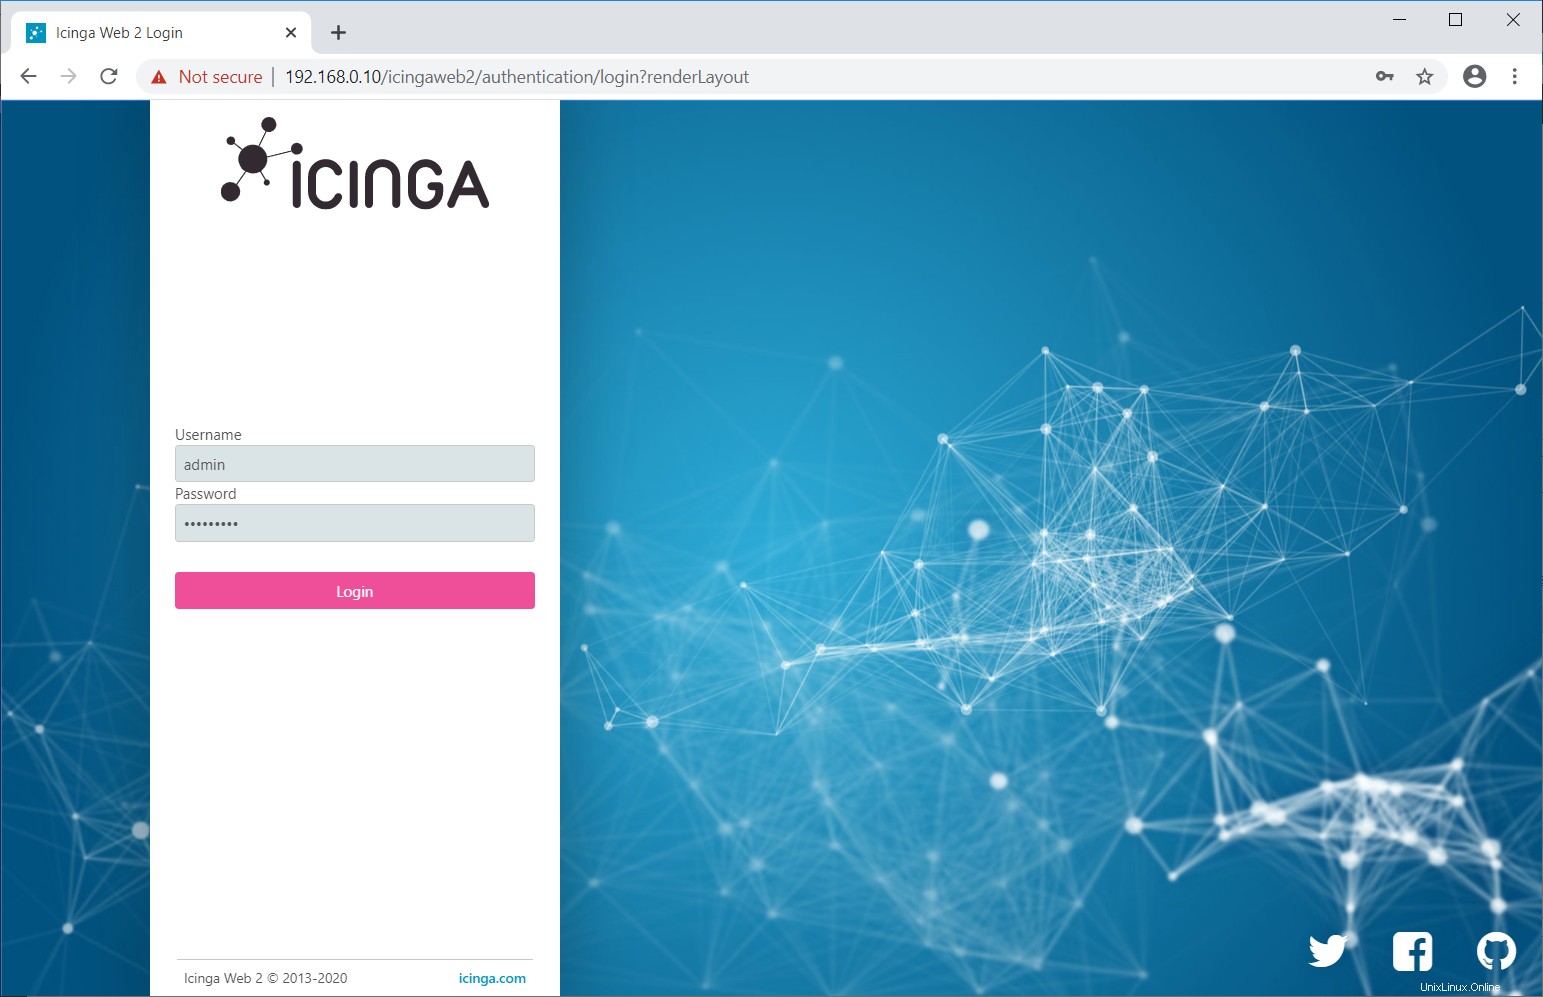
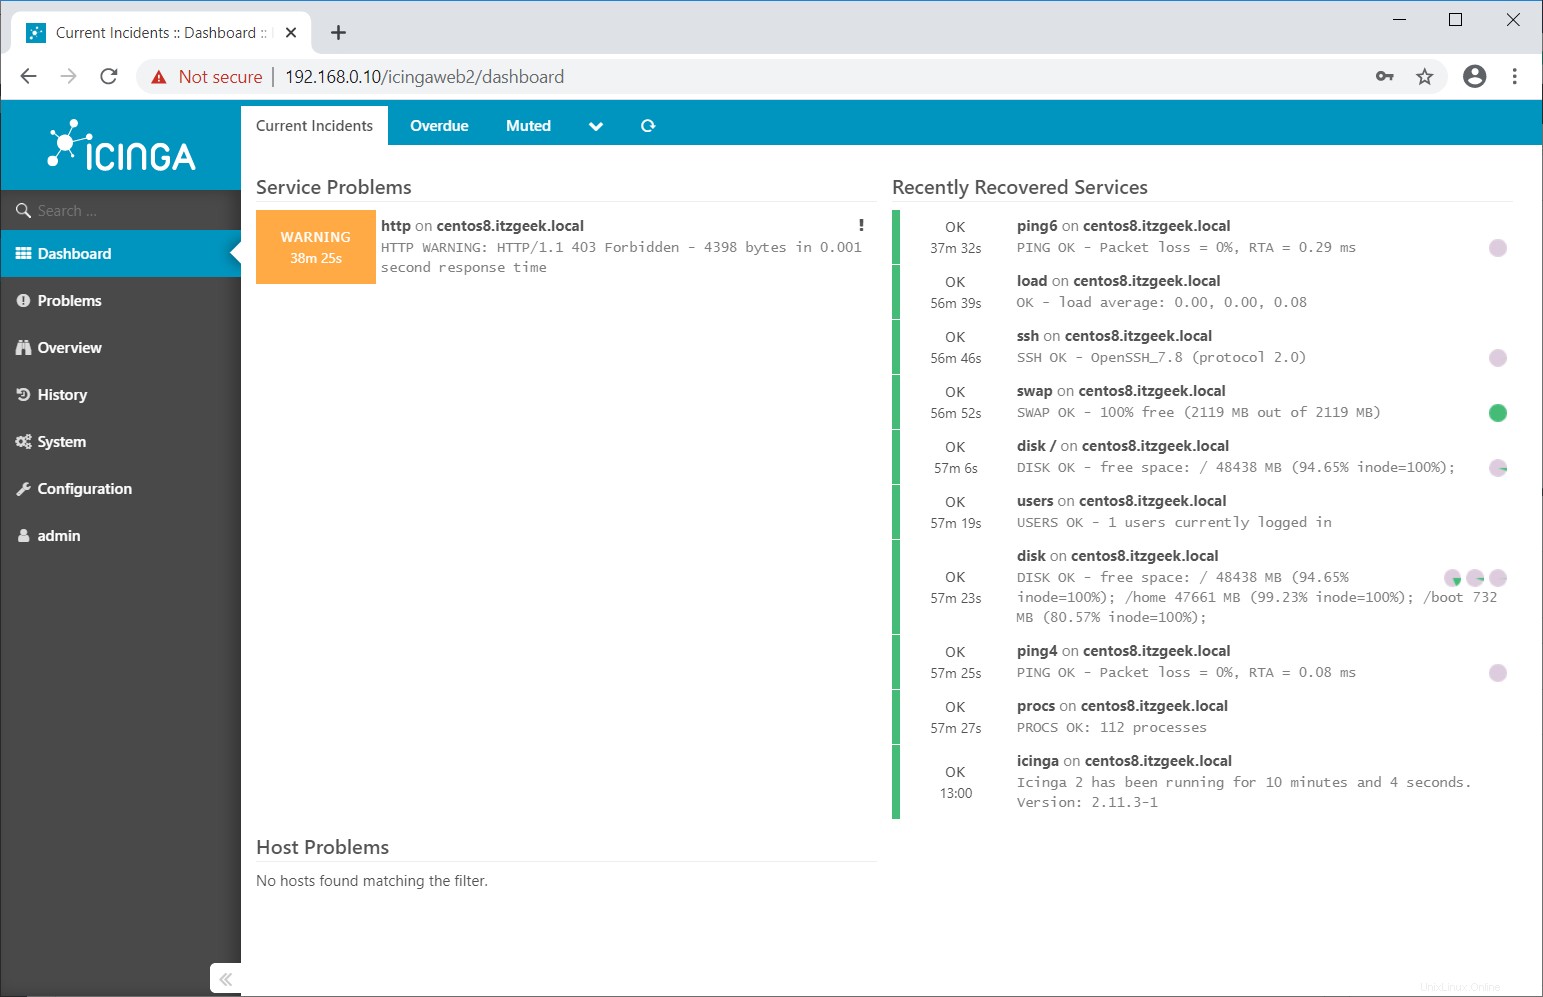
これで、IcingaWeb2ダッシュボードが表示されます。
それで全部です。次の記事では、リモートLinuxクライアントをIcinga2に追加します。