このチュートリアルは、Falko TimmeによるCopyright(c)2013です。これは、http://workaround.orgにあるChristophHaasのチュートリアルから派生しています。このチュートリアルは、クリエイティブコモンズライセンス2.5以降のバージョンで自由に使用できます。
このドキュメントでは、仮想ユーザーとドメイン、つまりMySQLデータベースにあるユーザーとドメインに基づくPostfixメールサーバーをインストールする方法について説明します。また、Courier(Courier-POP3、Courier-IMAP)のインストールと構成を示し、CourierがPostfixが使用するのと同じMySQLデータベースに対して認証できるようにします。
結果として得られるPostfixサーバーはSMTP-AUTHに対応しています およびTLS および割り当て (デフォルトでは、quotaはPostfixに組み込まれていません。Postfixに適切にパッチを適用する方法を説明します)。パスワードは暗号化で保存されます データベース内のフォーム(私が見つけたほとんどのドキュメントは、セキュリティリスクであるプレーンテキストのパスワードを扱っていました)。これに加えて、このチュートリアルでは Amavisdのインストールについて説明します。 、 SpamAssassin およびClamAV 電子メールがスパムやウイルスについてスキャンされるようにします。 SquirrelMailのインストール方法も紹介します ユーザーがメールを読んだり送信したり、パスワードを変更したりできるようにするためのウェブメールインターフェースとして。
このような「仮想」セットアップ(MySQLデータベース内の仮想ユーザーとドメイン)の利点は、「実際の」システムユーザーに基づくセットアップよりもはるかにパフォーマンスが高いことです。この仮想セットアップを使用すると、メールサーバーは数千のドメインとユーザーを処理できます。さらに、新しいユーザー/ドメインを追加したり、既存のユーザー/ドメインを編集したりするときにのみMySQLデータベースを処理する必要があるため、管理が容易です。 dbファイルを作成するためのpostmapコマンド、Postfixのリロードなどはもう必要ありません。MySQLデータベースの管理には、このハウツーにもインストールされるphpMyAdminなどのWebベースのツールを使用できます。 3番目の利点は、ユーザーがユーザー名として(ユーザー名+メールアドレスではなく)メールアドレスを持っていることです。これにより、理解しやすく、覚えやすくなります。
このハウツーは実用的なガイドとして意図されています。理論的背景については説明していません。それらは、Webの他の多くのドキュメントで扱われます。
このドキュメントには、いかなる種類の保証もありません。このようなシステムを構築する方法はこれだけではありません。この目標を達成する方法はたくさんありますが、これが私のやり方です。これがあなたのために働くという保証はありません!
1予備メモ
このチュートリアルはCentOS6.3x86_64に基づいているため、このチュートリアルを続行する前に、基本的なCentOS6.3サーバーのインストールをセットアップする必要があります。システムには静的IPアドレスが必要です。このチュートリアルでは、IPアドレスとして192.168.0.100を使用し、ホスト名としてserver1.example.comを使用しています。
ファイアウォールがオフになっていること(少なくとも今のところ)、およびSELinuxが無効になっていることを確認する必要があります。 (これは重要です!)
2追加のリポジトリを有効にして、いくつかのソフトウェアをインストールする
まず、ソフトウェアパッケージのGPGキーをインポートします:
rpm --import / etc / pki / rpm-gpg / RPM-GPG-KEY *
次に、CentOSシステムでRPMforgeおよびEPELリポジトリを有効にします。これは、このチュートリアルの過程でインストールするパッケージの多くが、公式のCentOS6.3リポジトリでは利用できないためです。
rpm --import http://dag.wieers.com/rpm/packages/RPM-GPG-KEY.dag.txt
 cd / tmp
 wget http://pkgs.repoforge.org/rpmforge-release/rpmforge-release-0.5.2-2.el6.rf.x86_64.rpm
 rpm -ivh rpmforge -release-0.5.2-2.el6.rf.x86_64.rpm
(上記のリンクが機能しなくなった場合は、rpmforge-releaseの現在のバージョンをここで見つけることができます:http://packages.sw.be/rpmforge-release/)
 rpm --import https://fedoraproject.org/static/0608B895.txt
 wget http://dl.fedoraproject.org/pub/epel/6/x86_64/epel-release-6-8 .noarch.rpm
 rpm -ivh epel-release-6-8.noarch.rpm
yum install yum-priorities
/etc/yum.repos.d/epel.repoを編集します...
vi /etc/yum.repos.d/epel.repo
...そして[epel]セクションにpriority=10という行を追加します:
[epel] name =Enterprise Linux6用の追加パッケージ-$basearch#baseurl =http://download.fedoraproject.org/pub/epel/ 6 / $ basearchmirrorlist =https://mirrors.fedoraproject.org/metalink?repo =epel-6&arch =$ basearchfailovermethod =priorityenabled =1priority =10gpgcheck =1gpgkey =file:/// etc / pki / rpm-gpg / RPM-GPG -KEY-EPEL-6 [...] |
次に、システム上の既存のパッケージを更新します。
yumアップデート
次に、後で必要になるソフトウェアをインストールします。
yumgroupinstall'開発ツール'
3 Apache、MySQL、phpMyAdminをインストールします
これはすべて、1つのコマンドでインストールできます(Courier-IMAPをビルドするために必要なパッケージを含む):
yum install ntp httpd mysql-server php php-mysql php-mbstring rpm-build gcc mysql-devel openssl-devel cyrus-sasl-devel pkgconfig zlib-devel phpMyAdmin pcre-devel openldap-devel postgresql-devel expected libtool-ltdl -devel openldap-servers libtool gdbm-devel pam-devel gamin-devel libidn-devel db4-devel mod_ssl telnet sqlite-devel
4 Courier-IMAP、Courier-Authlib、およびMaildropをインストールします
残念ながら、Courier-IMAP、Courier-Authlib、およびMaildrop用のrpmパッケージはないため、自分で作成する必要があります。
RPMパッケージはrootとしてビルドしないでください。 courier-imapは、コンパイルがrootユーザーとして実行されていることを検出した場合でも、コンパイルを拒否します。したがって、ここで通常のユーザーアカウント(この例ではfalko)を作成し、パスワードを与えます:
 useradd -m -s / bin / bash falko
 passwd falko
ユーザーfalkoがrpmパッケージをコンパイルしてインストールできるように、後でsudoコマンドが必要になります。ただし、最初に、falkoがsudoを使用してすべてのコマンドを実行できるようにする必要があります:
実行
visudo
開いたファイルには、ルートALL =(ALL)ALLという行があります。その行のすぐ下にfalkoの同様の行を追加します:
[...] |
これで、rpmパッケージをビルドする準備が整いました。最初にユーザーfalkoになります:
su falko
次に、ビルド環境を作成します:
 mkdir $ HOME / rpm
 mkdir $ HOME / rpm / SOURCES
 mkdir $ HOME / rpm / SPECS
 mkdir $ HOME / rpm / BUILD
 mkdir $ HOME / rpm / BUILDROOT
 mkdir $ HOME / rpm / SRPMS
 mkdir $ HOME / rpm / RPMS
 mkdir $ HOME / rpm / RPMS / i386
 mkdir $ HOME / rpm / RPMS / x86_64
echo "%_topdir $ HOME / rpm">> $ HOME / .rpmmacros
次に、ダウンロードディレクトリを作成し、http://www.courier-mta.org/download.phpからソースファイルをダウンロードします。
 mkdir $ HOME / downloads
 cd $ HOME / downloads
 wget --no-check-certificate https://sourceforge.net/projects/courier/files/authlib/0.65.0/courier-authlib-0.65.0.tar.bz2/download
 wget- -no-check-certificate https://sourceforge.net/projects/courier/files/imap/4.12.0/courier-imap-4.12.0.tar.bz2/download
 wget --no-check-証明書https://sourceforge.net/projects/courier/files/maildrop/2.6.0/maildrop-2.6.0.tar.bz2/download
これで(まだ$ HOME / downloadsにあります)、courier-authlibを作成できます:
sudo rpmbuild -ta courier-authlib-0.65.0.tar.bz2
ビルドプロセスの後、rpmパッケージは/ root / rpmbuild / RPMS / x86_64(i386システムを使用している場合は/ root / rpmbuild / RPMS / i386)にあります。コマンド
sudo ls -l / root / rpmbuild / RPMS / x86_64
利用可能なrpmパッケージを表示します:
 [example@unixlinux.online downloads] $ sudo ls -l / root / rpmbuild / RPMS / x86_64
 total 544
 -rw-r--r-- 1 root root 126728 Mar 4 12: 49 courier-authlib-0.65.0-1.el6.x86_64.rpm
 -rw-r--r-- 1 root root 274772 Mar 412:49courier-authlib-debuginfo-0.65.0-1。 el6.x86_64.rpm
-rw-r--r-- 1 root root 37824 Mar 4 12:49 courier-authlib-devel-0.65.0-1.el6.x86_64.rpm
-rw -r--r-- 1 root root 17256 Mar 4 12:49 courier-authlib-ldap-0.65.0-1.el6.x86_64.rpm
 -rw-r--r-- 1 root root 12000 Mar 4 12:49 courier-authlib-mysql-0.65.0-1.el6.x86_64.rpm
 -rw-r--r-- 1 root root 12984 Mar 4 12:49 courier-authlib-pgsql- 0.65.0-1.el6.x86_64.rpm
-rw-r--r-- 1 root root 8244 Mar 4 12:49 courier-authlib-pipe-0.65.0-1.el6.x86_64.rpm
-rw-r--r-- 1 root root 10620 Mar 4 12:49 courier-authlib-sqlite-0.65.0-1.el6.x86_64.rpm
 -rw-r--r --1 root root 34644 Mar 4 12:49 courier-authlib-userdb-0.65.0-1.el6.x86_64.rpm
 [example@unixlinux.online downloads] $
インストールするものを選択し、次のようにインストールします。
sudo rpm -ivh /root/rpmbuild/RPMS/x86_64/courier-authlib-0.65.0-1.el6.x86_64.rpm /root/rpmbuild/RPMS/x86_64/courier-authlib-mysql-0.65.0- 1.el6.x86_64.rpm /root/rpmbuild/RPMS/x86_64/courier-authlib-devel-0.65.0-1.el6.x86_64.rpm
次に、ダウンロードディレクトリに戻ります:
cd $ HOME / downloads
次のコマンドを実行して、必要なディレクトリを作成するか、ディレクトリのアクセス許可を変更します(そうしないと、Courier-Imapのビルドプロセスが失敗するため):
 sudo mkdir -p / var / cache / ccache / tmp
 sudo chmod o + rwx / var / cache / ccache /
 sudo chmod 777 / var / cache / ccache / tmp
ここで、今度はsudoを使用せずにrpmbuildを再度実行します。そうしないと、rootとして実行されたため、コンパイルが失敗します。
rpmbuild -ta courier-imap-4.12.0.tar.bz2
ビルドプロセスの後、rpmパッケージは$ HOME / rpm / RPMS / x86_64(i386システムを使用している場合は$ HOME / rpm / RPMS / i386)にあります:
cd $ HOME / rpm / RPMS / x86_64
コマンド
ls -l </ pre>利用可能なrpmパッケージを表示します:
[example@unixlinux.online x86_64] $ ls -l <br /> total 1116
-rw-rw-r-- 1 falko falko 332112 Mar 4 12:53 courier-imap-4.12.0-1 .x86_64.rpm
-rw-rw-r-- 1 falko falko 805288 Mar 4 12:53 courier-imap-debuginfo-4.12.0-1.x86_64.rpm
[example@unixlinux.online x86_64 ] $次のようにcourier-imapをインストールできます:
sudo rpm -ivh courier-imap-4.12.0-1.x86_64.rpm次に、ダウンロードディレクトリに戻ります:
cd $ HOME / downloadsそして、rpmbuildを再度実行して、今度はメールドロップパッケージをビルドします。
sudo rpmbuild -ta maildrop-2.6.0.tar.bz2ビルドプロセスの後、rpmパッケージは/ root / rpmbuild / RPMS / x86_64(i386システムを使用している場合は/ root / rpmbuild / RPMS / i386)にあります。コマンド
sudo ls -l / root / rpmbuild / RPMS / x86_64利用可能なrpmパッケージを表示します:
[example@unixlinux.online downloads] $ sudo ls -l / root / rpmbuild / RPMS / x86_64
total 1732
-rw-r--r-- 1 root root 126728 Mar 4 12: 49 courier-authlib-0.65.0-1.el6.x86_64.rpm
-rw-r--r-- 1 root root 274772 Mar 412:49courier-authlib-debuginfo-0.65.0-1。 el6.x86_64.rpm
-rw-r--r-- 1 root root 37824 Mar 4 12:49 courier-authlib-devel-0.65.0-1.el6.x86_64.rpm
-rw -r--r-- 1 root root 17256 Mar 4 12:49 courier-authlib-ldap-0.65.0-1.el6.x86_64.rpm
-rw-r--r-- 1 root root 12000 Mar 4 12:49 courier-authlib-mysql-0.65.0-1.el6.x86_64.rpm
-rw-r--r-- 1 root root 12984 Mar 4 12:49 courier-authlib-pgsql- 0.65.0-1.el6.x86_64.rpm
-rw-r--r-- 1 root root 8244 Mar 4 12:49 courier-authlib-pipe-0.65.0-1.el6.x86_64.rpm
-rw-r--r-- 1 root root 10620 Mar 4 12:49 courier-authlib-sqlite-0.65.0-1.el6.x86_64.rpm
-rw-r--r --1 root root 34644 Mar 4 12:49 courier-authlib-userdb-0.65.0-1.el6.x86_64.rpm
-rw-r--r-- 1 root root 286752 Mar 4 13:03 maildrop-2.6.0-1.x 86_64.rpm
-rw-r--r-- 1 root root 751304 Mar 4 13:03 maildrop-debuginfo-2.6.0-1.x86_64.rpm
-rw-r--r- -1 root root 102052 Mar 4 13:03 maildrop-devel-2.6.0-1.x86_64.rpm
-rw-r--r-- 1 root root 66184 Mar 4 13:03 maildrop-man-2.6 .0-1.x86_64.rpm
[[メール保護]ダウンロード]$これで、次のようにメールドロップをインストールできます:
sudo rpm -ivh /root/rpmbuild/RPMS/x86_64/maildrop-2.6.0-1.x86_64.rpm必要なすべてのパッケージをコンパイルしてインストールしたら、「
」と入力して再びrootになることができます。終了
5ポストフィックスにクォータパッチを適用する
Postfixソースrpmを取得し、クォータパッチでパッチを適用し、新しいPostfixrpmパッケージをビルドしてインストールする必要があります。
cd / usr / src
wget http://vault.centos.org/6.3/os/Source/SPackages/postfix-2.6.6-2.2.el6_1.src.rpm
rpm- ivh postfix-2.6.6-2.2.el6_1.src.rpm最後のコマンドは、無視できるいくつかの警告を表示します:
警告:ユーザーmockbuildが存在しません-rootを使用します
警告:グループmockbuildが存在しません-rootを使用しますcd /root/rpmbuild/SOURCES
wget http://vda.sourceforge.net/VDA/postfix-2.6.5-vda-ng.patch.gz
gunzip postfix-2.6.5 -vda-ng.patch.gz
cd / root / rpmbuild / SPECS /次に、ファイルpostfix.specを編集する必要があります:
vi postfix.specPatch0:postfix-2.6.5-vda-ng.patchを#Patchesスタンザに追加し、%patch0 -p1 -b .vda-ngを%setup -qスタンザに追加します:
[...] |
次に、クォータとMySQLをサポートする新しいPostfixrpmパッケージをビルドします。
rpmbuild -ba postfix.spec
Postfixrpmパッケージは/root/ rpmbuild / RPMS / x86_64(i386システムを使用している場合は/ root / rpmbuild / RPMS / i386)に作成されているので、そこに移動します:
cd / root / rpmbuild / RPMS / x86_64
コマンド
ls -l </ pre>利用可能なパッケージを表示します:
[example@unixlinux.online x86_64]#ls -l <br /> total 10748
-rw-r--r-- 1 root root 126728 Mar 4 12:49 courier-authlib-0.65.0- 1.el6.x86_64.rpm
-rw-r--r-- 1 root root 274772 Mar 4 12:49 courier-authlib-debuginfo-0.65.0-1.el6.x86_64.rpm
-rw-r--r-- 1 root root 37824 Mar 4 12:49 courier-authlib-devel-0.65.0-1.el6.x86_64.rpm
-rw-r--r-- 1 root root 17256 Mar 4 12:49 courier-authlib-ldap-0.65.0-1.el6.x86_64.rpm
-rw-r--r-- 1 root root 12000 Mar 4 12:49 courier-authlib- mysql-0.65.0-1.el6.x86_64.rpm
-rw-r--r-- 1 root root 12984 Mar 4 12:49 courier-authlib-pgsql-0.65.0-1.el6.x86_64 .rpm
-rw-r--r-- 1 root root 8244 Mar 4 12:49 courier-authlib-pipe-0.65.0-1.el6.x86_64.rpm
-rw-r- -r-- 1 root root 10620 Mar 4 12:49 courier-authlib-sqlite-0.65.0-1.el6.x86_64.rpm
-rw-r--r-- 1 root root 34644 Mar 4 12 :49 courier-authlib-userdb-0.65.0-1.el6.x86_64.rpm
-rw-r--r-- 1 root root 286752 Mar 4 13:03 maildrop-2.6.0-1.x86_64 .rpm
-rw-r--r- -1 root root 751304 Mar 4 13:03 maildrop-debuginfo-2.6.0-1.x86_64.rpm
-rw-r--r-- 1 root root 102052 Mar 4 13:03 maildrop-devel-2.6 .0-1.x86_64.rpm
-rw-r--r-- 1 root root 66184 Mar 4 13:03 maildrop-man-2.6.0-1.x86_64.rpm
-rw- r--r-- 1 root root 2138908 Mar 4 13:15 postfix-2.6.6-2.2.el6.x86_64.rpm
-rw-r--r-- 1 root root 7021184 Mar 4 13:15 postfix-debuginfo-2.6.6-2.2.el6.x86_64.rpm
-rw-r--r-- 1 root root 61752 Mar 4 13:15 postfix-perl-scripts-2.6.6-2.2.el6 .x86_64.rpm
[example@unixlinux.online x86_64]#以前にシステムにpostfixのバージョンがインストールされていないことを確認するには、次を使用します。
yum remove postfixPostfixパッケージを選び、次のようにインストールします:
rpm -ivh postfix-2.6.6-2.2.el6.x86_64.rpm
6MySQLパスワードの設定とphpMyAdminの構成
MySQLを起動します:
chkconfig --levels 235 mysqld on
/etc/init.d/mysqld start次に、MySQLルートアカウントのパスワードを設定します。
mysql_secure_installation[[メール保護]〜]#mysql_secure_installation
注:このスクリプトのすべての部分を実行することは、すべてのMySQLに推奨されます
本番環境で使用するサーバー!!各ステップを注意深くお読みください。
MySQLにログインしてセキュリティで保護するには、rootユーザーの現在の
パスワードが必要です。 MySQLをインストールしたばかりで、
rootパスワードをまだ設定していない場合、パスワードは空白になります。
ここで、Enterキーを押すだけです。
Enter rootの現在のパスワード(noneの場合は入力):<-ENTER
OK、正常に使用されたパスワード、次に進みます...
rootパスワードを設定すると、誰もMySQLにログインできないようになります
適切な承認なしのrootユーザー。
rootパスワードを設定しますか? [Y / n] <-ENTER
新しいパスワード:<-yourrootsqlpassword
新しいパスワードを再入力:<-yourrootsqlpassword
パスワードが正常に更新されました!
特権テーブルを再読み込みしています。 。
...成功!
デフォルトでは、MySQLのインストールには匿名のユーザーが含まれているため、誰でも
ユーザーアカウントを持っていなくてもMySQLにログインできます。
それらのために作成されました。これは、テストのみを目的としており、インストールを
少しスムーズにすることを目的としています。
本番環境に移動する前に、それらを削除する必要があります。
匿名ユーザーを削除しますか? [Y / n] <-ENTER
...成功!
通常、rootは「localhost」からの接続のみを許可する必要があります。これにより、
誰かが、ネットワークからのルートパスワードを推測できないようになります。
ルートログインをリモートで禁止しますか? [Y / n] <-ENTER
... Success!
デフォルトでは、MySQLには「test」という名前のデータベースが付属しており、誰でもアクセスできます。
これもテストのみを目的としており、本番環境に移動する前に
削除する必要があります。
テストデータベースを削除してアクセスしますか? [Y / n] <-ENTER
-テストデータベースを削除しています...
...成功しました!
-テストデータベースの特権を削除しています...
...成功しました!
特権テーブルを再読み込みすると、これまでに行われたすべての変更が
すぐに有効になります。
特権テーブルを今すぐ再読み込みしますか? [Y / n] <-ENTER
...成功!
クリーンアップ...
すべて完了しました!上記のすべての手順を完了した場合、MySQLのインストールは安全になっているはずです。
MySQLをご利用いただきありがとうございます。
[[メールで保護]〜]#次に、phpMyAdminを設定します。 Apacheの構成を変更して、phpMyAdminがローカルホストからだけでなく接続を許可するようにします(
スタンザをコメントアウトすることにより): vi /etc/httpd/conf.d/phpMyAdmin.conf
[...] |
次に、Apacheのシステム起動リンクを作成して起動します:
 chkconfig --levels 235 httpd on
/etc/init.d/httpd start
これで、ブラウザをhttp://server1.example.com/phpMyAdmin/またはhttp://192.168.0.100/phpMyAdmin/に誘導し、ユーザー名rootと新しいrootMySQLパスワードでログインできます。
7 Postfix/Courier用のMySQLデータベースを作成する
mailというデータベースを作成します:
mysqladmin -u root -p create mail
次に、MySQLシェルに移動します:
mysql -u root -p
MySQLシェルでは、メールデータベースに対するSELECT、INSERT、UPDATE、DELETE権限を持つpasswort mail_admin_password(独自のパスワードに置き換えます)を使用してユーザーmail_adminを作成します。このユーザーは、PostfixとCourierがメールデータベースに接続するために使用されます:
 GRANT SELECT、INSERT、UPDATE、DELETEONmail。*TO'mail_admin'@'localhost' IDENTIFIED BY'mail_admin_password';
 GRANT SELECT、INSERT、UPDATE、DELETEONmail。*TO'mail_admin'@ 'localhost.localdomain' IDENTIFIED BY'mail_admin_password';
 FLUSH PRIVILEGES;
引き続きMySQLシェルで、PostfixとCourierが必要とするテーブルを作成します。
メールを使用;
 CREATE TABLEドメイン(
 domain varchar(50)NOT NULL、
 PRIMARY KEY(domain))
 ENGINE =MyISAM;
 CREATE TABLE転送(
 source varchar(80)NOT NULL、
 destination TEXT NOT NULL、
 PRIMARY KEY(source))
 ENGINE =MyISAM;
 CREATE TABLEユーザー(
 email varchar(80)NOT NULL、
 password varchar(20)NOT NULL、
 quote bigint(20)DEFAULT '10485760'、
 PRIMARY KEY(メール)
)ENGINE =MyISAM;
 CREATE TABLEトランスポート(
 domain varchar(128)NOT NULL default''、
transport varchar(128)NOT NULL default''、
 UNIQUE KEYドメイン(ドメイン)
)ENGINE =MyISAM;
終了;
お気づきかもしれませんが、 quit; コマンドMySQLシェルを終了し、Linuxシェルに戻りました。
| ドメイン |
| example.com |
| ソース | 宛先 |
| [メール保護] | [メール保護] |
| メール | パスワード | クォータ |
| [メール保護] | No9.E4skNvGa。 (暗号化された形式の「秘密」) | 10485760 |
| ドメイン | トランスポート |
| example.com | smtp:[1.2.3.4] |
example.comのすべてのメールを転送します smtpプロトコルを介してIPアドレス
8Postfixを設定する
次に、データベース内のすべての情報を見つけることができる場所をPostfixに通知する必要があります。したがって、6つのテキストファイルを作成する必要があります。 PostfixにIPアドレス
それでは、6つのテキストファイルを作成しましょう。
vi /etc/postfix/mysql-virtual_domains.cf
user =mail_admin |
vi /etc/postfix/mysql-virtual_forwardings.cf
user =mail_admin |
vi /etc/postfix/mysql-virtual_mailboxes.cf
user =mail_admin |
vi /etc/postfix/mysql-virtual_email2email.cf
user =mail_admin |
vi /etc/postfix/mysql-virtual_transports.cf
user =mail_admin |
vi /etc/postfix/mysql-virtual_mailbox_limit_maps.cf
user =mail_admin |
 chmod o =/etc/postfix/mysql-virtual_*.cf
 chgrp postfix /etc/postfix/mysql-virtual_*.cf
次に、 vmailというユーザーとグループを作成します。 ホームディレクトリ
 groupadd -g 5000 vmail
 useradd -g vmail -u 5000 vmail -d / home / vmail -m
次に、Postfixの設定を行います。 必ず
 postconf -e'myhostname =server1.example.com'
 postconf -e'mydestination =server1.example.com、localhost、localhost.localdomain'
 postconf -e'mynetworks =127.0.0.0 / 8'
 postconf -e' virtual_alias_domains ='
 postconf -e' virtual_alias_maps =proxy:mysql:/ etc / postfix / mysql-virtual_forwardings.cf、mysql:/ etc / postfix/mysql-virtual_email2email。 cf'
 postconf -e' virtual_mailbox_domains =proxy:mysql:/etc/postfix/mysql-virtual_domains.cf'
 postconf -e' virtual_mailbox_maps =proxy:mysql:/ etc / postfix/mysql-virtual_mailboxes。 cf'
 postconf -e' virtual_mailbox_base =/ home / vmail'
 postconf -e' virtual_uid_maps =static:5000'
 postconf -e' virtual_gid_maps =static:5000'
 postconf -e'smtpd_sasl_auth_enable =yes'
 postconf -e'broken_sasl_auth_clients =yes'
 postconf -e'smtpd_sasl_authenticated_header =yes'
 postconf -e'smtpd_recipient_restrictions =permit_mynetworks、permit_sasl_> pos tconf -e'smtpd_use_tls =yes'
 postconf -e'smtpd_tls_cert_file =/etc/postfix/smtpd.cert'
 postconf -e'smtpd_tls_key_file =/etc/postfix/smtpd.key'
 postconf -e'transport_maps =proxy:mysql:/etc/postfix/mysql-virtual_transports.cf'
 postconf -e'virtual_create_maildirsize =yes'
 postconf -e'virtual_maildir_extended =yes'
 postconf -e'virtual_mailbox_limit_maps =proxy:mysql:/etc/postfix/mysql-virtual_mailbox_limit_maps.cf'
 postconf -e'virtual_mailbox_limit_override =yes'
 postconf -e'virtual_maildir_limit_message="到達しようとしているユーザーはクォータを超えています。 $ restore_maps $ Transportation_maps $ mynetworks $ virtual_mailbox_limit_ma ps'
 postconf -e' inet_interfaces =all'
その後、 TLSに必要なSSL証明書を作成します :
 cd / etc / postfix
 openssl req -new -outform PEM -out smtpd.cert -newkey rsa:2048 -nodes -keyout smtpd.key -keyform PEM -days 365 -x509
国名(2文字のコード)[XX]:<-国名を入力します(例:「DE」)。
州名または州名(フルネーム)[]:<-州名または州名を入力します。
地域名(例:都市)[デフォルトの都市]:<-都市を入力します。
組織名(例:会社)[デフォルトの会社株式会社]:<-組織名を入力します(例: 、会社名)。
組織単位名(例:セクション)[]:<-組織単位名(例:「IT部門」)を入力します。
一般名(例:名前またはサーバーのホスト名)[]:<-システムの完全修飾ドメイン名を入力します(例: "server1.example.com")。
メールアドレス[]:<-メールアドレスを入力します。
次に、smtpd.keyの権限を変更します:
chmod o =/etc/postfix/smtpd.key
9Saslauthdを構成する
/etc/sasl2/smtpd.confを編集します。次のようになります:
vi /etc/sasl2/smtpd.conf
pwcheck_method:authdaemond |
次に、Sendmailをオフにして、Postfix、saslauthd、およびcourier-authlibを起動します。
 chmod 755 / var / spool / authdaemon
 chkconfig --levels 235 courier-authlib on
 /etc/init.d/courier-authlib start
 chkconfig --levels 235 sendmail off
 chkconfig --levels 235 postfix on
 chkconfig --levels 235 saslauthd on
 /etc/init.d/sendmail stop
 / etc / init.d / postfix start
 /etc/init.d/saslauthd start
10クーリエの構成
次に、MySQLデータベースに対して認証する必要があることをCourierに通知する必要があります。まず、/ etc / authlib / authdaemonrcを編集し、 authmodulelistの値を変更します。 読むように
vi / etc / authlib / authdaemonrc
[...] |
次に、/ etc / authlib/authmysqlrcを編集します。正確に次のようになります(ここでも、正しいデータベースの詳細を入力してください):
 cp / etc / authlib / authmysqlrc / etc / authlib / authmysqlrc_orig
 cat / dev / null> / etc / authlib / authmysqlrc
 vi / etc / authlib / authmysqlrc
MYSQL_SERVER localhost |
次に、Courierを再起動します:
 chkconfig --levels 235 courier-imap on
 /etc/init.d/courier-authlib restart
 /etc/init.d/courier-imap restart
courier-imapを初めて起動すると、証明書ファイル/usr/lib/courier-imap/share/imapd.pemと/usr/lib/courier-imap/share/pop3d.pemが/usrから自動的に作成されます。 /lib/courier-imap/etc/imapd.cnfおよび/usr/lib/courier-imap/etc/pop3d.cnfファイル。 .cnfファイルにはCN=localhostという行が含まれていますが、サーバーの名前はserver1.example.comであるため、TLS接続を使用すると証明書によって問題が発生する可能性があります。これを解決するために、両方の証明書を削除します...
 cd / usr / lib / courier-imap / share
 rm -f imapd.pem
 rm -f pop3d.pem
...そして/usr/lib/courier-imap/etc/imapd.cnfと/usr/lib/courier-imap/etc/pop3d.cnfのCN=localhost行をCN=server1.example.comに置き換えます:
vi /usr/lib/courier-imap/etc/imapd.cnf
[...] |
vi /usr/lib/courier-imap/etc/pop3d.cnf
[...] |
次に、両方の証明書を再作成します...
 ./ mkimapdcert
./mkpop3dcert
...そしてcourier-authlibとcourier-imapを再起動します:
 /etc/init.d/courier-authlib restart
 /etc/init.d/courier-imap restart
実行することで
telnet localhost pop3
POP3サーバーが正しく機能しているかどうかを確認できます。 + OK Hello there 。 (
[example@unixlinux.online share]#telnet localhost pop3
Trying ::1 ...
localhostに接続しました。
エスケープ文字は「^]」です。
+OKこんにちは。
<-終了
+OK次回は幸運を祈ります。
外部ホストによって接続が閉じられました。
[[メール保護]共有]#
11 / etc/aliasesを変更します
ここで、/ etc/aliasesを開く必要があります。 postmasterがrootを指し、rootが自分のユーザー名またはメールアドレスを指していることを確認してください。このように:
vi / etc / aliases
[...] |
またはこのように(管理者が自分のユーザー名の場合):
[...]> |
/ etc / aliasesを変更するときはいつでも、実行する必要があります
newaliases
その後、Postfixを再起動します:
/etc/init.d/postfix restart
12 Amavisd-new、SpamAssassin、ClamAVをインストール
amavisd-new、spamassassin、およびclamavをインストールするには、次のコマンドを実行します。
yum install amavisd-new spamassassin clamav clamd unzip bzip2 unrar perl-DBD-mysql
次に、/ etc / amavisd/amavisd.confを編集する必要があります。
vi /etc/amavisd/amavisd.conf
このファイルでは、5つの場所を変更します:
1)変更
$ mydomain ='example.com'; #他の設定の便利なデフォルト |
に
$ mydomain ='localhost'; |
2)変更
$ sa_tag_level_deflt =2.0; #そのレベル以上の場合はスパム情報ヘッダーを追加します |
に
$ sa_tag_level_deflt =2.0; #そのレベル以上の場合はスパム情報ヘッダーを追加します |
(もちろん、スパムスコアはお好みに合わせて調整できます。)
3)変更
#@ lookup_sql_dsn = |
に
#@ lookup_sql_dsn = |
(データベースの詳細を正しく入力してください!)
4)変更
#$ receive_delimiter ='+'; #undefはアドレス拡張を完全に無効にします |
に
$ receiveient_delimiter =undef; #undefはアドレス拡張を完全に無効にします |
5)変更
$ final_virus_destiny =D_DISCARD; |
に
$ final_virus_destiny =D_REJECT; |
(もちろん、スパムとウイルスで何が起こるかを決めるのはあなた次第です。私はスパム(D_PASS)を受け入れることにしました。これにより、メールクライアントで簡単なフィルタールール(によって書き直される件名に基づいて)でスパムをフィルターにかけることができます。 amavisd-メールがスパムであると見なす場合は新規)許可されるアクション(D_PASS、D_DISCARD、D_BOUNCE、およびD_REJECT)については、http://www.ijs.si/software/amavisd/amavisd-new-docs.htmlで説明されています。 #actions)
変更後、/ etc / amavisd/amavisd.confは次のようになります。
use strict;#amavisdの最小限の構成ファイル-必要なすべての設定を備えた新しい##すべての変数のリストについてはamavisd.conf-defaultを参照してください。デフォルト;#従来のスタイルのコメント付きファイルについてはamavisd.conf-sampleを参照してください;#詳細については、INSTALL、README_FILES / *#およびhttp://www.ijs.si/software/amavisd/amavisd-newのドキュメントを参照してください。 -docs.html#COMMONLY ADJUSTED SETTINGS:#@bypass_virus_checks_maps =(1); #アンチウイルスコードの実行を制御します#@bypass_spam_checks_maps =(1); #スパム対策コードの実行を制御します#$ bytes_decode_parts =1; #デコーダーの実行を制御します&dearchivers $ max_servers =2; #事前にフォークされた子の数(2..30が一般的)、-m $ daemon_user ='amavis'; #(デフォルトなし;通常:vscanまたはamavis)、-u $ daemon_group ='amavis'; #(デフォルトなし;通常:vscanまたはamavis)、-g $ mydomain ='localhost';#$ mydomain ='example.com'; #他の設定の便利なデフォルト$ MYHOME ='/ var / spool / amavisd'; # a convenient default for other settings, -H$TEMPBASE ="$MYHOME/tmp"; # working directory, needs to exist, -T$ENV{TMPDIR} =$TEMPBASE; # environment variable TMPDIR, used by SA, etc.$QUARANTINEDIR =undef; # -Q# $quarantine_subdir_levels =1; # add level of subdirs to disperse quarantine# $release_format ='resend'; # 'attach', 'plain', 'resend'# $report_format ='arf'; # 'attach', 'plain', 'resend', 'arf'# $daemon_chroot_dir =$MYHOME; # chroot directory or undef, -R$db_home ="$MYHOME/db"; # dir for bdb nanny/cache/snmp databases, -D# $helpers_home ="$MYHOME/var"; # working directory for SpamAssassin, -S$lock_file ="/var/run/amavisd/amavisd.lock"; # -L$pid_file ="/var/run/amavisd/amavisd.pid"; # -P#NOTE:create directories $MYHOME/tmp, $MYHOME/var, $MYHOME/db manually$log_level =0; # verbosity 0..5, -d$log_recip_templ =undef; #受信者ごとのレベル0ログエントリを無効にする$ DO_SYSLOG =1; # log via syslogd (preferred)$syslog_facility ='mail'; # Syslog facility as a string # e.g.:mail, daemon, user, local0, ... local7$syslog_priority ='debug'; # Syslog base (minimal) priority as a string, # choose from:emerg, alert, crit, err, warning, notice, info, debug$enable_db =1; #BerkeleyDB / libdb(SNMPおよびnanny)の使用を有効にする$ enable_global_cache =1; # enable use of libdb-based cache if $enable_db=1$nanny_details_level =2; # nanny verbosity:1:traditional, 2:detailed$enable_dkim_verification =1; # enable DKIM signatures verification$enable_dkim_signing =1; # load DKIM signing code, keys defined by dkim_key@local_domains_maps =( [".$mydomain"] ); # list of all local domains@mynetworks =qw( 127.0.0.0/8 [::1] [FE80::]/10 [FEC0::]/10 10.0.0.0/8 172.16.0.0/12 192.168.0.0/16 );$unix_socketname ="$MYHOME/amavisd.sock"; # amavisd-release or amavis-milter # option(s) -p overrides $inet_socket_port and $unix_socketname$inet_socket_port =10024; # listen on this local TCP port(s)# $inet_socket_port =[10024,10026]; # listen on multiple TCP ports$policy_bank{'MYNETS'} ={ # mail originating from @mynetworks originating => 1, # is true in MYNETS by default, but let's make it explicit os_fingerprint_method => undef, # don't query p0f for internal clients};# it is up to MTA to re-route mail from authenticated roaming users or# from internal hosts to a dedicated TCP port (such as 10026) for filtering$interface_policy{'10026'} ='ORIGINATING';$policy_bank{'ORIGINATING'} ={ # mail supposedly originating from our users originating => 1, # declare that mail was submitted by our smtp client allow_disclaimers => 1, # enables disclaimer insertion if available # notify administrator of locally originating malware virus_admin_maps => ["virusalert\@$mydomain"], spam_admin_maps => ["virusalert\@$mydomain"], warnbadhsender => 1, # forward to a smtpd service providing DKIM signing service forward_method => 'smtp:[127.0.0.1]:10027', # force MTA conversion to 7-bit (e.g. before DKIM signing) s mtpd_discard_ehlo_keywords => ['8BITMIME'], bypass_banned_checks_maps => [1], # allow sending any file names and types terminate_dsn_on_notify_success => 0, # don't remove NOTIFY=SUCCESS option};$interface_policy{'SOCK'} ='AM.PDP-SOCK'; # only applies with $unix_socketname# Use with amavis-release over a socket or with Petr Rehor's amavis-milter.c# (with amavis-milter.c from this package or old amavis.c client use 'AM.CL'):$policy_bank{'AM.PDP-SOCK'} ={ protocol => 'AM.PDP', auth_required_release => 0, # do not require secret_id for amavisd-release};$sa_tag_level_deflt =2.0; # add spam info headers if at, or above that level$sa_tag2_level_deflt =4.0; # add 'spam detected' headers at that level$sa_kill_level_deflt =$sa_tag2_level_deflt; # triggers spam evasive actions (e.g. blocks mail)$sa_dsn_cutoff_level =10; # spam level beyond which a DSN is not sent#$sa_tag_level_deflt =2.0; # add spam info headers if at, or above that level#$sa_tag2_level_deflt =6.2; # add 'spam detected' headers at that level#$sa_kill_level_deflt =6.9; # triggers spam evasive actions (e.g. blocks mail)#$sa_dsn_cutoff_level =10; # spam level beyond which a DSN is not sent$sa_crediblefrom_dsn_cutoff_level =18; # likewise, but for a likely valid From# $sa_quarantine_cutoff_level =25; # spam level beyond which quarantine is off$penpals_bonus_score =8; # (no effect without a @storage_sql_dsn database)$penpals_threshold_high =$sa_kill_level_deflt; # don't waste time on hi spam$bounce_killer_score =100; # spam score points to add for joe-jobbed bounces$sa_mail_body_size_limit =400*1024; #メールが大きい場合はSAで時間を無駄にしないでください$ sa_local_tests_only =0; # only tests which do not require internet access?# @lookup_sql_dsn =# ( ['DBI:mysql:database=mail;host=127.0.0.1;port=3306', 'user1', 'passwd1'],# ['DBI:mysql:database=mail;host=host2', 'username2', 'password2'],# ["DBI:SQLite:dbname=$MYHOME/sql/mail_prefs.sqlite", '', ''] );# @storage_sql_dsn =@lookup_sql_dsn; # none, same, or separate database@lookup_sql_dsn =( ['DBI:mysql:database=mail;host=127.0.0.1;port=3306', 'mail_admin', 'mail_admin_password'] );$sql_select_policy ='SELECT "Y" as local FROM domains WHERE CONCAT("@",domain) IN (%k)';$sql_select_white_black_list =undef; # undef disables SQL white/blacklisting$recipient_delimiter ='+'; # (default is '+')$replace_existing_extension =1; # (default is false)$localpart_is_case_sensitive =0; # (default is false)# $timestamp_fmt_mysql =1; # if using MySQL *and* msgs.time_iso is TIMESTAMP;# defaults to 0, which is good for non-MySQL or if msgs.time_iso is CHAR(16)$virus_admin =undef; # notifications recip.$mailfrom_notify_admin =undef; # notifications sender$mailfrom_notify_recip =undef; # notifications sender$mailfrom_notify_spamadmin =undef; # notifications sender$mailfrom_to_quarantine =''; # null return path; uses original sender if undef@addr_extension_virus_maps =('virus');@addr_extension_banned_maps =('banned');@addr_extension_spam_maps =('spam');@addr_extension_bad_header_maps =('badh');$recipient_delimiter =undef; # undef disables address extensions altogether# $recipient_delimiter ='+'; # undef disables address extensions altogether# when enabling addr extensions do also Postfix/main.cf:recipient_delimiter=+$path ='/usr/local/sbin:/usr/local/bin:/usr/sbin:/sbin:/usr/bin:/bin';# $dspam ='dspam';$MAXLEVELS =14;$MAXFILES =1500;$MIN_EXPANSION_QUOTA =100*1024; # bytes (default undef, not enforced)$MAX_EXPANSION_QUOTA =300*1024*1024; # bytes (default undef, not enforced)$sa_spam_subject_tag ='***SPAM*** ';$defang_virus =1; # MIME-wrap passed infected mail$defang_banned =1; # MIME-wrap passed mail containing banned name# for defanging bad headers only turn on certain minor contents categories:$defang_by_ccat{+CC_BADH.",3"} =1; # NUL or CR character in header$defang_by_ccat{+CC_BADH.",5"} =1; # header line longer than 998 characters$defang_by_ccat{+CC_BADH.",6"} =1; # header field syntax error# OTHER MORE COMMON SETTINGS (defaults may suffice):# $myhostname ='host.example.com'; # must be a fully-qualified domain name!# $notify_method ='smtp:[127.0.0.1]:10025';# $forward_method ='smtp:[127.0.0.1]:10025'; # set to undef with milter!$final_virus_destiny =D_REJECT;$final_banned_destiny =D_REJECT;$final_spam_destiny =D_PASS;$final_bad_header_destiny =D_PASS;#$final_virus_destiny =D_DISCARD;#$final_banned_destiny =D_BOUNCE;#$final_spam_destiny =D_DISCARD;#$final_bad_header_destiny =D_BOUNCE;# $bad_header_quarantine_method =undef;# $os_fingerprint_method ='p0f:*:2345'; # to query p0f-analyzer.pl## hierarchy by which a final setting is chosen:## policy bank (based on port or IP address) -> *_by_ccat## *_by_ccat (based on mail contents) -> *_maps## *_maps (based on recipient address) -> final configuration value# SOME OTHER VARIABLES WORTH CONSIDERING (see amavisd.conf-default for all)# $warnbadhsender,# $warnvirusrecip, $warnbannedrecip, $warnbadhrecip, (or @warn*recip_maps)## @bypass_virus_checks_maps, @bypass_spam_checks_maps,# @bypass_banned_checks_maps, @bypass_header_checks_maps,## @virus_lovers_maps, @spam_lovers_maps,# @banned_files_lovers_maps, @bad_header_lovers_maps,## @blacklist_sender_maps, @score_sender_maps,## $clean_quarantine_method, $virus_quarantine_to, $banned_quarantine_to,# $bad_header_quarantine_to, $spam_quarantine_to,## $defang_bad_header, $defang_undecipherable, $defang_spam# REMAINING IMPORTANT VARIABLES ARE LISTED HERE BECAUSE OF LONGER ASSIGNMENTS@keep_decoded_original_maps =(new_RE( qr'^MAIL$', # retain full orig inal message for virus checking qr'^MAIL-UNDECIPHERABLE$', # recheck full mail if it contains undecipherables qr'^(ASCII(?! cpio)|text|uuencoded|xxencoded|binhex)'i,# qr'^Zip archive data', # don't trust Archive::Zip));# for $banned_namepath_re (a new-style of banned table) see amavisd.conf-sample$banned_filename_re =new_RE(### BLOCKED ANYWHERE# qr'^UNDECIPHERABLE$', # is or contains any undecipherable components qr'^\.(exe-ms|dll)$', # banned file(1) types, rudimentary# qr'^\.(exe|lha|tnef|cab|dll)$', # banned file(1) types### BLOCK THE FOLLOWING, EXCEPT WITHIN UNIX ARCHIVES:# [ qr'^\.(gz|bz2)$' => 0 ], # allow any in gzip or bzip2 [ qr'^\.(rpm|cpio|tar)$' => 0 ], # allow any in Unix-type archives qr'.\.(pif|scr)$'i, # banned extensions - rudimentary# qr'^\.zip$', # block zip type### BLOCK THE FOLLOWING, EXCEPT WITHIN ARCHIVES:# [ qr'^\.(zip|rar|arc|arj|zoo)$'=> 0 ], # allow any within these archives qr'^application/x-msdownload$'i, # block these MIME types qr'^application/x-msdos-program$'i, qr '^application/hta$'i,# qr'^message/partial$'i, # rfc2046 MIME type# qr'^message/external-body$'i, # rfc2046 MIME type# qr'^(application/x-msmetafile|image/x-wmf)$'i, # Windows Metafile MIME type# qr'^\.wmf$', # Windows Metafile file(1) type # block certain double extensions in filenames qr'\.[^./]*[A-Za-z][^./]*\.\s*(exe|vbs|pif|scr|bat|cmd|com|cpl|dll)[.\s]*$'i,# qr'\{[0-9a-f]{8}(-[0-9a-f]{4}){3}-[0-9a-f]{12}\}?'i, # Class ID CLSID, strict# qr'\{[0-9a-z]{4,}(-[0-9a-z]{4,}){0,7}\}?'i, # Class ID extension CLSID, loose qr'.\.(exe|vbs|pif|scr|cpl)$'i, # banned extension - basic# qr'.\.(exe|vbs|pif|scr|cpl|bat|cmd|com)$'i, # banned extension - basic+cmd# qr'.\.(ade|adp|app|bas|bat|chm|cmd|com|cpl|crt|emf|exe|fxp|grp|hlp|hta|# inf|ins|isp|js|jse|lnk|mda|mdb|mde|mdw|mdt|mdz|msc|msi|msp|mst|# ops|pcd|pif|prg|reg|scr|sct|shb|shs|vb|vbe|vbs|# wmf|wsc|wsf|wsh)$'ix, # banned ext - long# qr'.\.(ani|cur|ico)$'i, # banned cursors and icons filename# qr'^\.ani$', # banned animated cursor file(1) type# qr'.\.(mim|b64|bhx|hqx|xxe|uu|uue)$'i, # banned extension - WinZip vulnerab.);# See http://support.microsoft.com/default.aspx?scid=kb;EN-US;q262631# and http://www.cknow.com/vtutor/vtextensions.htm# ENVELOPE SENDER SOFT-WHITELISTING / SOFT-BLACKLISTING@score_sender_maps =({ # a by-recipient hash lookup table, # results from all matching recipient tables are summed# ## per-recipient personal tables (NOTE:positive:black, negative:white)# '[email protected]' => [{'[email protected]' => 10.0}],# '[email protected]' => [{'.ebay.com' => -3.0}],# '[email protected]' => [{'[email protected]' => -7.0,# '.cleargreen.com' => -5.0}], ## site-wide opinions about senders (the '.' matches any recipient) '.' => [ # the _first_ matching sender determines the score boost new_RE( # regexp-type loo kup table, just happens to be all soft-blacklist [qr'^(bulkmail|offers|cheapbenefits|earnmoney|foryou)@'i => 5.0], [qr'^(greatcasino|investments|lose_weight_today|market\.alert)@'i=> 5.0], [qr'^(money2you|MyGreenCard|new\.tld\.registry|opt-out|opt-in)@'i=> 5.0], [qr'^(optin|saveonlsmoking2002k|specialoffer|specialoffers)@'i => 5.0], [qr'^(stockalert|stopsnoring|wantsome|workathome|yesitsfree)@'i => 5.0], [qr'^(your_friend|greatoffers)@'i => 5.0], [qr'^(inkjetplanet|marketopt|MakeMoney)\d*@'i => 5.0], ),# read_hash("/var/amavis/sender_scores_sitewide"), { # a hash-type lookup table (associative array) '[email protected]' => -3.0, '[email protected]' => -3.0, '[email protected]' => -3.0, '[email protected]' => -3.0, 'securityfocus.com' => -3.0, '[email protected]' => -3.0, '[em ail protected]' => -3.0, '[email protected]' => -3.0, '[email protected]'=> -3.0, '[email protected]' => -3.0, 'spamassassin.apache.org' => -3.0, '[email protected]' => -3.0, '[email protected]' => -3.0, '[email protected]' => -3.0, '[email protected]' => -3.0, '[email protected]' => -3.0, '[email protected]' => -3.0, '[email protected]' => -3.0, '[email protected]' => -3.0, '[email protected]' => -3.0, '[email protected]' => -3.0, '[email protected]' => -3.0, '[email protected]' => -3.0, '[email protected]' => -3.0, '[email protected]' => -3.0, '[email protected]' => -5.0, '[email protected]' => -3.0, 'returns.groups.yahoo.com' => -3.0, '[email protected]' => -3.0, lc('[email protected]') => -3.0, lc ('[email protected]') => -5.0, # soft-blacklisting (positive score) '[email protected]' => 3.0, '.example.net' => 1.0, }, ], # end of site-wide tables});@decoders =( ['mail', \&do_mime_decode], ['asc', \&do_ascii], ['uue', \&do_ascii], ['hqx', \&do_ascii], ['ync', \&do_ascii], ['F', \&do_uncompress, ['unfreeze','freeze -d','melt','fcat'] ], ['Z', \&do_uncompress, ['uncompress','gzip -d','zcat'] ], ['gz', \&do_uncompress, 'gzip -d'], ['gz', \&do_gunzip], ['bz2', \&do_uncompress, 'bzip2 -d'], ['lzo', \&do_uncompress, 'lzop -d'], ['rpm', \&do_uncompress, ['rpm2cpio.pl','rpm2cpio'] ], ['cpio', \&do_pax_cpio, ['pax','gcpio','cpio'] ], ['tar', \&do_pax_cpio, ['pax','gcpio','cpio'] ], ['deb', \&do_ar, 'ar'],# ['a', \&do_ar, 'ar'], # unpacking .a seems an overkill ['zip', \&do_unzip], ['7z', \&do_7zip, ['7zr','7za','7z'] ], ['rar', \&do_unrar, ['rar' ,'unrar'] ], ['arj', \&do_unarj, ['arj','unarj'] ], ['arc', \&do_arc, ['nomarch','arc'] ], ['zoo', \&do_zoo, ['zoo','unzoo'] ], ['lha', \&do_lha, 'lha'],# ['doc', \&do_ole, 'ripole'], ['cab', \&do_cabextract, 'cabextract'], ['tnef', \&do_tnef_ext, 'tnef'], ['tnef', \&do_tnef],# ['sit', \&do_unstuff, 'unstuff'], # broken/unsafe decoder ['exe', \&do_executable, ['rar','unrar'], 'lha', ['arj','unarj'] ],);@av_scanners =(# ### http://www.clanfield.info/sophie/ (http://www.vanja.com/tools/sophie/)# ['Sophie',# \&ask_daemon, ["{}/\n", '/var/run/sophie'],# qr/(?x)^ 0+ ( :| [\000\r\n]* $)/m, qr/(?x)^ 1 ( :| [\000\r\n]* $)/m,# qr/(?x)^ [-+]? \d+ :(.*?) [\000\r\n]* $/m ],# ### http://www.csupomona.edu/~henson/www/projects/SAVI-Perl/# ['Sophos SAVI', \&sophos_savi ],# ### http://www.clamav.net/['ClamAV-clamd', \&ask_daemon, ["CONTSCAN {}\n", "/var/spool/amavisd/clamd.sock"], qr/\bOK$/m, qr/\bFOUND$/m, qr/^.*?:(?!Infected Archive)(.*) FOUND$/m ],# # NOTE:run clamd under the same user as amavisd, or run it under its own# # uid such as clamav, add user clamav to the amavis group, and then add# # AllowSupplementaryGroups to clamd.conf;# # NOTE:match socket name (LocalSocket) in clamav.conf to the socket name in# # this entry; when running chrooted one may prefer socket "$MYHOME/clamd".# ### http://www.clamav.net/ and CPAN (memory-hungry! clamd is preferred)# # note that Mail::ClamAV requires perl to be build with threading!# ['Mail::ClamAV', \&ask_clamav, "*", [0], [1], qr/^INFECTED:(.+)/m ],# ### http://www.openantivirus.org/# ['OpenAntiVirus ScannerDaemon (OAV)',# \&ask_daemon, ["SCAN {}\n", '127.0.0.1:8127'],# qr/^OK/m, qr/^FOUND:/m, qr/^FOUND:(.+)/m ],# ### http://www.vanja.com/tools/trophie/# ['Trophie',# \&ask_daemon, ["{}/\n", '/var/run/trophie'],# qr/(?x)^ 0+ ( :| [\000\r\n]* $)/m, qr/(?x)^ 1 ( :| [\000\r\n]* $)/m,# qr/(?x)^ [-+]? \d+ :(.*?) [\000\r\n]* $/m ],# ### http://www.grisoft.com/# ['AVG Anti-Virus',# \&ask_daemon, ["SCAN {}\n", '127.0.0.1:55555'],# qr/^200/m, qr/^403/m, qr/^403 .*?:([^\r\n]+)/m ],# ### http://www.f-prot.com/# ['F-Prot fpscand', # F-PROT Antivirus for BSD/Linux/Solaris, version 6# \&ask_daemon,# ["SCAN FILE {}/*\n", '127.0.0.1:10200'],# qr/^(0|8|64) /m,# qr/^([1235679]|1[01345]) |<[^>:]*(?i)(infected|suspicious|unwanted)/m,# qr/(?i)<[^>:]*(?:infected|suspicious|unwanted)[^>:]*:([^>]*)>/m ],# ### http://www.f-prot.com/# ['F-Prot f-protd', # old version# \&ask_daemon,# ["GET {}/*?-dumb%20-archive%20-packed HTTP/1.0\r\n\r\n",# ['127.0.0.1:10200', '127.0.0.1:10201', '127.0.0.1:10202',# '127.0.0.1:10203', '127.0.0.1:10204'] ],# qr/(?i) |
amavisd-new is the program that glues together Postfix and SpamAssassin/ClamAV. Postfix passes the mails to amavisd-new which then invokes SpamAssassin and ClamAV to scan the emails. Please have a look at the Spamassassin and ClamAV settings in /etc/amavisd/amavisd.conf 。 Of course, you can customize that file a lot more. Feel free to do so, and have a look at the explanations in the original /etc/amavisd/amavisd.conf file!
Now let's create the system startup links for ClamAV and amavisd-new, update ClamAV's virus signature database, and start both services:
chkconfig --levels 235 amavisd on
chkconfig --levels 235 clamd.amavisd on
/usr/bin/freshclam
/etc/init.d/amavisd start
/etc/init.d/clamd.amavisd start
次に、受信メールをamavisd-new経由でパイプするようにPostfixを設定する必要があります:
postconf -e 'content_filter =amavis:[127.0.0.1]:10024'
postconf -e 'receive_override_options =no_address_mappings'
Afterwards append the following lines to /etc/postfix/master.cf :
vi /etc/postfix/master.cf
[...] |
and restart Postfix:
/etc/init.d/postfix restart
13 Install Razor, Pyzor And DCC And Configure SpamAssassin
Razor, Pyzor and DCC are spamfilters that use a collaborative filtering network. To install Razor and Pyzor, run
yum install perl-Razor-Agent pyzor
Then initialize both services:
chmod -R a+rX /usr/share/doc/pyzor-0.5.0 /usr/bin/pyzor /usr/bin/pyzord
chmod -R a+rX /usr/lib/python2.6/site-packages/pyzor
su -m amavis -c 'pyzor --homedir /var/spool/amavisd discover'
su -m amavis -c 'razor-admin -home=/var/spool/amavisd -create'
su -m amavis -c 'razor-admin -home=/var/spool/amavisd -register'
Then we install DCC as follows:
cd /tmp
wget http://www.dcc-servers.net/dcc/source/dcc-dccproc.tar.Z
tar xzvf dcc-dccproc.tar.Z
cd dcc-dccproc-1.3.144
./configure --with-uid=amavis
make
make install
chown -R amavis:amavis /var/dcc
ln -s /var/dcc/libexec/dccifd /usr/local/bin/dccifd
次に、これら3つのプログラムを使用するようにSpamAssassinに指示する必要があります。 Edit /etc/mail/spamassassin/local.cf so that it looks like this:
vi /etc/mail/spamassassin/local.cf
# These values can be overridden by editing ~/.spamassassin/user_prefs.cf |
次に、SpamAssassinでDCCプラグインを有効にする必要があります。 Open /etc/mail/spamassassin/v310.pre and uncomment the loadplugin Mail::SpamAssassin::Plugin::DCC line:
vi /etc/mail/spamassassin/v310.pre
[...] |
次のコマンドを実行して、SpamAssassinの構成を確認できます。
spamassassin --lint
It shouldn't show any errors.
実行
/etc/init.d/amavisd restart
afterwards.
次に、SpamAssassinルールセットを次のように更新します。
sa-update --no-gpg
ルールセットが定期的に更新されるように、cronジョブを作成します。実行
crontab -e
cronジョブエディタを開きます。次のcronジョブを作成します:
23 4 * / 2 * * / usr / bin / sa-update --no-gpg&> / dev / null |
これにより、ルールセットが2日おきに4.23時間で更新されます。
14 Quota Exceedance Notifications
If you want to get notifications about all the email accounts that are over quota, then create the file /usr/local/sbin/quota_notify:
cd /usr/local/sbin/
vi quota_notify
#!/ usr / bin / perl -w#作成者<[メール保護]> ##このスクリプトは、postfixのメインのdefined#にあるvirtual_mailbox_baseを想定しています.cfファイル。 This directory is assumed to contain# directories which themselves contain your virtual user's maildirs.# For example:## -----------/# |# |# home/vmail/domains/# | |#| |#example.com/ foo.com/# |#|#-----------------#| | |#| | |#user1 / user2 / user3 /#|#|#maildirsize#use strict; my $ POSTFIX_CF ="/etc/postfix/main.cf"; my $ MAILPROG ="/ usr / sbin / sendmail -t"; my $ WARNPERCENT =80; my @POSTMASTERS =('example@unixlinux.online'); my $ CONAME ='My Company'; my $ COADDR ='example@unixlinux.online'; my $ SUADDR ='example@unixlinux.online'; my $ MAIL_REPORT =1; my $ MAIL_WARNING =1; #get virtual namespace base from postfix configopen(PCF、 "<$ POSTFIX_CF")or die $ !; my $ mboxBase; while( |
上部の変数(特に[メールで保護された]メールアドレス)を調整してください。
ファイルを実行可能にする必要があります:
chmod 755 quota_notify
実行
crontab -e
to create a cron job for that script:
0 0 * * * / usr / local / sbin / quote_notify&> / dev / null |
15 Test Postfix
To see if Postfix is ready for SMTP-AUTH and TLS , run
telnet localhost 25
Postfixメールサーバータイプへの接続を確立した後
ehlo localhost
線が表示されている場合
250-STARTTLS
および
250-AUTH PLAIN LOGIN
everything is fine.
[[email protected] sbin]# telnet localhost 25
Trying ::1...
Connected to localhost.
Escape character is '^]'.
220 server1.example.com ESMTP Postfix
<-- ehlo localhost
250-server1.example.com
250-PIPELINING
250-SIZE 10240000
250-VRFY
250-ETRN
250-STARTTLS
250-AUTH PLAIN LOGIN
250-AUTH=PLAIN LOGIN
250-ENHANCEDSTATUSCODES
250-8BITMIME
250 DSN
<-- quit
221 2.0.0 Bye
Connection closed by foreign host.
[[email protected] sbin]#
タイプ
終了
to return to the system's shell.
16 Populate The Database And Test
データベースにデータを入力するには、MySQLシェルを使用できます:
mysql -u root -p
メールを使用;
少なくとも、テーブル
INSERT INTO `domains` (`domain`) VALUES ('example.com');
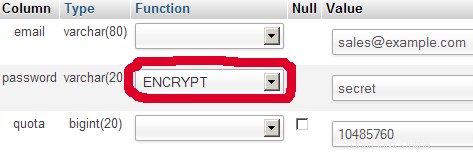
INSERT INTO `users` (`email`, `password`, `quota`) VALUES ('[email protected]', ENCRYPT('secret'), 10485760); (Please take care you use the ENCRYPT syntax in the second INSERT statement in order to encrypt the password!)
他の2つのテーブルにエントリを作成する場合は、次のようになります。
INSERT INTO `forwardings` (`source`, `destination`) VALUES ('[email protected]', '[email protected]');
INSERT INTO `transport` (`domain`, `transport`) VALUES ('example.com', 'smtp:mail.example.com');
MySQLシェルを終了するには、次のように入力します
終了;
ほとんどの人にとって、MySQLのグラフィカルなフロントエンドがあれば簡単です。 therefore you can also use phpMyAdmin (in this example under http://192.168.0.100/phpMyAdmin/ or http://server1.example.com/phpMyAdmin/) to administrate the mail データベース。 Again, when you create a user, go sure that you use the ENCRYPT function to encrypt the password:
I do not think I have to explain the domains and users table further.
The forwardings table can have entries like the following:
| ソース | 宛先 | |
| [email protected] | [email protected] | Redirects emails for [email protected] to [email protected] |
| @example.com | [email protected] | Creates a Catch-All account for [email protected] All emails to example.com will arrive at [email protected], except those that exist in the users table (i.e., if [email protected] exists in the users table, mails to [email protected] will still arrive at [email protected]). |
| @example.com | @anotherdomain.tld | これにより、example.com宛てのすべてのメールがanotherdomain.tldの同じユーザーにリダイレクトされます。 E.g., emails to [email protected] will be forwarded to [email protected] |
| [email protected] | [email protected], [email protected] |
The transport table can have entries like these:
| ドメイン | 輸送 | |
| example.com | : | |
| example.com | smtp:mail.anotherdomain.tld | Delivers all emails for example.com via smtp to the server mail.anotherdomain.com. |
| example.com | smtp:mail.anotherdomain.tld:2025 | Delivers all emails for example.com via smtp to the server mail.anotherdomain.com, but on port 2025, not 25 which is the default port for smtp. |
| example.com |
smtp:[1.2.3.4] | 角かっこは、Postfixが角かっこで囲まれたアドレスのMXDNSレコードを検索できないようにします。 Makes sense for IP addresses. |
| .example.com | smtp:mail.anotherdomain.tld | Mail for any subdomain of example.com is delivered to mail.anotherdomain.tld. |
| * | smtp:mail.anotherdomain.tld | All emails are delivered to mail.anotherdomain.tld. |
| [email protected] | smtp:mail.anotherdomain.tld | Emails for [email protected] are delivered to mail.anotherdomain.tld. |
参照
man transport
for more details.
トランスポートテーブルのエントリの順序が重要であることに注意してください。 The entries will be followed from the top to the bottom.
重要: Postfixはトランスポートにキャッシュメカニズムを使用するため、トランスポートテーブルの変更が有効になるまでに時間がかかる場合があります。 If you want them to take effect immediately, run
postfix reload
after you have made your changes in the transport table.
17 Send A Welcome Email For Creating Maildir
新しい電子メールアカウントを作成し、そこから(POP3 / IMAPを使用して)電子メールを取得しようとすると、Maildirが存在しないことを示すエラーメッセージが表示される可能性があります。 Maildirは、新しいアカウントの最初の電子メールが到着したときに自動的に作成されます。 Therefore it's a good idea to send a welcome email to a new account.
まず、mailxパッケージをインストールします:
yum install mailx
[メール保護]にウェルカムメールを送信するには、次のようにします。
mailx[メール保護]
件名の入力を求められます。件名(例:ようこそ)を入力し、Enterキーを押して、次の行にメッセージを入力します。 When the message is finished, press ENTER again so that you are in a new line, then press CTRL+D:
[[email protected] ~]# mailx [email protected]
Subject:Welcome <-- ENTER
Welcome!新しいメールアカウントを楽しんでください。 <-- ENTER
<-- CTRL+D
EOT
[[email protected] ~]#
18 Installing SquirrelMail
SquirrelMailは、ユーザーがブラウザでメールを送受信できるようにするウェブメールインターフェースです。この章では、ユーザーがSquirrelMailインターフェースからメールアカウントのパスワードを変更できるように、インストールしてセットアップに合わせて調整する方法を示します。
SquirrelMailをインストールするには、次のコマンドを実行します:
yum install squirrelmail php-pear-DB
Afterwards we restart Apache:
/etc/init.d/httpd再起動
SquirrelMailにはいくつかのプラグインがプリインストールされていますが、残念ながら、MySQLデータベースの電子メールパスワードを変更できるプラグインはありません。ただし、手動でインストールできるSQLパスワードの変更プラグインがあります:
cd /usr/share/squirrelmail/plugins
wget http://www.squirrelmail.org/plugins/change_sqlpass-3.3-1.2.tar.gz
tar xvfz change_sqlpass-3.3-1.2.tar.gz
cd change_sqlpass
cp config.php.sample config.php
次に、config.phpを編集して、セットアップに合わせて調整する必要があります。 $ csp_dsn、$ lookup_password_query、$ password_update_queries、$ password_encryption、$ csp_salt_static、および$ csp_delimiterの変数を次のように調整し、$csp_salt_queryをコメントアウトしてください。
vi config.php
[...] |
完全なファイルは次のようになります。
|
SQLパスワードの変更プラグインは、次のようにインストールする互換性プラグインにも依存します。
cd /usr/share/squirrelmail/plugins
wget http://www.squirrelmail.org/countdl.php?fileurl=http%3A%2F%2Fwww.squirrelmail.org%2Fplugins%2Fcompatibility-2.0.16-1.0.tar.gz
tar xvfz compatibility-2.0.16-1.0.tar.gz
Now we must go into the SquirrelMail configuration and tell SquirrelMail that we use Courier as our POP3 and IMAP server and enable the Change SQL Password and the Compatibility plugins:
/usr/share/squirrelmail/config/conf.pl
次のメニューが表示されます。示されているようにナビゲートします:
SquirrelMail Configuration : Read: config.php (1.4.0)
---------------------------------------------------------
Main Menu --
1.組織の設定
2。サーバー設定
3。フォルダのデフォルト
4。一般的なオプション
5。テーマ
6。名簿
7。今日のメッセージ(MOTD)
8。プラグイン
9。データベース
10。 Languages

D. Set pre-defined settings for specific IMAP servers

C   Turn color off
S   Save data
Q   Quit

Command >> <-- D


SquirrelMail Configuration : Read: config.php
---------------------------------------------------------
While we have been building SquirrelMail, we have discovered some
preferences that work better with some servers that don't work so
well with others. If you select your IMAP server, this option will
set some pre-defined settings for that server.

Please note that you will still need to go through and make sure
everything is correct.これによってすべてが変わるわけではありません。 There are
only a few settings that this will change.

Please select your IMAP server:
    bincimap    = Binc IMAP server
    courier     = Courier IMAP server
    cyrus       = Cyrus IMAP server
    dovecot     = Dovecot Secure IMAP server
    exchange    = Microsoft Exchange IMAP server
    hmailserver = hMailServer
    macosx      = Mac OS X Mailserver
    mercury32   = Mercury/32
    uw          = University of Washington's IMAP server
    gmail       = IMAP access to Google mail (Gmail) accounts

    quit        = Do not change anything
Command >> <-- courier


              imap_server_type = courier
         default_folder_prefix = INBOX.
                  trash_folder = Trash
                   sent_folder = Sent
                  draft_folder = Drafts
            show_prefix_option = false
          default_sub_of_inbox = false
show_contain_subfo lders_option = false
            optional_delimiter = .
                 delete_folder = true

Press enter to continue... <-- ENTER


SquirrelMail Configuration : Read: config.php (1.4.0)
---------------------------------------------------------
Main Menu --
1.組織の設定
2。サーバー設定
3。フォルダのデフォルト
4。一般的なオプション
5。テーマ
6。名簿
7。今日のメッセージ(MOTD)
8。プラグイン
9。データベース
10。 Languages

D. Set pre-defined settings for specific IMAP servers

C   Turn color off
S   Save data
Q   Quit

Command >> <-- 8


SquirrelMail Configuration : Read: config.php (1.4.0)
---------------------------------------------------------
Plugins
  Installed Plugins
    1. delete_move_next
    2. squirrelspell
    3. newmail

  Available Plugins:
    4. administrator
    5. bug_report
    6. calendar
    7. change_sqlpass
    8. compatibility
    9. filters
    10. fortune
    11. info
    12. listcommands
    13. mail_fetch
    14. message_details
    15. sent_subfolders
    16. spamcop
    17. test
    18. translate

R   Return to Main Menu
C   Turn color off
S   Save data
Q   Quit

Command >> <-- 8 (or whatever number the compatibility plugin has - it's needed by the change_sqlpass plugin)


SquirrelMail Configuration : Read: config.php (1.4.0)
---------------------------------------------------------
Plugins
  Installed Plugins
    1. delete_move_next
    2. squirrelspell
    3. newmail
    4. compatibility

  Available Plugins:
    5. administrator
    6. bug_report
    7. calendar
    8. change_sqlpass
    9. filters
    10. fortune
    11. info
    12. listcommands
    13. mail_fetch
    14. message_details
    15. sent_subfolders
    16. spamcop
    17. test
    18. translate

R   Return to Main Menu
C   Turn color off
S   Save data
Q   Quit

Command >> <-- 8 (the number of the change_sqlpass plugin)


SquirrelMail Configuration : Read: config.php (1.4.0)
---------------------------------------------------------
Plugins
  Installed Plugins
    1. delete_move_next
    2. squirrelspell
    3. newmail
    4. compatibility
    5. change_sqlpass

  Available Plugins:
    6. administrator
    7. bug_report
    8. calendar
    9. filters
    10. fortune
    11. info
    12. listcommands
    13. mail_fetch
    14. message_details
    15. sent_subfolders
    16. spamcop
    17. test
    18. translate

R   Return to Main Menu
C   Turn color off
S   Save data
Q   Quit

Command >> <-- S


SquirrelMail Configuration : Read: config.php (1.4.0)
---------------------------------------------------------
Plugins
  Installed Plugins
    1. delete_move_next
    2. squirrelspell
    3. newmail
    4. compatibility
    5. change_sqlpass

  Available Plugins:
    6. administrator
    7. bug_report
    8. calendar
    9. filters
    10. fortune
    11. info
    12. listcommands
    13. mail_fetch
    14. message_details
    15. sent_subfolders
    16. spamcop
    17. test
    18. translate

R   Return to Main Menu
C   Turn color off
S   Save data
Q   Quit

Command >> S

Data saved in config.php
Press enter to continue... <-- ENTER


SquirrelMail Configuration : Read: config.php (1.4.0)
---------------------------------------------------------
Plugins
  Installed Plugins
    1. delete_move_next
    2. squirrelspell
    3. newmail
    4. compatibility
    5. change_sqlpass

  Available Plugins:
    6. administrator
    7. bug_report
    8. calendar
    9. filters
    10. fortune
    11. info
    12. listcommands
    13. mail_fetch
    14. message_details
    15. sent_subfolders
    16. spamcop
    17. test
    18 . translate

R   Return to Main Menu
C   Turn color off
S   Save data
Q   Quit

Command >> <-- Q
One last thing we need to do is modify the file /etc/squirrelmail/config_local.php and comment out the $default_folder_prefix variable - if you don't do this, you will see the following error message in SquirrelMail after you've logged in:Query:CREATE "Sent" Reason Given:Invalid mailbox name.
vi /etc/squirrelmail/config_local.php
|
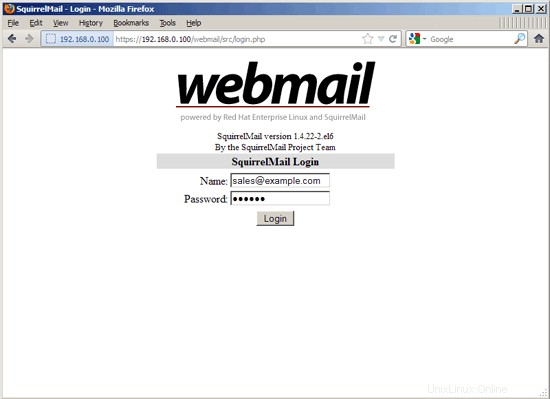
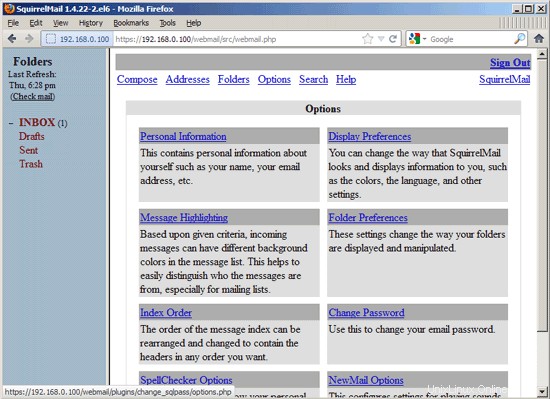
Now you can type in http://server1.example.com/webmail or http://192.168.0.100/webmail in your browser to access SquirrelMail.
メールアドレス(例:[メール保護])とパスワードを使用してログインします:
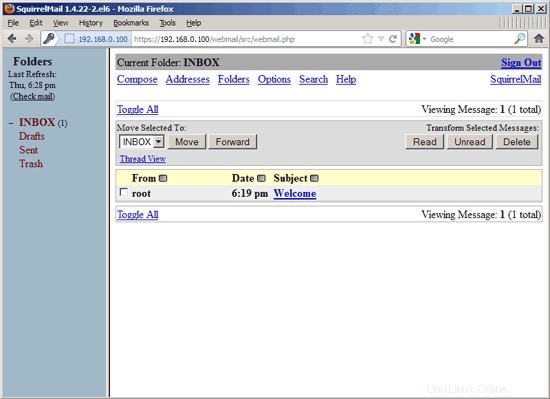
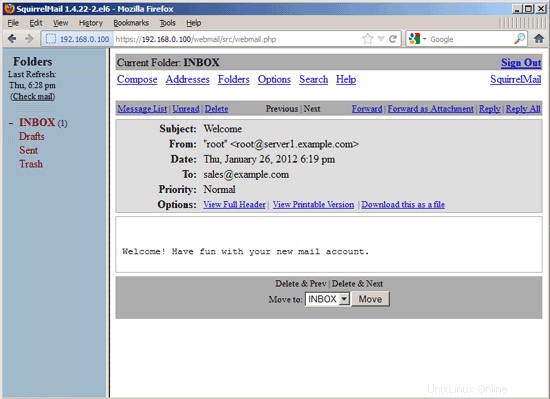
受信トレイにウェルカムメールがあります:
パスワードを変更するには、[オプション]に移動し、[パスワードの変更]を選択します:
現在のパスワードを入力してから、新しいパスワードを2回入力します。
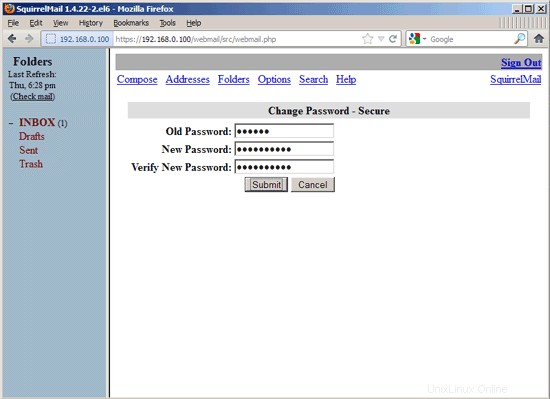
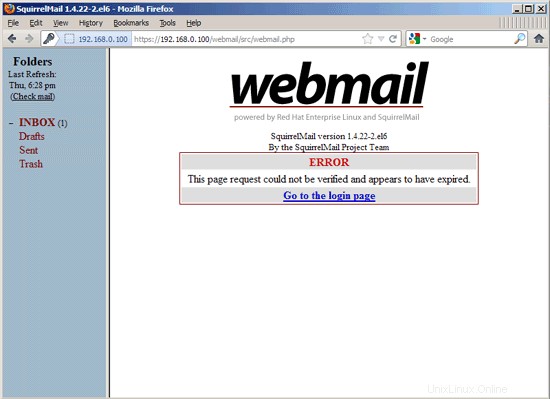
After you've changed the password, you will have to immediately log in again with the new password:
19 VMA (Virtual Mail Admin Interface)
Virtual Mail Admin(VMA)は、このガイドで設定された電子メールシステムを管理するために作成された小さなPHPベースのWebアプリです。テストはしていませんが、共有したいと思いました。
これは、開発者(Charl Loubser)が私にメールで書いたものです:
"Hi There,
I don't know if you'll like this, or if this has any use to you, but I thought I'd Share:
I wrote a silly little webapp for the setup you did in the Howto:https://www.howtoforge.com/virtual-users-domains-postfix-courier-mysql-squirrelmail-ubuntu-10.04
If you approve and think it worthy of sharing on your tutorial, you are more than welcome, and can feel free to do so.
As mentioned in the readme, this is not a perfect app, but it does the job for now, and I'd thing it's relatively safe in a closed environment (LAN setup between servers).
The rar file with the app is attached, but can also be downloaded at :http://code.google.com/p/vma/"
20 References
Tutorial:ISP-style Email Service with Debian-Sarge and Postfix 2.1:http://workaround.org/articles/ispmail-sarge/
Postfix + Quota:http://vhcs.net/new/modules/newbb/viewtopic.php?topic_id=3496&forum=17
Mail Passwords Encrypted using saslauthd:http://www.syscp.de/docs/public/contrib/cryptedmailpws
21 Links
- Postfix MTA:http://www.postfix.org/
- Postfix Quota Patch:http://web.onda.com.br/nadal/
- phpMyAdmin:http://www.phpmyadmin.net/
- SquirrelMail:http://www.squirrelmail.org/
- CentOS:http://www.centos.org/