MantisBTは、PHPで記述された無料のオープンソースのWebベースのバグ追跡ソフトウェアです。シンプルで使いやすく、ユーザーフレンドリーで、チームと協力してバグや問題をすばやく解決するのに役立つ多くのツールが付属しています。メールによる通知、役割ベースのアクセス制御、プロジェクト、サブプロジェクト、カテゴリサポート、問題の関係グラフ、カスタマイズ可能なダッシュボードなど、豊富な機能セットを提供します。
このチュートリアルでは、CentOS8にMantisバグトラッキングシステムをインストールする方法を紹介します。
- CentOS8を実行しているサーバー。
- サーバーIPで指定された有効なドメイン名。
- ルートパスワードはサーバーで構成されています。
LAMPサーバーをインストールする
まず、Apache Webサーバー、MariaDBサーバー、PHP、およびその他の必要なパッケージをシステムにインストールする必要があります。次のコマンドですべてをインストールできます:
dnf install httpd mariadb-server php php-mysqli php-mbstring php-curl unzip -y
すべてのパッケージがインストールされたら、ApacheおよびMariaDBサービスを開始し、次のコマンドを使用してシステムの再起動時にパッケージを開始できるようにします。
systemctl start httpd
systemctl start mariadb
systemctl enable httpd
systemctl enable mariadb
終了したら、次のステップに進むことができます。
Mantisは、MariaDBまたはMySQLをデータベースバックエンドとして使用します。そのため、Mantisのデータベースとユーザーを作成する必要があります。
まず、次のコマンドを使用してMariaDBシェルにログインします。
mysql
ログインしたら、次のコマンドを使用してデータベースとユーザーを作成します。
MariaDB [(none)]> CREATE DATABASE mantisdb;
MariaDB [(none)]> GRANT ALL PRIVILEGES ON mantisdb.* TO 'mantis'@'localhost' IDENTIFIED BY 'mantispassword';
次に、特権をフラッシュし、次のコマンドを使用してMariaDBシェルを終了します。
MariaDB [(none)]> FLUSH PRIVILEGES;
MariaDB [(none)]> EXIT;
終了したら、次のステップに進むことができます。
まず、次のコマンドを使用して、SourceforgeWebサイトから最新バージョンのMantisをダウンロードします。
wget https://excellmedia.dl.sourceforge.net/project/mantisbt/mantis-stable/2.24.2/mantisbt-2.24.2.zip
ダウンロードが完了したら、次のコマンドを使用してダウンロードしたファイルを解凍します。
unzip mantisbt-2.24.2.zip
次に、次のコマンドを使用して、抽出したディレクトリをApacheルートディレクトリにコピーします。
cp -r mantisbt-2.24.2 /var/www/html/mantis
次に、mantisディレクトリの所有権をapacheに変更します:
chown -R apache:apache /var/www/html/mantis
終了したら、次のステップに進むことができます。
次に、Mantis用のApache仮想ホスト構成ファイルを作成する必要があります。次のコマンドで作成できます:
nano /etc/httpd/conf.d/mantis.conf
次の行を追加します:
<VirtualHost *:80>
ServerAdmin [email protected]
DocumentRoot "/var/www/html/mantis"
ServerName mantis.linuxbuz.com
<Directory "/var/www/html/mantis/">
Options MultiViews FollowSymlinks
AllowOverride All
Order allow,deny
Allow from all
</Directory>

TransferLog /var/log/httpd/mantis_access.log
ErrorLog /var/log/httpd/mantis_error.log

</VirtualHost>
終了したらファイルを保存して閉じ、Apacheサービスを再起動して変更を適用します。
systemctl restart httpd
次のコマンドを使用して、Apacheのステータスを確認することもできます。
systemctl status httpd
次の出力が得られるはずです:
? httpd.service - The Apache HTTP Server
   Loaded: loaded (/usr/lib/systemd/system/httpd.service; disabled; vendor preset: disabled)
  Drop-In: /usr/lib/systemd/system/httpd.service.d
           ??php-fpm.conf
   Active: active (running) since Sat 2020-09-19 11:06:51 EDT; 37s ago
     Docs: man:httpd.service(8)
 Main PID: 41737 (httpd)
   Status: "Running, listening on: port 80"
    Tasks: 213 (limit: 25014)
   Memory: 25.0M
   CGroup: /system.slice/httpd.service
           ??41737 /usr/sbin/httpd -DFOREGROUND
           ??41738 /usr/sbin/httpd -DFOREGROUND
           ??41739 /usr/sbin/httpd -DFOREGROUND
           ??41740 /usr/sbin/httpd -DFOREGROUND
           ??41741 /usr/sbin/httpd -DFOREGROUND

Sep 19 11:06:51 centos8 systemd[1]: Starting The Apache HTTP Server...
次に、システムにCertbotユーティリティをインストールして、MantisWebサイト用のLet'sEncryptSSLをダウンロードしてインストールする必要があります。
次のコマンドを使用して、Certbotクライアントをインストールできます。
wget https://dl.eff.org/certbot-auto
mv certbot-auto /usr/local/bin/certbot-auto
chown root /usr/local/bin/certbot-auto
chmod 0755 /usr/local/bin/certbot-auto
次に、次のコマンドを使用して、MantisWebサイトのSSL証明書を取得してインストールします。
certbot-auto --apache -d mantis.linuxbuz.com
上記のコマンドは、最初に必要なすべての依存関係をサーバーにインストールします。インストールすると、以下に示すように、メールアドレスを入力して利用規約に同意するよう求められます。
Saving debug log to /var/log/letsencrypt/letsencrypt.log
Plugins selected: Authenticator apache, Installer apache
Enter email address (used for urgent renewal and security notices) (Enter 'c' to
cancel): [email protected]

- - - - - - - - - - - - - - - - - - - - - - - - - - - - - - - - - - - - - - - -
Please read the Terms of Service at
https://letsencrypt.org/documents/LE-SA-v1.2-November-15-2017.pdf. You must
agree in order to register with the ACME server at
https://acme-v02.api.letsencrypt.org/directory
- - - - - - - - - - - - - - - - - - - - - - - - - - - - - - - - - - - - - - - -
(A)gree/(C)ancel: A

- - - - - - - - - - - - - - - - - - - - - - - - - - - - - - - - - - - - - - - -
Would you be willing to share your email address with the Electronic Frontier
Foundation, a founding partner of the Let's Encrypt project and the non-profit
organization that develops Certbot? We'd like to send you email about our work
encrypting the web, EFF news, campaigns, and ways to support digital freedom.
- - - - - - - - - - - - - - - - - - - - - - - - - - - - - - - - - - - - - - - -
(Y)es/(N)o: Y


Obtaining a new certificate
Performing the following challenges:
http-01 challenge for mantis.linuxbuz.com
Waiting for verification...
Cleaning up challenges
Deploying Certificate to VirtualHost /etc/apache/conf.d/mantis.conf
次に、以下に示すように、HTTPトラフィックをHTTPSにリダイレクトするかどうかを選択する必要があります。
Please choose whether or not to redirect HTTP traffic to HTTPS, removing HTTP access.
- - - - - - - - - - - - - - - - - - - - - - - - - - - - - - - - - - - - - - - -
1: No redirect - Make no further changes to the webserver configuration.
2: Redirect - Make all requests redirect to secure HTTPS access. Choose this for
new sites, or if you're confident your site works on HTTPS. You can undo this
change by editing your web server's configuration.
- - - - - - - - - - - - - - - - - - - - - - - - - - - - - - - - - - - - - - - -
Select the appropriate number [1-2] then [enter] (press 'c' to cancel): 2
2と入力し、Enterキーを押して続行します。インストールが完了すると、次の出力が表示されます。
Redirecting all traffic on port 80 to ssl in /etc/apache/conf.d/mantis.conf

- - - - - - - - - - - - - - - - - - - - - - - - - - - - - - - - - - - - - - - -
Congratulations! You have successfully enabled https://mantis.linuxbuz.com

You should test your configuration at:
https://www.ssllabs.com/ssltest/analyze.html?d=mantis.linuxbuz.com
- - - - - - - - - - - - - - - - - - - - - - - - - - - - - - - - - - - - - - - -

IMPORTANT NOTES:
 - Congratulations! Your certificate and chain have been saved at:
   /etc/letsencrypt/live/mantis.linuxbuz.com/fullchain.pem
   Your key file has been saved at:
   /etc/letsencrypt/live/mantis.linuxbuz.com/privkey.pem
   Your cert will expire on 2020-03-23. To obtain a new or tweaked
   version of this certificate in the future, simply run certbot-auto
   again with the "certonly" option. To non-interactively renew *all*
   of your certificates, run "certbot-auto renew"
 - If you like Certbot, please consider supporting our work by:

   Donating to ISRG / Let's Encrypt:   https://letsencrypt.org/donate
   Donating to EFF:                    https://eff.org/donate-le
デフォルトでは、SELinuxはCentOS 8で有効になっているため、MantisWebサイト用に構成する必要があります。
次のコマンドでSELinuxを設定できます:
setsebool httpd_can_network_connect on -P
chcon -R -u system_u -t httpd_sys_rw_content_t -r object_r /var/www/html/mantis
次に、次のコマンドを使用して、ポート80と443がファイアウォールを通過できるようにします。
firewall-cmd --permanent --add-service=http
firewall-cmd --permanent --add-service=https
firewall-cmd --reload
完了したら、次のステップに進むことができます。
MantisWebUIにアクセス
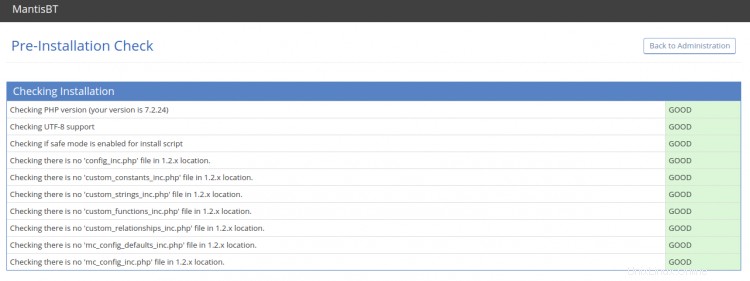
次に、Webブラウザーを開き、URLhttps://mantis.linuxbuz.comを使用してMantisWebインターフェースにアクセスします。次の画面が表示されます。
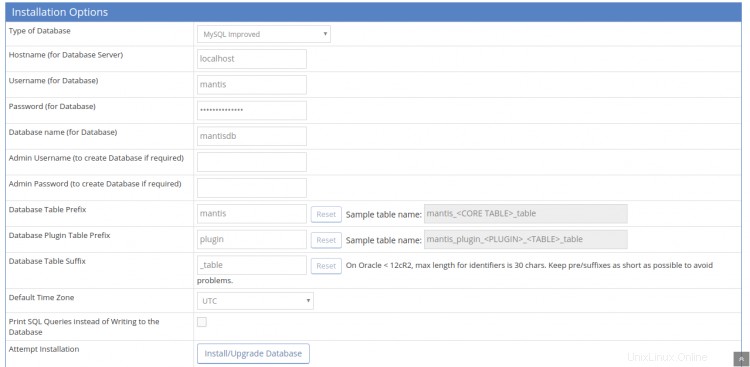
データベース名、ユーザー名、管理者ユーザー名、パスワード、メールアドレスを入力し、インストール/アップグレードをクリックします。 データベースボタン。インストールが完了すると、次の画面が表示されます。
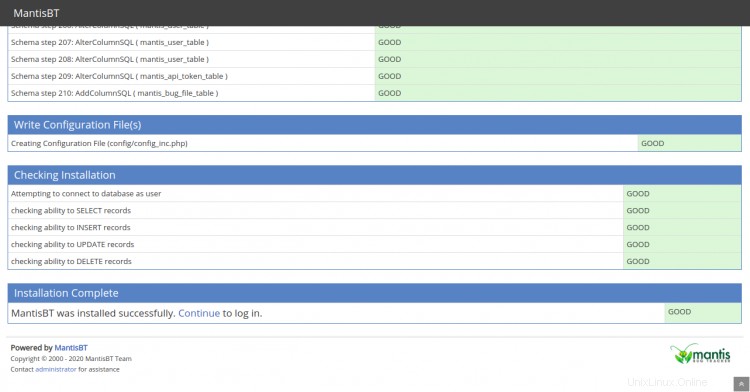
次に、[続行]をクリックします 「」ボタンをクリックすると、次の画面にMantisBTログインページが表示されます。
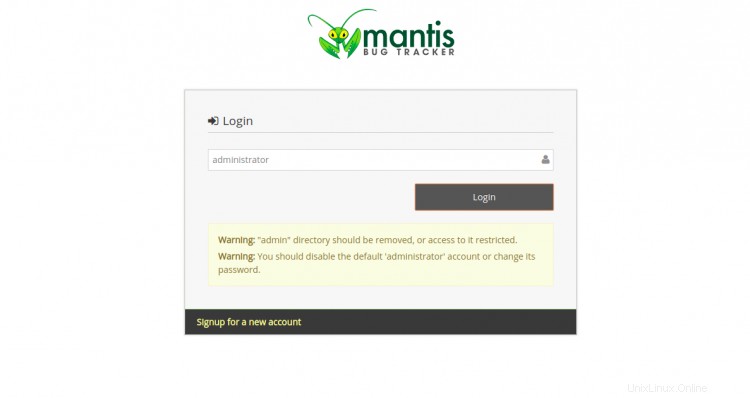
デフォルトのMantisユーザー名管理者を指定し、ログインをクリックします ボタン。次の画面に示すように、パスワードの入力を求められます。
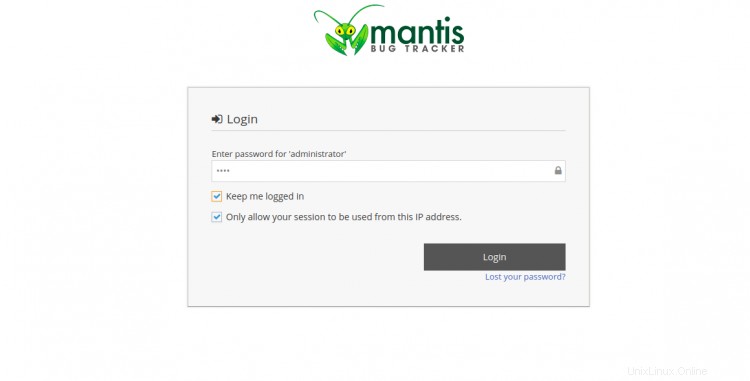
Mantisのデフォルトパスワード「root」を入力し、ログインボタンをクリックします。次の画面にリダイレクトされます:
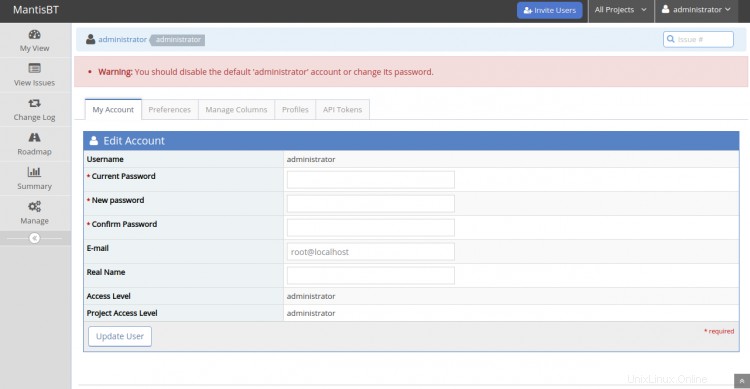

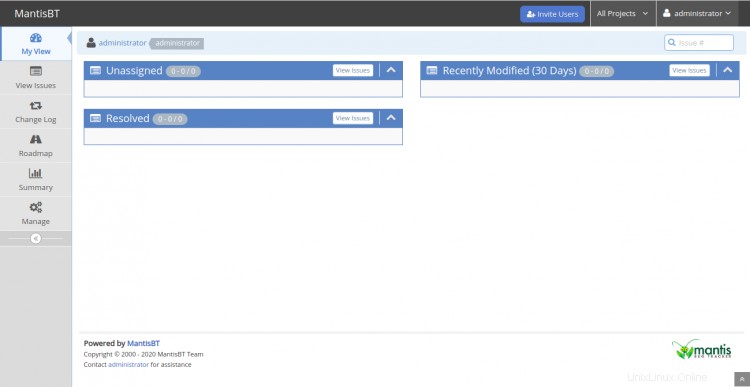
デフォルトの管理者パスワードを変更することをお勧めします。現在のパスワード、新しいパスワード、メールアドレス、本名、アクセスレベル、プロジェクトアクセスレベルを入力し、ユーザーの更新をクリックします。 ボタン。次の画面にMantisダッシュボードが表示されます。
おめでとう!これで、CentOS8にLet'sEncrypt SSLを使用してMantisが正常にインストールされました。これで、開発環境にMantisを実装し、チームと共同作業を行うことができます。ご不明な点がございましたら、お気軽にお問い合わせください。