専用IPをお探しですか?心配しないで! KnowHostは、ホスティング環境に必要なすべてをカバーするようになりました。 WHMサーバーで専用IPを割り当てて構成したら、次のステップはcPanelアカウントへの専用IPの割り当てです。専用のIPアドレスをcPanelアカウントに割り当てる方法を学びましょう。
1.まず、WHMパネルにログインします
https://your-domain.com:2087 またはhttps:// IP-address:2087 またはhttps:// server-hostname:2087 。
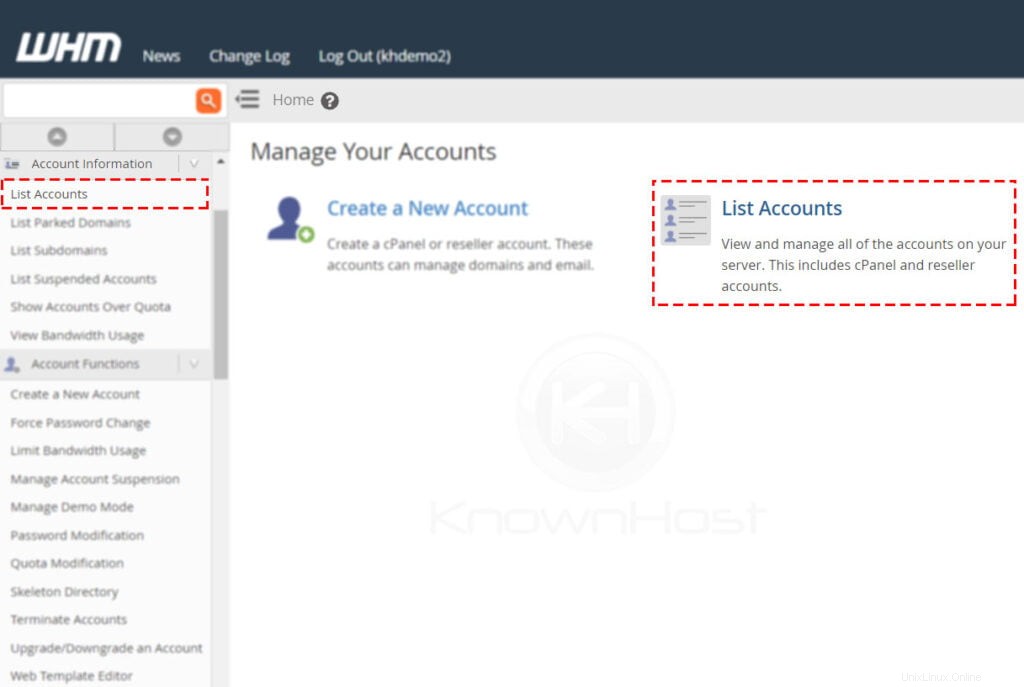
2.アカウント情報→アカウントの一覧表示に移動します またはホーム →リストアカウント 。
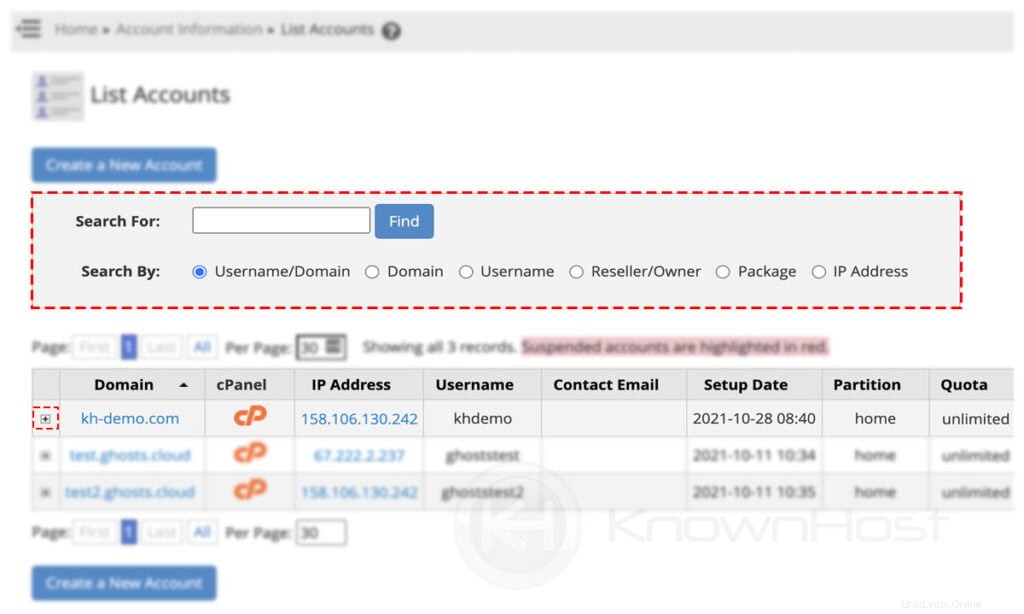
3.ここに、cPanelアカウントのリストがあり、複数のフィルターを使用して特定のcPanelアカウントを検索します。 cPanelアカウントで利用可能なオプションを展開するには、「+」をクリックします 。
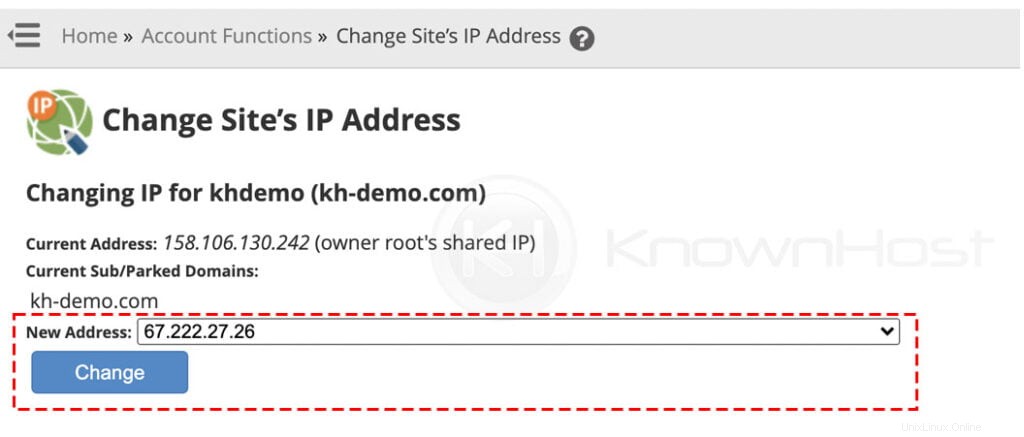
4.次に、クリックします。 変更 IP 住所 。
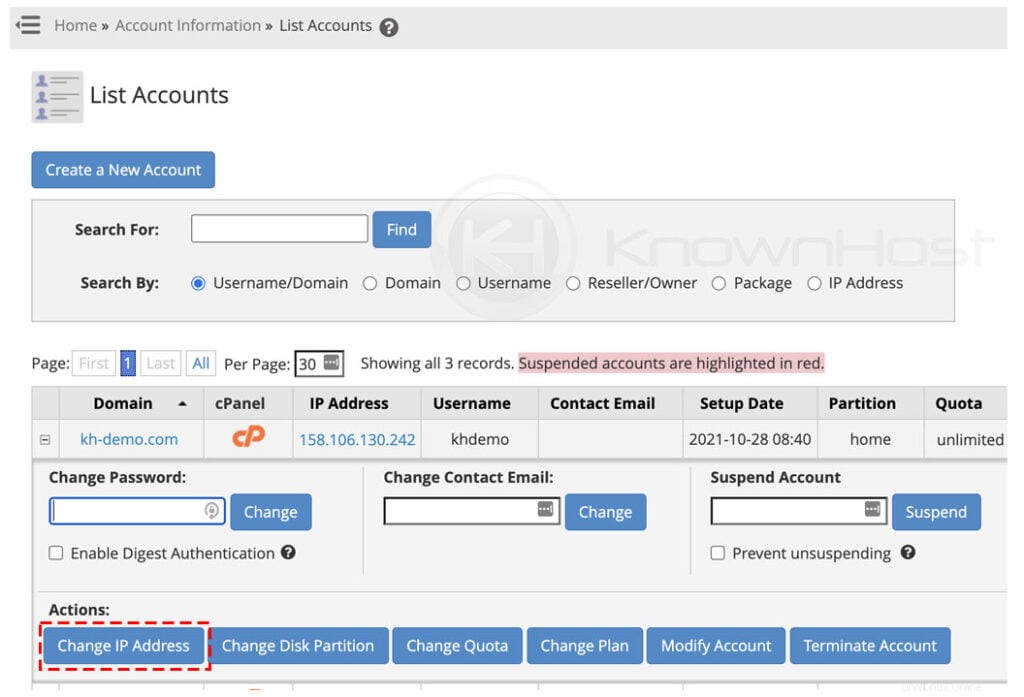
5.選択 専用 IP ドロップダウンから→クリック 変更 。
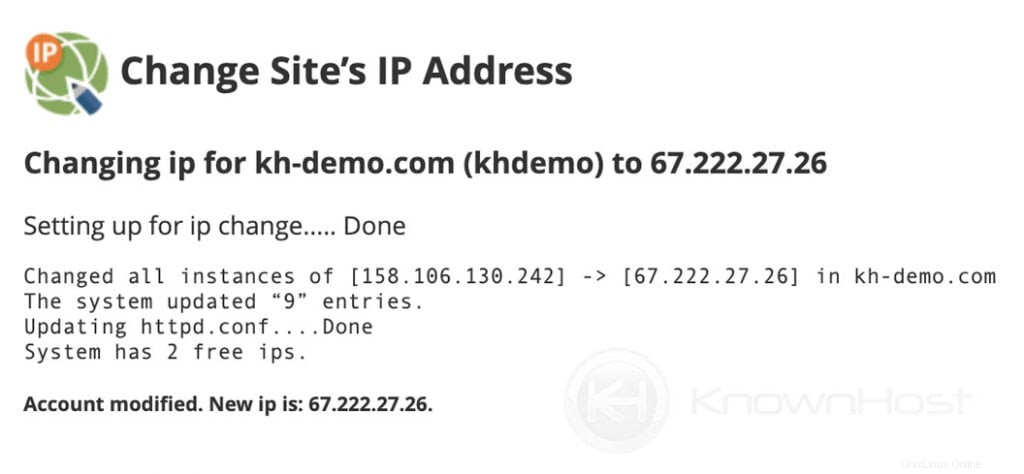
6.おめでとうございます!これで、cPanelアカウントに専用のIPアドレスが正常に割り当てられました。
結論
これで、専用IPアドレスをcPanelアカウントに割り当てる方法について説明しました。変更が完了したら、ローカルDNSリゾルバーによっては、DNSの伝播に時間がかかる場合があります(24時間から48時間)。