Dockerを使用すると、コラボレーションとデプロイを簡素化する方法でアプリケーションをパッケージ化できます。しかし、Dockerを初めて使用し、Webアプリケーション用のDjango Dockerコンテナーを作成する方法を知りたい場合は、ご馳走になります!
このチュートリアルでは、Djangoアプリケーション用のDockerイメージとコンテナーを構築するための独自のマスターになる方法を学びます。
準備をしてコンテナ化を始めましょう!
このチュートリアルは、実践的なデモンストレーションになります。フォローする場合は、次のものがあることを確認してください。
- DockerとDockerComposeがインストールされています。
- Linuxマシン–このチュートリアルでは Ubuntu20.04.3LTSを使用します。
- Pythonがインストールされています–このチュートリアルではPython3.8.12を使用しています。
DjangoAPIの作成とPostgreSQLへの接続
Django Dockerアプリケーションコンテナーを作成する前に、まずコンテナー化するアプリケーションが必要です。レシピAPIを作成し、それをPostgreSQLに接続します。PostgreSQLにはデフォルトでDjangoが付属しています。
ただし、最初に、ローカルマシンにDjangoとDjangoRESTフレームワークをインストールする必要があります。 Django RESTフレームワークは、DjangoでAPIを構築するために不可欠です。
1.ターミナルを開き、pipを実行します 以下のコマンドでdjangoをインストールします およびdjangorestframework ローカルマシンで。
pip install django djangorestframework2.次に、次のコマンドを実行して、〜/ django_recipe_apiという名前のディレクトリを作成します そのディレクトリに移動します。このディレクトリには、このプロジェクトに必要なすべてのファイルが含まれます。
mkdir ~/django_recipe_api
cd ~/django_recipe_api
3.次のコマンドを実行して、新しいDjangoプロジェクト(recipe_api)を作成します )とアプリ(recipe )APIが存在する現在のディレクトリ。
# Create a new Django project named "recipe_api" in the current directory.
django-admin startproject recipe_api .
# Create an app named "recipe" in the current directory where the API will live.
python manage.py startapp recipe4.次に、〜/django_recipe_api/recipe_api/settings.pyを開きます。 お好みのテキストエディタでファイルを作成し、次のコードを追加します。
以下のコードは、rest_frameworkを追加します 以前に作成したアプリ(レシピ)に(ステップ3)。
INSTALLED_APPS = [
    'django.contrib.admin',
    'django.contrib.auth',
    'django.contrib.contenttypes',
    'django.contrib.sessions',
    'django.contrib.messages',
    'django.contrib.staticfiles',
		'rest_framework' # for Django REST Framework to work
    'recipe', # newly created app
]
5. 〜/django_recipe_api/recipe/models.pyを開きます 以下のコードをファイルして貼り付けます。
以下のコードは、データベースに保存するフィールドとデータの種類を開始します。
from django.db import models

class Recipe(models.Model):
    """Recipe object"""
    title = models.CharField(max_length=255)
    time_minutes = models.IntegerField()
    ingredients = models.CharField(max_length=255)
   # display an instance of the model when necessary
    def __str__(self):
        return self.title
6. 〜/django_recipe_api/recipe/serializers.pyという別のファイルを作成します ファイルに以下のコードを入力します。
次のコードは、以前に作成したモデルのシリアライザーを作成します(ステップ5)。シリアライザーは、APIからのデータをフロントエンドで使用できるJSONなどのフォームに変換するのに役立ちます。
from dataclasses import fields
from rest_framework import serializers
from .models import Recipe

# create a serializer
class RecipeSerializer(serializers.Serializer):
    # initialize model and fields you want to serialize
    class Meta:
        model = Recipe
fields = ('title', 'time_minutes', 'ingredients')7.ここで、〜/django_recipe_api/recipe/views.pyという名前のファイルを作成します。 以下のコードを貼り付けます。
次のコードは、APIからフロントエンドにデータを返し、ユーザーからのGETリクエストを処理するためのビューセットを作成します。
from rest_framework import viewsets
from .serializers import RecipeSerializer #impor the serializer we just created
from .models import Recipe


class recipe_view_set(viewsets.ModelViewSet):
    # define queryset
    queryset = Recipe.objects.all()
serializer_class = RecipeSerializer8.最後に、パス〜/ django_recipe_api / recipe_api / urls.pyでファイルを開きます ファイル内のコードを以下のコードに置き換えます。
以下のコードでは、DjangoRESTFrameworkがアプリケーションに正しく接続できるようにURLを設定しています。また、ブラウザでAPIにアクセスするときに使用するルートも指定します。
from django.contrib import admin
from django.urls import path, include
from recipe.views import recipe_view_set
from rest_framework import routers

# define the router
router = routers.DefaultRouter()
router.register(r'recipe', recipe_view_set) #the route tha will be used to access your API on the browser

urlpatterns = [
    path('admin/', admin.site.urls),
    path('', include(router.urls)),
    path('api-auth/', include('rest_framework.urls')) # Adds 'Login' link in the top right of the page

]
DjangoAPIをビルドするためのDockerfileの作成
現在、コンテナ化されていないDjangoAPIしかありません。アプリケーションをコンテナ化すると、必要に応じてコラボレーションと展開が容易になります。
Dockerfileというファイルを作成します プロジェクトのルートで、ファイルに以下のコードを入力します。 Dockerfile DockerがDockerイメージを構築するために使用する命令のリストが含まれています。
以下のコードは、コンテナにディレクトリを作成し、ローカルマシンのコードをコンテナにコピーします。
# The image you are going to inherit your Dockerfile from
FROM python:3.7-alpine
# Necessary, so Docker doesn't buffer the output and that you can see the output
# of your application (e.g., Django logs) in real-time.
ENV PYTHONUNBUFFERED 1
# Make a directory in your Docker image, which you can use to store your source code
RUN mkdir /django_recipe_api
# Set the /django_recipe_api directory as the working directory
WORKDIR /django_recipe_api
# Copies from your local machine's current directory to the django_recipe_api folder
# in the Docker image
COPY . .
# Copy the requirements.txt file adjacent to the Dockerfile
# to your Docker image
COPY ./requirements.txt /requirements.txt
# Install the requirements.txt file in Docker image
RUN pip install -r /requirements.txt
# Create a user that can run your container
RUN adduser -D user
USER user
次に、 requirements.txtを作成します プロジェクトのルートにあるファイルを作成し、以下のテキストを入力します。
以下は、プロジェクトを実行するために必要な依存関係のリストです。
django==3.1.2
djangorestframework==3.13.1
DjangoとPostgreSQLを実行するためのDockerComposeファイルのビルド
アプリケーションのDockerイメージを作成したばかりですが、どのように実行しますか? Docker-composeは、ローカルマシンからDockerイメージを実行するために使用されるツールです。 Docker-composeは、Djangoやデータベースなど、アプリケーション内のさまざまなサービスを管理するのに役立ちます。
1. docker-compose.ymlというファイルを作成します プロジェクトのルートに配置し、以下のコードを貼り付けます。
以下のコードは、ローカルマシンからイメージのポートにポートをマッピングし、アプリケーションを実行します。
# Verion of docker-compose to use
version: "3"

services:
  django_recipe_api:
    build:
      context: . #Sets the directory for docker-compose to build.

    # Maps port on the local machine to port on Docker image
    ports:
      - "8000:8000"

    volumes:
    # Copy changes made to the project to your image in real-time.
      - .:/django_recipe_api
    # Handles the command used to run the project in the Docker container.
    command: sh -c "python manage.py runserver 0.0.0.0:8000"
2.次に、 settings.pyを開きます ファイルを作成し、0.0.0.0を追加します ALLOWED_HOSTSの値として Dockerはホスト(0.0.0.0)で実行されるため。 ALLOWS_HOSTS 変数は、アプリケーションにアクセスできるドメイン/ホストのリストを保持します。
ALLOWED_HOSTS = ['0.0.0.0']3.次のコマンドを実行して、APIモデルのデータベースを生成します。
# Generates the SQL code for yuou models.
sudo docker-compose run django_recipe_api sh -c "python manage.py makemigrations"
# Runs the SQL commands that you generated.
sudo docker-compose run django_recipe_api sh -c "python manage.py migrate"
4.次に、以下の各コマンドを実行して、Djangoコンテナーをビルドして実行します。
sudo docker-compose build # Build your Service
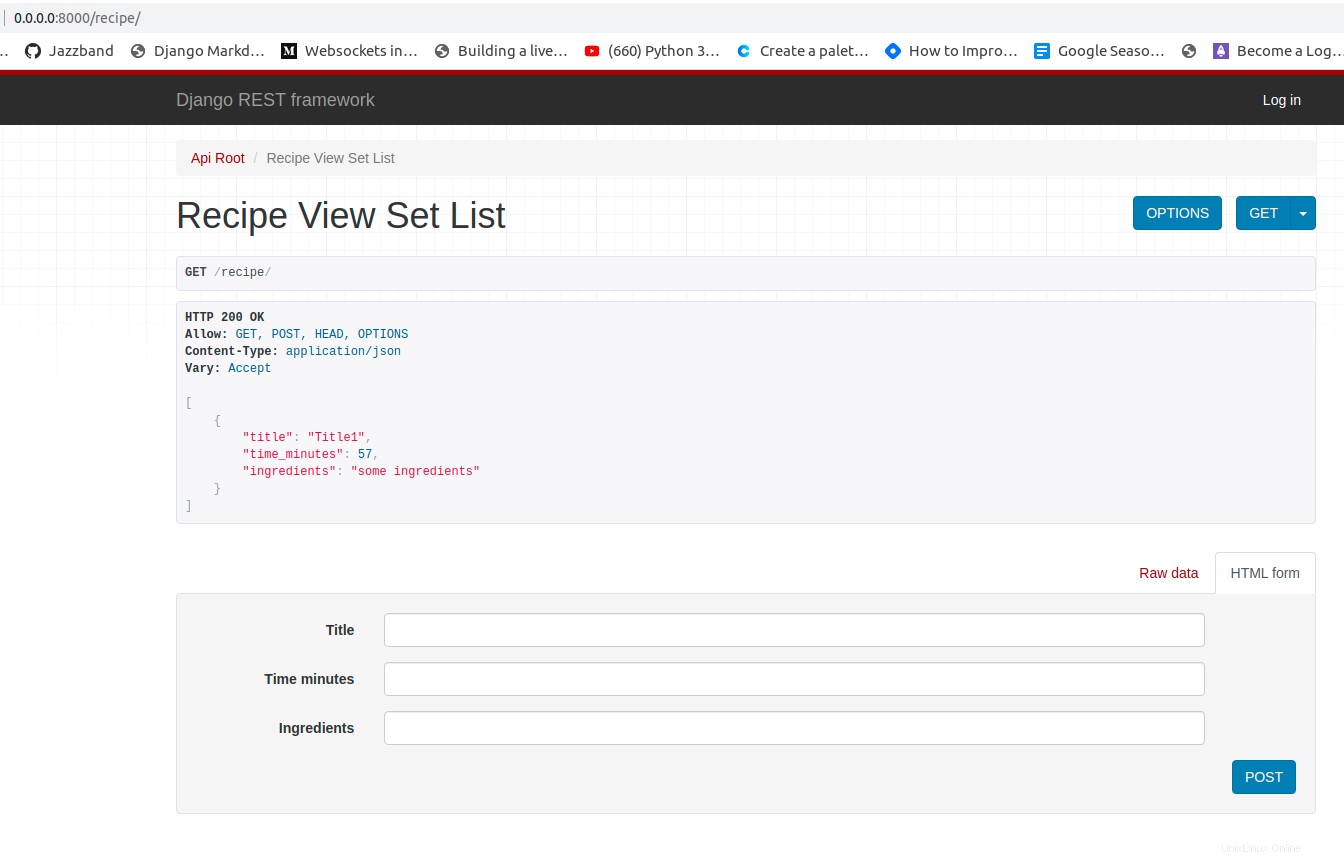
sudo docker-compose up # Runs your application5.最後に、お好みのWebブラウザーを開き、http://0.0.0.0:8000 /recipe/に移動してAPIを実行します。
以下に示すように、APIは完全に実行されており、レシピを追加できます。
PostgreSQLをWに構成する DockerとDjangoを使用したオーク
現在、データベースとしてSQLiteを使用していますが、アプリケーションを拡張する場合は理想的ではありません。 Djangoとうまく接続するためのより良いオプションはPostgreSQLであり、これをアプリケーションに追加します。
DockerおよびDjangoと連携するようにPostgreSQLを構成するには:
1. Dockerfileを開きます RUN pip install -r /requirements.txtの上に以下のコードを追加します ライン。これらの依存関係は、PostgreSQLがDjangoで正しく機能するために必要です。
RUN apk add --update postgresql-client jpeg-dev
RUN apk add --update --virtual .tmp-build-deps \
      gcc libc-dev linux-headers postgresql-dev musl-dev zlib zlib-dev
2.次に、 requirements.txtを開きます ファイルを作成し、psycopg2==2.8.6を追加します 要件。
3.以下のコマンドを再実行して、イメージを再構築します。
docker-compose build
4. settings.pyを開きます ファイルを作成し、DATABASESを置き換えます 次のコードでブロックします。
以下のコードは、PostgreSQLを使用するようにDjangoのデータベースを更新します。
os 以下のコードではモジュールが使用されているため、import osを追加する必要があります 〜/django_recipe_api/recipe_api/settings.pyの上部にあります ファイルのコンテンツ。
DATABASES = {
  'default': {
    'ENGINE': 'django.db.backends.postgresql',
    'HOST': os.environ.get('DB_HOST'),
    'NAME': os.environ.get('DB_NAME'),
    'USER': os.environ.get('DB_USER'),
    'PASSWORD': os.environ.get('DB_PASS'),
  }
}
5. docker-compose.ymlを開きます ファイルを作成し、ファイルの内容を以下のコードに置き換えます。
以下のコードは、作成したデータベースのサービスを作成し(ステップ4)、データベースのクレデンシャルをDjangoにフィードします。
# Verion of docker-compose to use
version: "3"

services:
  django_recipe_api:
    build:
      context: . # Sets the directory for docker-compose to build.

    # Maps port on the local machine to port on Docker image
    ports:
      - "8000:8000"

    volumes:
    # Copy changes made to the project to your image in real-time.
      - .:/django_recipe_api
    # Handles the command used to run the project in the Docker container.
    command: sh -c "python manage.py runserver 0.0.0.0:8000"

    environment:
			# The environment variable credetials that is needed
      # in the settings for Postgres.
      - DB_HOST=db
      - DB_NAME=recipe
      - DB_USER=postgres
      - DB_PASS=supersecretpassword
    depends_on:
      - db

  db:
    image: postgres:10-alpine
    environment:
			# credentials required by postgres:10-alpine
      - POSTGRES_DB=recipe
      - POSTGRES_USER=postgres
      - POSTGRES_PASSWORD=supersecretpassword
6.次のコマンドを実行して、作成した新しいデータベースに移行を適用します(ステップ5)。
sudo docker-compose build
sudo docker-compose run django_recipe_api sh -c "python manage.py makemigrations"
sudo docker-compose run django_recipe_api sh -c "python manage.py migrate"
7.次に、次のコマンドを実行して、DockerコンテナでDjangoアプリケーションを実行します。
sudo docker-compose up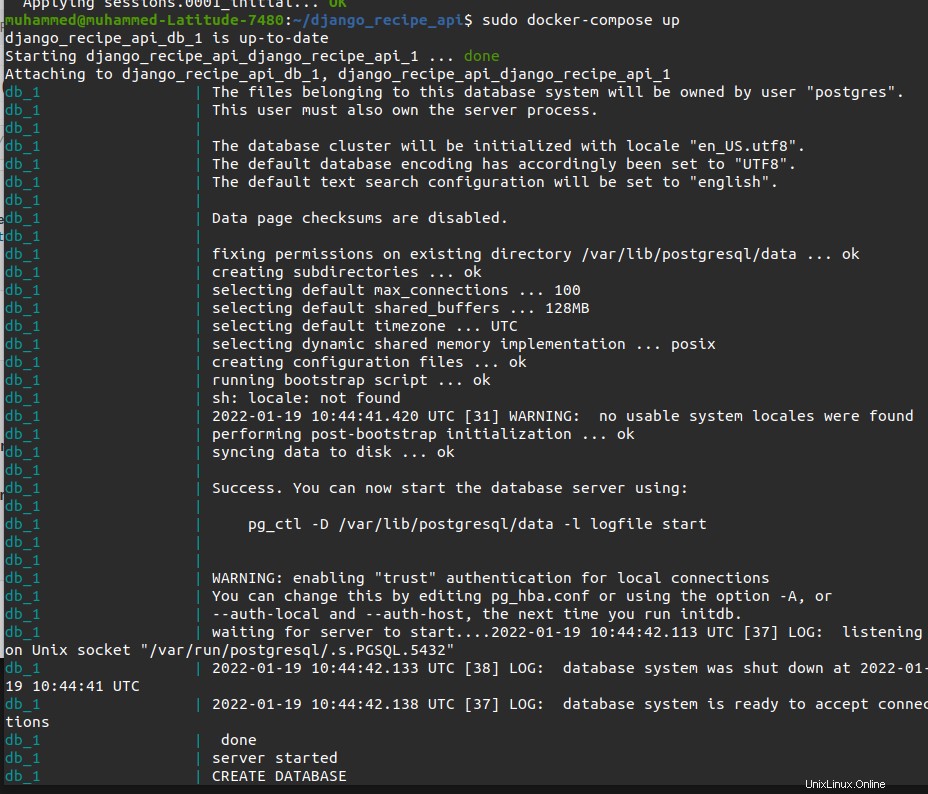
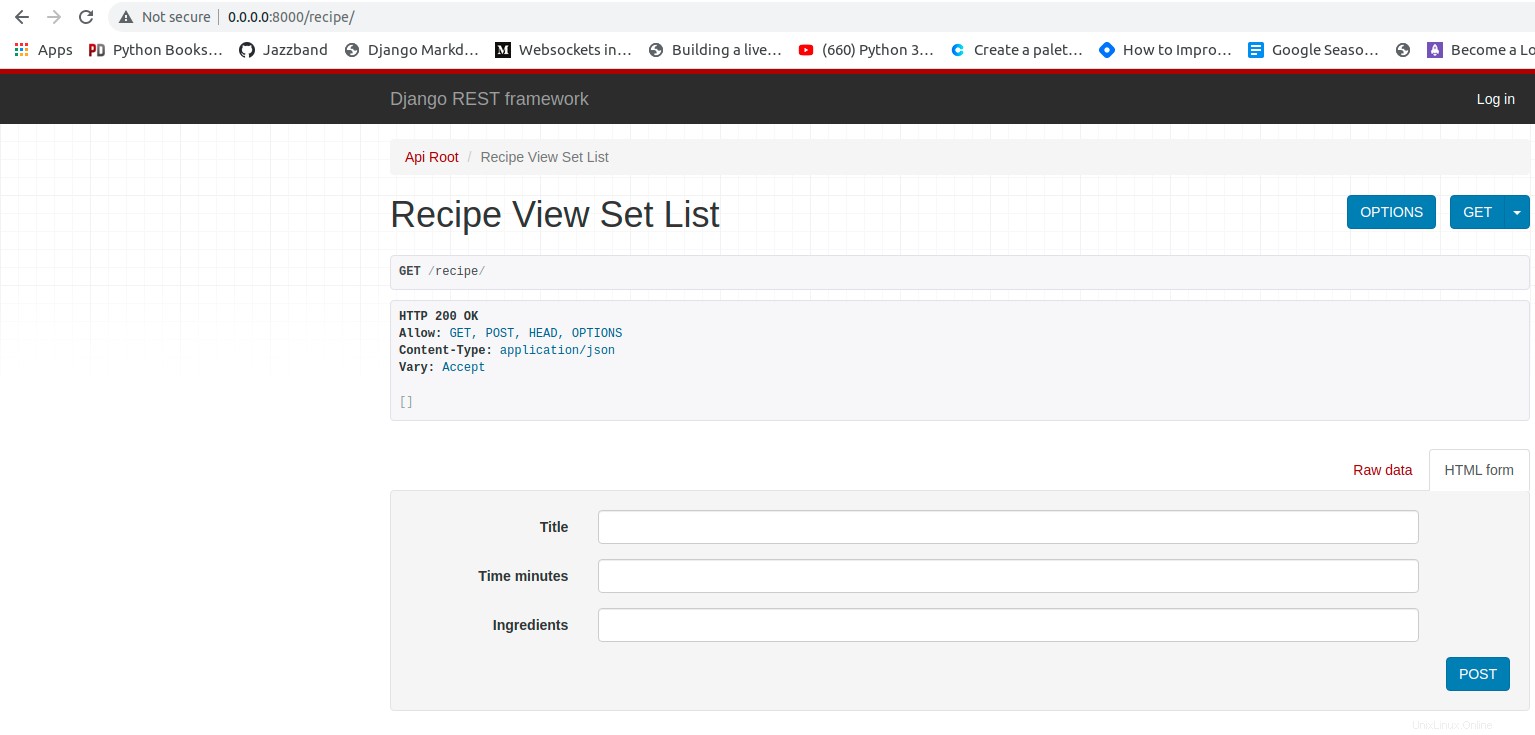
8.最後に、ブラウザでhttp://0.0.0.0:8000/recipe/に再度移動します。
以下に示すように、データベースを変更したため、以前に保存されたデータはもう存在しません。これで、必要に応じてデータを追加できます。
このチュートリアルでは、データの保存にPostgreSQLを使用するDjangoAPI用のDockerコンテナを設定する方法を学びました。また、 Dockerfileを使用してDjangoコンテナを起動しました。 およびdocker-compose.yml ファイル。
この時点で、Dockerコンテナでアプリケーションを実行するための基本をすでにマスターしています。では、Dockerコンテナで実行する他のアプリケーションを考えていますか?おそらく、DjangoおよびMongoDBコンテナー用のDockerコンテナーですか?