
このチュートリアルでは、Debian 11にpgAdminをインストールする方法を紹介します。知らなかった方のために、pgAdminは無料のオープンソースのWebベースのツールです。 PostgreSQLデータベースを完全に管理するための使いやすいWebインターフェイスであり、データベースの管理と保守を容易にするいくつかの機能が含まれています。Pythonで記述されており、Linux、Windows、macOSなどの多くのオペレーティングシステムをサポートしています。
この記事は、少なくともLinuxの基本的な知識があり、シェルの使用方法を知っていること、そして最も重要なこととして、サイトを独自のVPSでホストしていることを前提としています。インストールは非常に簡単で、ルートアカウントで実行されていますが、そうでない場合は、'sudoを追加する必要があります。 ルート権限を取得するコマンドに‘。 Debian 11(Bullseye)にpgAdminを段階的にインストールする方法を紹介します。
前提条件
- 次のオペレーティングシステムのいずれかを実行しているサーバー:Debian 11(Bullseye)。
- 潜在的な問題を防ぐために、OSの新規インストールを使用することをお勧めします。
- サーバーへのSSHアクセス(またはデスクトップを使用している場合はターミナルを開く)
non-root sudo userまたはroot userへのアクセス 。non-root sudo userとして行動することをお勧めします ただし、ルートとして機能するときに注意しないと、システムに害を及ぼす可能性があるためです。
Debian11BullseyeにpgAdminをインストールする
ステップ1.ソフトウェアをインストールする前に、次のaptを実行して、システムが最新であることを確認することが重要です。 ターミナルのコマンド:
sudo apt update
sudo apt upgrade
sudo apt install wget software-properties-common apt-transport-https gnupg gnupg2
ステップ2.PostgreSQLをインストールします。
pgAdmin5をインストールする前に、PostgreSQLサーバーをサーバーにインストールする必要があります。次のコマンドを実行してインストールします。
sudo apt install postgresql
PostgreSQLをインストールした後、PostgreSQLサービスを開始し、システムの再起動時に開始できるようにします:
sudo systemctl start postgresql
sudo systemctl enable postgresql
sudo systemctl status postgresql
ステップ3.Debian11にpgAdminをインストールします。
デフォルトでは、pgAdminをDebian 11ベースリポジトリから直接インストールすることはできません。ここで、公式のpgAdminリポジトリをシステムに追加します:
echo "deb https://ftp.postgresql.org/pub/pgadmin/pgadmin4/apt/$(lsb_release -cs) pgadmin4 main"\
| sudo tee /etc/apt/sources.list.d/pgadmin4.list
次に、次のコマンドを使用してpgAdminリポジトリのGPGキーをインポートします。
curl https://www.pgadmin.org/static/packages_pgadmin_org.pub | sudo apt-key add
その後、以下のコマンドを使用してpgAdminをインストールします。
sudo apt update
sudo apt install pgadmin4-web
ステップ4.pgAdminを設定します。
次に、アクセスする前にpgAdmin 4を設定します:
sudo /usr/pgadmin4/bin/setup-web.sh
以下に示すように、構成を完了するために電子メールとパスワードを入力するように求められます。
Setting up pgAdmin 4 in web mode on a Debian based platform...
Creating configuration database...
NOTE: Configuring authentication for SERVER mode.

Enter the email address and password to use for the initial pgAdmin user account:

Email address: admin@idroot.us
Password: your-strong-passwd
Retype password: your-strong-passwd
pgAdmin 4 - Application Initialisation
======================================

Creating storage and log directories...
We can now configure the Apache Web server for you. This involves enabling the wsgi module and configuring the pgAdmin 4 application to mount at /pgadmin4. Do you wish to continue (y/n)? y << Type y and press Enter
The Apache web server is running and must be restarted for the pgAdmin 4 installation to complete. Continue (y/n)? y << Type y and press Enter
Apache successfully restarted. You can now start using pgAdmin 4 in web mode at http://127.0.0.1/pgadmin
でウェブモードでpgAdmin4の使用を開始できます。
手順5.ファイアウォールを構成します。
pgadmin4 Webインターフェースにアクセスする前に、UFWファイアウォールを実行している場合は、次のようにポート80(HTTP)を開いてApacheサービスの着信トラフィックを許可する必要があります。
>sudo ufw allow 80 sudo ufw allow 443 sudo ufw status
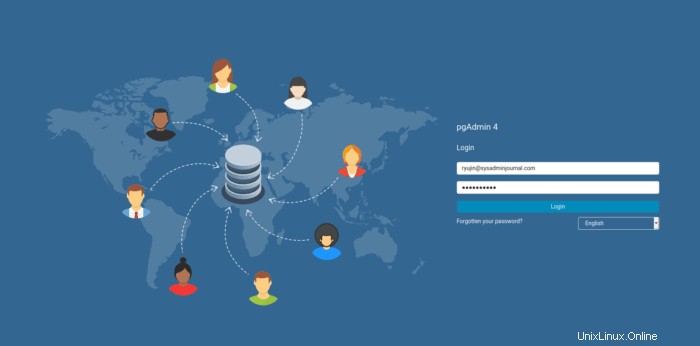
ステップ6.PgAdminWebインターフェイスにアクセスします。
正常にインストールされたら、Webブラウザーを開き、URL http://your-server-ip/pgadmin4を入力します。 pgAdmin4Webインターフェイスにアクセスします。 pgAdmin4ログインページにリダイレクトされます:
おめでとうございます!pgAdminが正常にインストールされました。Debian11Bullseyeに最新バージョンのpgAdminをインストールするためにこのチュートリアルを使用していただきありがとうございます。追加のヘルプや役立つ情報については、公式のpgAdminWebサイトを確認することをお勧めします。 。