Nextcloudは、オープンソースのファイル同期および共有ソフトウェアです。これはownCloudのフォークであり、個人レベルとエンタープライズレベルの両方で使用されています。これは最近、ownCloudプロジェクトを以前に設立したFrankKarlitschekによって開始されました。 NextcloudはownCloudのすべての機能を備えているだけでなく、新しく革新的な機能も提供する予定です。
この記事では、Nginx(EngineXと発音)、MariaDB、PHP7を使用してDebian8に最新バージョンのNextcloudをインストールする方法を学習します。
1)Nextcloudをインストールする
NextcloudファイルはNextcloudサーバーからダウンロードできます。 zipファイルをダウンロードして解凍し、インストールを完了することができます。
# wget https://download.nextcloud.com/server/releases/nextcloud-10.0.1.zip# unzip nextcloud-10.0.1.zipnextcloudディレクトリを/var/ wwwに移動し、所有権をwww-data
に変更しましょう。# mkdir /var/www/
# mv nextcloud /var/www/
# rm -f nextcloud-10.0.1.zip
# chown -R www-data: /var/www/nextcloud2)Nginxをインストールします
Nginxはオープンソースであり、利用可能な最も一般的なWebサーバーの1つです。効率的に動作し、最小限のハードウェアで適切に拡張でき、負荷がかかった状態でも良好な応答を提供します。インストールは、apt-getinstallコマンドを実行するだけの簡単なタスクです。
# apt-get update

# apt-get install nginx -y
インストールされたnginxのバージョンとステータスをチェックして、サービスが開始されたかどうかを確認できます。
# nginx -v
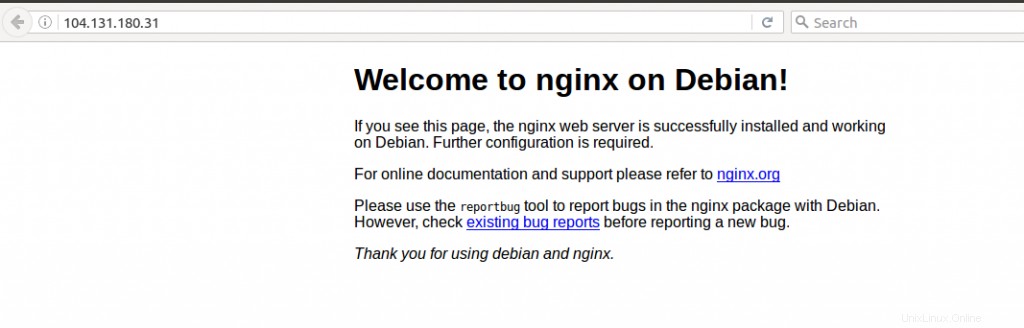
#service nginx statusまたは、ブラウザでサーバーのIPを指定して、nginxウェルカムページを表示することもできます:
3)MariaDBをインストールします
MariaDBサーバーとクライアントソフトウェアをインストールします
# apt-get install mariadb-server-10.0 mariadb-client-10.0 -yDBの設定時に、「管理」rootユーザーのパスワードを設定するように求められます。パスワードを入力して終了します。
インストールされているバージョンを確認する
# mysql --version
mysql Ver 15.1 Distrib 10.0.27-MariaDB, for debian-linux-gnu (x86_64) using readline 5.2
MySQLセキュアインストールを実行することにより、インストールをさらに保護できます。これは本番サーバーに推奨されます。
# mysql_secure_installation

NOTE: RUNNING ALL PARTS OF THIS SCRIPT IS RECOMMENDED FOR ALL MariaDB
SERVERS IN PRODUCTION USE! PLEASE READ EACH STEP CAREFULLY!

In order to log into MariaDB to secure it, we'll need the current
password for the root user. If you've just installed MariaDB, and
you haven't set the root password yet, the password will be blank,
so you should just press enter here.
Enter current password for root (enter for none):
OK, successfully used password, moving on...

Setting the root password ensures that nobody can log into the MariaDB
root user without the proper authorisation.

You already have a root password set, so you can safely answer 'n'.

Change the root password? [Y/n] n
... skipping.

By default, a MariaDB installation has an anonymous user, allowing anyone
to log into MariaDB without having to have a user account created for
them. This is intended only for testing, and to make the installation
go a bit smoother. You should remove them before moving into a
production environment.

Remove anonymous users? [Y/n] y
... Success!

Normally, root should only be allowed to connect from 'localhost'. This
ensures that someone cannot guess at the root password from the network.

Disallow root login remotely? [Y/n] y
... Success!

By default, MariaDB comes with a database named 'test' that anyone can
access. This is also intended only for testing, and should be removed
before moving into a production environment.

Remove test database and access to it? [Y/n] y
- Dropping test database...
... Success!
- Removing privileges on test database...
... Success!

Reloading the privilege tables will ensure that all changes made so far
will take effect immediately.

Reload privilege tables now? [Y/n] y
... Success!

Cleaning up...

All done! If you've completed all of the above steps, your MariaDB
installation should now be secure.

Thanks for using MariaDB!
4)Nextcloudのデータベースとユーザーを作成します
DBの構成中に以前に設定したパスワードを使用してMariaDBにログインします。
# mysql -u root -p
Enter password:
次に、ユーザーを作成し、同じユーザーのパスワードを設定します。
MariaDB [(none)]> create database nextcloud;
Query OK, 1 row affected (0.00 sec)

MariaDB [(none)]> create user nxtcloudadmin@localhost identified by 'admin123';
Query OK, 0 rows affected (0.00 sec)

MariaDB [(none)]> grant all privileges on nextcloud.* to nxtcloudadmin@localhost identified by 'admin123'
-> ;
Query OK, 0 rows affected (0.00 sec)

MariaDB [(none)]> flush privileges;
Query OK, 0 rows affected (0.00 sec)

MariaDB [(none)]> exit;
5)MariaDBのバイナリロギングを有効にする
バイナリログには、DBに対して行われたデータ変更と構造変更の両方が含まれます。このログは、レプリケーションとデータの復元に役立ちます。これを有効にするには、ファイル/etc/mysql/my.cnfを編集し、次の行を追加します
log-bin = /var/log/mysql/mariadb-bin
log-bin-index = /var/log/mysql/mariadb-bin.index
binlog_format = mixed
この後、mysqlサーバーをリロードします
# service mysql reload6)PHP7をインストールします
まず、PHPがシステムにすでにインストールされているかどうかを確認します。これを行うには、以下のコマンドを実行します
# dpkg --list |grep phpそうでない場合は、お持ちのDebianバージョンを調べて、対応するパッケージを入手してください。
# lsb_release -a
No LSB modules are available.
Distributor ID: Debian
Description: Debian GNU/Linux 8.6 (jessie)
Release: 8.6
Codename: jessie
上記の例では、リリース名は「jessie」です。したがって、ジェシーパッケージの詳細をソースリストに追加し、キーを追加してから、必要なPHPパッケージをインストールしましょう。
# echo 'deb http://packages.dotdeb.org jessie all' >> /etc/apt/sources.list
# echo 'deb-src http://packages.dotdeb.org jessie all' >> /etc/apt/sources.list

# cd /tmp
# wget https://www.dotdeb.org/dotdeb.gpg
# apt-key add dotdeb.gpg

apt-get update

root@debian-linoxide:~# apt install php7.0-common php7.0-fpm php7.0-cli php7.0-json php7.0-mysql php7.0-curl php7.0-intl php7.0-mcrypt php-pear php7.0-gd php7.0-zip php7.0-xml php7.0-mbstring
7)Nextcloudドメインの無料SSL証明書を取得する
WebサイトでHTTPSを有効にするには、認証局(CA)から証明書を取得する必要があります。 「Let'sEncrypt」は、ドメインに無料のSSL証明書を提供するCAです。
このためには、最初に「git」パッケージをインストールしてから、GitHubリポジトリのクローンを作成してletsencryptをダウンロードする必要があります
# apt-get install git bc -y

# git clone https://github.com/letsencrypt/letsencrypt
これで、「letsencrypt」ディレクトリに変更して単一のコマンドを発行することでSSL証明書を取得できます。
# /letsencrypt-auto certonly --standalone --email <your-email-address> --agree-tos -d <your-node-name>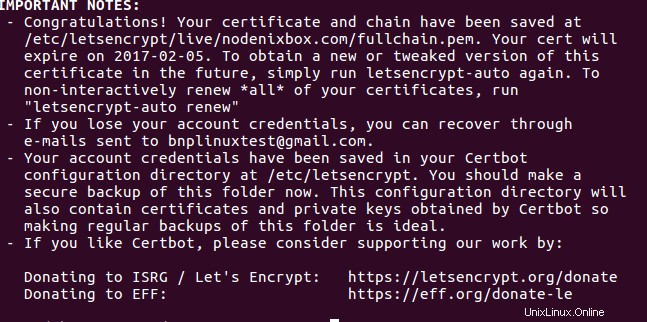
8)ドメインの仮想ホストを設定する
仮想ホストを作成するには、ドメイン名に「.conf」拡張子の付いたファイル(この場合はnodenixbox.com.confなど)をパス/ etc / nginx / sites-enabledに作成し、以下の内容を追加します。
注:ノード名(赤色)を独自のドメイン名に置き換え、ssl証明書パス(青色)をssl証明書が存在する場所に変更する必要があります。
upstream php-handler {
server unix:/run/php/php7.0-fpm.sock;
}

server {
listen 80;
server_name nodenixbox.com;
}

server {
listen 443 ssl;
server_name nodenixbox.com;

ssl_certificate /etc/letsencrypt/live/nodenixbox.com/fullchain.pem;
  ssl_certificate_key /etc/letsencrypt/live/nodenixbox.com/privkey.pem;

# Path to the root of your installation
root /var/www/nextcloud/;
# set max upload size
client_max_body_size 10G;
fastcgi_buffers 64 4K;

# Disable gzip to avoid the removal of the ETag header
gzip off;

# Uncomment if your server is build with the ngx_pagespeed module
# This module is currently not supported.
#pagespeed off;

index index.php;
error_page 403 /core/templates/403.php;
error_page 404 /core/templates/404.php;

rewrite ^/.well-known/carddav /remote.php/dav/ permanent;
rewrite ^/.well-known/caldav /remote.php/dav/ permanent;

# The following 2 rules are only needed for the user_webfinger app.
# Uncomment it if you're planning to use this app.
#rewrite ^/.well-known/host-meta /public.php?service=host-meta last;
#rewrite ^/.well-known/host-meta.json /public.php?service=host-meta-json last;

location = /robots.txt {
allow all;
log_not_found off;
access_log off;
}

location ~ ^/(build|tests|config|lib|3rdparty|templates|data)/ {
deny all;
}

location ~ ^/(?:\.|autotest|occ|issue|indie|db_|console) {
deny all;
}

location / {

rewrite ^/remote/(.*) /remote.php last;

rewrite ^(/core/doc/[^\/]+/)$ $1/index.html;

try_files $uri $uri/ =404;
}

location ~ \.php(?:$|/) {
fastcgi_split_path_info ^(.+\.php)(/.+)$;
include fastcgi_params;
fastcgi_param SCRIPT_FILENAME $document_root$fastcgi_script_name;
fastcgi_param PATH_INFO $fastcgi_path_info;
fastcgi_param HTTPS on;
fastcgi_param modHeadersAvailable true; #Avoid sending the security headers twice
fastcgi_pass php-handler;
fastcgi_intercept_errors on;
}

# Adding the cache control header for js and css files
# Make sure it is BELOW the location ~ \.php(?:$|/) { block
location ~* \.(?:css|js)$ {
add_header Cache-Control "public, max-age=7200";
# Add headers to serve security related headers
add_header Strict-Transport-Security "max-age=15768000; includeSubDomains; preload;";
add_header X-Content-Type-Options nosniff;
add_header X-Frame-Options "SAMEORIGIN";
add_header X-XSS-Protection "1; mode=block";
add_header X-Robots-Tag none;
add_header X-Download-Options noopen;
add_header X-Permitted-Cross-Domain-Policies none;
# Optional: Don't log access to assets
access_log off;
}

# Optional: Don't log access to other assets
location ~* \.(?:jpg|jpeg|gif|bmp|ico|png|swf)$ {
access_log off;
}
}
9)NextcloudWebインターフェースへのアクセス
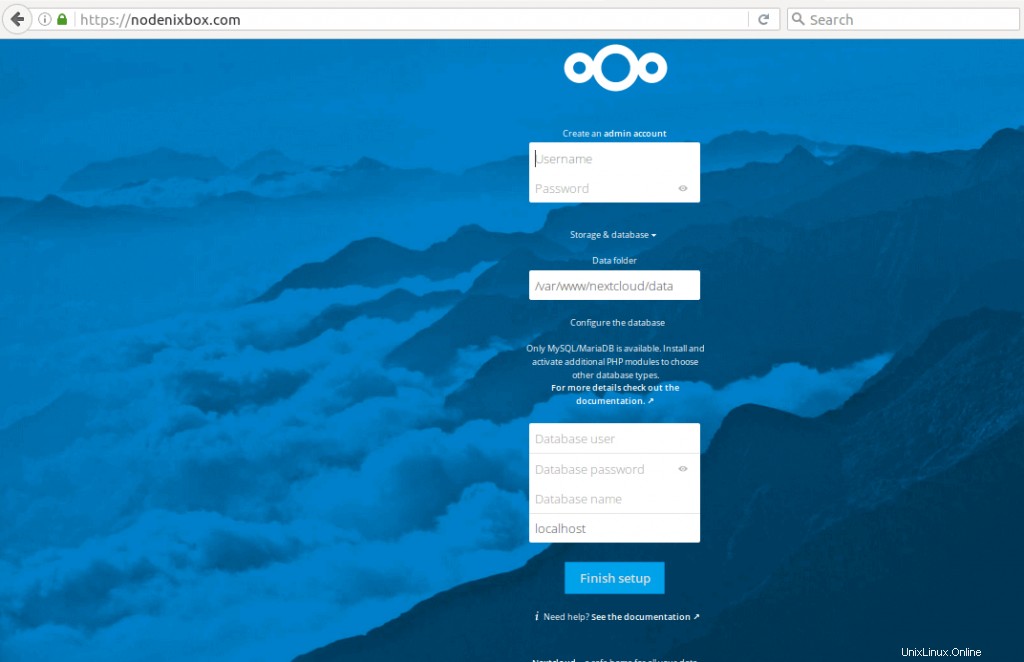
Nextcloud管理アカウントを作成および管理するには、ブラウザでドメイン名を指定します。この例では、「https://nodenixbox.com」です。これにより、以下に示すようなウィンドウが開き、管理者アカウントの作成を求められます。同じページの下部に、データベースユーザー、パスワード、データベース名を尋ねる別のボックスが表示されます。ここに、MariaDBのインストール中に作成したアカウントの詳細を入力し、[セットアップの完了]ボタンを押します。
おめでとう!これで、独自のNextcloudサーバーがセットアップされ、それを使用してファイルの共有を開始できます。
結論
Nextcloudは、企業を含む誰にとっても、ファイルやデータを保存、共有、保護するための安全な場所です。安全性を気にせずにカレンダーや連絡先、コミュニケーションなどを共有するのにも使えます。ユーザーと顧客のニーズに焦点を当て、さらに機能を追加しようとしています。全体的に、使用するのに最適なツールです。