LAMPはLの略です inux、 A pache、 M ySQL、 P HP。このチュートリアルでは、PHP 7(mod_php)とMariaDBをサポートするDebian Stretch(9)サーバーにApacheウェブサーバーをインストールする方法を示します。 MariaDBは、よく知られているMySQLデータベースサーバーのフォークであり、MySQL互換の機能セットを提供し、インターネットで見つけたベンチマークによると少し高速です。 MariaDBは、Wordpress、JoomlaなどのMySQLを必要とするすべてのアプリケーションで動作します。
LAMPセットアップは、Joomla、Wordpress、DrupalなどのCMSシステムの完璧な基盤です。
1予備メモ
このチュートリアルでは、ホスト名server1.example.comとIPアドレス192.168.1.100を使用します。これらの設定はユーザーによって異なる場合があるため、必要に応じて置き換える必要があります。
2MySQLの代替としてMariaDBをインストールする
まず、MariaDBを次のようにインストールします:
apt-get -y install mariadb-server mariadb-client
次に、 mysql_secure_installationを使用してMariaDBを保護します 指図。以下のコマンドを実行し、ウィザードに従います。
mysql_secure_installation
推奨される入力は赤で表示されます。
mysql_secure_installation
NOTE: RUNNING ALL PARTS OF THIS SCRIPT IS RECOMMENDED FOR ALL MariaDB
SERVERS IN PRODUCTION USE! PLEASE READ EACH STEP CAREFULLY!
In order to log into MariaDB to secure it, we'll need the current
password for the root user. If you've just installed MariaDB, and
you haven't set the root password yet, the password will be blank,
so you should just press enter here.
Enter current password for root (enter for none): <-- Hit return
OK, successfully used password, moving on...
Setting the root password ensures that nobody can log into the MariaDB
root user without the proper authorisation.
Set root password? [Y/n] <-- y
New password: <-- Enter the new password for the MariaDB root user
Re-enter new password: <-- Enter the password again
Password updated successfully!
Reloading privilege tables..
... Success!
By default, a MariaDB installation has an anonymous user, allowing anyone
to log into MariaDB without having to have a user account created for
them. This is intended only for testing, and to make the installation
go a bit smoother. You should remove them before moving into a
production environment.
Remove anonymous users? [Y/n] <-- y
... Success!
Normally, root should only be allowed to connect from 'localhost'. This
ensures that someone cannot guess at the root password from the network.
Disallow root login remotely? [Y/n] <-- y
... Success!
By default, MariaDB comes with a database named 'test' that anyone can
access. This is also intended only for testing, and should be removed
before moving into a production environment.
Remove test database and access to it? [Y/n] <-- y
- Dropping test database...
... Success!
- Removing privileges on test database...
... Success!
Reloading the privilege tables will ensure that all changes made so far
will take effect immediately.
Reload privilege tables now? [Y/n] <-- y
... Success!
Cleaning up...
All done! If you've completed all of the above steps, your MariaDB
installation should now be secure.
Thanks for using MariaDB!
これでMariaDBのセットアップが保護されました。
3ApacheWebサーバーのインストール
ApacheはDebianパッケージとして入手できるため、次のようにインストールできます。
apt-get -y install apache2
次に、ブラウザをhttp://192.168.1.100に移動すると、Apache2プレースホルダーページが表示されます(機能します!):
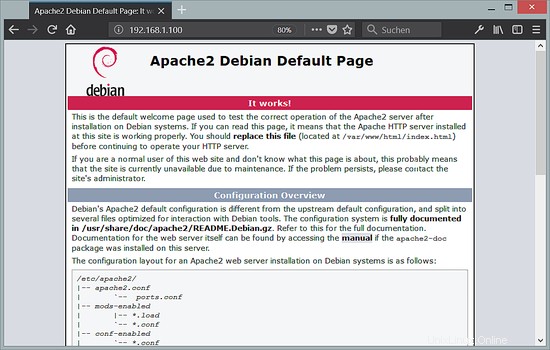
ApacheのデフォルトのドキュメントルートはDebianでは/var/ wwwであり、設定ファイルは/etc/apache2/apache2.confです。追加の設定は、/ etc / apache2 / mods-enabled(Apacheモジュールの場合)、/ etc / apache2 / sites-enabled(仮想ホストの場合)、/ etc / apache2/confなどの/etc/apache2ディレクトリのサブディレクトリに保存されます。 -有効。
4PHP7.1のインストール
PHPとApachePHPモジュールは次のようにインストールできます。
apt-get -y install php7.0 libapache2-mod-php7.0
後でApacheを再起動する必要があります:
service apache2 restart
5PHPのテスト/PHPインストールの詳細の取得
デフォルトのWebサイトのドキュメントルートは/var/ www/htmlです。次に、そのディレクトリに小さなPHPファイル(info.php)を作成し、ブラウザで呼び出します。このファイルには、インストールされているPHPのバージョンなど、PHPのインストールに関する多くの役立つ詳細が表示されます。
nano /var/www/html/info.php
<?php
phpinfo();
次に、そのファイルをブラウザ(http://192.168.1.100/info.phpなど)で呼び出します。
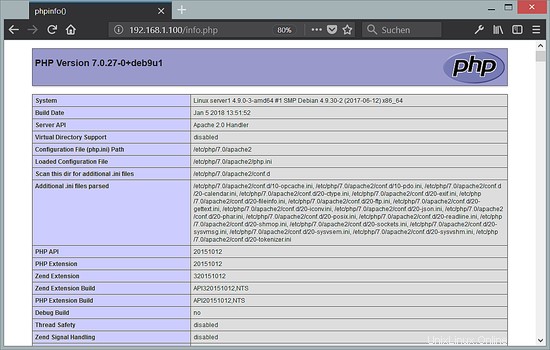
ご覧のとおり、PHP 7.0は機能しており、サーバーAPI行に示されているように、Apache2.0ハンドラーを介して機能しています。さらに下にスクロールすると、PHP5ですでに有効になっているすべてのモジュールが表示されます。 MySQL / MariaDBはそこにリストされていません。つまり、PHP5ではMySQLがまだサポートされていません。
6PHPでのMySQLおよびMariaDBサポートの取得
PHPでMySQLをサポートするには、php7.0-mysqlパッケージをインストールします。他のPHPモジュールをインストールすることをお勧めします。また、アプリケーションでそれらが必要になる場合もあります。次のように、利用可能なPHP7モジュールを検索できます。
apt-cache search php7.0
必要なものを選び、次のようにインストールします:
apt-get -y install php7.0-mysql php7.0-curl php7.0-gd php7.0-intl php-pear php-imagick php7.0-imap php7.0-mcrypt php-memcache php7.0-pspell php7.0-recode php7.0-sqlite3 php7.0-tidy php7.0-xmlrpc php7.0-xsl
次にApacheを再起動します:
service apache2 restart
7PHPキャッシュによるPHP速度の向上
PHPを高速化するには、Opcacheをインストールする必要があります。 PHP Opcacheモジュールがインストールされ、正しく有効になっているかどうかを確認します。次のコマンドを実行します。
php --version
出力には、私が赤でマークした行が含まれます。
PHP 7.0.27-0+deb9u1 (cli) (built: Jan 5 2018 13:51:52) ( NTS )
Copyright (c) 1997-2017 The PHP Group
Zend Engine v3.0.0, Copyright (c) 1998-2017 Zend Technologies
with Zend OPcache v7.0.27-0+deb9u1, Copyright (c) 1999-2017, by Zend Technologies
結果にOpcacheモジュールが表示されない場合は、次のコマンドを使用してインストールします。
apt-get -y install php7.0-opcache
役に立つかもしれないもう1つのキャッシュがあります。その名前はAPCuです。 APCuは、PHP中間コードをキャッシュおよび最適化するための無料のPHPオペコードキャッシャーです。
APCuは次のようにインストールできます:
apt-get -y install php-apcu
次にApacheを再起動します:
service apache2 restart
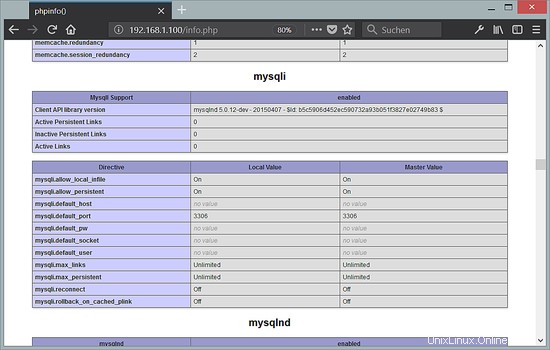
次に、ブラウザにhttp://192.168.1.100/info.phpをリロードし、モジュールセクションまでスクロールダウンします。これで、MariaDBドライバーとして使用されるMySQLモジュールを含む、多くの新しいモジュールが見つかるはずです。
8 phpMyAdmin
phpMyAdminは、MySQLおよびMariaDBデータベースを管理するためのWebインターフェイスです。インストールすることをお勧めします:
apt-get -y install phpmyadmin
次の質問が表示されます:
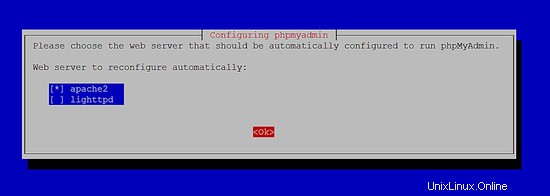
Web server to reconfigure automatically: <-- apache2

Configure database for phpmyadmin with dbconfig-common?<-- Yes
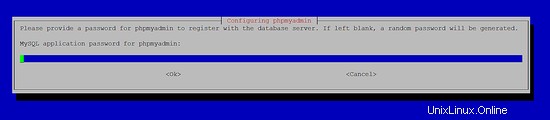
MySQL application password for phpmyadmin: <-- Press enter, apt will create a random password automatically.
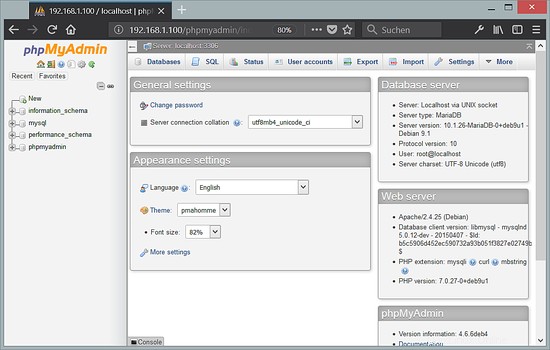
その後、http://192.168.1.100/phpmyadmin/からphpMyAdminにアクセスできます:
9phpMyAdminのMySQLルートログインを有効にする
rootユーザーとしてシェルのMariaDBにログインできますが、phpMyAdminではrootログインは機能しません。 rootユーザーがphpMyAdminも使用できるようにするには、シェルで次のコマンドを実行します。
echo "UPDATE mysql.user SET plugin = 'mysql_native_password' WHERE user = 'root' AND plugin = 'unix_socket';FLUSH PRIVILEGES;" | mysql -u root -p
10リンク
- Apache:http://httpd.apache.org/
- PHP:http://www.php.net/
- MySQL:http://www.mysql.com/
- Debian:http://www.debian.org/
- phpMyAdmin:http://www.phpmyadmin.net/