ClickHouseは、無料のオープンソースの列指向データベース管理システムです。オンライン分析処理に使用され、SQLクエリを使用してリアルタイムで分析レポートを生成できます。行ではなく列でグループ化されたブロックにレコードを格納します。したがって、クエリの完了中にデータを読み取るために費やす時間が短縮されます。また、列指向データベースは、特定のワークロードに対して、従来の行ベースのシステムよりもはるかに高速に結果を計算して返すことができます。
この投稿では、ClickHoustデータベースをDebian11にインストールする方法を紹介します。
- Debian11を実行しているサーバー。
- ルートパスワードはサーバーで構成されています。
開始する前に、システムパッケージを更新されたバージョンに更新する必要があります。次のコマンドを実行して更新できます:
apt-get update -y
すべてのパッケージが更新されたら、次のコマンドを使用して他の必要なパッケージをインストールします。
apt-get install curl gnupg2 wget git apt-transport-https ca-certificates -y
必要なパッケージがすべてインストールされたら、次のステップに進むことができます。
Debian11にClickHouseをインストールする
デフォルトでは、ClickHouseパッケージはDebian11のデフォルトリポジトリに含まれていません。したがって、ClickHouseリポジトリをシステムに追加する必要があります。
まず、次のコマンドを使用してGPGキーをダウンロードして追加します。
apt-key adv --keyserver keyserver.ubuntu.com --recv E0C56BD4
次の出力が得られます:
Executing: /tmp/apt-key-gpghome.WyTt1Mpvh7/gpg.1.sh --keyserver keyserver.ubuntu.com --recv E0C56BD4
gpg: key C8F1E19FE0C56BD4: public key "ClickHouse Repository Key <[email protected]>" imported
gpg: Total number processed: 1
gpg:               imported: 1
次に、次のコマンドを使用して、ClickHouseリポジトリをAPTに追加します。
echo "deb http://repo.yandex.ru/clickhouse/deb/stable/ main/" | tee /etc/apt/sources.list.d/clickhouse.list
次に、リポジトリを更新し、次のコマンドを使用してClickHouseをインストールします。
apt-get update -y
apt-get install clickhouse-server clickhouse-client -y
インストール中に、以下に示すように、ClickHouse管理者ユーザーのパスワードを入力するように求められます。
Enter password for default user:
Password for default user is saved in file /etc/clickhouse-server/users.d/default-password.xml.
Setting capabilities for clickhouse binary. This is optional.
 chown -R clickhouse:clickhouse '/etc/clickhouse-server'

ClickHouse has been successfully installed.

Start clickhouse-server with:
 sudo clickhouse start

Start clickhouse-client with:
 clickhouse-client --password

Synchronizing state of clickhouse-server.service with SysV service script with /lib/systemd/systemd-sysv-install.
Executing: /lib/systemd/systemd-sysv-install enable clickhouse-server
Created symlink /etc/systemd/system/multi-user.target.wants/clickhouse-server.service → /etc/systemd/system/clickhouse-server.service.
Setting up clickhouse-client (21.12.3.32) ...
インストールが完了したら、次の手順に進むことができます。
ClickHouseサービスの管理
これで、次のコマンドを使用して、ClickHouseサービスを開始し、システムの再起動時に開始できるようになります。
systemctl start clickhouse-server
systemctl enable clickhouse-server
これで、次のコマンドを使用してClickHouseのステータスを確認できます。
systemctl status clickhouse-server
次の出力が得られます:
? clickhouse-server.service - ClickHouse Server (analytic DBMS for big data)
     Loaded: loaded (/etc/systemd/system/clickhouse-server.service; enabled; vendor preset: enabled)
     Active: active (running) since Fri 2021-12-31 11:22:57 UTC; 9s ago
   Main PID: 18152 (clckhouse-watch)
      Tasks: 206 (limit: 2341)
     Memory: 108.2M
        CPU: 931ms
     CGroup: /system.slice/clickhouse-server.service
             ??18152 clickhouse-watchdog        --config=/etc/clickhouse-server/config.xml --pid-file=/run/clickhouse-server/clickhouse-serve>
             ??18153 /usr/bin/clickhouse-server --config=/etc/clickhouse-server/config.xml --pid-file=/run/clickhouse-server/clickhouse-serve>

Dec 31 11:22:57 debian11 systemd[1]: Started ClickHouse Server (analytic DBMS for big data).
Dec 31 11:22:57 debian11 clickhouse-server[18152]: Processing configuration file '/etc/clickhouse-server/config.xml'.
Dec 31 11:22:57 debian11 clickhouse-server[18152]: Logging trace to /var/log/clickhouse-server/clickhouse-server.log
Dec 31 11:22:57 debian11 clickhouse-server[18152]: Logging errors to /var/log/clickhouse-server/clickhouse-server.err.log
Dec 31 11:22:58 debian11 clickhouse-server[18153]: Processing configuration file '/etc/clickhouse-server/config.xml'.
Dec 31 11:22:58 debian11 clickhouse-server[18153]: Saved preprocessed configuration to '/var/lib/clickhouse/preprocessed_configs/config.xml'.
Dec 31 11:22:58 debian11 clickhouse-server[18153]: Processing configuration file '/etc/clickhouse-server/users.xml'.
Dec 31 11:22:58 debian11 clickhouse-server[18153]: Merging configuration file '/etc/clickhouse-server/users.d/default-password.xml'.
Dec 31 11:22:58 debian11 clickhouse-server[18153]: Saved preprocessed configuration to '/var/lib/clickhouse/preprocessed_configs/users.xml'.
ClickHouseの使用方法
このセクションでは、ClickHouseに接続し、データベースとテーブルを作成する方法を説明します。
まず、次のコマンドを使用してClickHouseに接続します。
clickhouse-client --password
以下に示すように、デフォルトのパスワードを入力するように求められます。
ClickHouse client version 21.12.3.32 (official build).
Password for user (default):

Provide the password which you have set during the installation and press the Enter key. You will get the following shell:

Connecting to localhost:9000 as user default.
Connected to ClickHouse server version 21.12.3 revision 54452.

debian11 :)
次に、次のコマンドを使用してtestdbという名前のデータベースを作成します。
debian11 :) CREATE DATABASE testdb;
次の出力が得られます:
CREATE DATABASE testdb

Query id: a48b3031-a363-4357-b4f9-ffd3edd73b0e

Ok.

0 rows in set. Elapsed: 0.005 sec.
次に、次のコマンドを使用してデータベースをtestdbに変更します。
debian11 :) USE testdb;
次の出力が得られます:
USE testdb

Query id: 827e0d94-c3eb-46ec-ba04-97386a58e531

Ok.

0 rows in set. Elapsed: 0.001 sec.
次に、次のコマンドを使用してtable1という名前のテーブルを作成します。
debian11 :) CREATE TABLE table1 (? id UInt64,? name String,? url String,? created DateTime?) ENGINE = MergeTree()?PRIMARY KEY id?ORDER BY id;
次の出力が得られます:
CREATE TABLE table1
(
    `id` UInt64,
    `name` String,
    `url` String,
    `created` DateTime
)
ENGINE = MergeTree
PRIMARY KEY id
ORDER BY id

Query id: 922f4fe1-283f-4e5d-9966-498344b2aa4d

Ok.

0 rows in set. Elapsed: 0.006 sec.
次に、次のコマンドを使用してテーブルに値を挿入します。
debian11 :) INSERT INTO table1 VALUES (1, 'jay', 'https://www.howtoforge.com', '2021-12-31 00:01:01');
次の出力が得られます:
INSERT INTO table1 FORMAT Values

Query id: be1c57cd-5759-47cd-8649-ce82cd0c1f7d

Ok.

1 rows in set. Elapsed: 0.005 sec.
次に、次のコマンドを使用して新しい列を追加します。
debian11 :) ALTER TABLE table1 ADD COLUMN location String;
次の出力が得られます:
ALTER TABLE table1
    ADD COLUMN `location` String

Query id: 106fa166-afda-4598-a32c-b50da237bfe5

Ok.

0 rows in set. Elapsed: 0.007 sec.
テーブルからデータを取得する場合は、次のコマンドを実行します。
debian11 :) SELECT url, name FROM table1 WHERE url = 'https://www.howtoforge.com' LIMIT 1;
次の出力が得られます:
SELECT
    url,
    name
FROM table1
WHERE url = 'https://www.howtoforge.com'
LIMIT 1

Query id: 8ee433ec-0eb1-4409-b9a8-7e5794b872ce

??url?????????????????????name??
? https://www.howtoforge.com ? jay  ?
????????????????????????????????

1 rows in set. Elapsed: 0.007 sec.
列を削除するには、次のコマンドを実行します。
debian11 :) ALTER TABLE table1 DROP COLUMN location;
テーブルを削除するには、次のコマンドを実行します。
debian11 :) DROP TABLE table1;
データベースを削除するには、次のコマンドを実行します。
debian11 :) DROP DATABASE testdb;
ClickHouseシェルを終了するには、次のコマンドを実行します。
debian11 :) exit;
ClickHouseWebUIを有効にする
ClickHouseは、データベースを管理するためのWebベースのインターフェースも提供します。ただし、デフォルトでは無効になっています。 ClickHouse構成ファイルを編集することで有効にできます:
nano /etc/clickhouse-server/config.xml
コメントを外して、次の行を変更します。
 <listen_host>0.0.0.0</listen_host>
    <http_server_default_response><![CDATA[<html ng-app="SMI2"><head><base href="http://ui.tabix.io/"></head><body><div ui-view="" class="content-ui"></div><script src="http://loader.tabix.io/master.js"></script></body></html>]]></http_server_default_response>
ファイルを保存して閉じてから、ClickHouseサービスを再起動して、構成の変更を適用します。
systemctl restart clickhouse-server
ClickHouseWebUIにアクセス
デフォルトでは、ClickHouseWebUIはポート8123でリッスンします 。次のコマンドを使用して確認できます:
ss -antpl | grep 8123
次の出力が表示されます。
LISTEN 0 4096 0.0.0.0:8123 0.0.0.0:* users:(("clickhouse-serv",pid=18580,fd=158))
次に、Webブラウザーを開き、URL http:// your-server-ip:8123を使用してClickHouseWebUIにアクセスします。 。次の画面が表示されます。
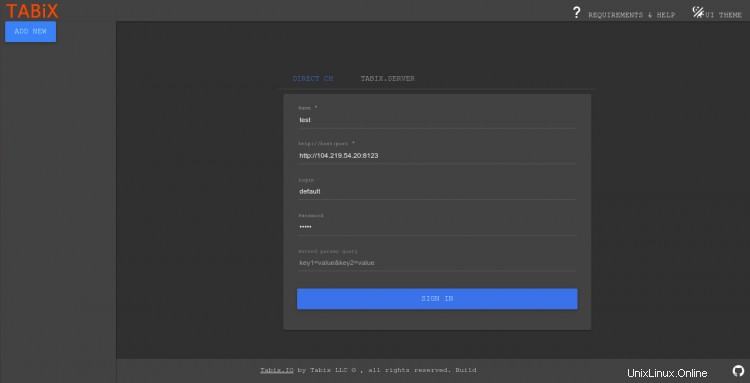
デフォルトのユーザー名とパスワードを入力し、サインインをクリックします ボタン。ログインすると、次の画面が表示されます。

上記のガイドでは、Debian 11にClickHouseデータベースシステムをインストールする方法について説明しました。また、データベースを作成および管理し、ClickHouseWebインターフェイスを有効にする方法についても説明しました。これが、実稼働環境にClickHouseをインストールするのに役立つことを願っています。ご不明な点がございましたら、お気軽にお問い合わせください。