Magentoは、オンラインストアをホストできる無料のオープンソースeコマースアプリケーションです。 PHPで記述されており、Zendフレームワークを使用しています。用途が広くスケーラブルであるため、中小規模の店舗に適しています。プログラミングの知識がなくても、完全に機能するオンラインショッピングカートシステムをホストできます。シンプルで使いやすいため、何千ものオンラインストアで使用されています。
このチュートリアルでは、Debian11にMagento2をインストールする方法を紹介します。
- Debian11を実行しているサーバー。
- サーバーIPで指定された有効なドメイン名。
- ルートパスワードはサーバーで構成されています。
Apache、PHP、およびその他の必要な拡張機能をインストールします
まず、Apache、PHP、およびその他の必要なPHP拡張機能をサーバーにインストールする必要があります。次のコマンドを使用して、それらすべてをインストールできます。
apt-get install apache2 php libapache2-mod-php php-common php-gmp php-curl php-soap php-bcmath php-intl php-mbstring php-xmlrpc php-mysql php-gd php-xml php-cli php-zip -y
すべてのパッケージがインストールされたら、php.iniファイルを編集し、いくつかのデフォルト設定を変更します。
nano /etc/php/7.4/apache2/php.ini
次の値を変更します。
file_uploads = On
allow_url_fopen = On
short_open_tag = On
memory_limit = 512M
upload_max_filesize = 128M
max_execution_time = 3600
ファイルを保存して閉じてから、Apacheサービスを再起動して変更を適用します。
systemctl restart apache2
MySQLサーバーのインストールと構成
Magento2は、データベースバックエンドとしてMariaDBまたはMySQLを使用します。デフォルトでは、MariaDBバージョン10.5はDebian 11のデフォルトリポジトリに含まれていますが、これはMagento2ではサポートされていません。したがって、MySQLServer8をサーバーにインストールする必要があります。
まず、次のコマンドを使用してMySQLパッケージファイルをダウンロードします。
wget https://repo.mysql.com//mysql-apt-config_0.8.18-1_all.deb
次に、次のコマンドを使用してインストールします。
apt install ./mysql-apt-config_0.8.18-1_all.deb -y
インストールするMySQLのバージョンを選択するように求められます:
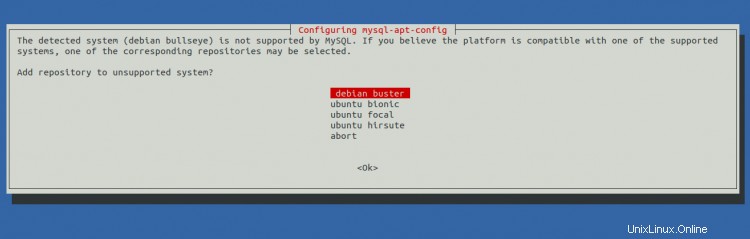
MySQL Server 8を選択し、 OKをクリックします ボタン。
次に、リポジトリを更新し、次のコマンドを使用してMySQLサーバー8をインストールします。
apt-get update -y
apt-get install mysql-server -y
MySQLがインストールされたら、次のコマンドを使用してMySQLに接続します。
mysql -u root -p
ログインしたら、次のコマンドを使用してMagento2のデータベースとユーザーを作成します。
mysql> CREATE DATABASE magento2;
mysql> CREATE USER 'magento2'@'localhost' IDENTIFIED BY 'password';
次に、Magento2データベースにすべての権限を付与します。
mysql> GRANT ALL PRIVILEGES ON magento2.* TO 'magento2'@'localhost';
次に、特権をフラッシュし、次のコマンドを使用してMySQLを終了します。
mysql> FLUSH PRIVILEGES;
mysql> EXIT;
終了したら、次のステップに進むことができます。
Composerは、プロジェクトに必要なPHPの依存関係を管理するために使用されるPHPの依存関係マネージャーです。
まず、次のコマンドを使用してcurlコマンドラインツールをインストールします。
apt-get install curl -y
次に、次のコマンドを使用してComposerをインストールします。
curl -sS https://getcomposer.org/installer | php -- --install-dir=/usr/local/bin --filename=composer
次の出力が得られます:
All settings correct for using Composer
Downloading...

Composer (version 2.1.12) successfully installed to: /usr/local/bin/composer
Use it: php /usr/local/bin/composer
次に、次のコマンドを使用してComposerのバージョンを確認します。
composer --version
次の出力が表示されます。
Composer version 2.1.12 2021-11-09 16:02:04
Magento2をインストール
次に、ディレクトリをApache Webルートディレクトリに変更し、次のコマンドを使用して最新バージョンのMagento2をダウンロードします。
cd /var/www/html
composer create-project --repository-url=https://repo.magento.com/ magento/project-community-edition magento2
以下に示すように、Magentoアカウントのユーザー名とパスワードを入力するように求められます。
Creating a "magento/project-community-edition" project at "./magento2"
Warning from repo.magento.com: You haven't provided your Magento authentication keys. For instructions, visit https://devdocs.magento.com/guides/v2.3/install-gde/prereq/connect-auth.html
    Authentication required (repo.magento.com):
      Username: a6b333ad41629bac913eaabb9b8e053c
      Password:
ユーザー名として公開鍵を使用し、パスワードとして秘密鍵を使用してから、Enterキーを押します。次の出力が得られます:
Do you want to store credentials for repo.magento.com in /root/.config/composer/auth.json ? [Yn] Y
Installing magento/project-community-edition (2.4.3-p1)
  - Downloading magento/project-community-edition (2.4.3-p1)
  - Installing magento/project-community-edition (2.4.3-p1): Extracting archive
Created project in /var/www/html/magento2
Loading composer repositories with package information
次に、Magento2およびその他のディレクトリの適切な権限と所有権を設定します。
chown -R www-data:www-data /var/www/html/magento2/
cd /var/www/html/magento2
find var generated vendor pub/static pub/media app/etc -type f -exec chmod g+w {} +
find var generated vendor pub/static pub/media app/etc -type d -exec chmod g+ws {} +
chown -R :www-data .
chmod u+x bin/magento
次に、次のコマンドでElasticsearchモジュールを無効にします。
php bin/magento module:disable {Magento_Elasticsearch,Magento_InventoryElasticsearch,Magento_Elasticsearch6,Magento_Elasticsearch7} 次の出力が得られます:
The following modules have been disabled:
- Magento_Elasticsearch
- Magento_Elasticsearch6
- Magento_InventoryElasticsearch
- Magento_Elasticsearch7

Cache cleared successfully.
Generated classes cleared successfully. Please run the 'setup:di:compile' command to generate classes.
Info: Some modules might require static view files to be cleared. To do this, run 'module:disable' with the --clear-static-content option to clear them.
次に、次のコマンドを使用してMagento2をインストールします。
bin/magento setup:install --base-url=http://magento.example.com --db-host=localhost --db-name=magento2 --db-user=magento2 --db-password=password --admin-firstname=admin --admin-lastname=admin [email protected] --admin-user=admin [email protected] --language=en_US --currency=USD --timezone=America/Chicago --use-rewrites=1
Magento2をインストールすると、次の出力が表示されます。
Module 'Vertex_AddressValidation':
[Progress: 1363 / 1370]
Module 'Yotpo_Yotpo':
[Progress: 1364 / 1370]
Enabling caches:
Current status:
layout: 1
block_html: 1
full_page: 1
[Progress: 1365 / 1370]
Installing admin user...
[Progress: 1366 / 1370]
Caches clearing:
Cache cleared successfully
[Progress: 1367 / 1370]
Disabling Maintenance Mode:
[Progress: 1368 / 1370]
Post installation file permissions check...
For security, remove write permissions from these directories: '/var/www/html/magento2/app/etc'
[Progress: 1369 / 1370]
Write installation date...
[Progress: 1370 / 1370]
[SUCCESS]: Magento installation complete.
[SUCCESS]: Magento Admin URI: /admin_fgadpx
Nothing to import.
注:上記の出力のMagento2管理URIを覚えておいてください。 MagentoWebインターフェイスにアクセスするにはこれを使用する必要があります。
次に、Magento2 2要素認証を無効にし、キャッシュをクリアして、次のコマンドでCronをインストールします。
sudo -u www-data bin/magento module:disable Magento_TwoFactorAuth
sudo -u www-data bin/magento cache:flush
sudo -u www-data bin/magento cron:install
終了したら、次のステップに進むことができます。
Apache仮想ホスト構成ファイルを作成する
次に、Magento2用のApache仮想ホスト構成ファイルを作成する必要があります。次のコマンドで作成できます:
nano /etc/apache2/sites-available/magento2.conf
次の行を追加します:
<VirtualHost *:80>
     ServerAdmin [email protected]
      DocumentRoot /var/www/html/magento2/
     ServerName magento.example.com

     <Directory /var/www/html/magento2/>
          Options FollowSymlinks
          AllowOverride All
          Require all granted
     </Directory>

     ErrorLog ${APACHE_LOG_DIR}/magento2_error.log
     CustomLog ${APACHE_LOG_DIR}/magento2_access.log combined

</VirtualHost>
ファイルを保存して閉じてから、次のコマンドを使用してMagento仮想ホストとApacheリライトモジュールをアクティブにします。
a2ensite magento2.conf
a2enmod rewrite
最後に、Apacheサービスを再起動して、変更を適用します。
systemctl restart apache2
次のコマンドを使用して、Apacheのステータスを確認することもできます。
systemctl status apache2
次の出力が表示されます。
? apache2.service - The Apache HTTP Server
     Loaded: loaded (/lib/systemd/system/apache2.service; enabled; vendor preset: enabled)
     Active: active (running) since Sat 2021-11-20 06:00:59 UTC; 4s ago
       Docs: https://httpd.apache.org/docs/2.4/
    Process: 18394 ExecStart=/usr/sbin/apachectl start (code=exited, status=0/SUCCESS)
   Main PID: 18398 (apache2)
      Tasks: 6 (limit: 4679)
     Memory: 15.1M
        CPU: 99ms
     CGroup: /system.slice/apache2.service
             ??18398 /usr/sbin/apache2 -k start
             ??18399 /usr/sbin/apache2 -k start
             ??18400 /usr/sbin/apache2 -k start
             ??18401 /usr/sbin/apache2 -k start
             ??18402 /usr/sbin/apache2 -k start
             ??18403 /usr/sbin/apache2 -k start

Nov 20 06:00:59 debian11 systemd[1]: Starting The Apache HTTP Server...
Magento2Webインターフェイスにアクセス
次に、Webブラウザーを開き、URL http://magento.example.com/admin_fgadpxを使用してMagento2管理インターフェースにアクセスします。 。 Magento2のログインページが表示されます:
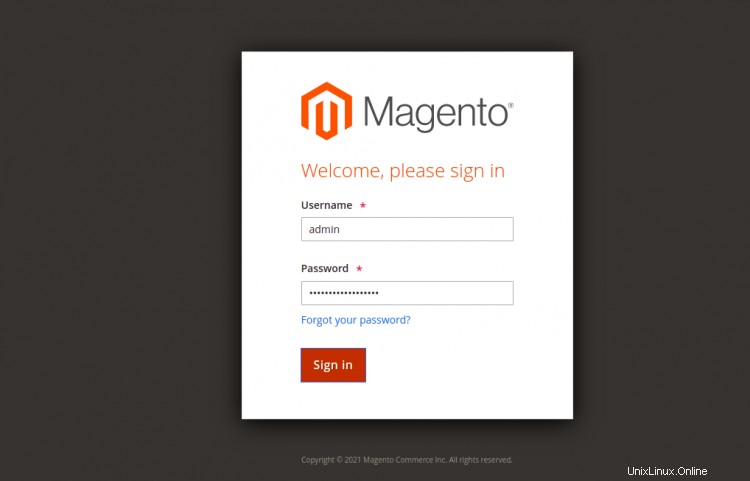
管理者のユーザー名とパスワードを入力し、ログインをクリックします ボタン。次のページにMagento2ダッシュボードが表示されます。
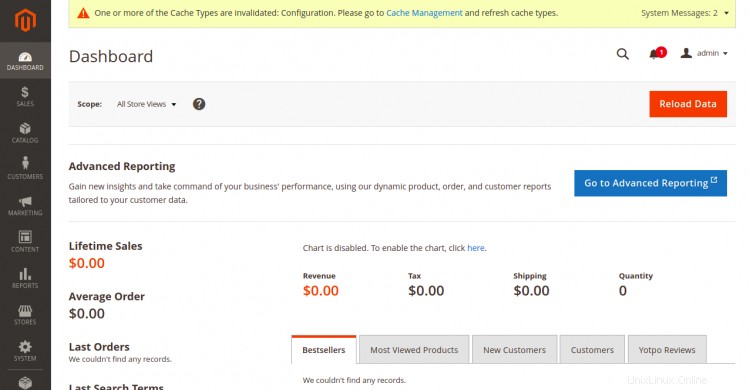
おめでとう!これで、Debian11にMagento2が正常にインストールされました。これでMagentoを使用してオンラインストアを簡単にホストできます。ご不明な点がございましたら、お気軽にお問い合わせください。