GitLabは、無料のオープンソースDevOpsプラットフォームであり、チームがより速く反復し、一緒に革新できるようにします。これは、GitLab Incによって開発されたWebベースのツールです。GitHubと非常によく似ており、Wiki、問題追跡、継続的インテグレーションとデプロイを提供するGitリポジトリマネージャーを提供します。 GitLab Community Editionは、開発および本番環境で完全に無料で利用できます。
このチュートリアルでは、Nginxを使用してGitLabをインストールし、Debian11にSSLを暗号化する方法を紹介します。
- 8GB以上のRAMを搭載したDebian11を実行しているサーバー。
- サーバーIPで指定された有効なドメイン名。
- ルートパスワードはサーバーで構成されています。
開始する前に、パッケージキャッシュを最新バージョンに更新することをお勧めします。次のコマンドで実行できます:
apt-get update -y
完了したら、次のコマンドを使用して他の必要な依存関係をインストールします。
apt-get install curl ca-certificates apt-transport-https gnupg2 -y
必要なすべての依存関係がインストールされたら、次のステップに進むことができます。
GitLabリポジトリを追加
デフォルトでは、GitLabパッケージはDebianのデフォルトリポジトリでは利用できません。そのため、GitLabリポジトリをAPTに追加する必要があります。
次のスクリプトを実行して追加できます:
curl -s https://packages.gitlab.com/install/repositories/gitlab/gitlab-ce/script.deb.sh | bash
これにより、GitLabリポジトリがAPTソースリストファイルに追加されます。
この記事の執筆時点では、GitLabパッケージはDebian 11では利用できません。そのため、GitLabソースファイルを編集して、Debian11コードネームをDebian10に置き換える必要があります。
nano /etc/apt/sources.list.d/gitlab_gitlab-ce.list
次の行を見つけます:
deb https://packages.gitlab.com/gitlab/gitlab-ce/debian/ bullseye main
deb-src https://packages.gitlab.com/gitlab/gitlab-ce/debian/ bullseye main
それらを次の行に置き換えました:
deb https://packages.gitlab.com/gitlab/gitlab-ce/debian/ buster main
deb-src https://packages.gitlab.com/gitlab/gitlab-ce/debian/ buster main
ファイルを保存して閉じてから、次のコマンドでリポジトリを更新します。
apt-get update -y
GitLabCEをインストールする
これで、次のコマンドを実行してGitLabCEをインストールできます。
apt-get install gitlab-ce -y
GitLabをインストールすると、次の出力が表示されます。
It looks like GitLab has not been configured yet; skipping the upgrade script.

       *.                  *.
      ***                 ***
     *****               *****
    .******             *******
    ********            ********
   ,,,,,,,,,***********,,,,,,,,,
  ,,,,,,,,,,,*********,,,,,,,,,,,
  .,,,,,,,,,,,*******,,,,,,,,,,,,
      ,,,,,,,,,*****,,,,,,,,,.
         ,,,,,,,****,,,,,,
            .,,,***,,,,
                ,*,.


     _______ __  __          __
    / ____(_) /_/ /   ____ _/ /_
   / / __/ / __/ /   / __ `/ __ \
  / /_/ / / /_/ /___/ /_/ / /_/ /
  \____/_/\__/_____/\__,_/_.___/


Thank you for installing GitLab!
GitLab was unable to detect a valid hostname for your instance.
Please configure a URL for your GitLab instance by setting `external_url`
configuration in /etc/gitlab/gitlab.rb file.
Then, you can start your GitLab instance by running the following command:
  sudo gitlab-ctl reconfigure

For a comprehensive list of configuration options please see the Omnibus GitLab readme
https://gitlab.com/gitlab-org/omnibus-gitlab/blob/master/README.md

Help us improve the installation experience, let us know how we did with a 1 minute survey:
https://gitlab.fra1.qualtrics.com/jfe/form/SV_6kVqZANThUQ1bZb?installation=omnibus&release=14-3
この時点で、GitLabはシステムにインストールされていますが、まだ構成されていません。次のファイルを編集して構成できます:
nano /etc/gitlab/gitlab.rb
次の行をドメイン名に変更します:
external_url 'https://gitlab.linuxbuz.com'
次に、次の行を変更して、Let'sEncryptSSLを有効にします。
# Enable the Let's encrypt SSL
letsencrypt['enable'] = true

# This is optional to get SSL related alerts
letsencrypt['contact_emails'] = ['[email protected]']

# This example renews every 7th day at 02:00 AM
letsencrypt['auto_renew_hour'] = "2"
letsencrypt['auto_renew_minute'] = "0"
letsencrypt['auto_renew_day_of_month'] = "*/7"
ファイルを保存して閉じてから、次のコマンドを使用してGitLabを再構成します。
gitlab-ctl reconfigure
GitLabを再構成すると、GitLabアクセスパスワードを含む次の出力が表示されます。
Notes:
Default admin account has been configured with following details:
Username: root
Password: You didn't opt-in to print initial root password to STDOUT.
Password stored to /etc/gitlab/initial_root_password. This file will be cleaned up in first reconfigure run after 24 hours.

NOTE: Because these credentials might be present in your log files in plain text, it is highly recommended to reset the password following https://docs.gitlab.com/ee/security/reset_user_password.html#reset-your-root-password.

gitlab Reconfigured!
次に、次のコマンドを使用してGitLabアクセスパスワードを取得します。
cat /etc/gitlab/initial_root_password
次の出力が表示されます。
# WARNING: This value is valid only in the following conditions
#          1. If provided manually (either via `GITLAB_ROOT_PASSWORD` environment variable or via `gitlab_rails['initial_root_password']` setting in `gitlab.rb`, it was provided before database was seeded for the first time (usually, the first reconfigure run).
#          2. Password hasn't been changed manually, either via UI or via command line.
#
#          If the password shown here doesn't work, you must reset the admin password following https://docs.gitlab.com/ee/security/reset_user_password.html#reset-your-root-password.

Password: WBgnk2SH4xK5FeJVsJX0Qo79IeyE5LSTGWm3EjDVEkw=

# NOTE: This file will be automatically deleted in the first reconfigure run after 24 hours.
URL https://gitlab.linuxbuz.comを使用してGitLabダッシュボードにアクセスできるようになりました 。 GitLabログインページにリダイレクトされます:

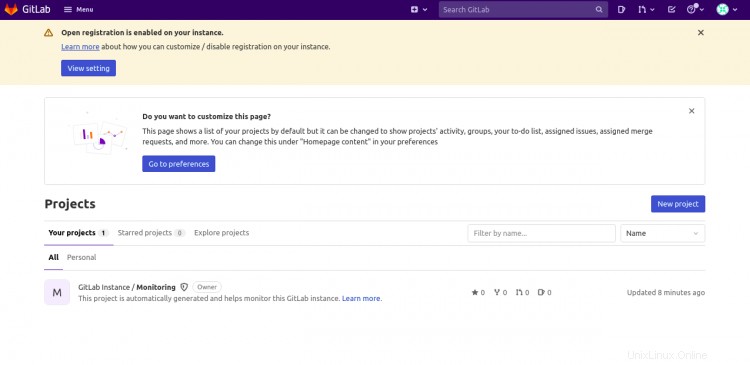
ユーザー名とパスワードを入力し、ログインをクリックします ボタン。次の画面にGitLabダッシュボードが表示されます。
GitLabバックアップを構成する
インストール後、GitLabの完全バックアップを取ることをお勧めします。次のコマンドで実行できます:
gitlab-rake gitlab:backup:create
/ etc/crontabファイルを編集してバックアップをスケジュールすることもできます。
nano /etc/crontab
次の行を追加します:
0 22 * * * root gitlab-rake gitlab:backup:create
終了したら、ファイルを保存して閉じます。
おめでとう!これで、GitLabとNginxおよびLet's EncryptSSLがDebian11に正常にインストールされました。これで、開発環境にGitLabを実装して、ソフトウェア開発プロセスを高速化できます。ご不明な点がございましたら、お気軽にお問い合わせください。