Laravel は、PHP 開発者向けに構築された人気のある Web アプリケーション フレームワークです。 Laravel は、大規模で堅牢なアプリケーションを構築するためのツールとして、そのシンプルさで PHP コミュニティでよく知られています。 Laravel は、表現力豊かで洗練された構文でも知られています。
その誕生以来、Laravel は進化を遂げ、最も人気のある強力な Web アプリケーション フレームワークの 1 つになりました。多くの大規模な組織がこのフレームワークの可能性を認識し、採用し始めています。
このチュートリアルでは、Ubuntu 22.04 で Laravel をセットアップする方法について説明します。
セットアップから始めましょう。
1 前提条件
- Ubuntu 22.04 オペレーティング システム
- PHP バージョン 8.0 以上
- サーバーに少なくとも 2GB の RAM が搭載されているとより良いでしょう
2 システムの更新
まずシステムを更新しましょう。
sudo apt update -y && apt upgrade -y
3 PHP および PHP 拡張機能のインストール
Ubuntu 22.04 リポジトリの PHP のデフォルト バージョンは PHP 8.1 であるため、リポジトリを追加せずに PHP のインストールを続行できます。
sudo apt-get install php php-fpm libapache2-mod-php php-dev php-zip php-curl php-pear php-mbstring php-mysql php-gd php-xml curl -yPHP のバージョンを確認します:
php -v


Output:

PHP 8.1.2 (cli) (built: Jul 21 2022 12:10:37) (NTS)
Copyright (c) The PHP Group
Zend Engine v4.1.2, Copyright (c) Zend Technologies
    with Zend OPcache v8.1.2, Copyright (c), by Zend Technologies
4 データベースのインストールと構成
このセットアップでは、MariaDB をデータベース管理システムとして使用しますが、SQLite、MySQL、Postgres、SQL Server など、Laravel がサポートする任意のデータベース管理システムを選択できます。
MariaDB をインストールしましょう。
sudo apt install mariadb-serverMariaDB を有効にして開始します。
sudo systemctl enable mariadb --nowMariaDB のステータスを確認してください。
sudo systemctl status mariadb

Output:
● mariadb.service - MariaDB 10.6.7 database server
     Loaded: loaded (/lib/systemd/system/mariadb.service; enabled; vendor preset: enabled)
     Active: active (running) since Sat 2022-09-03 12:32:57 EDT; 2min 13s ago
       Docs: man:mariadbd(8)
             https://mariadb.com/kb/en/library/systemd/
   Main PID: 123075 (mariadbd)
     Status: "Taking your SQL requests now..."
      Tasks: 9 (limit: 9456)
     Memory: 57.2M
        CPU: 425ms
     CGroup: /system.slice/mariadb.service
             └─123075 /usr/sbin/mariadbd
MariaDB データベースを保護しましょう。
sudo mysql_secure_installationMariaDB サーバー導入ガイドに従ってください:
Securing the MySQL server deployment.

Enter password for user root:
The 'validate_password' component is installed on the server.
The subsequent steps will run with the existing configuration
of the component.
Using existing password for root.

Estimated strength of the password: 50
Change the password for root ? ((Press y|Y for Yes, any other key for No) : N

 ... skipping.
By default, a MySQL installation has an anonymous user,
allowing anyone to log into MySQL without having to have
a user account created for them. This is intended only for
testing, and to make the installation go a bit smoother.
You should remove them before moving into a production
environment.

Remove anonymous users? (Press y|Y for Yes, any other key for No) : Y
Success.


Normally, root should only be allowed to connect from
'localhost'. This ensures that someone cannot guess at
the root password from the network.

Disallow root login remotely? (Press y|Y for Yes, any other key for No) : Y
Success.

By default, MySQL comes with a database named 'test' that
anyone can access. This is also intended only for testing,
and should be removed before moving into a production
environment.


Remove test database and access to it? (Press y|Y for Yes, any other key for No) : Y
 - Dropping test database...
Success.

 - Removing privileges on test database...
Success.

Reloading the privilege tables will ensure that all changes
made so far will take effect immediately.

Reload privilege tables now? (Press y|Y for Yes, any other key for No) : Y
Success.

All done!
MariaDB を再起動してください。
sudo systemctl restart mariadb
それでは、Laravel アプリケーション用のデータベースとデータベース ユーザーを作成しましょう。
mysql -u root -p
MariaDB [(none)]> create database laravel;
MariaDB [(none)]> grant all privileges on laravel.* to 'laravel_user'@'localhost' identified by 'your_secure_password';
MariaDB [(none)]> flush privileges;
MariaDB [(none)]> exit;
注: 「your_secure_password」を忘れずに変更してください ‘ 自分のパスワードに。
5 Composer のインストール
Composer は、PHP 用のアプリケーション レベルの依存関係パッケージ マネージャーであり、PHP ソフトウェアと必要なライブラリの依存関係を管理するための標準形式を提供します。 Laravel パッケージと依存関係を簡単に管理するには、Laravel で Composer が必要です。
composer をインストールしましょう。
curl -sS https://getcomposer.org/installer | phpsudo mv composer.phar /usr/local/bin/composer
sudo chmod +x /usr/local/bin/composer
インストールを確認してください。
composer --version

Output:

Composer version 2.4.1 2022-08-20 11:44:50
6 Laravel フレームワークのインストール
インストールを開始する前に、ディレクトリを変更しましょう。
cd /var/www/Laravel アプリケーションをダウンロードします。これを書いている時点で、最新の Laravel バージョンは 9 であるため、バージョンを指定せずに直接 Laravel 9 をダウンロードできます。
sudo composer create-project laravel/laravel mylara-app --prefer-dist正常にインストールされた場合の出力:
79 packages you are using are looking for funding.
Use the `composer fund` command to find out more!
> @php artisan vendor:publish --tag=laravel-assets --ansi --force

   INFO  No publishable resources for tag [laravel-assets].

No security vulnerability advisories found
> @php artisan key:generate --ansi

   INFO  Application key set successfully.
バージョンを確認するには、Laravel ディレクトリに移動します。
cd mylara-appphp artisan --version
output:
Laravel Framework 9.28.0注: 特定のバージョンをインストールする場合は、次のコマンドを実行できます (以下のサンプルはバージョン 8 をインストールします):
sudo composer create-project laravel/laravel lara8-app “8.*” –prefer-dist
所有権を www-data に設定します。
sudo chown -R www-data:www-data /var/www/mylara-appすべてのディレクトリを 755 パーミッションに設定します。
sudo find /var/www/mylara-app/ -type d -exec chmod 755 {} \;
すべてのファイルを 644 パーミッションに設定してください。
sudo find /var/www/mylara-app/ -type f -exec chmod 644 {} \;開発サーバーを実行してアプリケーションを確認してください。
php artisan serve --host=0.0.0.0

Output:

INFO  Server running on [http://0.0.0.0:8000].

  Press Ctrl+C to stop the server
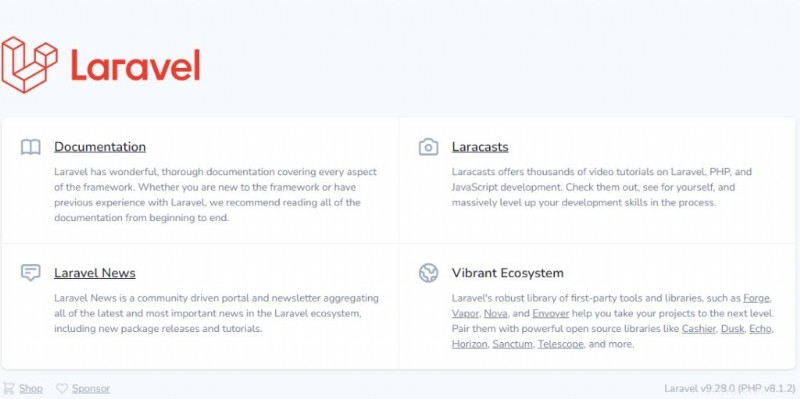
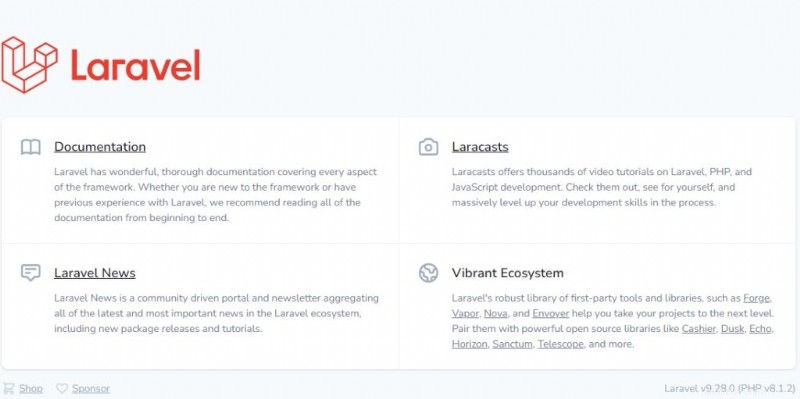
http://ipaddress:8000 で Laravel 開発サーバーにアクセスできるはずです。 .

7 Laravel プロダクションのセットアップ
Apache ウェブサーバー :
sudo apt install apache2Apache を有効にして起動します。
systemctl enable apache2 --now
仮想ホストを作成します。
sudo nano /etc/apache2/sites-available/laravel.conf以下を追加してください:
<VirtualHost *:80>
     ServerAdmin [email protected]
     DocumentRoot /var/www/mylara-app/public
     ServerName domain.com www.domain.com


     ErrorLog ${APACHE_LOG_DIR}/error.log
     CustomLog ${APACHE_LOG_DIR}/access.log combined

     <Directory /var/www/laravel/>
        Options +FollowSymlinks
        AllowOverride All
        Require all granted
     </Directory>

</VirtualHost>注:ドメインを忘れずに変更してください ServerName ディレクティブで。
ファイルを保存して終了します。
作成した仮想ホストを有効にします。
sudo a2ensite laravel.conf
Apache mod_rewrite も有効にします。
sudo a2enmod rewriteApache Web サーバーを再起動します。
sudo systemctl restart apache2
Nginx ウェブサーバー :
まず、Nginx をインストールしましょう。
sudo apt install nginx -y
Nginx を有効にして起動します。
sudo systemctl enable nginx --now
サーバー ブロックを作成します。
sudo nano /etc/nginx/sites-available/laravel.conf
以下を追加してください:
server {
        server_name domain.com www.domain.com;

    access_log   /var/log/nginx/domain.com.access.log;
    error_log    /var/log/nginx/domain.com.error.log;

        root /var/www/mylara-app/public;
        index index.php;

        location / {
                try_files $uri $uri/ /index.php?$args;
        }

        location ~ \.php$ {
      fastcgi_pass unix:/run/php/php-fpm.sock;
      include         fastcgi_params;
      fastcgi_param   SCRIPT_FILENAME    $document_root$fastcgi_script_name;
      fastcgi_param   SCRIPT_NAME        $fastcgi_script_name;
        }
}
注: 「domain.com」を忘れずに変更してください 「.
ファイルを保存して終了します。
Nginx 構成ファイル (サーバー ブロック) を有効にしましょう。
sudo ln -s /etc/nginx/sites-available/laravel.conf /etc/nginx/sites-enabled/
Nginx を再起動します。
sudo systemctl restart nginx
8 Laravel アプリへのアクセス
プロダクションを正常にセットアップしたら、http://domain.com のドメインで Laravel アプリにアクセスできるはずです。 .

9 まとめ
Nginx または Apache Web サーバーを使用して Ubuntu 22.04 に Laravel 9 をセットアップする方法を学習しました。
Web サイトを保護するために SSL 証明書をインストールする場合は、Let's Encrypt に関する記事を確認してください。