Linux、Apache、MySQL、およびPHPの組み合わせは、LAMPスタックとして知られており、PHPベースのアプリケーションで人気のあるWebホスティング環境です。ここで、Linuxはオペレーティングシステム、ApacheはApache Foundationによって開発された人気のあるWebサーバー、MySQLはデータの保存に使用されるリレーショナルデータベース管理システム、PHPは広く使用されているプログラミング言語です。
この記事は、Ubuntu 20.04 LTS(Focal Fossa)システムにApache 2.4、MySQL 8.0、およびPHP7.4をインストールするのに役立ちます。 UbuntuマシンのLAMPスタックのインストールを始めましょう。
前提条件
Ubuntu20.04システムへのrootまたはsudo特権ユーザーアクセスが必要です。デスクトップ用のGUIとサーバー版用のSSHを使用してUbuntuシステムにログインします。
ssh [email protected]
次に、現在のパッケージを最新バージョンにアップグレードします。
sudo apt update && sudo apt upgrade
サーバーの初期設定手順に従って、システムを動作させる準備をします。
ステップ1–Apache2のインストール
Apache2は、多数のWebサイトで使用される強力なWebサーバーソフトウェアです。これは、Ubuntu20.04システムでLAMPをセットアップするためにインストールする最初のコンポーネントです。
Apache2パッケージをインストールするには、次のように入力します。
sudo apt update && sudo apt install apache2
Apache2パッケージのインストールが完了したら、サービスのステータスを確認します。
sudo systemctl status apache2
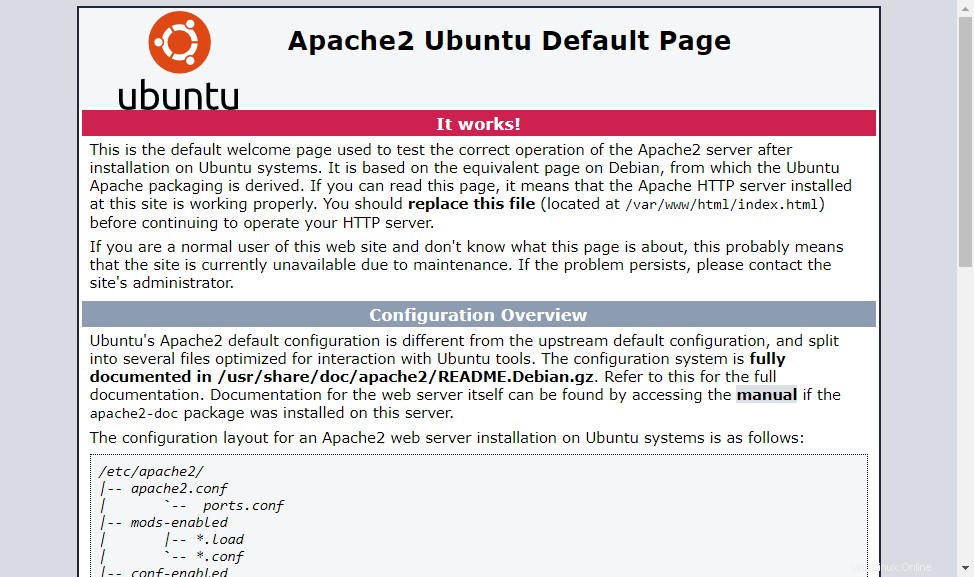
Apacheサービスがアクティブで実行されています。次に、Webブラウザーを開き、サーバーのIPアドレスを入力します。デフォルトのApacheWebページが表示されます
すべての設定ファイルは/etc/apache2ディレクトリに保存されます。追加の仮想ホストを作成するには、このチュートリアルにアクセスしてください。
ステップ2–PHPのインストール
PHP 7.4パッケージは、Ubuntu20.04LTSのデフォルトのAptリポジトリで利用できます。システムにPHPをインストールするには、apt indexを更新してから、システムにインストールします。
sudo apt install -y php libapache2-mod-php
また、アプリケーションに必要な追加のPHPモジュールをインストールします。
sudo apt install php-curl php-gd php-json php-mbstring php-xml
ステップ3–MySQLサーバーのインストール
デフォルトのUbuntu20.04aptリポジトリには、MySQLサーバー8.0が含まれています。最後に、MySQLデータベース用のmysql-serverパッケージをインストールします。また、php-mysqlパッケージをインストールして、PHPを使用したMySQLサポートを使用します。次のコマンドを使用してインストールします。
sudo apt install mysql-server php-mysql
インストーラーはrootパスワードの入力を求めます。このパスワードはMySQLrootユーザーに対して機能します。 MySQLをインストールした後、MySQLサーバーの初期設定に対して次のコマンドを実行します。スクリプトは、パスワード検証ポリシーなど、以前のMySQLバージョンよりも多くの設定を要求することがわかります。
sudo mysql_secure_installation
Securing the MySQL server deployment. Connecting to MySQL using a blank password. VALIDATE PASSWORD COMPONENT can be used to test passwords and improve security. It checks the strength of password and allows the users to set only those passwords which are secure enough. Would you like to setup VALIDATE PASSWORD component? Press y|Y for Yes, any other key for No: yThere are three levels of password validation policy: LOW Length >= 8 MEDIUM Length >= 8, numeric, mixed case, and special characters STRONG Length >= 8, numeric, mixed case, special characters and dictionary file Please enter 0 = LOW, 1 = MEDIUM and 2 = STRONG: 2Please set the password for root here. New password: Re-enter new password:Estimated strength of the password: 100 Do you wish to continue with the password provided?(Press y|Y for Yes, any other key for No) : y By default, a MySQL installation has an anonymous user, allowing anyone to log into MySQL without having to have a user account created for them. This is intended only for testing, and to make the installation go a bit smoother. You should remove them before moving into a production environment. Remove anonymous users? (Press y|Y for Yes, any other key for No) : ySuccess. Normally, root should only be allowed to connect from 'localhost'. This ensures that someone cannot guess at the root password from the network. Disallow root login remotely? (Press y|Y for Yes, any other key for No) : ySuccess. By default, MySQL comes with a database named 'test' that anyone can access. This is also intended only for testing, and should be removed before moving into a production environment. Remove test database and access to it? (Press y|Y for Yes, any other key for No) : y- Dropping test database... Success. - Removing privileges on test database... Success. Reloading the privilege tables will ensure that all changes made so far will take effect immediately. Reload privilege tables now? (Press y|Y for Yes, any other key for No) : ySuccess. All done!
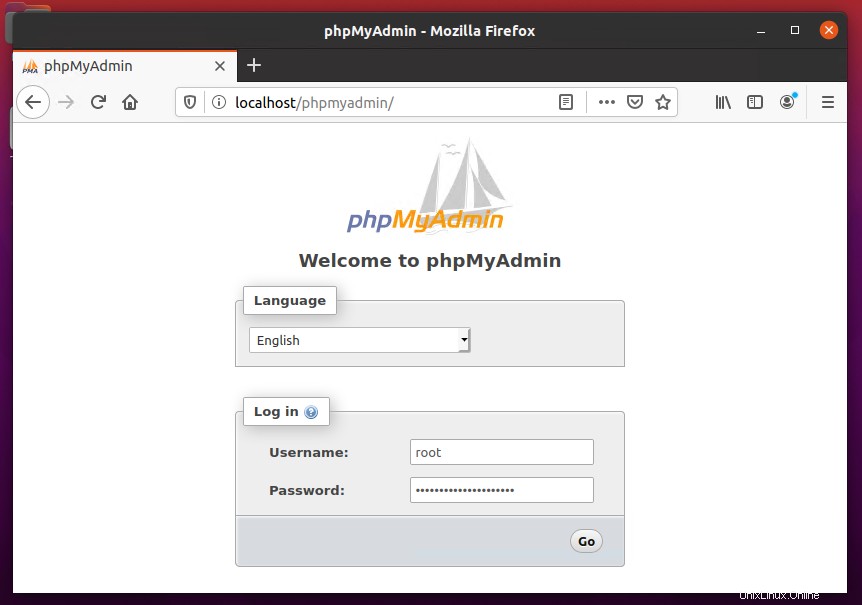
ステップ4– phpMyAdminのインストール(オプション)
phpMyAdminは、MySQLデータベースサーバーを管理するためのユーザーフレンドリーなWebインターフェイスを提供します。次のコマンドを実行して、phpMyAdminをUbuntu20.04にインストールできます。
sudo apt install phpmyadmin
インストールプロセスでは、構成するWebサーバーを選択するように求められます。 phpMyAdminを実行するWebサーバーとして「Apache」を選択します。
次に、phpMyAdminのデータベースを作成するように求められ、管理ユーザーアクセスの詳細を求めるように求められます。すべての手順を完了して、phpMyAdminのインストールを完了します。
ステップ5–サービスの管理
Ubuntu20.04LTSシステムにLAMPスタックをインストールしました。以下のコマンドは、systemdで実行されているApacheおよびMySQLサービスを開始/停止または再起動するのに役立ちます。
ApacheおよびMySQLサービスを再起動するには、次のように入力します。
sudo systemctl restart apache2sudo systemctl restart mysql
ApacheおよびMySQLサービスを開始するには、次のように入力します。
sudo systemctl start apache2sudo systemctl start mysql
ApacheおよびMySQLサービスを停止するには、次のように入力します。
sudo systemctl stop apache2sudo systemctl stop mysql
ステップ6–ファイアウォールルールの調整
「http」や「https」などのサービス名を直接指定して許可することができます。 Firewalldは、/ etc / servicesファイルを使用して、サービスの対応するポートを判別します。
sudo firewall-cmd --permanent --add-service=httpsudo firewall-cmd --permanent --add-service=httpssudo firewall-cmd --reload
ステップ7–テストセットアップ
すべてのセットアップが完了した後。 info.phpを作成しましょう 次のコンテンツを含むファイルWebサイトドキュメントルート。
sudo echo "<?php phpinfo(); ?>" > /var/www/html/info.php
次に、Webブラウザでこのファイルにアクセスします。以下のような画面が表示され、サーバー上のPHPの詳細がすべて表示されます。
phpMyAdminにもアクセスします