CentOSでのIcinga(監視ソリューション)のインストールと構成
Icingaは、ネットワークと考えられるネットワークリソースを監視し、エラーとリカバリをユーザーに通知し、レポート用のパフォーマンスデータを生成するエンタープライズグレードのオープンソース監視システムです。スケーラブルで拡張可能なIcingaは、分散した場所にまたがる複雑で大規模な環境を監視できます。
Icingaの基本的なインストールを使用しますが、これはNagiosに似ており、このドキュメントはNagiosのインストールにも参照できます。多くのドキュメントがインターネット上で利用可能であり、nagiosユーザーでインストールされますが、私のセットアップでは、システム(デーモン)にすでに存在するデフォルトユーザーを使用しました。また、代わりにデフォルトパスにインストールしません。非常に便利だと思うので、/optを参照します。 IcingaのUIはNagiosよりもはるかに優れています。
このチュートリアルでは、3つのサーバーを使用します。
192.168.1.20 – Icinga監視サーバー(centos5)
192.168.1.30 –2008年に監視対象の勝利
192.168.1.40 –監視対象のUbuntu10.10サーバー
要件
注:インストール中に開発ツールと開発ライブラリがインストールされていることを確認してください:
- GCCコンパイラ
- C /C++開発ライブラリ
- GD開発ライブラリ
1. Linux用のXampp:
[example@unixlinux.online〜]#mkdir / software
[example@unixlinux.online〜]#cd / software
[example@unixlinux.online software]#wget http://sourceforge.net/projects/xampp /files/XAMPP%20Linux/1.7.3/xampp-linux-1.7.3.tar.gz/download
2. Icingaコア:
[[email protected] software]# wget http://sourceforge.net/projects/icinga/files/icinga/1.2.1/icinga-1.2.1.tar.gz/download
Icingaのインストール
1. xamppパッケージを解凍します:
[[メール保護]ソフトウェア]#tar -zxvf xampp-linux-1.7.3.tar.gz
[[メール保護]ソフトウェア]#mvlampp / / opt /
Xamppパッケージは非常にきちんとコンパイルされたパッケージであり、同じものを抽出するだけで十分です。詳細については、xamppページを参照してください。
http://www.apachefriends.org/en/xampp.html
2. Icingaパッケージを解凍します:
[[メール保護]ソフトウェア]#tar -zxvf icinga-1.2.1.tar.gz
[[メール保護]ソフトウェア]#cd icinga-1.2.1
[[メール保護]icinga-1.2 .1]#./configure --prefix =/ opt / icinga --with-icinga-user =daemon --with-icinga-group =daemon --with-httpd-conf =/ opt / lampp / etc
注:コンパイル中にエラーが発生しないことを確認してください。エラーが発生した場合は、必要なパッケージがインストールされていることを確認してください。
[example@unixlinux.online icinga-1.2.1]#make all
[example@unixlinux.online icinga-1.2.1]#make install
[example@unixlinux.online icinga-1.2.1]#make install -config
[example@unixlinux.online icinga-1.2.1]#make install-commandmode
[example@unixlinux.online icinga-1.2.1]#make install-webconf
3.次に、Icingaを使用してApacheを構成する必要があります:
[[メール保護]icinga-1.2.1]#cd /opt/lampp/etc/
[[メール保護]]#vim httpd.conf
4.次の行を追加します:
Include etc/icinga.conf
5.ログイン用のパスワードを設定します:
[[メール保護]/]#cd / opt / lampp / bin /
[[メール保護]bin]#./htpasswd –c /opt/icinga/etc/htpasswd.users icingaadmin
新しいパスワード:
新しいパスワードを再入力します:
ユーザーicingaadminのパスワードを追加します
6. Apacheを起動します:
[example@unixlinux.online]#cd / opt / lampp /
[example@unixlinux.online]#./lamp startapache
XAMPP:SSL(およびPHP5)でApacheを起動しています...
XAMPP:エラー1! Apacheを起動できませんでした!
XAMPP:診断を開始しています...
XAMPP:httpd.confをシステムに適合させます。
XAMPP:次の試行...
XAMPP:開始SSL(およびPHP5)を使用したApache ...
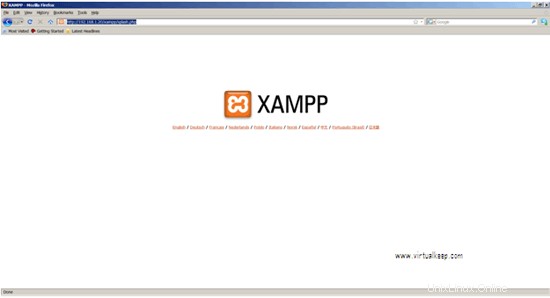
7. Apacheが機能しているかどうかを確認します:
http://192.168.1.20
8.次に、Icingaを起動する必要がありますが、その前に、Icingaが正しくコンパイルされ、すべての構成が設定されているかどうかを確認する必要があります。
[[email protected]]# cd /opt/icinga/
9. Icingaを構成する前に、ページが表示されるかどうかを確認します。
[[email protected]]# /opt/icinga/bin/icinga –v /opt/icinga/etc/icinga.cfg
警告の総数:0
エラーの総数:0
物事は大丈夫に見えます-飛行前のチェック中に深刻な問題は検出されませんでした。
10.エラーが発生しないので、Icingaを起動します。
[[メール保護]]#/ opt / icinga / bin / icinga -d /opt/icinga/etc/icinga.cfg
[[メール保護]]#ps -ef | grep icinga
デーモン696110 19:03? 00:00:00 / opt / icinga / bin / icinga -d /opt/icinga/etc/icinga.cfg
root 6998 2929 0 19:05 pts / 1 00:00:00 grep icinga
[example@unixlinux.online]#chmod 777 / opt /
[example@unixlinux.online]#chmod 777 / opt / icinga /
[example@unixlinux.online]#chmod 777 / opt / icinga / var /
[example@unixlinux.online]#chmod 777 /opt/icinga/var/rw/
[example@unixlinux.online]#chmod 777 /opt/icinga/var/rw/icinga.cmd
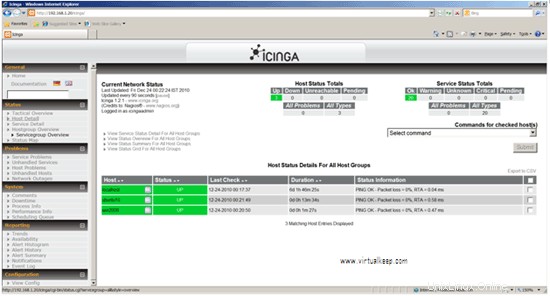
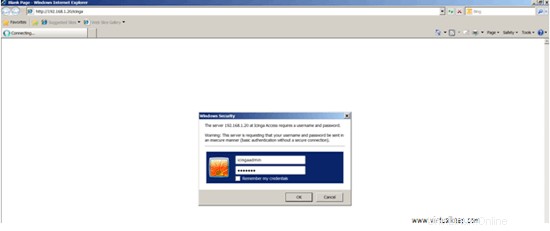
11.ログインして、IcingaWebサイトが開くかどうかを確認します。

1. Nagiosプラグインをダウンロードし、同じものをコンパイルします:
[[メール保護]ソフトウェア]#wget http://prdownloads.sourceforge.net/sourceforge/nagiosplug/nagios-plugins-1.4.15.tar.gz
[[メール保護]ソフトウェア]#tar -zxvf nagios -plugins-1.4.15.tar.gz
[example@unixlinux.online software]#cd nagios-plugins-1.4.15
[example@unixlinux.online nagios-plugins-1.4.15]#./ configure --prefix =/ opt / icinga / --with-nagios-user =demomon --with-nagios-group =daemon
[example@unixlinux.online nagios-plugins-1.4.15]#make &&make install
メールアラートの構成:
[[メール保護]/]#cd / opt / icinga / etc /
[[メール保護]]#viオブジェクト/contacts.cfg
define contact{
contact_nameicingaadmin             ; Short name of user
use     generic-contact         ; Inherit default values from generic-contact template (defined above)
alias Icinga Admin            ; Full name of user
[email protected]        ; <<***** CHANGE THIS TO YOUR EMAIL ADDRESS ******
        }
メールアドレスを[メール保護]から自分のメールアドレス[メール保護]に変更します。
CentOSサーバーでスマートホストを構成したことを確認してください。
CentOSでスマートホストを構成するには
[[email protected]]# rpm -qa|grepsendmail
sendmail-8.13.8-2.el5
[[email protected]]# vim /etc/mail/sendmail.mc
次の行を無効にします:
DAEMON_OPTIONS(`Port=smtp,Addr=127.0.0.1, Name=MTA')dnl
dnl#DAEMON_OPTIONS(`Port=smtp,Addr=127.0.0.1, Name=MTA')dnl
次の行を有効にします:
dnl define(`SMART_HOST', `smtp.your.provider')dnl
ここにSMTPアドレスを入力します-この場合はsunil.cc:
define(`SMART_HOST', `smtp.sunil.cc')dnl
[[メール保護]/]#m4 /etc/mail/sendmail.mc> /etc/mail/sendmail.cf
[[メール保護]/]#/etc/init.d/sendmailrestart
Ubuntu192.168.1.40へのNagiosプラグインとnrpeのインストール
1. UbuntuをIcingaサーバーで監視するには、Nagiosプラグインとnrpeをインストールする必要があります:
[email protected]:~# apt-get install gcc*
[email protected]:~#wget http://prdownloads.sourceforge.net/sourceforge/nagiosplug/nagios-plugins-1.4.15.tar.gz
[email protected]:~# tar -zxvf nagios-plugins-1.4.15.tar.gz
2. Nagiosプラグインのコンパイル:
[メール保護]:〜#cd nagios-plugins-1.4.15 /
[メール保護]:〜/ nagios-plugins-1.4.15#./ configure --with-nagios-user =daemon --with -nagios-group =diamond
example@unixlinux.online:〜/ nagios-plugins-1.4.15#make &&make install
example@unixlinux.online:〜/ nagios-plugins-1.4.15#chown- Rデーモン:デーモン/ usr / local / nagios /
NRPE(Nagios Remote Plugin Executor)のインストール
1. NRPEをダウンロードしてコンパイルします:
[email protected]:~# wget http://prdownloads.sourceforge.net/sourceforge/nagios/nrpe-2.12.tar.gz
[メール保護]:〜#tar -zxvf nrpe-2.12.tar.gz
[メール保護]:〜#cd nrpe-2.12 /
[メール保護]:〜/ nrpe-2.12#apt- get install openssllibssl-dev
example@unixlinux.online:〜#make all
example@unixlinux.online:〜#make install-plugin
example@unixlinux.online:〜#make install-daemon
[メール保護]:〜#make install-daemon-config
[メール保護]:〜/ nrpe-2.12#apt-get installxinetd
[メール保護]:〜#make install-xinetd
2. nrpeをxinetdサービスとして構成する必要があります:
[email protected]:~/nrpe-2.12# vim /etc/xinetd.d/nrpe
servicenrpe
{
flags           = REUSE
socket_type     = stream
port            = 5666
wait            = no
user            = daemon
group           = daemon
server          = /usr/local/nagios/bin/nrpe
server_args     = -c /usr/local/nagios/etc/nrpe.cfg --inetd
log_on_failure  += USERID
disable         = no
only_from       = 127.0.0.1
}
3. only_fromにIcingaサーバーIPを追加して編集します:
servicenrpe
{
flags           = REUSE
socket_type     = stream
port            = 5666
wait            = no
user            = daemon
group           = daemon
server          = /usr/local/nagios/bin/nrpe
server_args     = -c /usr/local/nagios/etc/nrpe.cfg --inetd
log_on_failure  += USERID
disable         = no
only_from       = 127.0.0.1 192.168.1.20
}
4.次に、次の行を追加して、サービスとして実行する必要があります。
[email protected]:~# vim /etc/services
nrpe 5666/tcp
5. xinetdサービスを再起動します:
[email protected]:~# /etc/init.d/xinetd restart
6.nrpeが開始したかどうかを確認します。
[email protected]:~# netstat -a |grep nrpe
UbuntuがIcingaサーバーと通信できるかどうかを確認するには:
[email protected]:~# /usr/local/nagios/libexec/check_nrpe -H localhost
NRPE v2.12
この出力を取得できるはずです。
1.http://nsclient.org/nscp/downloadsからダウンロードします。
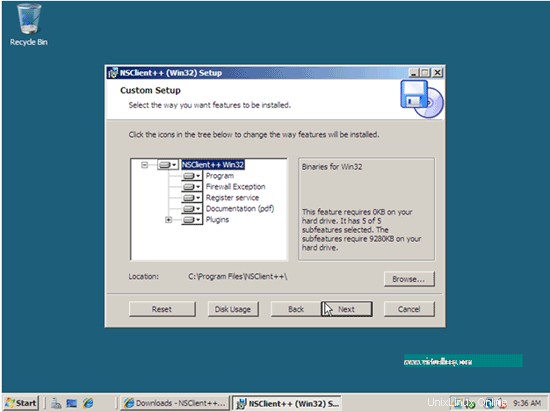
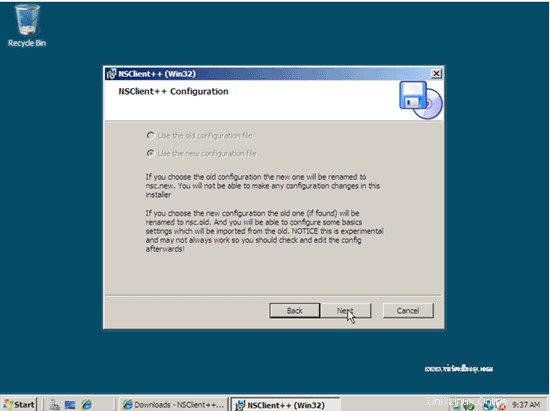
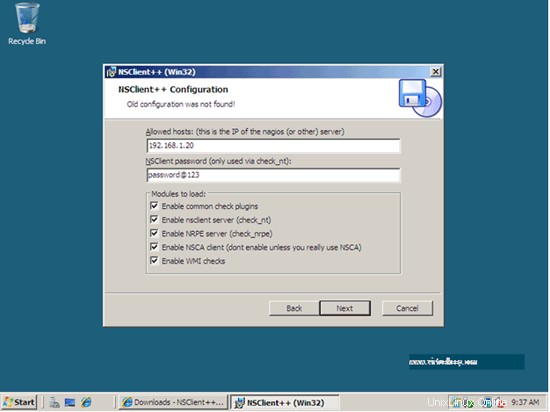
2.スクリーンショットに従ってください:
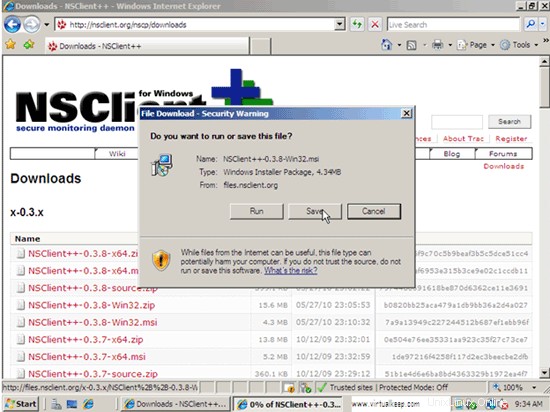
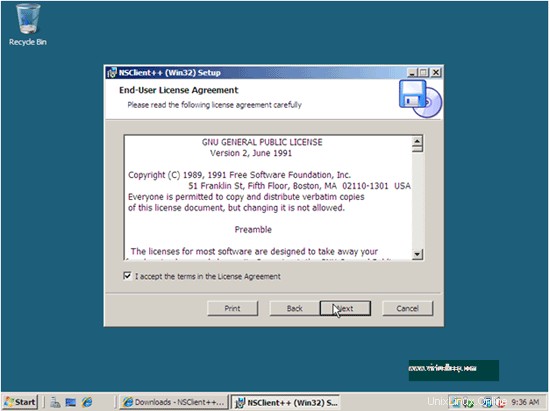


3.nsclient++がサービスとして実行されていることを確認します。
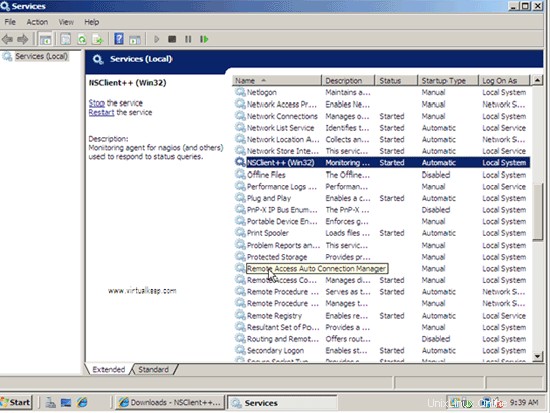
1.
[[email protected] /]# cd /opt/icinga/etc/objects/
2.まず、Ubuntuクライアントを構成します。
3.次のコンテンツを含む同じのcfgファイルを作成します。同じディレクトリにあるlocalhost.cfgも参照できます。
[[email protected] ~]# vim /opt/icinga/etc/objects/ubuntu10.cfg
define host{
uselinux-server
host_name ubuntu10
alias ubuntu10
address 192.168.1.40
}
define service{
use local-service
host_name ubuntu10
service_description PING
check_command check_ping!100.0,20%!500.0,60%
}
define service{
use local-service
host_name ubuntu10
service_description Root
check_command check_local_disk!20%!10%!/
}
define service{
use local-service
host_name ubuntu10
service_description Current Users
check_command check_local_users!20!50
}
define service{
use local-service
host_name ubuntu10
service_description Total Processes
check_command check_local_procs!250!400!RSZDT
}
define service{
use local-service
host_name ubuntu10
service_description Current Load
check_command check_local_load!5.0,4.0,3.0!10.0,6.0,4.0
}
define service{
use local-service
host_name ubuntu10
service_description Swap Usage
check_command check_local_swap!20!10
}
define service{
use local-service
host_name ubuntu10
service_description SSH
check_commandcheck_ssh
notifications_enabled 0
}
サーバーをグループ化するには、次の行をubuntu10.cfgに追加できます。
definehostgroup{
hostgroup_namelinux-servers ; The name of the hostgroup
alias           Linux Servers ; Long name of the group
memberslocalhost, ubuntu10     ; Comma separated list of hosts that belong to this group
        }
4. Windows 2008の場合、windows.cfgを参照します:
define host{
use             windows-server  ; Inherit default values from a template
host_namewin2008 ; The name we're giving to this host
alias           My Windows Server       ; A longer name associated with the host
address         192.168.1.30    ; IP address of the host
        }

define service{
use                     generic-service
host_name               win2008
service_descriptionNSClient++ Version
check_commandcheck_nt!CLIENTVERSION
        }
define service{
use                     generic-service
host_name               win2008
service_description     Uptime
check_commandcheck_nt!UPTIME
        }
define service{
use                     generic-service
host_name               win2008
service_description     CPU Load
check_commandcheck_nt!CPULOAD!-l 5,80,90
        }
define service{
use                     generic-service
host_name               win2008
service_description     Memory Usage
check_commandcheck_nt!MEMUSE!-w 80 -c 90
        }
define service{
use                     generic-service
host_name               win2008
service_description     C:\ Drive Space
check_commandcheck_nt!USEDDISKSPACE!-l c -w 80 -c 90
        }
5.Windowsサーバーにログインするためのパスワードを設定する必要があります。
[[email protected] etc]# vim objects/commands.cfg
# 'check_nt' command definition
define command{
command_namecheck_nt
command_line    $USER1$/check_nt -H $HOSTADDRESS$ -p 12489 -v $ARG1$ $ARG2$
        }
6.パスワードを追加します:
define command{
command_namecheck_nt
command_line    $USER1$/check_nt -H $HOSTADDRESS$ -p 12489 –s [email protected] -v $ARG1$ $ARG2$
        }
[[email protected] objects]# chown -R daemon:daemon /opt/icinga/
[[email protected]]# vimicinga.cfg
cfg_file=/opt/icinga/etc/objects/ubuntu10.cfg
cfg_file=/opt/icinga/etc/objects/win2008.cfg
2行追加します。
Icingaを停止して開始します。