Kolabは、オープンソースのWebベースのグループウェアソフトウェアアプリケーションであり、電子メールサーバー、ディレクトリサービス、Webサービス、カレンダー、タスク、アドレス帳などのソリューションを提供します。 Kolabは、Outlook、KDE Contact、Thunderbird、Roundcubeなどのいくつかのクライアントをサポートしています。 Kolabは、ユーザー、ドメイン、共有フォルダーなどを追加、変更、削除するために使用できる、ユーザーフレンドリーで使いやすいWebインターフェイスを提供します。
Kolabには多くの機能があり、そのうちのいくつかを以下に示します。
- Outlook、Web、KDEなどの混合クライアント環境のサポートを提供します。
- メールにはIMAPとPOP3を使用し、構成データの保存にはLDAPを使用します。
- 共有の連絡先とカレンダーをサポートします。
- CardDAVとWebDAV、ActiveSyncとCalDAVの完全なサーバー側サポート。
- Ubuntu16.04を実行しているサーバー。
- サーバーにsudo権限が設定されているroot以外のユーザー。
- サーバーでの静的IP192.168.0.190セットアップ。
開始する前に、システムに完全修飾ドメイン名またはホスト名を設定する必要があります。これを行うには、/ etc/hostsおよび/etc/hostnameファイルを編集します。
sudo nano /etc/hosts
ファイルの最後にIPアドレスとホスト名を追加します:
192.168.0.190 mail.kolab.com mail
ファイルを保存して閉じてから、/ etc / hostnameファイルを編集します:
sudo nano /etc/hostname
次の行を追加します:
mail.kolab.com
終了したらファイルを保存し、システムを再起動してすべての変更を適用します。
MariaDBをインストール
Kolabをインストールする前に、サーバーに最新バージョンのMariaDBをインストールする必要があります。デフォルトでは、MariaDBはUbuntu16.04のデフォルトリポジトリでは使用できません。したがって、最初に次のコマンドを使用してMariaDBのAPTキーをダウンロードします。
sudo apt-key adv --recv-keys --keyserver hkp://keyserver.ubuntu.com:80 0xF1656F24C74CD1D8
次に、次のコマンドを使用してMaria-DBリポジトリを追加します。
sudo add-apt-repository 'deb [arch=amd64,i386,ppc64el] http://mirror.jmu.edu/pub/mariadb/repo/10.1/ubuntu xenial main'
次に、リポジトリを更新し、次のコマンドを使用してMariaDBをインストールします。
sudo apt-get update -y
sudo apt-get install mariadb-server -y
MariaDBがインストールされたら、MariaDBサービスを開始し、次のコマンドを使用して起動時に開始できるようにします。
sudo systemctl start mysql
sudo systemctl enable mysql
次に、次のスクリプトを実行して、MariaDBのインストールを保護します。
sudo mysql_secure_installation
以下に示すように、すべての質問に答えてください。
Enter current password for root (enter for none):
Change the root password? [Y/n] n
Remove anonymous users? [Y/n] Y
Disallow root login remotely? [Y/n] Y
Remove test database and access to it? [Y/n] Y
Reload privilege tables now? [Y/n] Y
MariaDBが保護されたら、次のステップに進むことができます。
Kolabをインストールする
デフォルトでは、KolabはUbuntu16.04のデフォルトリポジトリでは使用できません。したがって、KolabリポジトリをAPTに追加する必要があります。これを行うには、/ etc / apt/sources.listファイルを編集します。
sudo nano /etc/apt/sources.list
ファイルの最後に次の行を追加します。
deb http://obs.kolabsys.com/repositories/Kolab:/16/Ubuntu_16.04/ ./
deb-src http://obs.kolabsys.com/repositories/Kolab:/16/Ubuntu_16.04/ ./
ファイルを保存して閉じてから、パッケージの署名に使用したGPGキーをインポートします。
wget -q -O- https://ssl.kolabsys.com/community.asc | sudo apt-key add -
次に、KolabパッケージがUbuntuパッケージよりも優先されるようにする必要があります。これを行うには、/ etc / apt / Preferences.d/kolabファイルを作成します。
sudo nano /etc/apt/preferences.d/kolab
次の行を追加します:
Package: *
Pin: origin obs.kolabsys.com
Pin-Priority: 501
次のコマンドを使用して、ファイルを保存し、リポジトリのメタデータを更新します。
sudo apt-get update -y
最後に、次のコマンドを実行してKolabをインストールします。
sudo apt-get install kolab -y
Kolabを構成する
Kolabをインストールした後、Kolabグループウェアをセットアップする必要があります。これを行うには、次のコマンドを実行します。
sudo setup-kolab
Kolabのセットアップ中に、次の質問が表示されます。それらと一緒に提供される指示に従ってください。
#Please supply a password for the LDAP administrator user 'admin', used to login to the graphical console of 389 Directory server.

Administrator password [JAOw_2oIhlezXlK]:
Confirm Administrator password:

#Please supply a password for the LDAP Directory Manager user, which is the administrator user you will be using to at least initially log in to the Web
#Admin, and that Kolab uses to perform administrative tasks.

Directory Manager password [QXML8Suxv-YTUFr]:
Confirm Directory Manager password:

#Please choose the system user and group the service should use to run under. These should be existing, unprivileged, local system POSIX accounts with no shell.

User [dirsrv]:
Group [dirsrv]:

#This setup procedure plans to set up Kolab Groupware for the following domain name space. This domain name is obtained from the reverse DNS entry on your
#network interface. Please confirm this is the appropriate domain name space.

kolab.com [Y/n]: Y

#The standard root dn we composed for you follows. Please confirm this is the root dn you wish to use.

dc=kolab,dc=com [Y/n]: Y

#Setup is now going to set up the 389 Directory Server. This may take a little while (during which period there is no output and no progress indication).

Created symlink from /etc/systemd/system/multi-user.target.wants/dirsrv.target to /lib/systemd/system/dirsrv.target.

#Please supply a Cyrus Administrator password. This password is used by Kolab to execute administrative tasks in Cyrus IMAP. You may also need the password
#yourself to troubleshoot Cyrus IMAP and/or perform other administrative tasks against Cyrus IMAP directly.

Cyrus Administrator password [h3IbKvhbKGUwhy5]:
Confirm Cyrus Administrator password:

#Please supply a Kolab Service account password. This account is used by various services such as Postfix, and Roundcube, as anonymous binds to the LDAP server
#will not be allowed.

Kolab Service password [KhHTzhSYh4w11Vw]:
Confirm Kolab Service password:

What MySQL server are we setting up?
 - 1: Existing MySQL server (with root password already set).
 - 2: New MySQL server (needs to be initialized).
Choice:  - 1: Existing MySQL server (with root password already set).
 - 2: New MySQL server (needs to be initialized).
Choice:  - 1: Existing MySQL server (with root password already set).
 - 2: New MySQL server (needs to be initialized).
Choice: 2

#Please supply the root password for MySQL, so we can set up user accounts for other components that use MySQL.

MySQL root password:

#Please supply a password for the MySQL user 'kolab'. This password will be used by Kolab services, such as the Web Administration Panel.

MySQL kolab password [2-Zz7j_AjGI8QF0]:
Confirm MySQL kolab password:

#Please supply the timezone PHP should be using. You have to use a Continent or Country / City locality name like 'Europe/Berlin', but not just 'CEST'.

Timezone ID [UTC]: Asia/Kolkata

#Please supply a password for the MySQL user 'roundcube'. This password will be used by the Roundcube webmail interface.

MySQL roundcube password [OVwJoKktzbOMAys]:
Confirm MySQL roundcube password:
Kolabのセットアップが完了すると、KolabWebインターフェイスへのアクセスに進むことができます。
KolabWebインターフェイスにアクセス
ウェブブラウザを開き、URLhttp://mail.kolab.com/kolab-webadminまたはhttp://192.168.0.190/kolab-webadminを入力します。以下に示すように、Kolabログインページにリダイレクトされます。
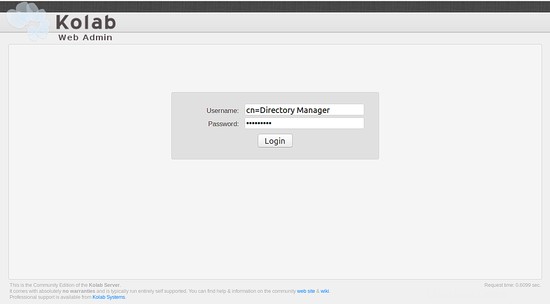
ユーザー名をcn=Directory Managerとして指定します 上記の手順で設定したパスワード。次に、ログインをクリックします ボタン。次の画面が表示されます。
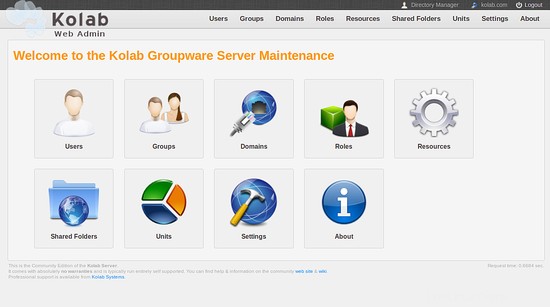
次に、ユーザーをクリックします Webインターフェイスのアイコンを表示し、次のようにメールユーザーを作成します。
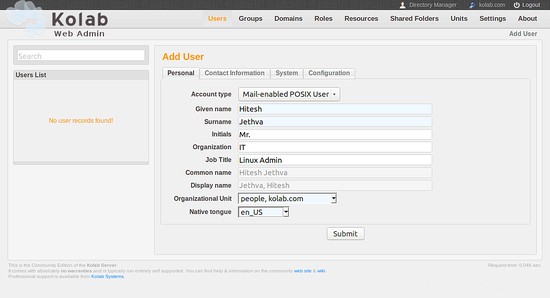
次に、お問い合わせをクリックします タブでユーザーIDを確認します:
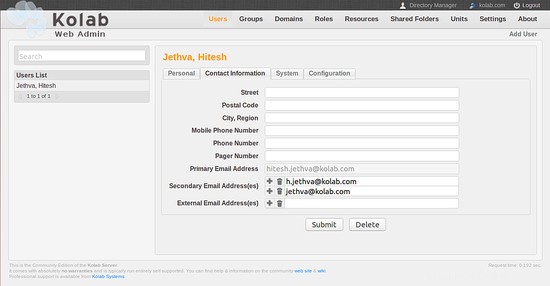
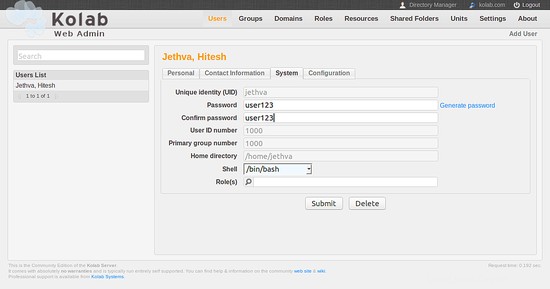
次に、システムをクリックします メールユーザーのパスワードを設定するタブ:
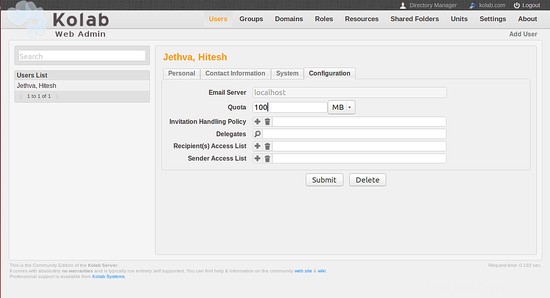
次に、構成をクリックします タブでユーザーのメールクォータを設定します:
完了したら、送信をクリックします ボタンをクリックして、すべての構成を保存します。
RoundcubeWebメールにアクセス
これでメールユーザーが作成されました。Rouncubeウェブメールを介してメールにアクセスします。
Webブラウザーを開き、URLhttp://mail.kolab.com/roundcubemailを入力します。次の画面が表示されます。
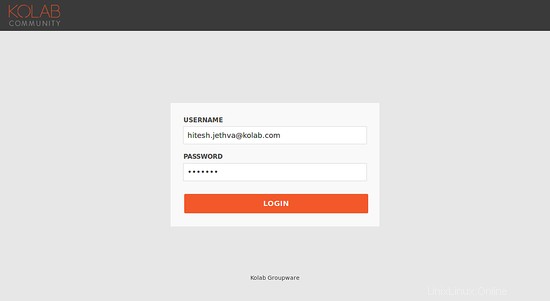
上記の手順で設定したメインのメールIDとパスワードとしてユーザー名を入力します。次に、ログインをクリックします ボタン。次の画面にRoundcubeWebインターフェイスが表示されます。
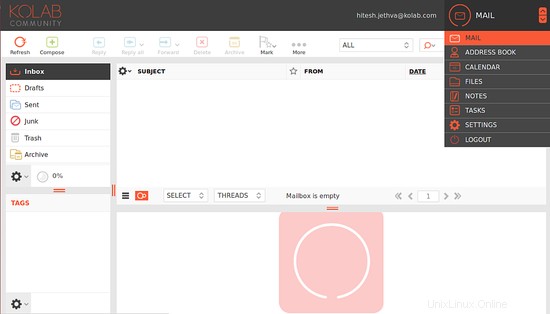
このインターフェースを使用すると、メールに簡単にアクセスして送信したり、名簿、カレンダー、タスクを管理したりできます。
おめでとう!これで、Ubuntu16.04サーバーにKolabグループウェアが正常にインストールされました。メールの送受信、連絡先、タスク、名簿の管理が簡単にできるようになりました。