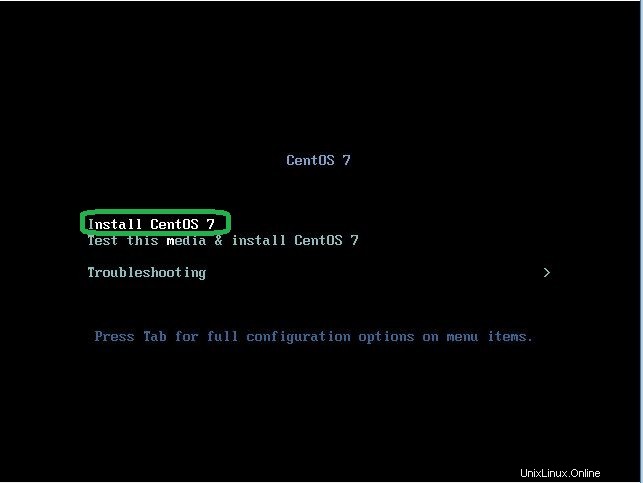
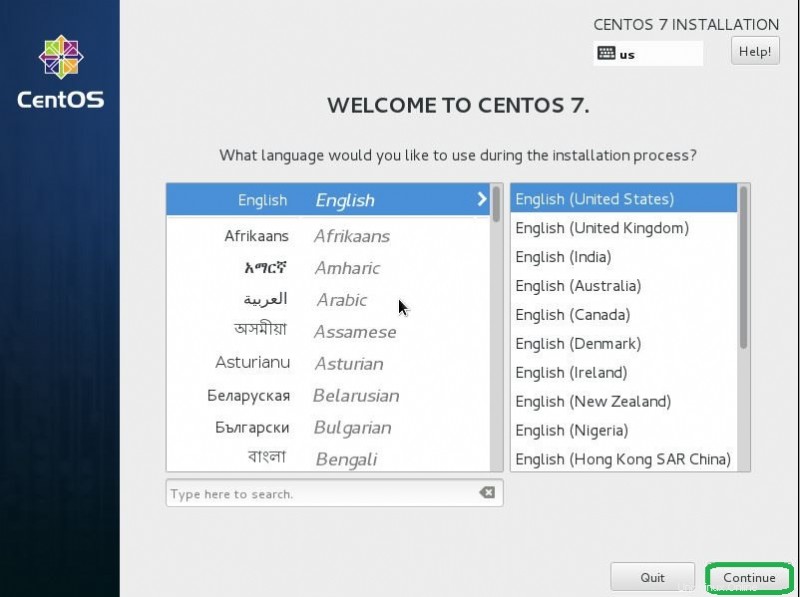
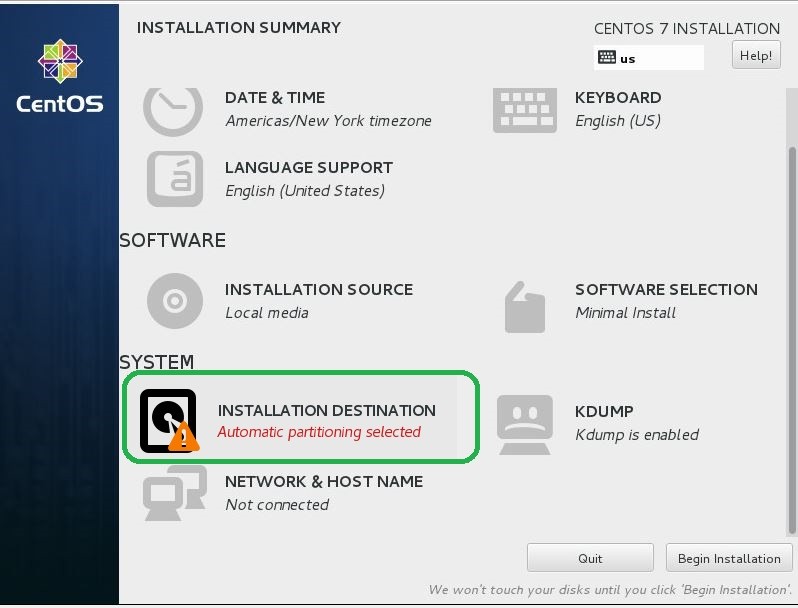
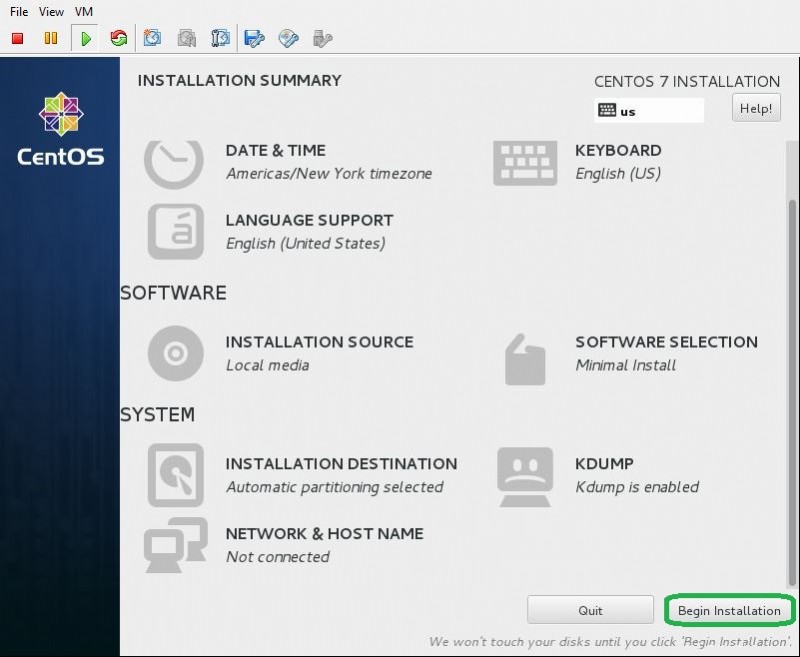
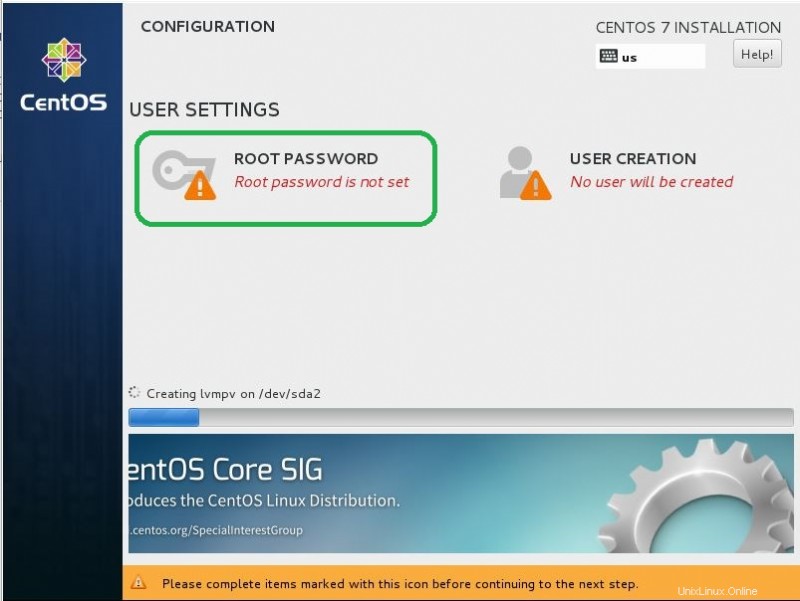
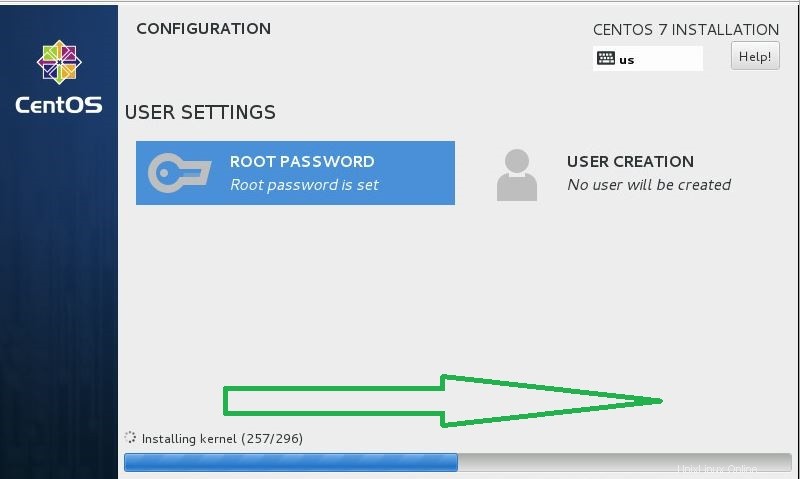
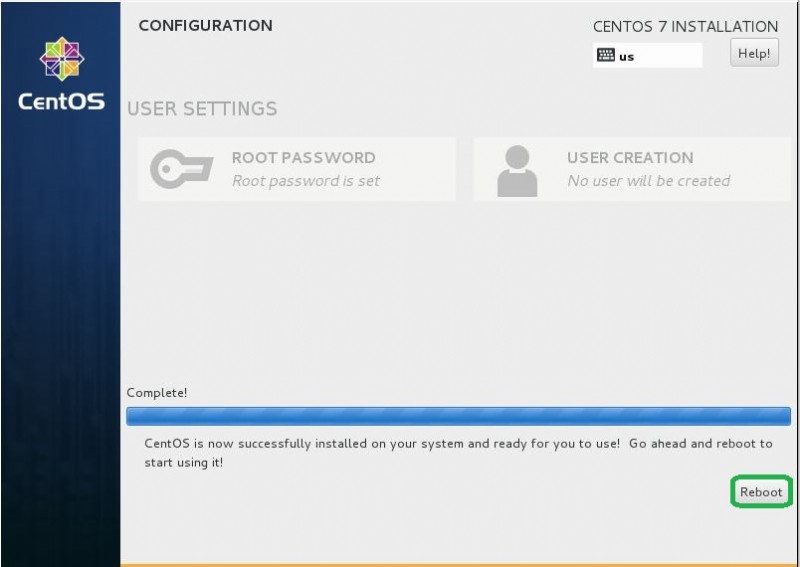
Centos 7 OS をインストールするには、以下の手順に従います:
<オール>以下のスライドに従って、これらすべての手順を確認できます:


基本コマンド:サーバーの更新、サービス制御など
オペレーティング システムをインストールしたら、サーバーを更新する必要があります。これを行うには、以下のコマンドに従います:
[root@thehackertips ~]# yum -y update
Centos 7 で実行中のサービスを一覧表示するには、次のコマンドを実行します:
[root@thehackertips ~]# systemctl -t service
UNIT                         LOAD   ACTIVE SUB     DESCRIPTION
auditd.service               loaded active running Security Auditing Service
crond.service                loaded active running Command Scheduler
dbus.service                 loaded active running D-Bus System Message Bus
firewalld.service            loaded active running firewalld - dynamic firewall
getty@tty1.service           loaded active running Getty on tty1
kdump.service                loaded active exited  Crash recovery kernel arming
kmod-static-nodes.service    loaded active exited  Create list of required stati
lvm2-lvmetad.service         loaded active running LVM2 metadata daemon
lvm2-monitor.service         loaded active exited  Monitoring of LVM2 mirrors, s
lvm2-pvscan@8:2.service      loaded active exited  LVM2 PV scan on device 8:2
network.service              loaded active exited  LSB: Bring up/down networking
NetworkManager.service       loaded active running Network Manager
ntpd.service                 loaded active running Network Time Service
polkit.service               loaded active running Authorization Manager
postfix.service              loaded active running Postfix Mail Transport Agent
rhel-dmesg.service           loaded active exited  Dump dmesg to /var/log/dmesg
rhel-import-state.service    loaded active exited  Import network configuration
rhel-readonly.service        loaded active exited  Configure read-only root supp
rsyslog.service              loaded active running System Logging Service
sshd.service                 loaded active running OpenSSH server daemon
systemd-journald.service     loaded active running Journal Service
systemd-logind.service       loaded active running Login Service
systemd-random-seed.service  loaded active exited  Load/Save Random Seed
systemd-remount-fs.service   loaded active exited  Remount Root and Kernel File
systemd-sysctl.service       loaded active exited  Apply Kernel Variables
systemd-t...etup-dev.service loaded active exited  Create static device nodes in
systemd-t...es-setup.service loaded active exited  Create Volatile Files and Dir
systemd-udev-trigger.service loaded active exited  udev Coldplug all Devices
systemd-udevd.service        loaded active running udev Kernel Device Manager
systemd-update-utmp.service  loaded active exited  Update UTMP about System Rebo
systemd-u...sessions.service loaded active exited  Permit User Sessions
systemd-v...le-setup.service loaded active exited  Setup Virtual Console
tuned.service                loaded active running Dynamic System Tuning Daemon

LOAD   = Reflects whether the unit definition was properly loaded.
ACTIVE = The high-level unit activation state, i.e. generalization of SUB.
SUB    = The low-level unit activation state, values depend on unit type.

33 loaded units listed. Pass --all to see loaded but inactive units, too.
To show all installed unit files use 'systemctl list-unit-files'.
すべてのサービスを一覧表示するには、以下のコマンドを実行します:
[root@thehackertips ~]# systemctl list-unit-files -t service
UNIT FILE                                   STATE
auditd.service                              enabled
autovt@.service                             disabled
blk-availability.service                    disabled
brandbot.service                            static
console-getty.service                       disabled
console-shell.service                       disabled
cpupower.service                            disabled
crond.service                               enabled
dbus-org.fedoraproject.FirewallD1.service   enabled
dbus-org.freedesktop.hostname1.service      static
dbus-org.freedesktop.locale1.service        static
dbus-org.freedesktop.login1.service         static
dbus-org.freedesktop.machine1.service       static
これらのコマンドを使用して、サービスを開始、再起動、停止、またはステータスを表示するには:
[root@thehackertips ~]# systemctl start firewalld
[root@thehackertips ~]# systemctl restart  firewalld
[root@thehackertips ~]# systemctl stop  firewalld
[root@thehackertips ~]# systemctl status firewalld
新しいユーザーを追加してパスワードを設定する
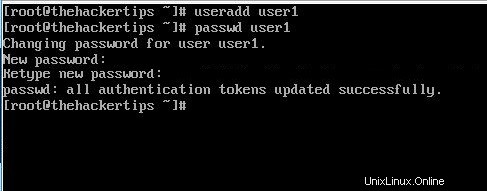
新しいユーザーを作成し、centos 7 でパスワードを設定するには、以下のコマンドに従います:
[root@thehackertips ~]# useradd user1
[root@thehackertips ~]# passwd user1
Changing password for user user1.
New password:# set password
Retype new password:# confirm
passwd: all authentication tokens updated successfully.
[root@thehackertips ~]# exit
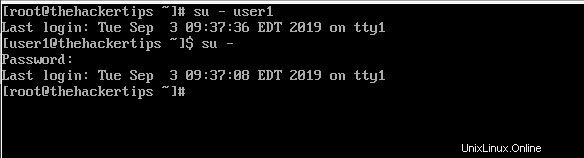
root を user1 に、または user1 を root に切り替えることができます。これを行うには、以下のコマンドに従います:
[root@thehackertips ~]# su - user1
Last login: Tue Sep 3 09:37:36 EDT 2019 om tty1
[root@thehackertips ~]# su -
Password: # type the root password
Last login: Tue Sep 3 09:37:08 EDT 2019 om tty1
[root@thehackertips ~]#
ルート/ユーザー パスワードのリセット
Centos 7 でパスワードをリセットするには、以下のコマンドを使用する必要があります:
- sudo passwd root # root ユーザーの場合
- sudo passwd user1 # その他のユーザー
- パスワード # すでにログインしていて、パスワードを変更したい場合
ホスト名を設定
Centos 7 でホスト名を変更するには、次の方法を使用できます:
- オプション 1:sudo vi /etc/hostname を使用してホスト名ファイルを編集する
- オプション 2:hostnamectl set-hostname thehackertips.com # ホスト名を永続的に設定
- オプション 3:ホスト名 thehackertips.com # これは再起動後に消えます
このコマンドを使用してホスト名のステータスを調べるには
[root@thehackertips ~]# hostnamectl
   Static hostname: thehackertips.com
         Icon name: computer
           Chassis: n/a
        Machine ID: afa6c9d874624941b30b5caf02c5e24a
           Boot ID: 8e08002be86e4355a82b9b343810ef38
    Virtualization: vmware
  Operating System: CentOS Linux 7 (Core)
       CPE OS Name: cpe:/o:centos:centos:7
            Kernel: Linux 3.10.0-229.el7.x86_64
      Architecture: x86_64
ネットワーク設定の変更
サーバーに静的 IP アドレスを設定する方法の 1 つは、nmcli コマンドを使用することです。インターフェイスのステータスを表示するには、次のコマンドを使用できます:
[root@thehackertips ~]# nmcli d
DEVICE  TYPE      STATE      CONNECTION
ens32   ethernet  connected  ens32
lo      loopback  unmanaged  --
[root@thehackertips ~]# nmcli d show ens32
GENERAL.DEVICE:                         ens32
GENERAL.TYPE:                           ethernet
GENERAL.HWADDR:                         00:0C:29:02:99:09
GENERAL.MTU:                            1500
GENERAL.STATE:                          100 (connected)
GENERAL.CONNECTION:                     ens32
GENERAL.CON-PATH:                       /org/freedesktop/NetworkManager/ActiveConnection/0
WIRED-PROPERTIES.CARRIER:               on
IP4.ADDRESS[1]:                         172.16.171.201/24
IP4.GATEWAY:
IP4.DNS[1]:                             172.16.171.33
IP6.ADDRESS[1]:                         fe80::20c:29ff:fe02:9909/64
IP6.GATEWAY:
[root@thehackertips ~]#
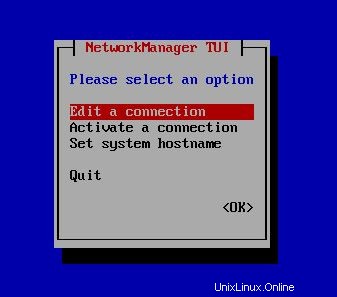
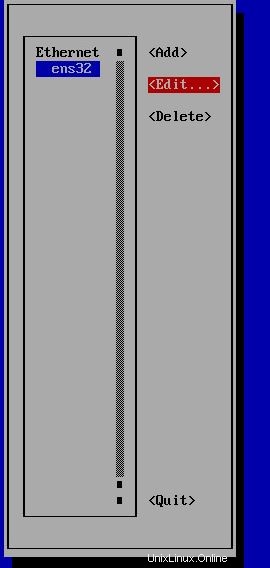
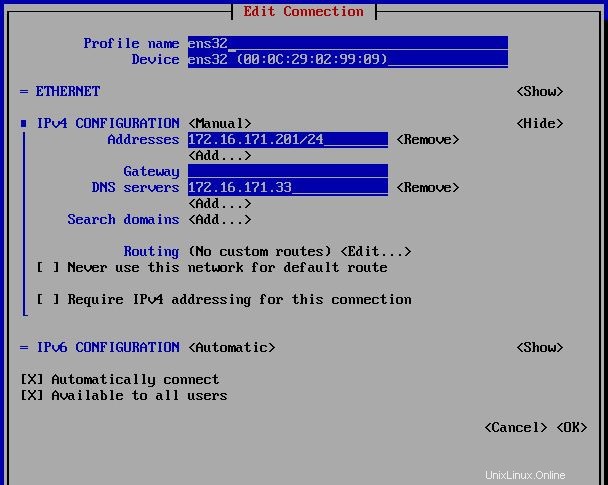
新しい IP アドレスを設定するには、nmtui と入力します CLI でコマンドを実行し、次の手順に従います。最後のステップで、nmtui と入力する必要があります 接続を有効にする :

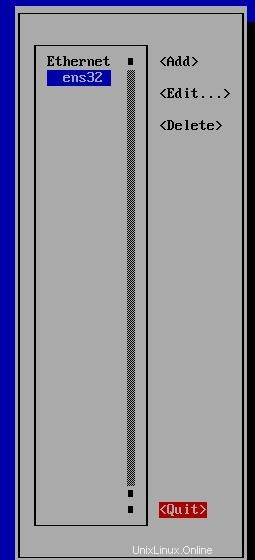
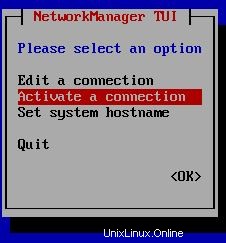
nmcli で IP アドレスを設定することもできます 以下のコマンド:
# Set IP address
[root@thehackertips ~]# nmcli c modify ens32 ipv4.addresses 172.16.171.201/24
# Set default gateway
[root@thehackertips ~]# nmcli c modify ens32 ipv4.gateway 172.16.171.1
# Set the DNS
[root@thehackertips ~]# nmcli c modify ens32 ipv4.dns 172.16.171.33
# Set manual IP address
[root@thehackertips ~]# nmcli c modify ens32 ipv4.method manual
# If you want to set DHCP IP address
[root@thehackertips ~]# nmcli c modify ens32 ipv4.method dhcp
# to restart interface
[root@thehackertips ~]# nmcli c down ens32 ; nmcli c up
IPアドレス確認用:
[root@thehackertips ~]# ip addr
 1: lo:  mtu 65536 qdisc noqueue state UNKNOWN
     link/loopback 00:00:00:00:00:00 brd 00:00:00:00:00:00
     inet 127.0.0.1/8 scope host lo
        valid_lft forever preferred_lft forever
     inet6 ::1/128 scope host
        valid_lft forever preferred_lft forever
 2: ens32:  mtu 1500 qdisc pfifo_fast state UP qlen 1000
     link/ether 00:0c:29:02:99:09 brd ff:ff:ff:ff:ff:ff
     inet 172.16.171.201/24 brd 172.16.171.255 scope global ens32
        valid_lft forever preferred_lft forever
     inet6 fe80::20c:29ff:fe02:9909/64 scope link
        valid_lft forever preferred_lft forever