GitLabは、無料のオープンソースのWebベースのDevOpsソフトウェアソリューションであり、単一のアプリケーションでソフトウェアを開発、保護、および運用する機能を組み合わせています。これはRubyで書かれており、世界中の何千もの組織で使用されています。 GitLabは、問題追跡、継続的インテグレーション、デプロイパイプラインなど、多くの機能を提供するGitリポジトリマネージャーです。 EnterpriseEditionとCommunityEditionの2つのエディションがあります。 GitHubと非常によく似ており、さまざまなサービスと統合できます。開発者がプロジェクトをホストできる開発環境でGitLabを使用して、独自のリポジトリをホストできます。
この投稿では、GitLabCommunityEditionをOracleLinux8にインストールする方法を紹介します。
前提条件
- Atlantic.NetCloudPlatformでOracleLinux8を実行しているサーバー
- サーバーにルートパスワードが設定されています
ステップ1-Atlantic.Netクラウドサーバーを作成する
まず、Atlantic.Netクラウドサーバーにログインします。 4GB以上のRAMを搭載したオペレーティングシステムとしてOracleLinuxを選択して、新しいサーバーを作成します。 SSH経由でクラウドサーバーに接続し、ページの上部で強調表示されているクレデンシャルを使用してログインします。
サーバーにログインしたら、次のコマンドを実行して、ベースシステムを最新の利用可能なパッケージで更新します。
dnf update -y
ステップ2–Postfixサーバーをインストールする
開始する前に、メール機能を含めるためにPostfixパッケージをインストールする必要があります。次のコマンドを使用してインストールできます:
dnf install postfix
インストール後、Postfixサービスを開始し、システムの再起動時に開始できるようにします:
systemctl enable --now postfix
ステップ3–GitLabCEリポジトリを追加する
まず、次のコマンドを使用してGitLabからスクリプトをダウンロードします。
wget https://packages.gitlab.com/install/repositories/gitlab/gitlab-ce/script.rpm.sh
スクリプトをダウンロードしたら、次のコマンドを使用して実行権限を設定します。
chmod +x script.rpm.sh
次に、スクリプトを実行してGitLabCEリポジトリを追加します。
os=el dist=8 ./script.rpm.sh
リポジトリが作成されると、次の出力が表示されます。
Complete!
Generating yum cache for gitlab_gitlab-ce...
Importing GPG key 0x51312F3F:
 Userid     : "GitLab B.V. (package repository signing key) <example@unixlinux.online>"
 Fingerprint: F640 3F65 44A3 8863 DAA0 B6E0 3F01 618A 5131 2F3F
 From       : https://packages.gitlab.com/gitlab/gitlab-ce/gpgkey
Importing GPG key 0xF27EAB47:
 Userid     : "GitLab, Inc. <example@unixlinux.online>"
 Fingerprint: DBEF 8977 4DDB 9EB3 7D9F C3A0 3CFC F9BA F27E AB47
 From       : https://packages.gitlab.com/gitlab/gitlab-ce/gpgkey/gitlab-gitlab-ce-3D645A26AB9FBD22.pub.gpg
Generating yum cache for gitlab_gitlab-ce-source...

The repository is setup! You can now install packages.
これで、次のコマンドを使用してリポジトリを確認できます。
dnf repolist
次の出力にGitLabリポジトリが表示されます。
repo id                                       repo name
gitlab_gitlab-ce                              gitlab_gitlab-ce
gitlab_gitlab-ce-source                       gitlab_gitlab-ce-source
ol8_UEKR6                                     Latest Unbreakable Enterprise Kernel Release 6 for Oracle Linux 8 (x86_64)
ol8_appstream                                 Oracle Linux 8 Application Stream (x86_64)
ol8_baseos_latest                             Oracle Linux 8 BaseOS Latest (x86_64)
pgdg-common                                   PostgreSQL common RPMs for RHEL / Oracle 8 - x86_64
pgdg10                                        PostgreSQL 10 for RHEL / Oracle 8 - x86_64
pgdg11                                        PostgreSQL 11 for RHEL / Oracle 8 - x86_64
pgdg12                                        PostgreSQL 12 for RHEL / Oracle 8 - x86_64
pgdg13                                        PostgreSQL 13 for RHEL / Oracle 8 - x86_64
pgdg14                                        PostgreSQL 14 for RHEL / Oracle 8 - x86_64
ステップ4– OracleLinux8にGitLabCEをインストールする
この時点で、GitLabCEリポジトリがサーバーに追加されます。これで、次のコマンドを使用してGitLabCEをインストールできます。
dnf install gitlab-ce -y
GitLabをインストールすると、次の出力が表示されます。
It looks like GitLab has not been configured yet; skipping the upgrade script.

       *.                  *.
      ***                 ***
     *****               *****
    .******             *******
    ********            ********
   ,,,,,,,,,***********,,,,,,,,,
  ,,,,,,,,,,,*********,,,,,,,,,,,
  .,,,,,,,,,,,*******,,,,,,,,,,,,
      ,,,,,,,,,*****,,,,,,,,,.
         ,,,,,,,****,,,,,,
            .,,,***,,,,
                ,*,.


     _______ __  __          __
    / ____(_) /_/ /   ____ _/ /_
   / / __/ / __/ /   / __ `/ __ \
  / /_/ / / /_/ /___/ /_/ / /_/ /
  \____/_/\__/_____/\__,_/_.___/


Thank you for installing GitLab!
GitLab was unable to detect a valid hostname for your instance.
Please configure a URL for your GitLab instance by setting `external_url`
configuration in /etc/gitlab/gitlab.rb file.
Then, you can start your GitLab instance by running the following command:
  sudo gitlab-ctl reconfigure

For a comprehensive list of configuration options please see the Omnibus GitLab readme
https://gitlab.com/gitlab-org/omnibus-gitlab/blob/master/README.md
ステップ5–GitLabCEを構成する
これでGitLabがシステムにインストールされましたが、まだ構成されていません。 /etc/gitlab/gitlab.rbを編集して構成できます ファイル:
nano /etc/gitlab/gitlab.rb
以下に示すように、外部URとメールアドレスを定義し、Let’sEncryptを有効にします。
external_url "https://gitlab.linuxbuz.com"

# Enable the Let's encrypt SSL
letsencrypt['enable'] = true

# This is optional to get SSL related alerts
letsencrypt['contact_emails'] = ['example@unixlinux.online']

# This example renews every 7th day at 12:30
letsencrypt['auto_renew_hour'] = "12"
letsencrypt['auto_renew_minute'] = "30"
letsencrypt['auto_renew_day_of_month'] = "*/7"
ファイルを保存して閉じてから、次のコマンドを実行してGitLabを構成します。
gitlab-ctl reconfigure
構成が完了すると、次の出力が表示されます。
Default admin account has been configured with following details:
Username: root
Password: You didn't opt-in to print initial root password to STDOUT.
Password stored to /etc/gitlab/initial_root_password. This file will be cleaned up in first reconfigure run after 24 hours.

NOTE: Because these credentials might be present in your log files in plain text, it is highly recommended to reset the password following https://docs.gitlab.com/ee/security/reset_user_password.html#reset-your-root-password.

gitlab Reconfigured!
上記のコマンドはGitLabを構成し、アクセス資格情報を / etc / gitlab / initial_root_passwordに保存します ファイル。
次のコマンドを使用して、アクセスパスワードを確認できます。
cat /etc/gitlab/initial_root_password
次の出力が得られるはずです:
Password: Uzpeo6P8eYZQE5D0hMtCAC2xH9rCjTsx1E9iYvGQMuw=
ステップ6–GitLabCEダッシュボードにアクセスする
次に、Webブラウザーを開き、URL https://gitlab.linuxbuz.comを使用してGitLabCEWebUIにアクセスします。 。 GitLabログインページにリダイレクトされます:
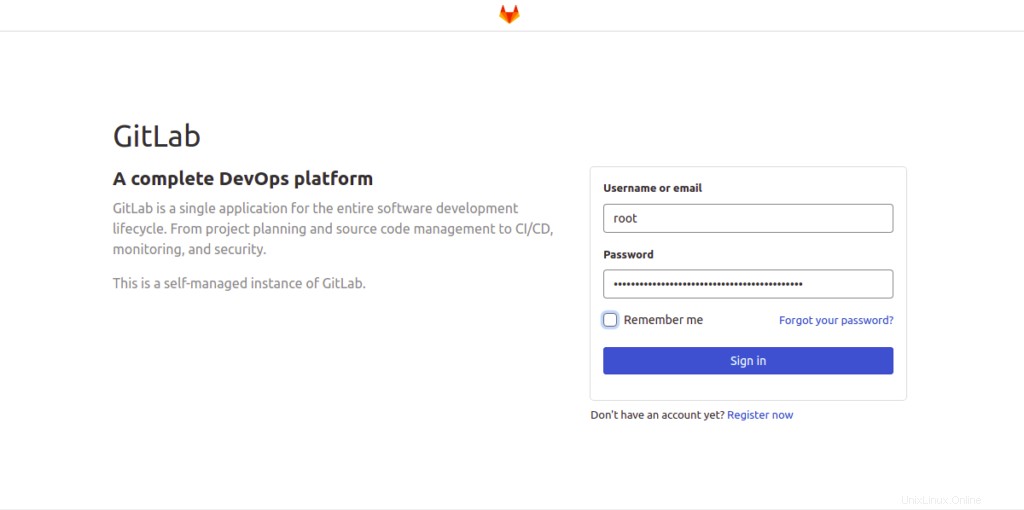
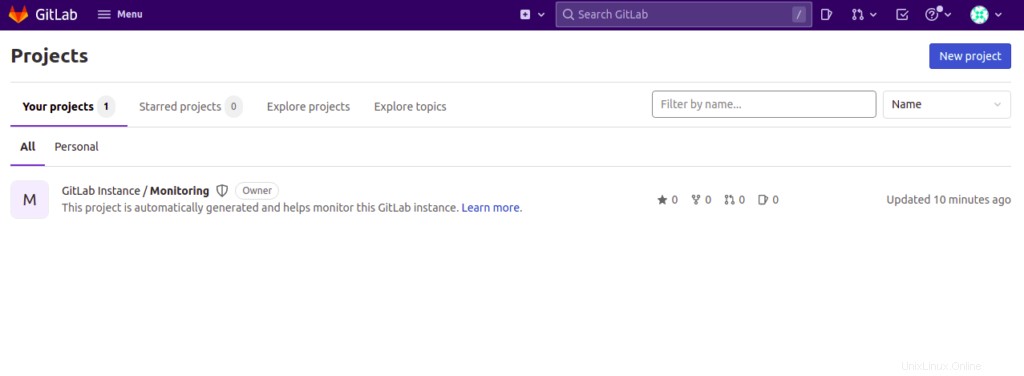
rootのユーザー名とパスワードを入力し、サインインをクリックします。 ボタン。次のページにGitLabダッシュボードが表示されます。
ステップ7–GitLabのバックアップ
GitLabインスタンスを定期的にバックアップすることをお勧めします。 GitLabインスタンスをバックアップするには、次のコマンドを実行します。
gitlab-rake gitlab:backup:create
バックアップを自動化することもお勧めします。 cronジョブを作成することでそれを行うことができます。
nano /etc/crontab
次の行を追加します:
0 22 * * * gitlab-rake gitlab:backup:create
終了したら、ファイルを保存して閉じます。
結論
このガイドでは、Oracle Linux8にGitLabCEをインストールする方法を学びました。また、GitLab CEを編集して、Let’sEncryptSSLを有効にする方法も学びました。これで、GitLabインスタンスがインストールされ、保護されました。これで、ローカル開発環境でGitLabを使用して、すべてのプロジェクトを追跡できるようになります。 Atlantic.NetからVPSホスティングを始めましょう。