LEMPは、インターネット上でWebサイトをホストするために一緒に使用される4つのオープンソースソフトウェアコンポーネントのコレクションです。 LEMPスタックでは、LはLinuxオペレーティングシステムを表し、EはNginx Webサーバーを表し、MはMariaDB / MySQLデータベースサーバーを表し、PはPHPプログラミング言語を表します。すべてのコンポーネントはLEMPスタックでオープンソースであるため、Web全体の大規模なアプリケーションで使用されます。
この投稿では、OracleLinux8にLEMPスタックをインストールする方法を紹介します。
前提条件
- Atlantic.NetCloudPlatformでOracleLinux8を実行しているサーバー
- サーバーで構成されているrootパスワード
ステップ1-Atlantic.Netクラウドサーバーを作成する
まず、Atlantic.Netクラウドサーバーにログインします。 2GB以上のRAMを搭載したオペレーティングシステムとしてOracleLinux8を選択して、新しいサーバーを作成します。 SSH経由でクラウドサーバーに接続し、ページの上部で強調表示されているクレデンシャルを使用してログインします。
サーバーにログインしたら、次のコマンドを実行して、ベースシステムを最新の利用可能なパッケージで更新します。
dnf update -y
ステップ2– OracleLinux8にNginxWebサーバーをインストールする
NginxはLEMPスタックの最初のコンポーネントです。デフォルトでは、NginxパッケージはOracleLinux8のデフォルトリポジトリに含まれています。次のコマンドを使用してインストールできます:
dnf install nginx -y
Nginxがインストールされたら、Nginxサービスを開始し、システムの再起動時に開始できるようにします。
systemctl start nginx
systemctl enable nginx
次のコマンドを使用して、Nginxのステータスを確認することもできます。
systemctl status nginx
Nginxのバージョンを確認するには、次のコマンドを実行します。
nginx -v
次の出力が表示されます。
nginx version: nginx/1.14.1
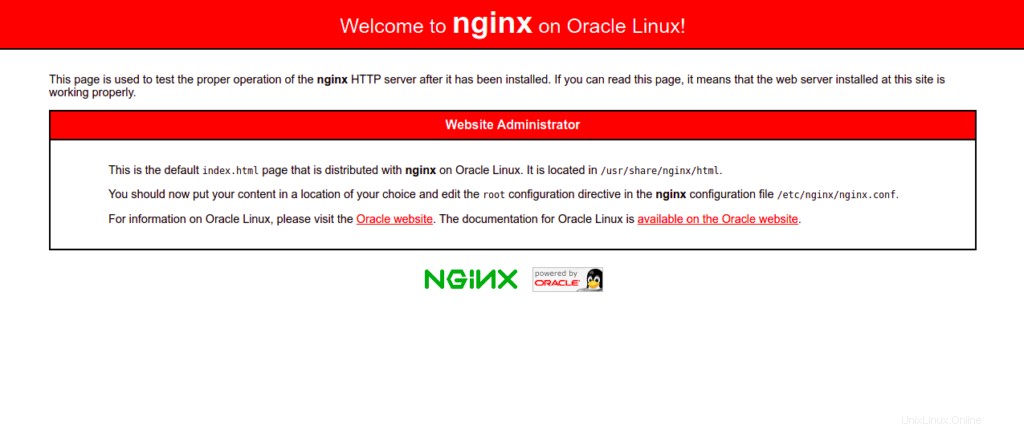
次に、Webブラウザーを開き、URL http:// your-server-ipを入力します。 。次の画面にNginxのデフォルトページが表示されます。
ステップ3– OracleLinux8にMariaDBデータベースサーバーをインストールする
MariaDBは、Webサイトのコンテンツを保存するために使用されるオープンソースのデータベースサーバーです。デフォルトでは、MariaDBはOracleLinux8のデフォルトリポジトリに含まれています。次のコマンドを使用してインストールできます:
dnf install mariadb-server mariadb -y
MariaDBがインストールされたら、MariaDBサービスを開始し、システムの再起動時に開始できるようにします。
systemctl start mariadb
systemctl enable mariadb
次のコマンドを使用して、MariaDBのステータスを確認できます。
systemctl status mariadb
次のコマンドが表示されます:
● mariadb.service - MariaDB 10.3 database server
   Loaded: loaded (/usr/lib/systemd/system/mariadb.service; disabled; vendor preset: disabled)
   Active: active (running) since Sat 2022-06-11 00:46:12 EDT; 6s ago
     Docs: man:mysqld(8)
           https://mariadb.com/kb/en/library/systemd/
  Process: 27020 ExecStartPost=/usr/libexec/mysql-check-upgrade (code=exited, status=0/SUCCESS)
  Process: 26883 ExecStartPre=/usr/libexec/mysql-prepare-db-dir mariadb.service (code=exited, status=0/SUCCESS)
  Process: 26859 ExecStartPre=/usr/libexec/mysql-check-socket (code=exited, status=0/SUCCESS)
 Main PID: 26988 (mysqld)
   Status: "Taking your SQL requests now..."
    Tasks: 30 (limit: 11409)
   Memory: 80.0M
   CGroup: /system.slice/mariadb.service
           └─26988 /usr/libexec/mysqld --basedir=/usr
次のコマンドを使用して、MariaDBのバージョンを確認することもできます。
mysqladmin -V
次の出力が表示されます。
mysqladmin Ver 9.1 Distrib 10.3.32-MariaDB, for Linux on x86_64
ここで、MariaDBのインストールを保護する必要があります。次のコマンドで保護できます:
mysql_secure_installation
以下に示すように、rootパスワードを設定するように求められます。
Enter current password for root (enter for none):
OK, successfully used password, moving on...

Setting the root password ensures that nobody can log into the MariaDB
root user without the proper authorisation.

Set root password? [Y/n] Y
New password:
Re-enter new password:
Password updated successfully!
Reloading privilege tables..
 ... Success!
次に、以下に示すように匿名ユーザーを削除するように求められます:
By default, a MariaDB installation has an anonymous user, allowing anyone
to log into MariaDB without having to have a user account created for
them.  This is intended only for testing, and to make the installation
go a bit smoother.  You should remove them before moving into a
production environment.

Remove anonymous users? [Y/n] Y
Yと入力し、Enterキーを押します。 rootログインをリモートで禁止するように求められます:
 ... Success!

Normally, root should only be allowed to connect from 'localhost'.  This
ensures that someone cannot guess at the root password from the network.

Disallow root login remotely? [Y/n] Y
Yと入力し、Enterキーを押します。テストデータベースを削除するように求められます:
 ... Success!

By default, MariaDB comes with a database named 'test' that anyone can
access.  This is also intended only for testing, and should be removed
before moving into a production environment.

Remove test database and access to it? [Y/n] Y
Yを押してEnterキーを押します。特権テーブルをリロードするように求められます:
 - Dropping test database...
 ... Success!
 - Removing privileges on test database...
 ... Success!

Reloading the privilege tables will ensure that all changes made so far
will take effect immediately.

Reload privilege tables now? [Y/n] Y
Yと入力し、Enterキーを押してMariaDBを保護します。
 ... Success!

Cleaning up...

All done!  If you've completed all of the above steps, your MariaDB
installation should now be secure.

Thanks for using MariaDB!
ステップ4– OracleLinux8にPHPをインストールする
次のコマンドを実行して、それらを追加できます。
dnf install epel-release -y
dnf install dnf-utils http://rpms.remirepo.net/enterprise/remi-release-8.rpm
次に、使用可能なすべてのPHPバージョンを次の出力にリストします。
dnf module list php
次の出力に、利用可能なすべてのPHPバージョンが表示されます。
Safe Remi's RPM repository for Enterprise Linux 8 - x86_64                                                    1.8 MB/s | 2.1 MB     00:01
Oracle Linux 8 Application Stream (x86_64)
Name                     Stream                        Profiles                                      Summary
php                      7.2 [d][e]                    common [d], devel, minimal                    PHP scripting language
php                      7.3                           common [d], devel, minimal                    PHP scripting language
php                      7.4                           common [d], devel, minimal                    PHP scripting language
php                      8.0                           common [d], devel, minimal                    PHP scripting language

Remi's Modular repository for Enterprise Linux 8 - x86_64
Name                     Stream                        Profiles                                      Summary
php                      remi-7.2                      common [d], devel, minimal                    PHP scripting language
php                      remi-7.3                      common [d], devel, minimal                    PHP scripting language
php                      remi-7.4                      common [d], devel, minimal                    PHP scripting language
php                      remi-8.0                      common [d], devel, minimal                    PHP scripting language
php                      remi-8.1                      common [d], devel, minimal                    PHP scripting language
次に、デフォルトのPHPモジュールをリセットし、次のコマンドでPHPバージョン8.1を有効にします。
dnf module reset php
dnf module enable php:remi-8.1
次に、次のコマンドを使用して、他の必要な拡張機能を使用してPHPをインストールします。
dnf install php php-fpm php-gd php-mysqlnd php-cli php-opcache -y
次に、PHP-FPMのデフォルト構成ファイルを編集し、ユーザーをapacheからnginxに変更します。
nano /etc/php-fpm.d/www.conf
次の行を変更します:
user = nginx
Group = nginx
ファイルを保存して閉じてから、PHP-FPMサービスを開始し、システムの再起動時に開始できるようにします。
systemctl start php-fpm
systemctl enable php-fpm
ステップ5–Nginxを使用してサンプルWebサイトを作成する
このセクションでは、Nginx仮想ホストを使用して簡単なWebサイトをホストする方法を示します。まず、ウェブサイトのコンテンツを保存するディレクトリを作成します:
mkdir -p /var/www/html/website
次に、次のコマンドを使用してWebサイトの所有権とアクセス許可を変更します。
chown -R nginx:nginx /var/www/html/website
chmod -R 755 /var/www/html/website
次に、次のコマンドを使用して簡単なPHPページを作成します。
nano /var/www/html/website/info.php
次のPHPコードを追加します:
<?php
phpinfo();
?>
ファイルを保存して閉じてから、Nginx仮想ホスト構成ファイルを作成します。
nano /etc/nginx/conf.d/website.conf
次の行を追加します:
server {
    listen  80;

    server_name website.example.com;

    location / {
        root  /var/www/html/website/;
        index  info.php;
        try_files $uri $uri/ =404;
    }

    error_page  500 502 503 504  /50x.html;
    location = /50x.html {
        root  /usr/share/nginx/html;
    }

location ~ \.php$ {
        fastcgi_split_path_info ^(.+\.php)(/.+)$;
        fastcgi_pass   unix:/run/php-fpm/www.sock;
        fastcgi_index  info.php;
        fastcgi_param  SCRIPT_FILENAME $document_root$fastcgi_script_name;
        include        fastcgi_params;
    }

}
ファイルを保存して閉じてから、Nginxメイン構成ファイルを編集します。
nano /etc/nginx/nginx.conf
http {:
の行の後に次の行を追加しますserver_names_hash_bucket_size 64;
ファイルを保存して閉じ、次のコマンドを使用してNginxの構成を確認します。
nginx -t
次の出力が表示されます。
nginx: the configuration file /etc/nginx/nginx.conf syntax is ok
nginx: configuration file /etc/nginx/nginx.conf test is successful
次に、Nginxサービスを再起動して、構成を適用します。
systemctl restart nginx
ステップ6–NginxWebサイトを確認する
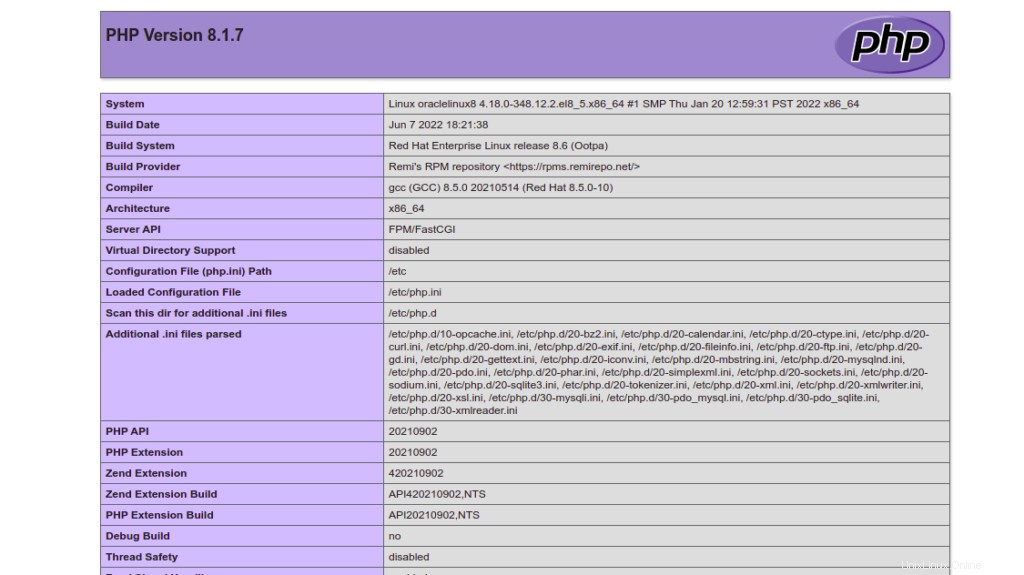
次に、Webブラウザーを開き、URL http://website.example.comを入力します。 。次の画面にPHPページが表示されます。
結論
この投稿では、Oracle Linux 8にLEMPサーバーをインストールする方法を学びました。これで、Nginx仮想ホスティング機能を使用して1台のマシンで複数のWebサイトをホストできます。 Atlantic.NetのVPSホスティングでお試しください!